OpenClaw
OpenClaw is a highly regarded open-source, autonomous AI virtual assistant platform. It is widely nicknamed "Crawfish" by the tech community because its default application icon is a red crayfish.
Prerequisites
- You have activated a TCB environment and obtained the environment ID
cloudBaseEnvID - Enable the required model in the AI console
- Obtain the
Base URLandAPI Keyin the AI console
Configuration Steps
We use OpenClaw-2026.6.5 (5181e4f) as an example.
- Configuration via CC Switch
- DashBoard Panel Configuration
- Manually Modify Configuration File
CC Switch is an open-source desktop application for centrally managing provider configurations for multiple AI coding tools. For installation instructions, refer to the CC Switch configuration guide.
- Open CC Switch and add CloudBase as a provider
| Field | Description |
|---|---|
| API Key | Obtained from the AI console |
| Base URL | https://{{cloudBaseEnvID}}.api.tcloudbasegateway.com/v1/ai/cloudbase |
| API Format | Chat Completions |
- Switch to the CloudBase provider and start using OpenClaw
- Open the DashBoard panel. If your OpenClaw is running on your local computer, you can directly run the following shortcut command in the terminal. The system will automatically copy the link and attempt to open it in your browser.
openclaw dashboard
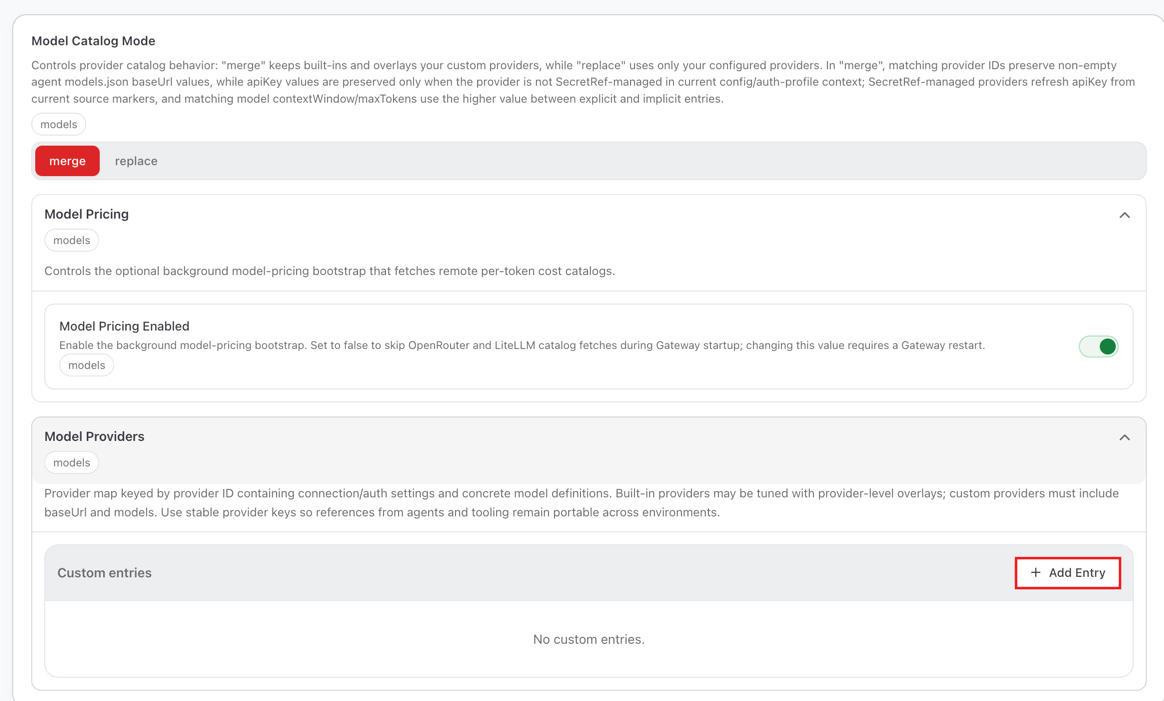
- Click Settings - AI & Agents - Models - Model Providers.
- Expand the Model Provides panel and click Add Entry.
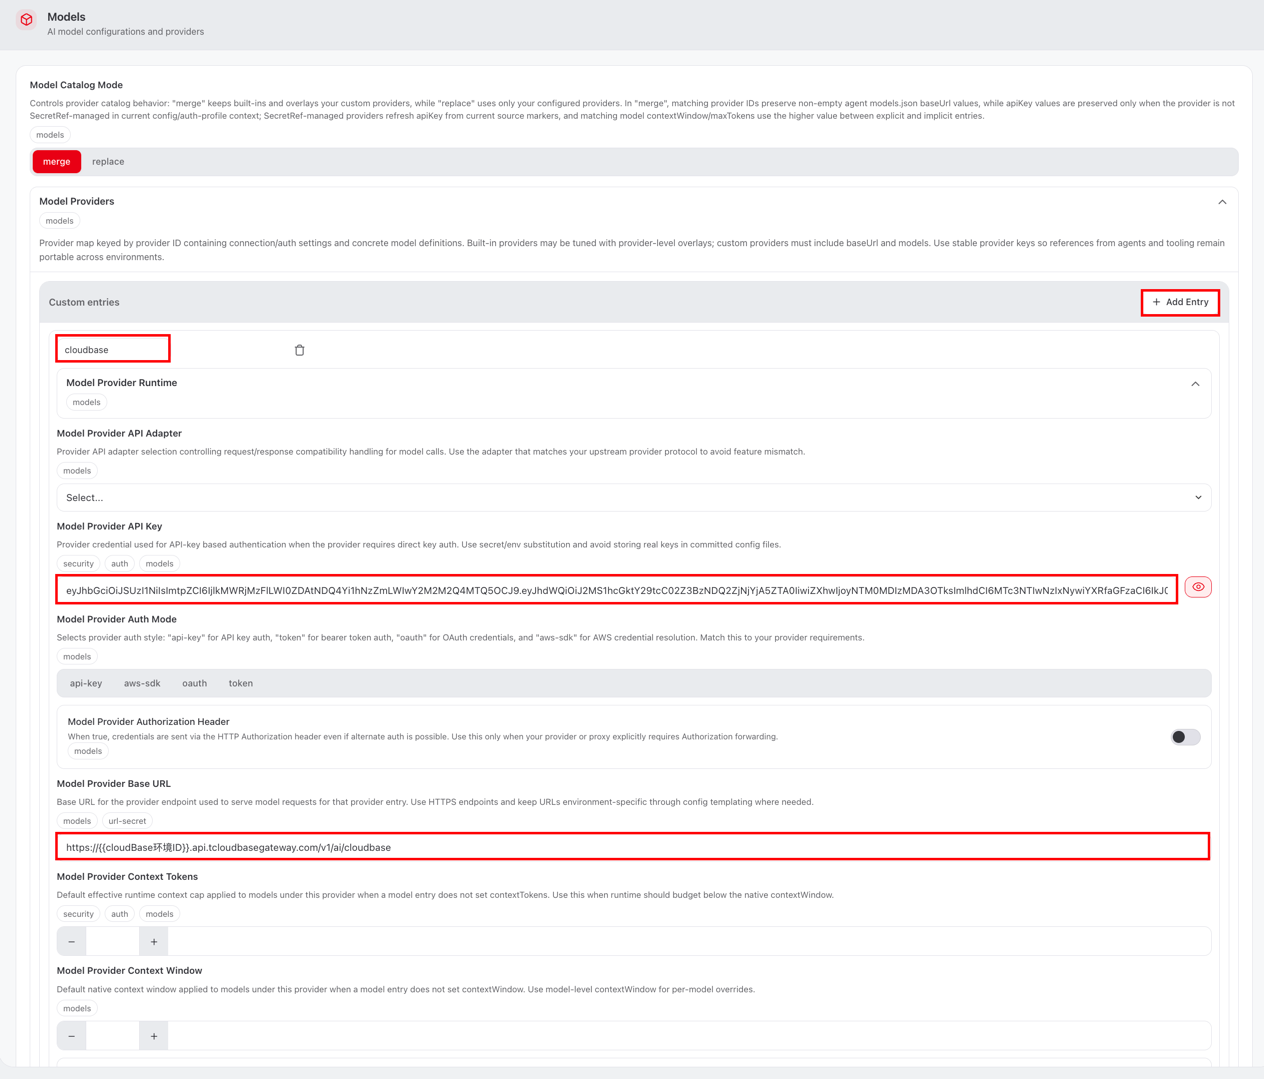
- In Custom entries, enter the following information:
This example is populated with the minimum required information. You can customize the fields according to your needs. The meanings of the fields to be filled in are as follows:
| Field to Enter | Explanation |
|---|---|
| Provider Name | The vendor name, which can be any value. In the screenshot example, cloudbase is entered. |
| Model Provider API Key | The API Key for calling the large model, which is obtained in the AI console. |
| Model Provider Base URL | The Base URL for the large model, which is obtained in the AI console. |
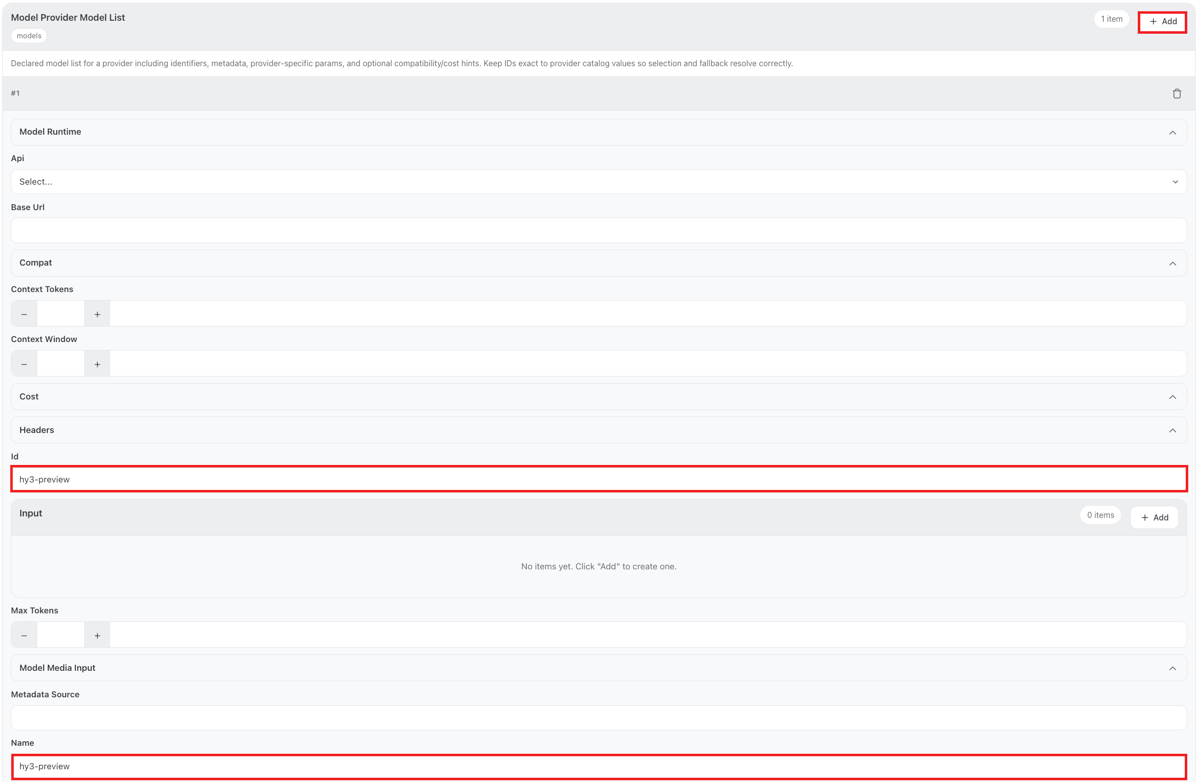
- Expand the Model Provider Model List sub-panel under Custom entries, and click Add to add a model.
Enter the meaning of each field as follows (other fields do not need to be filled in, as they are based on the information configured in Custom entries).
| Field to Enter | Explanation |
|---|---|
| Id | The large model ID. Copy the identifier of an enabled large model from the model list in the AI console and enter it here. |
| Name | The name of the large model, which can be filled in arbitrarily. In the example, the large model Id and the large model name are kept consistent to avoid confusion. |
- Click Save to return to the chat and start testing.
- Open the configuration file.
If you use your file browser to locate files, note that the file browser hides files with names starting with a period (.) by default. You may need to enable the hidden files option in your file browser to view them.
On macOS, use the Finder shortcut Command + Shift + . to show hidden files. On Windows, you can select "File Explorer - View - Show - Hidden items".
Open.
- Configuration Path for Windows
C:\Users\<YourUsername>\.openclaw\openclaw.json
- Configuration Path for Mac/Linux
~/.openclaw/openclaw.json
- Enter the configuration.
This example populates the large model configuration with a minimal set of fields. You can customize the fields according to your needs. This example adds a custom large model provider, cloudbase.
The meanings of the fields to be entered for models.providers.cloudbase are as follows:
| Field to Enter | Explanation |
|---|---|
| baseUrl | The Base URL for the large model, which is obtained from the AI console. |
| apiKey | The API Key for calling the large model, which is obtained from the AI console. |
| models.name | The vendor name, which can be any value. In the screenshot example, cloudbase is entered. |
| models.id | The large model ID. Copy the identifier of an enabled large model from the model list in the AI console and enter it here. |
{
  "models": {
    "providers": {
      "cloudbase": {
        "baseUrl": "https://{{cloudBaseEnvID}}.api.tcloudbasegateway.com/v1/ai/cloudbase",
        "apiKey": "eyJhbGciOiJSUzI1N...",
        "models": [
          {
            "id": "hy3",
            "name": "hy3"
          }
        ]
      }
    }
  }
}
Common Error Troubleshooting
| Error Message | Solution |
|---|---|
| All models are temporarily rate-limited. Please try again in a few minutes. | The Base URL is incorrect. Go to the AI console to copy the correct Base URL. An incorrect large model ID is configured, and the large model is not enabled in the AI console. |
401 gent failed before reply: 401 status code | The API Key is entered incorrectly or may have been deleted. |