Agent Development
This article introduces how to develop, debug, and deploy an AI Agent based on Function-based Cloud Hosting.
The following is a simple AI Agent sample code:
const { BotRunner, BotCore } = require("@cloudbase/aiagent-framework");

const ANSWER = "Hello, I am an Agent, but I can only say this one sentence.";

class MyBot extends BotCore {
  async sendMessage() {
    for (let i = 0; i < ANSWER.length; i++) {
      // Send a message to the client
      this.sseSender.send({ data: { content: ANSWER[i] } });
    }
    // Send completed
    this.sseSender.end();
  }
}

exports.main = (event, context) =>
  BotRunner.run(event, context, new MyBot(context));
For the complete project sample of this code, refer to the template: Github, Gitee.
Create a folder, create index.js and fill it with the above code, then run npm i @cloudbase/aiagent-framework to install the required dependencies, and you can implement a simple Agent.
The key to implementing an Agent lies in implementing the methods defined in the IBot interface. With the help of the BotCore class, we can complete the implementation with just a few lines of code:
The above code implements a MyBot class with the following features:
- Inherits from the
BotCoreclass, and can obtain the ability to send SSE responses viathis.sseSender - Implements the
IBotinterface. As defined, we need to implement at least thesendMessagemethod. The Agent implemented here will always return a fixed response.
For the usage of the Cloud Development Agent development framework @cloudbase/aiagent-framework, refer to: https://www.npmjs.com/package/@cloudbase/aiagent-framework
Local Development and Debugging of Agent
Create a package.json file and write the following content:
{
  "name": "function-agent-test",
  "main": "index.js",
  "scripts": {
    "login": "tcb login",
    "dev": "tcb cloudrun run --runMode=agent -w",
    "deploy": "tcb cloudrun deploy"
  },
  "dependencies": {
    "@cloudbase/aiagent-framework": "^1.0.0-beta.10"
  },
  "devDependencies": {
    "@cloudbase/cli": "^2.6.16"
  }
}
Install dependencies:
npm install
After installation is complete, you can enter the following command to log in:
npm run login
Starting the Agent Service
Run the following command to start the service:
npm run dev
Invoking the Agent Service
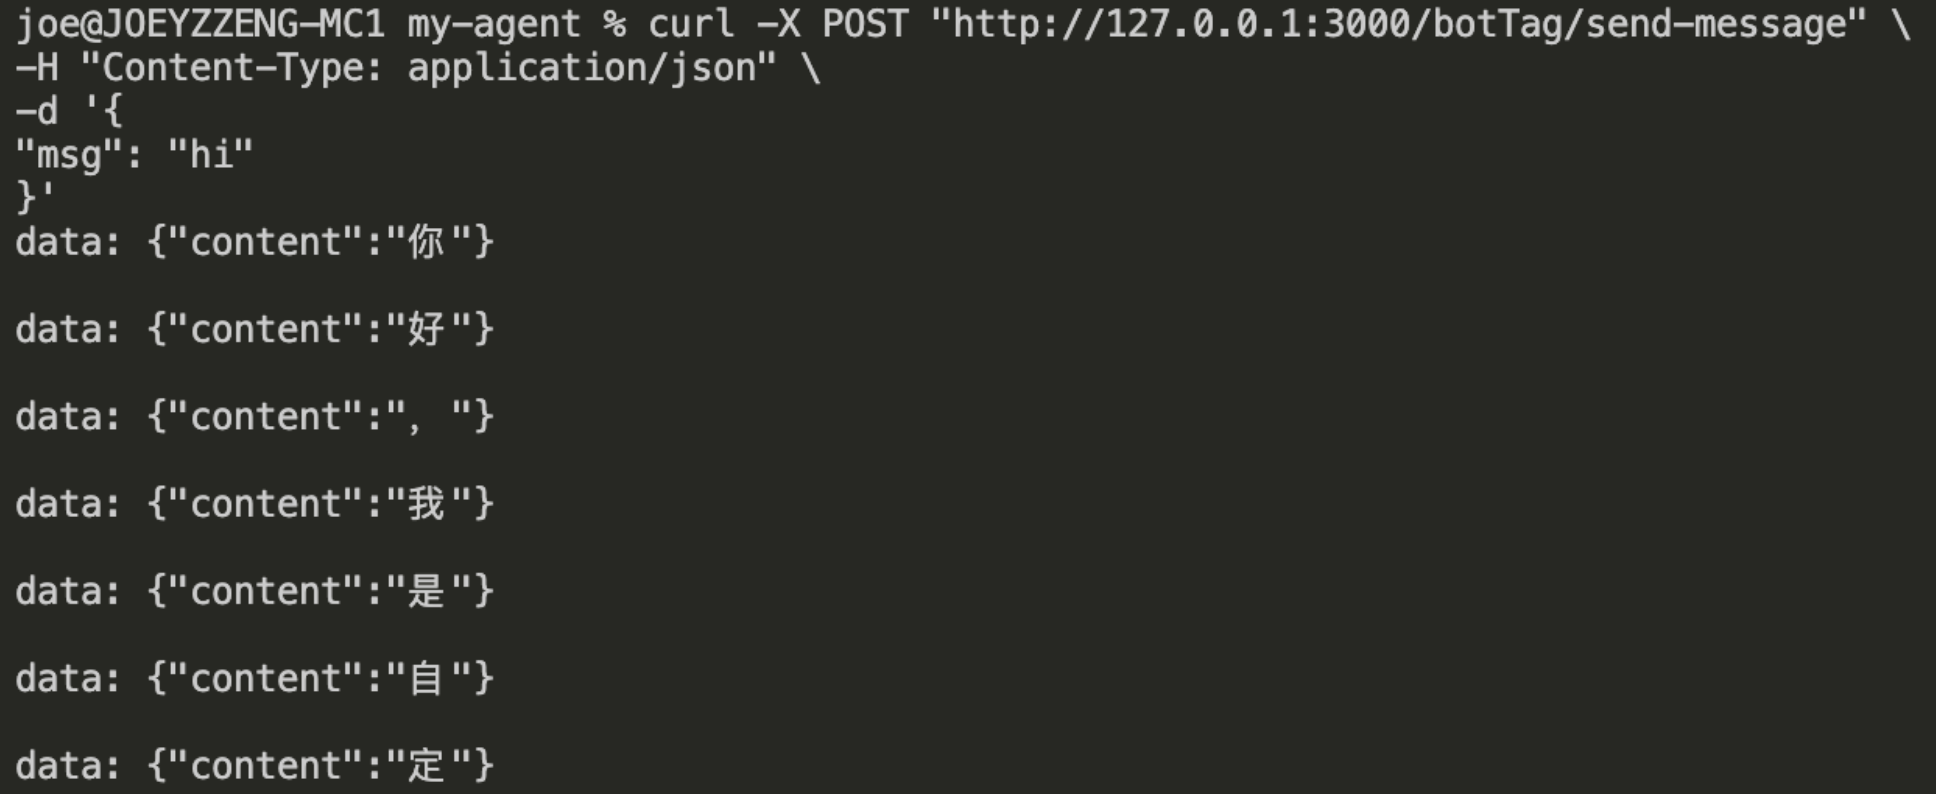
Access via command line using cURL
curl 'http://127.0.0.1:3000/v1/aibot/bots/ibot-myBot-botTag/send-message' \
  -H 'Accept: text/event-stream' \
  -H 'Content-Type: application/json' \
  --data-raw '{"msg":"hi"}'
The running results are as follows:
Web Access Using @cloudbase/js-sdk
@cloudbase/js-sdk provides a method for clients to access the Agent interface. For more details, visit the CloudBase documentation.
Here is an HTML sample using @cloudbase/js-sdk:
<!DOCTYPE html>
<html lang="en">
  <head>
    <meta charset="UTF-8" />
    <meta name="viewport" content="width=device-width, initial-scale=1.0" />
    <title>Test Agent</title>
  </head>

  <body>
    <p id="result"></p>
  </body>
  <script src="//static.cloudbase.net/cloudbase-js-sdk/2.9.0/cloudbase.full.js"></script>
  <script>
    const p = document.getElementById("result");

    async function main() {
      const app = cloudbase.init({
        env: "your-env-id", // Fill in the CloudBase environment id
      });
      const auth = app.auth();
      await auth.signInAnonymously();

      const ai = app.ai();
      const res = await ai.bot.sendMessage({
        botId: "ibot-myBot-botTag",
        msg: "hi",
      });
      for await (let x of res.textStream) {
        console.log(x);
        p.innerText += x;
      }
    }

    main();
  </script>
</html>
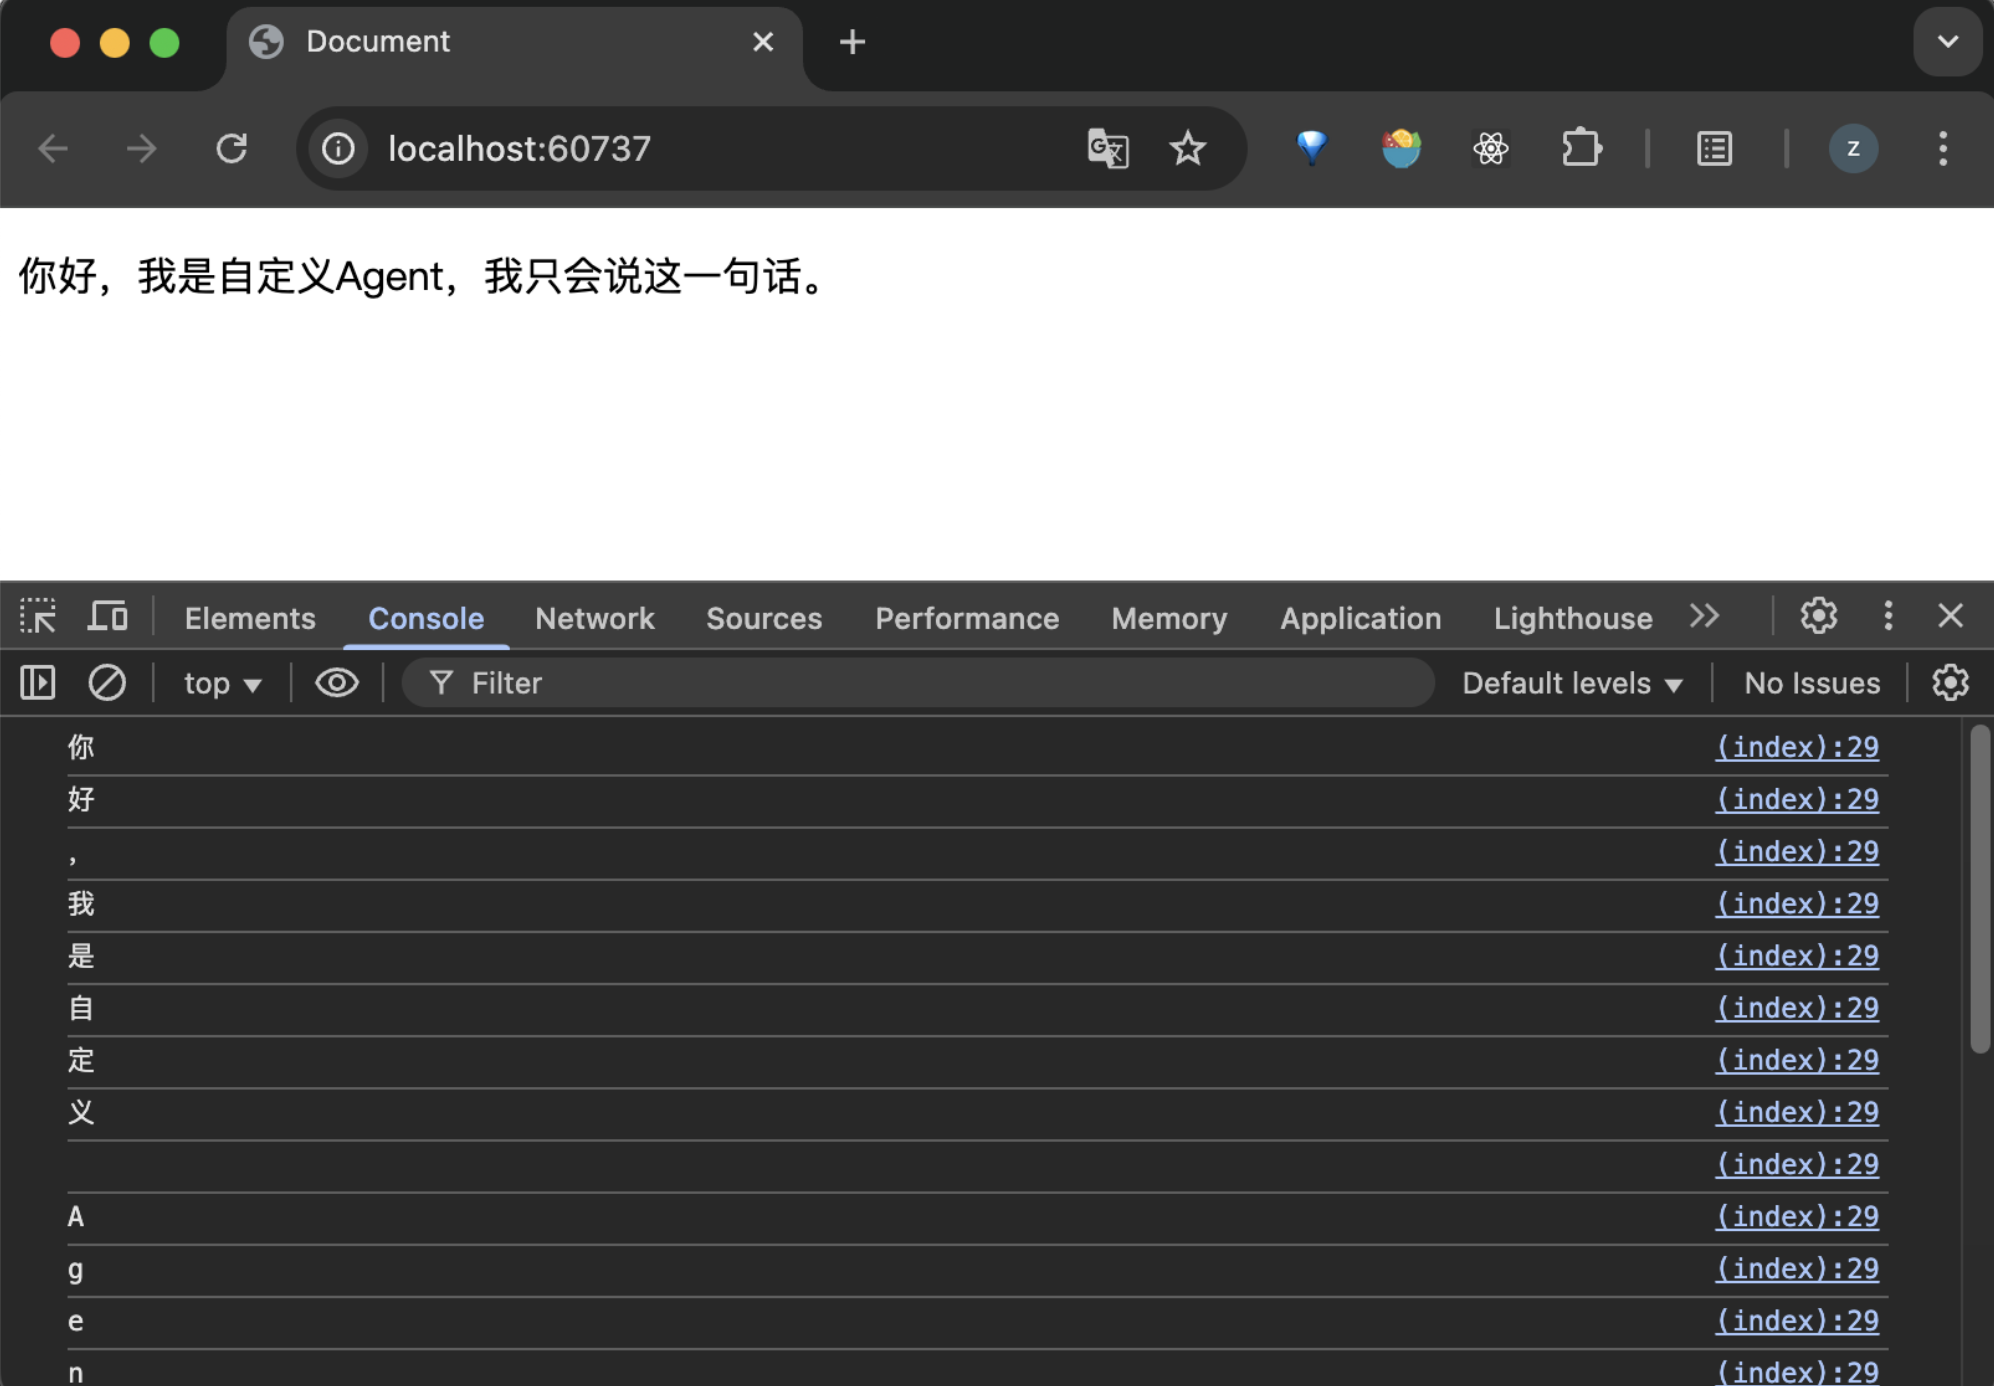
Start a local server to enable browser access to this HTML file. We also need to configure a proxy service to route requests to the local service. Taking whistle as an example, configure it as follows:
/.*.api.tcloudbasegateway.com/([^S]*)/ http://localhost:3000/$1
Open the web page to view the invocation results:
Local Development and Deployment of Agent
Run the following command to deploy the Agent:
npm run deploy
Follow the prompts to select the environment and service name. The service name must follow the ibot-xxx format.
Associate Cloud Hosting Service with Agent
If you have created a Cloud Hosting Service but haven't created the corresponding Agent on the Cloud Development Platform, go to the Cloud Development Platform AI+ page to create one.
The identifier should align with the cloud hosting service name. For example, if the cloud hosting service name is ibot-testAgent, the corresponding Agent identifier should be ibot-testAgent-123456 (the last segment is not used for associating with the cloud hosting service).
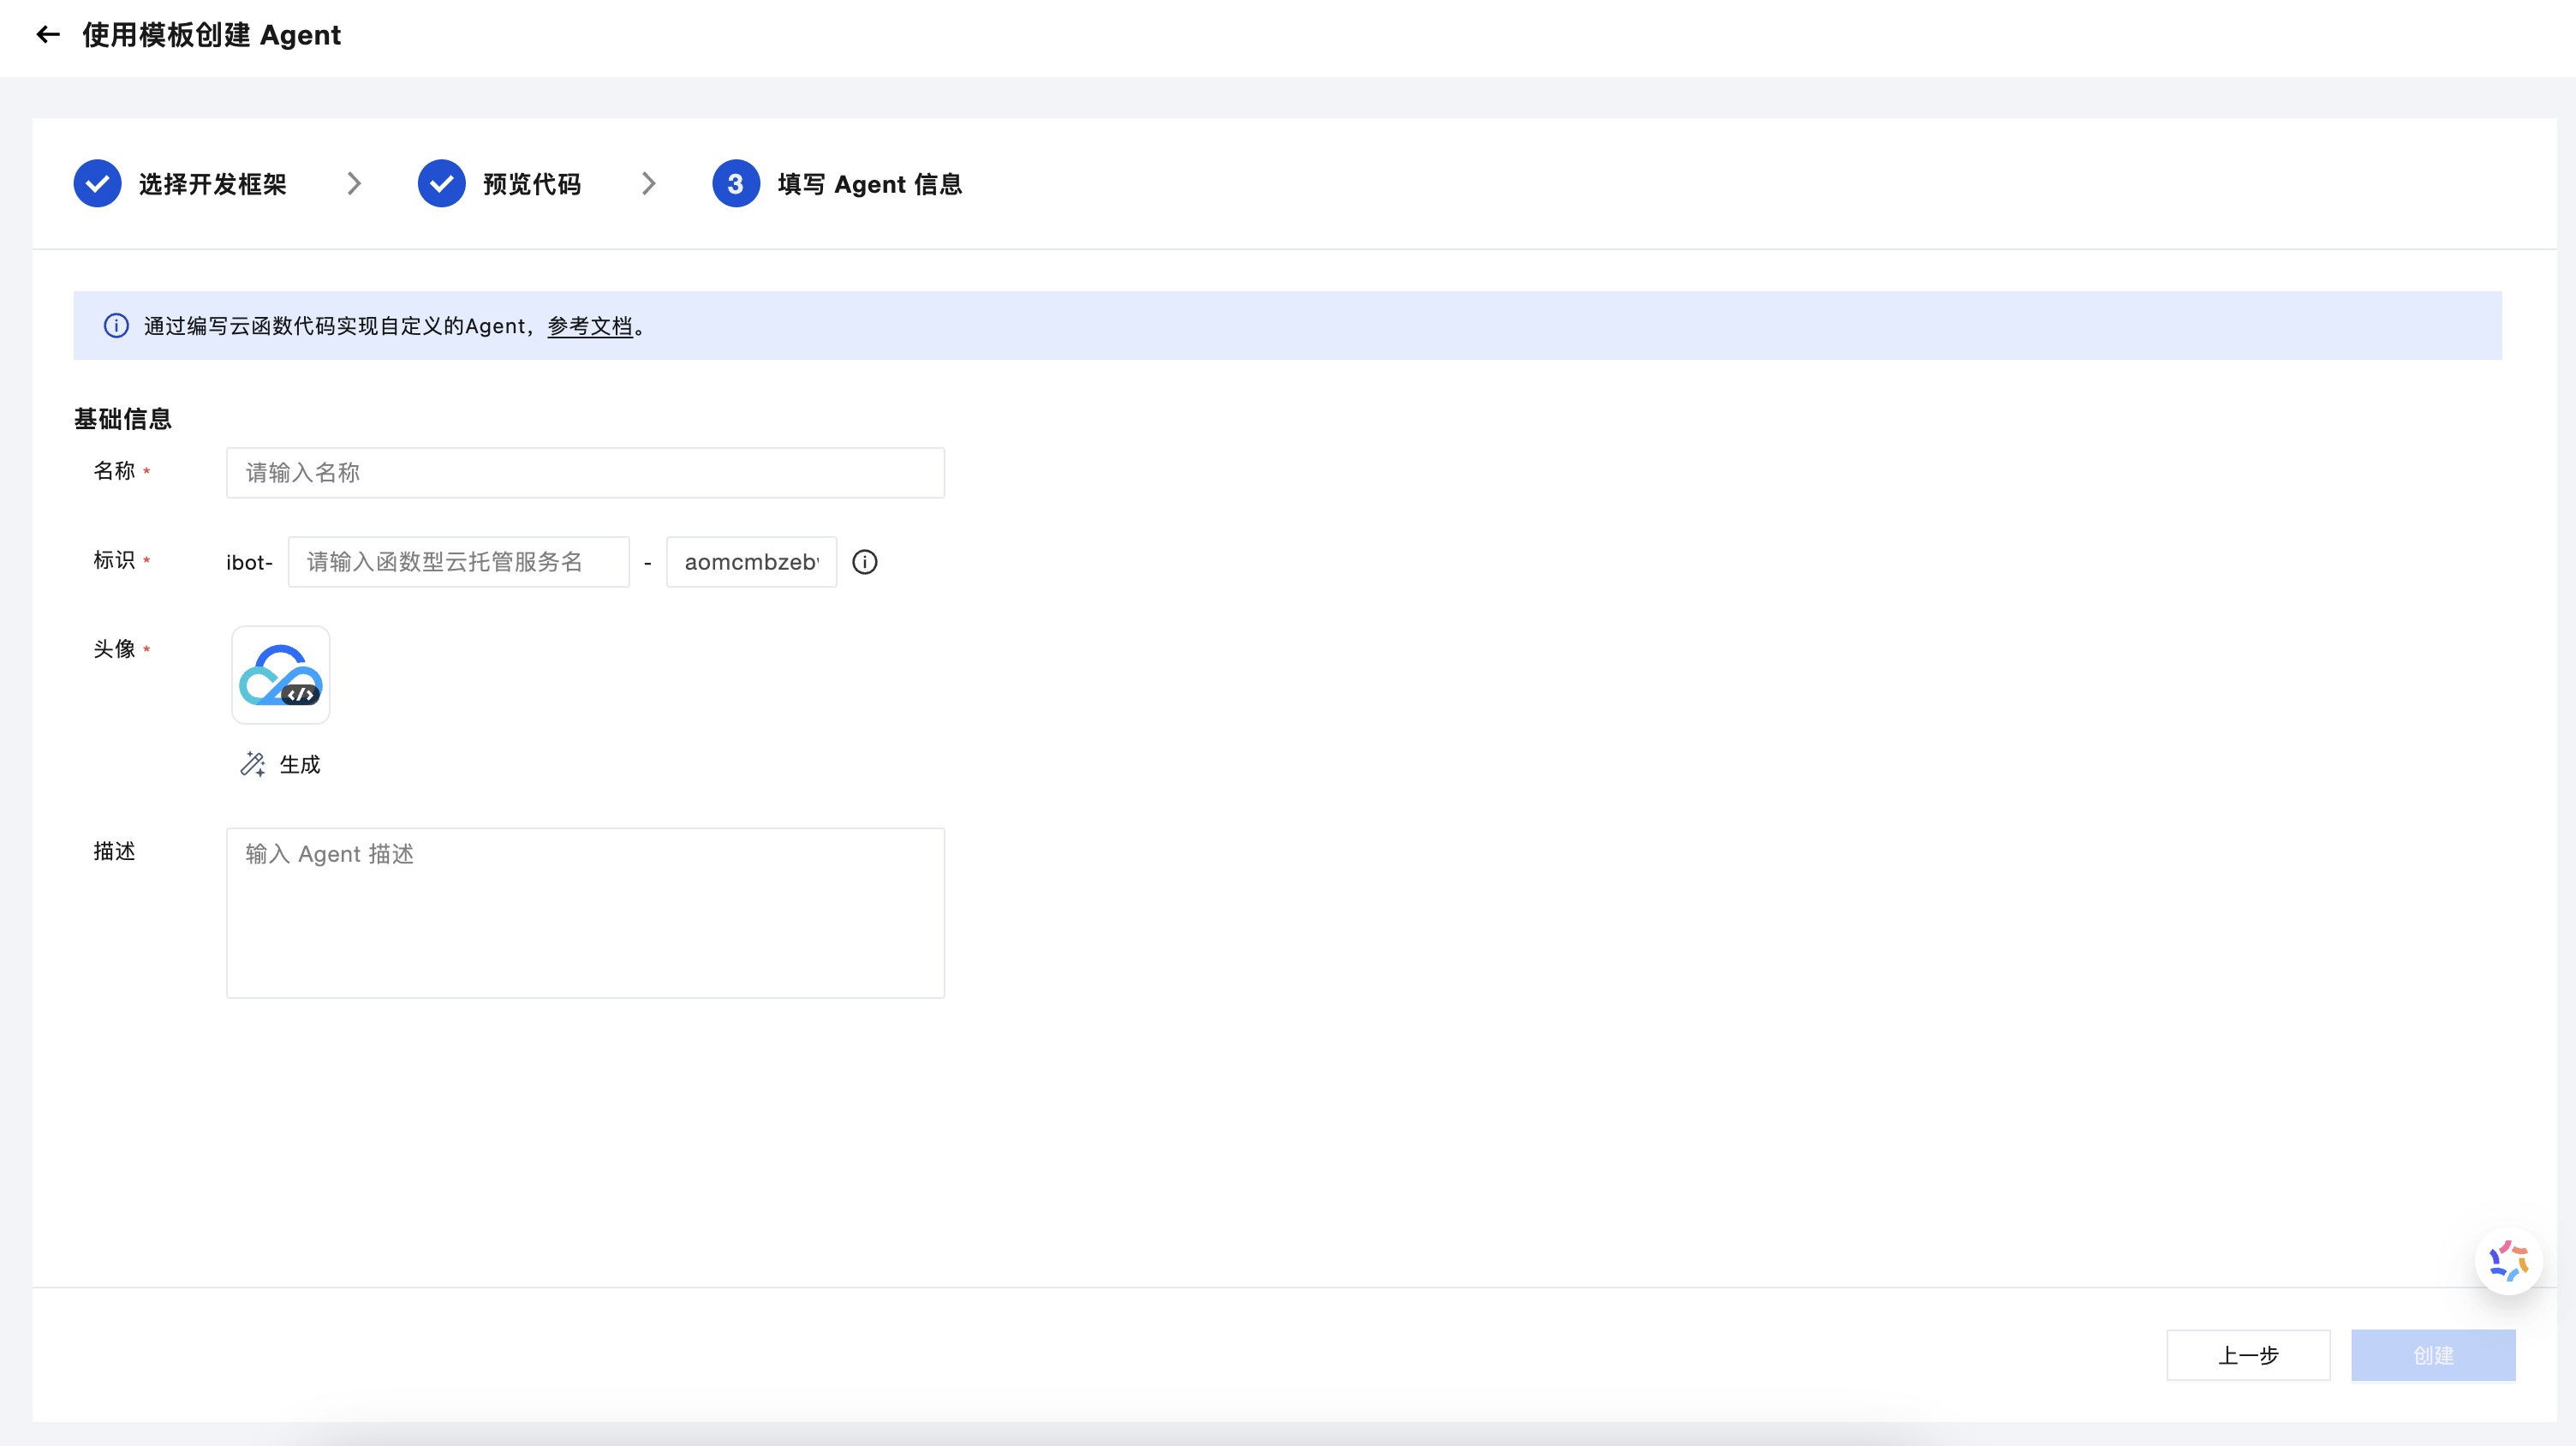 .
.
Cloud-based Development and Debugging of Agent
Step.1: Create Agent
Refer to the documentation at https://docs.cloudbase.net/ai/cbrf-agent/quickstart describing the process to create an Agent.
After creation, the corresponding Agent can be viewed in the Agent list.
Click Online Development to go to the online development page and develop an Agent based on Function-based Cloud Hosting.
Step.2: Develop and Debug Agent Code
- For how to develop, debug, and deploy Agents in the cloud, refer to the document: https://docs.cloudbase.net/cbrf/how-to-develop-online
- For how to use the
@cloudbase/aiagent-frameworkframework, refer to: https://www.npmjs.com/package/@cloudbase/aiagent-framework - For how to write Agent code based on Function-based Cloud Hosting, refer to the function writing guide: https://docs.cloudbase.net/cbrf/how-to-writing-functions-code
More sample code can be found:
- Empty Agent sample Github
- Sample based on DeepSeek Agent Github
- Yuanqi Agent sample Github
- Sample based on Mastra Agent Github