Custom Artifact Parsing
Through Artifact, users can effortlessly create and manage various types of content, such as code architecture diagrams, flow charts, web designs, SVG graphics, and interactive components. Artifact is particularly suitable for developers, designers, product managers, and marketers to quickly turn ideas into tangible products.
The current Agent UI React component supports custom Artifact capabilities.
Effect
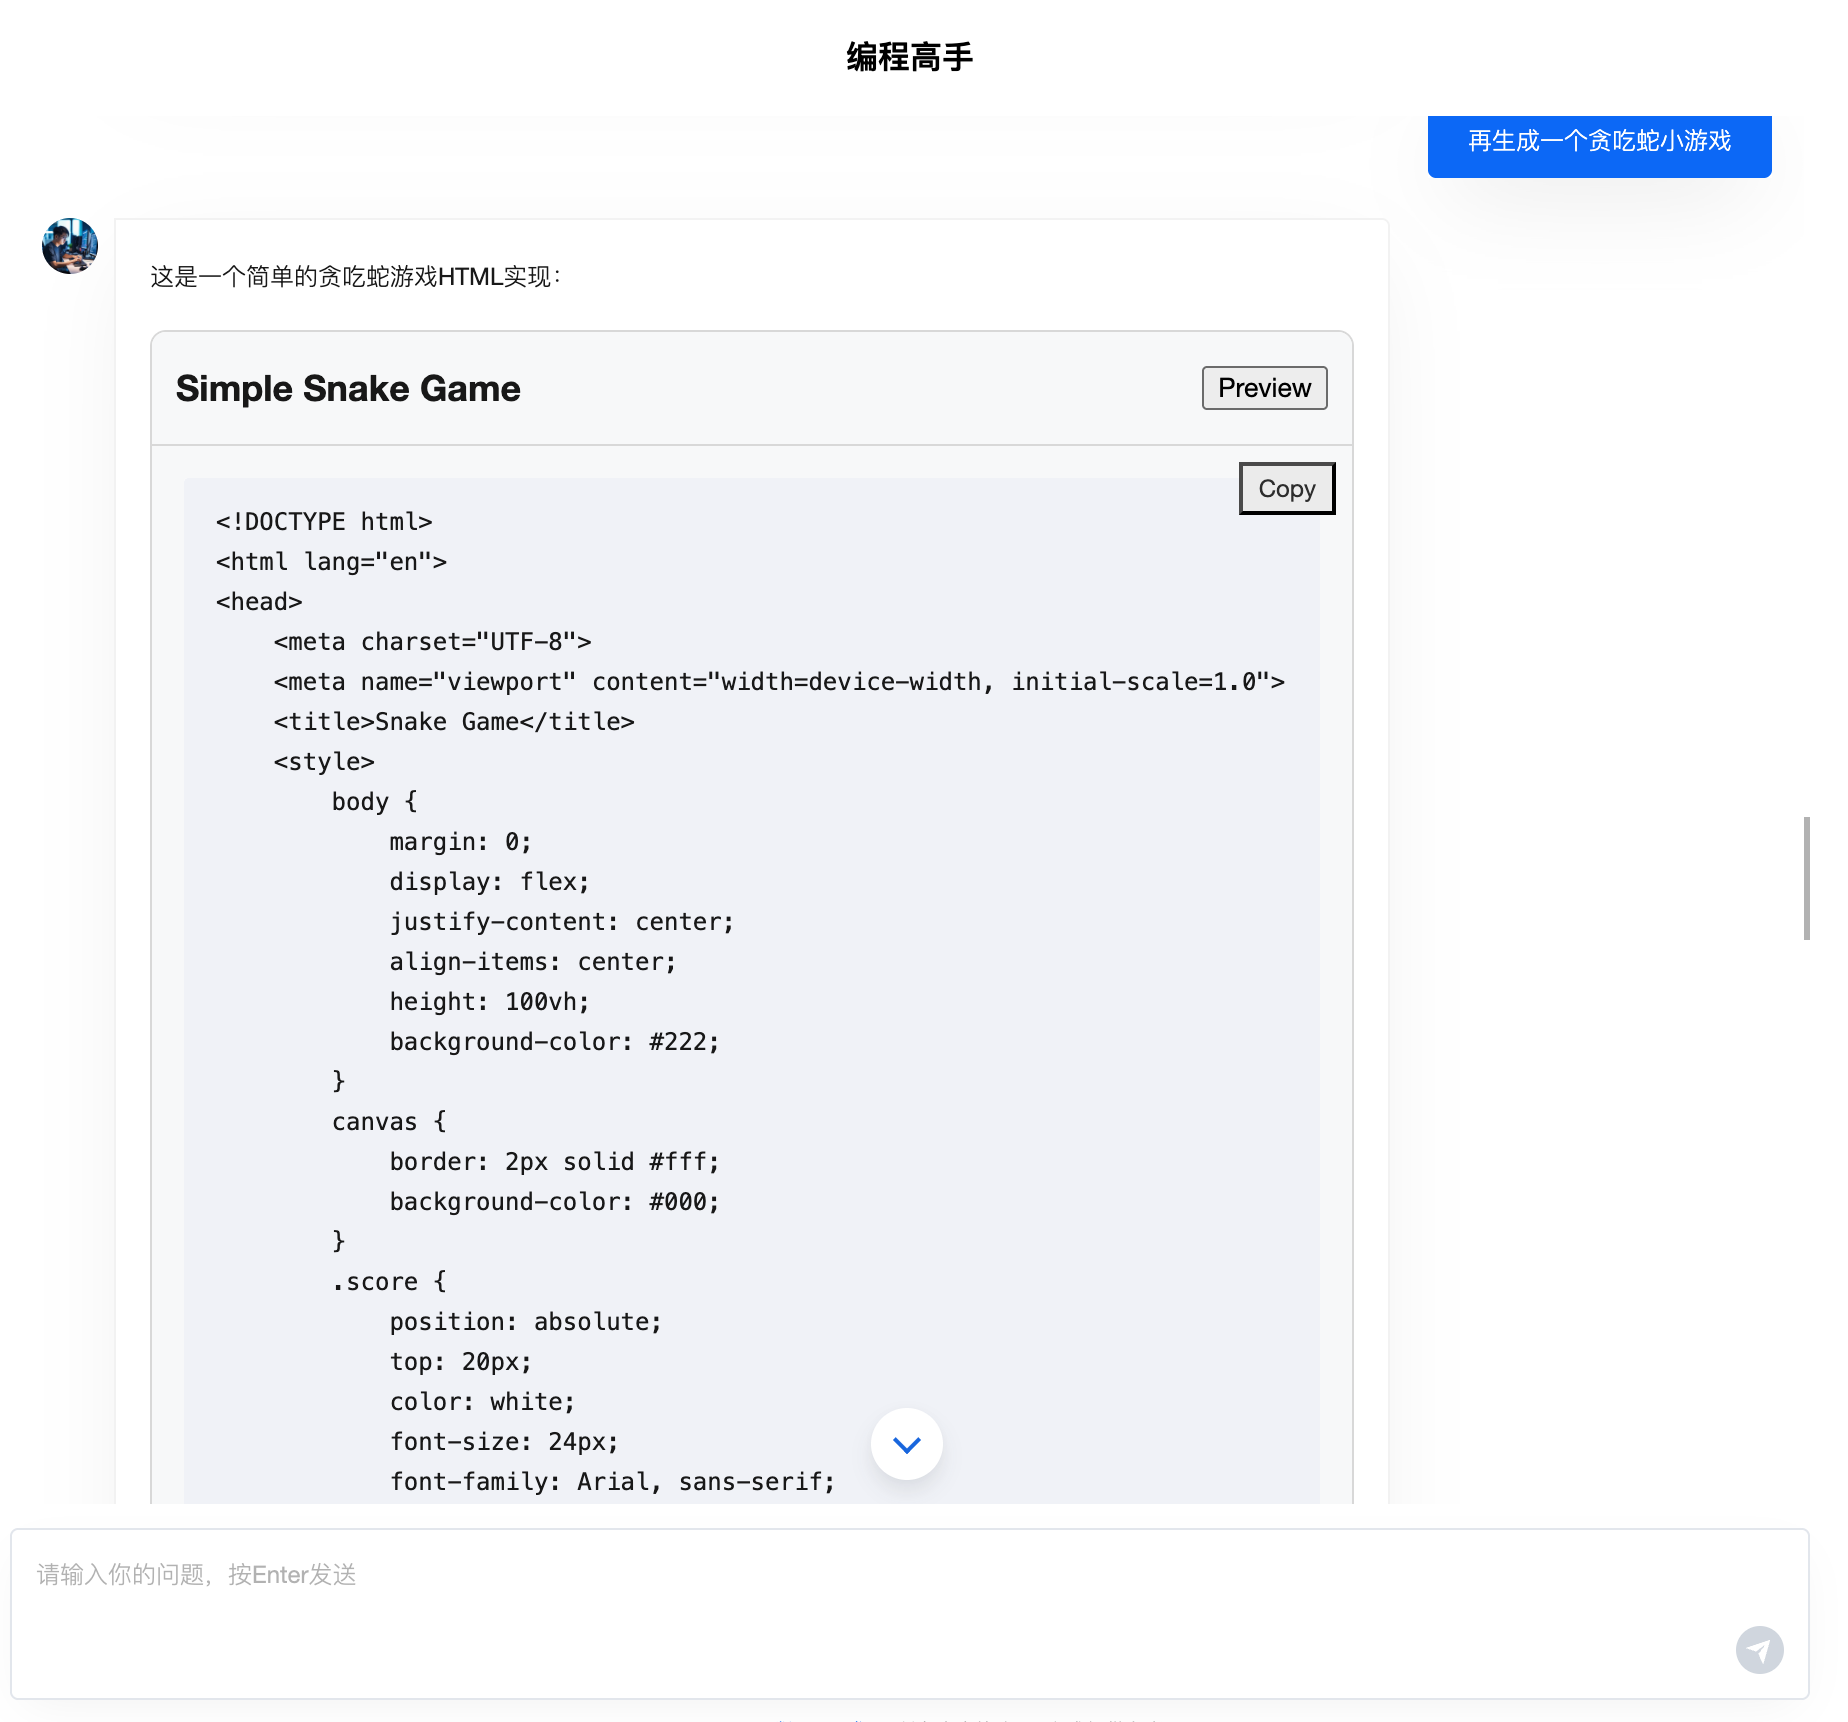
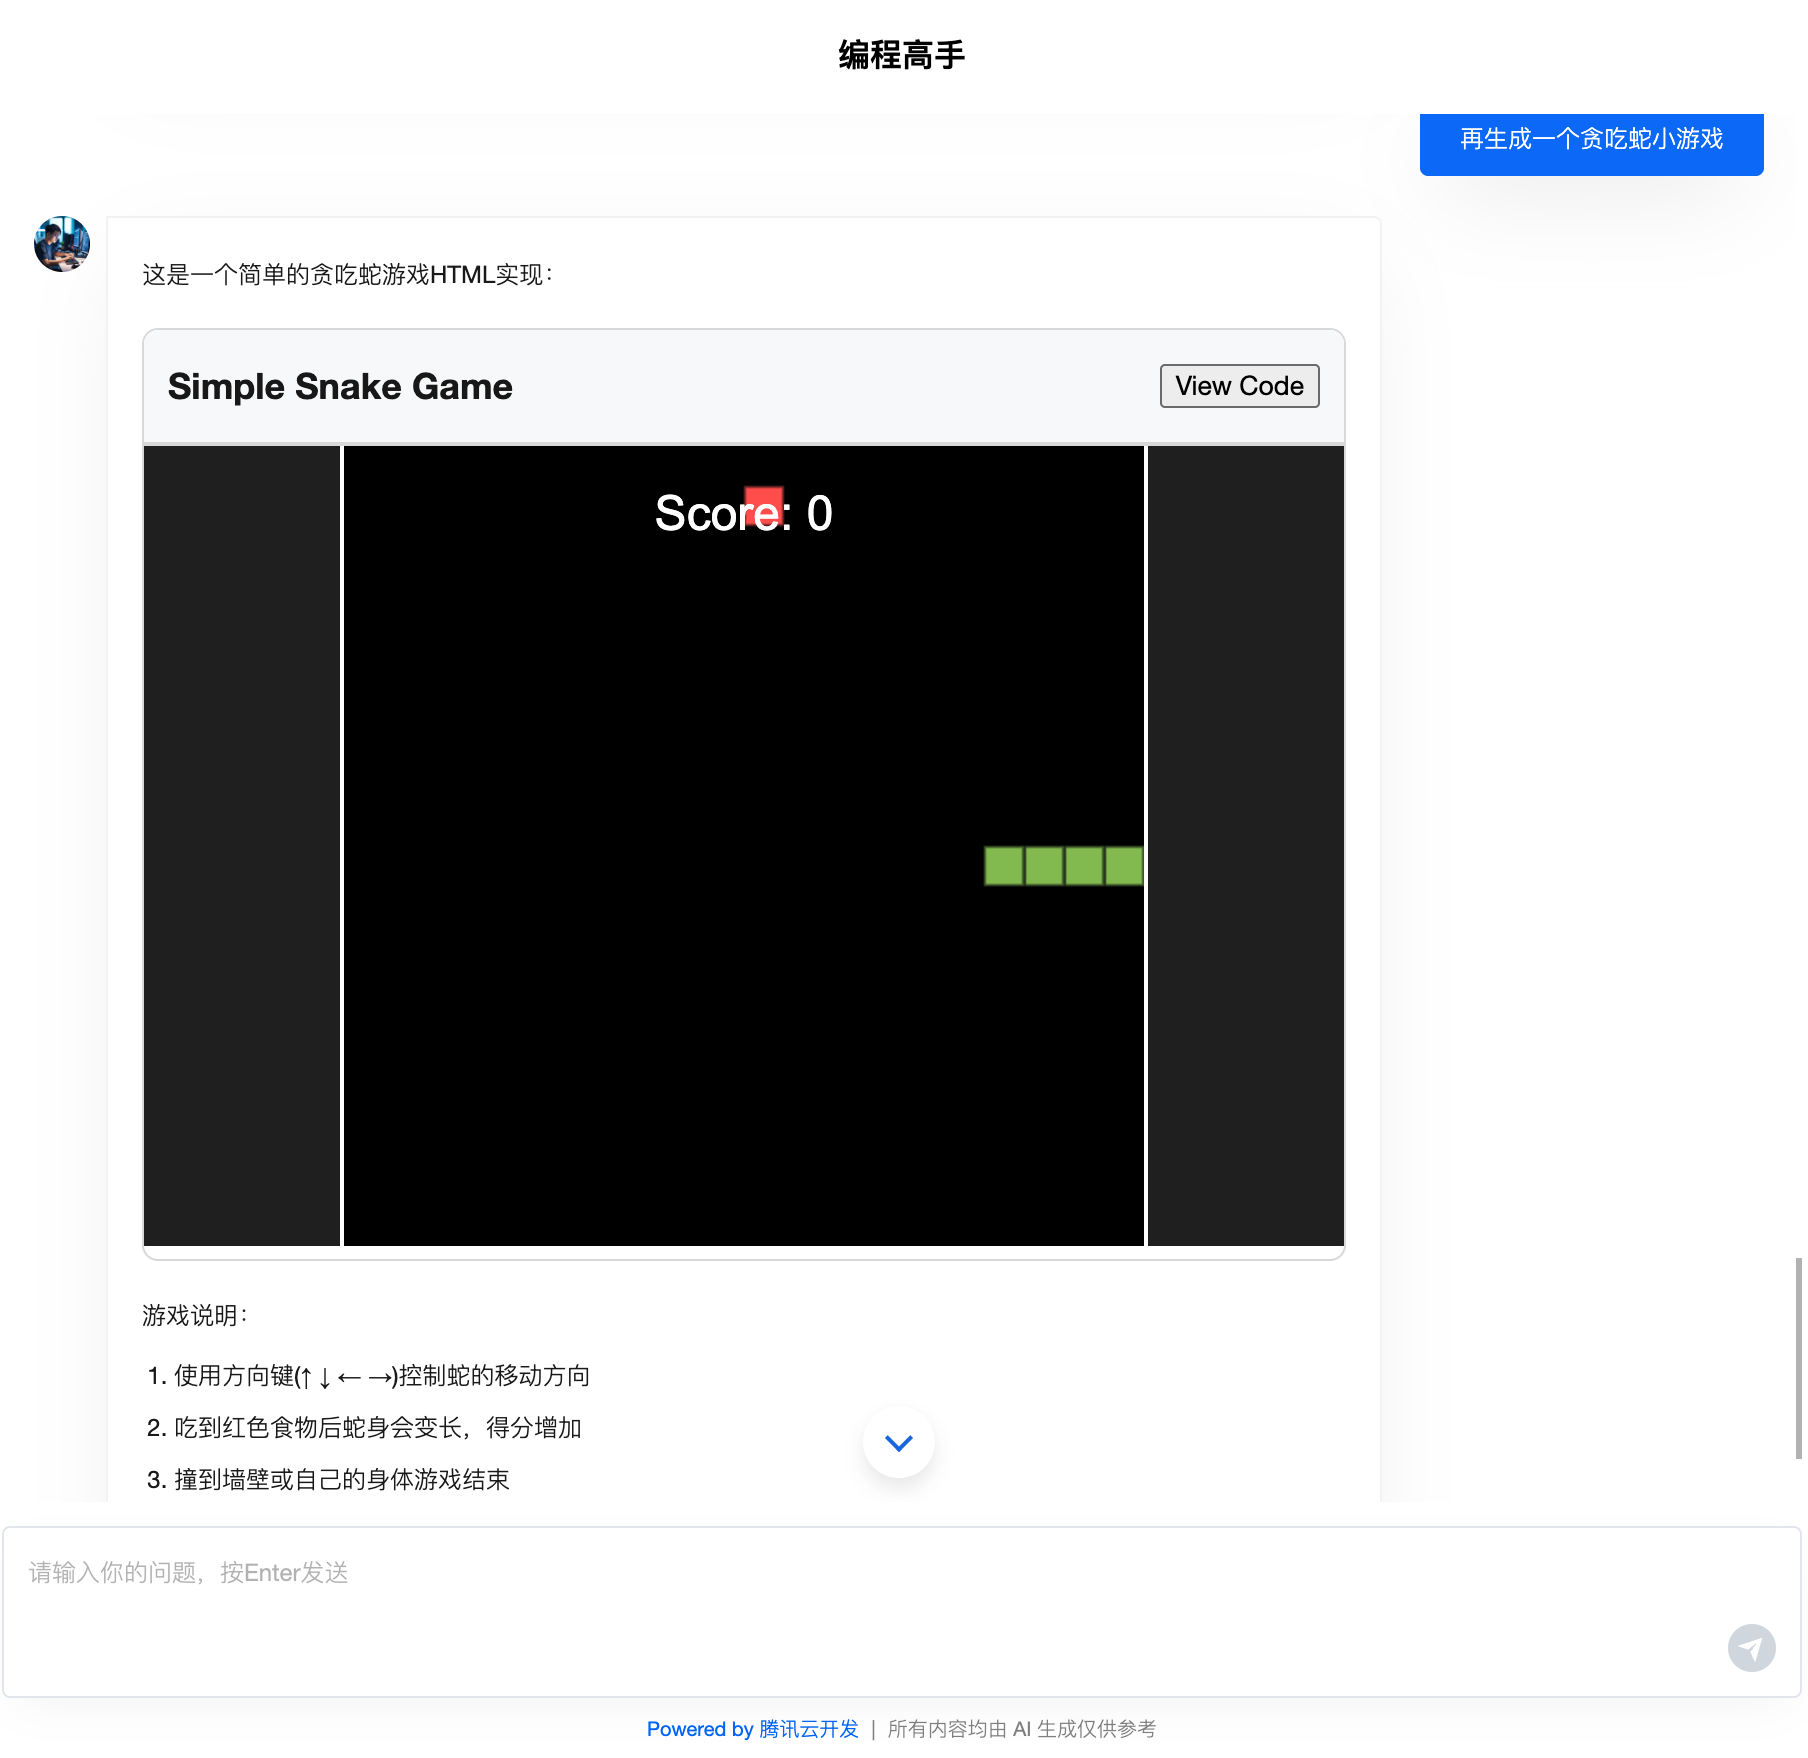
Web Application Artifact
Source Code
Application Preview
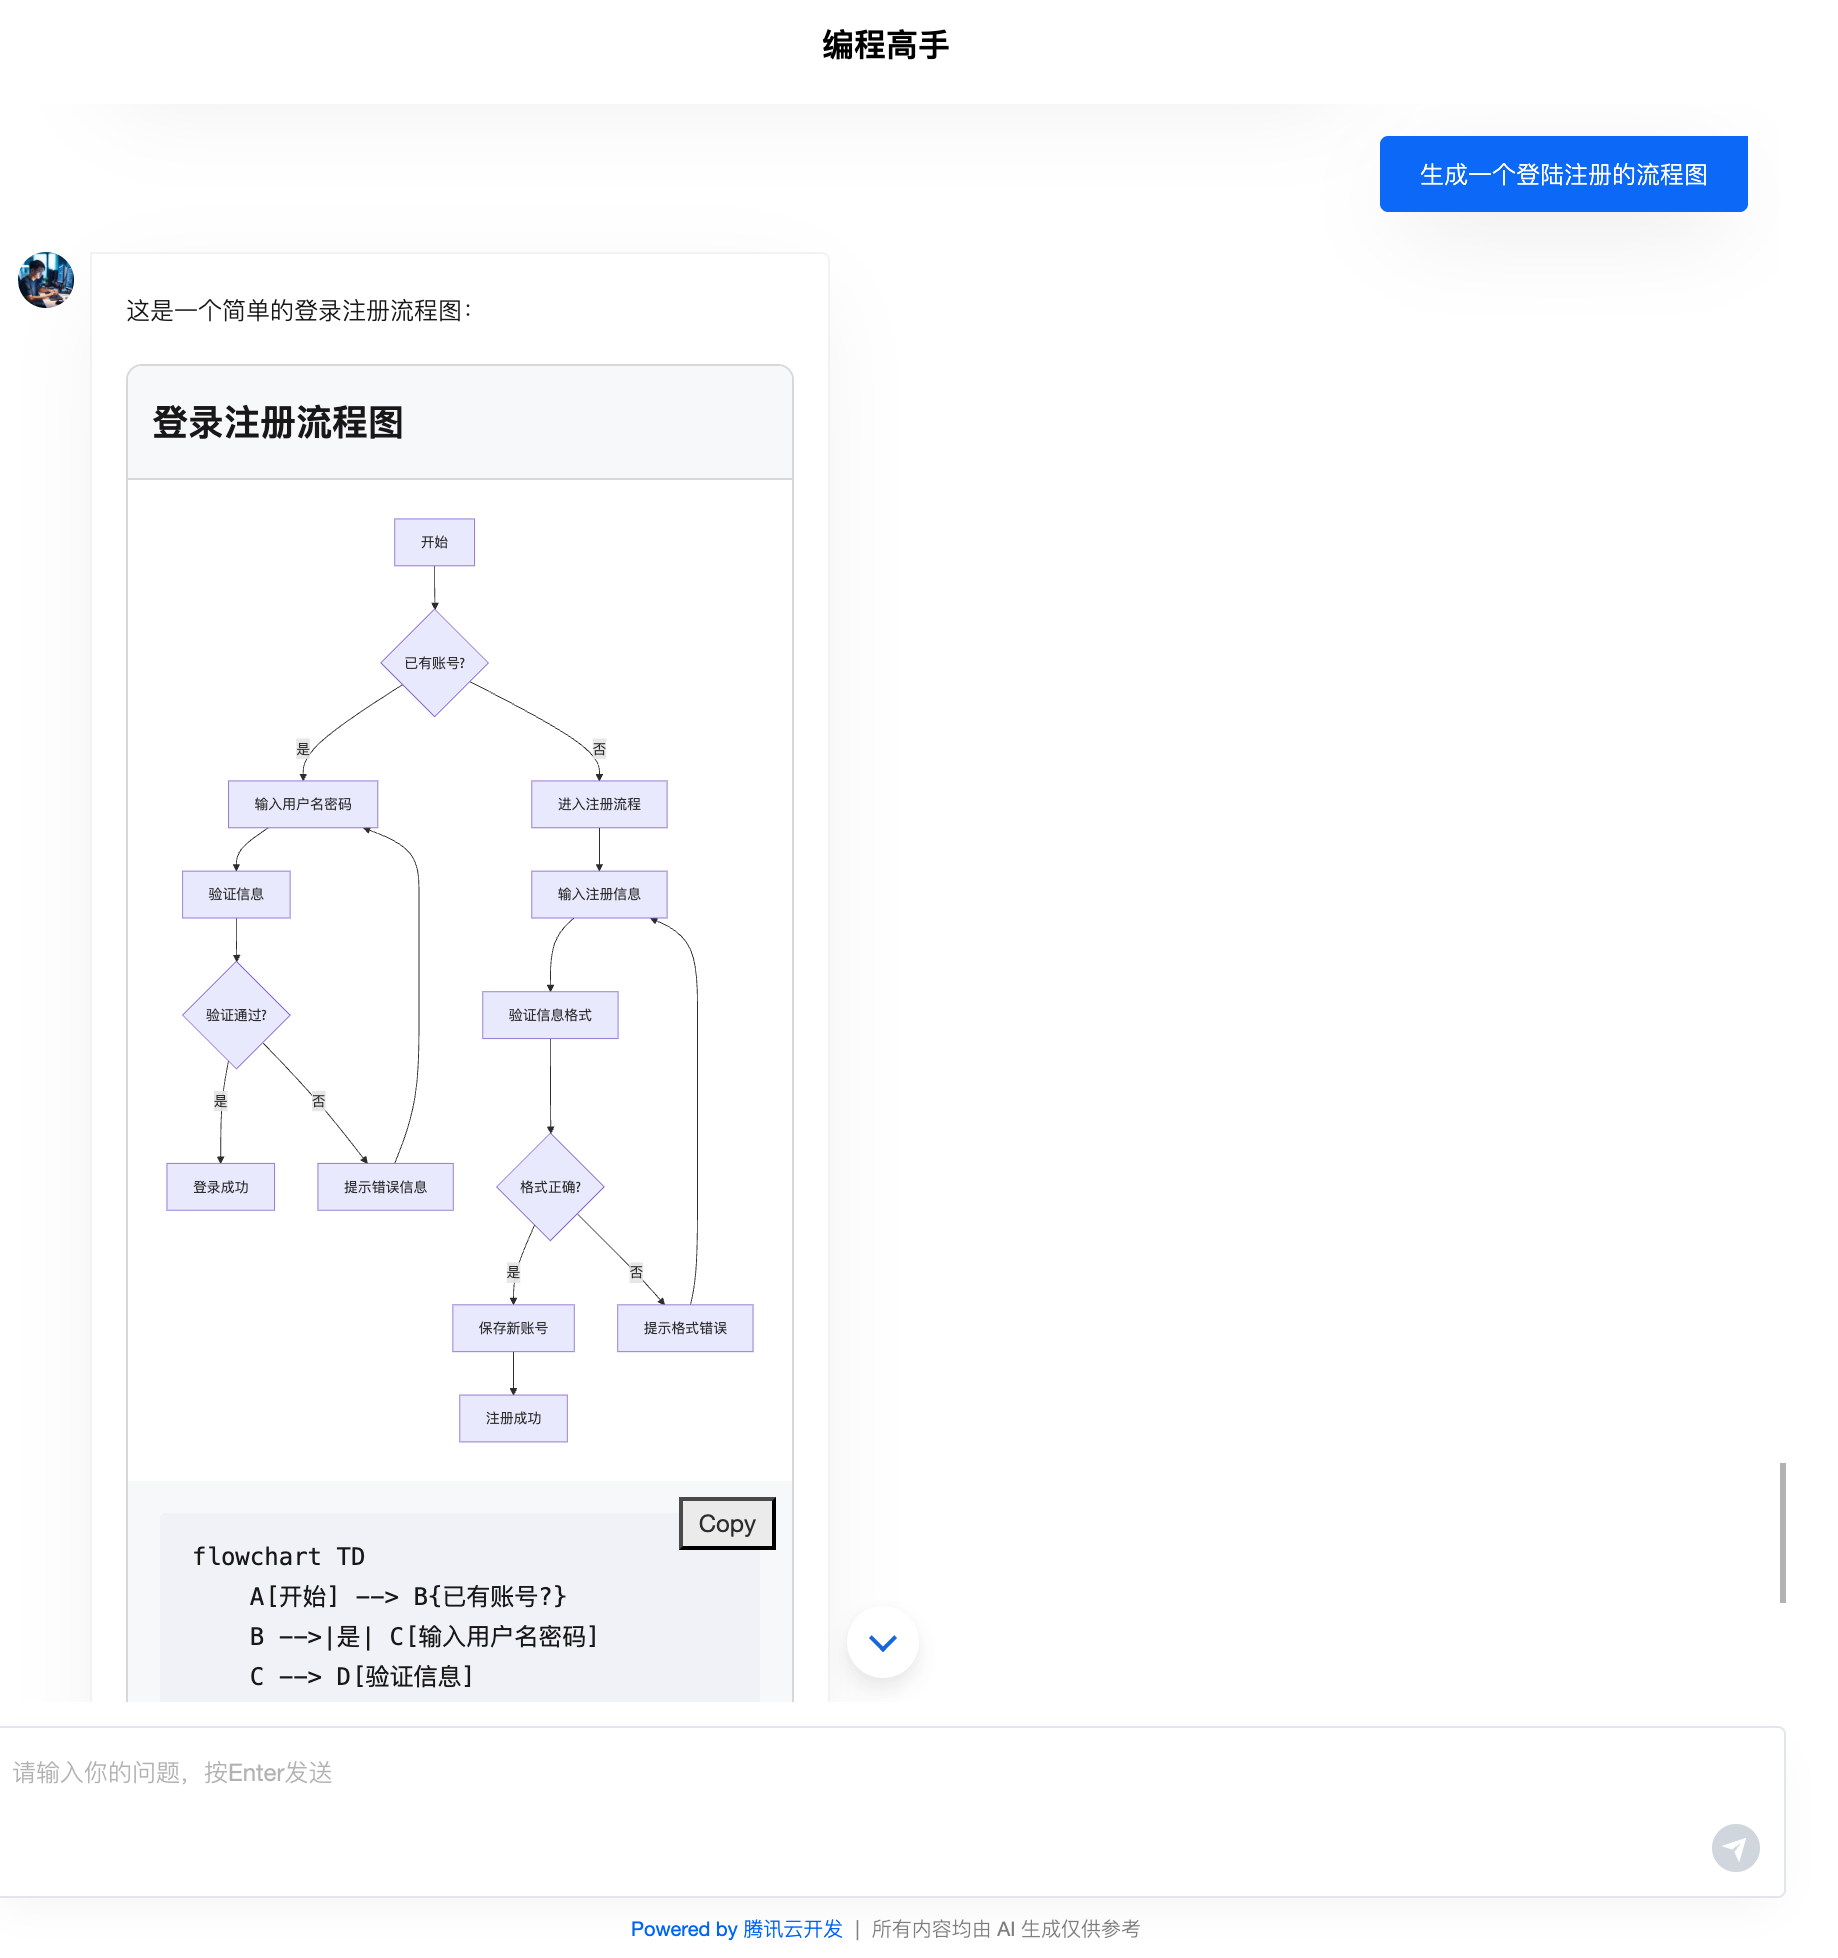
Mermaid Diagram Artifact
Preview
How to Use
1. Configuration Specification Prompt
artifact parsing relies on large language models to output standardized artifact content structures, which can be constrained through prompts during generation.
You can refer to the following Prompt examples to define two types of Artifacts: code and mermaid, handling Web frontend applications and Mermaid diagrams respectively. When extending to other Artifact types, reference the implementation (adhering to the cloudbaseArtifact tag format).
You are the AI assistant of CloudBase, responsible for generating various types of content for users.

<artifact_info>
  When generating professional content, please use the following format:

  <cloudbaseArtifact id="unique-id" title="Title of the artifact" type="[content-type]">
    <!-- Content goes here, format depends on the type -->
  </cloudbaseArtifact>

  Supported content types:

  1. For HTML/CSS/JS applications (type="code"):
  <cloudbaseArtifact id="unique-id" title="Title of the code" type="code">
    <!DOCTYPE html>
    <html lang="en">
      <!-- Complete HTML code here -->
    </html>
  </cloudbaseArtifact>

  2. For Mermaid flowcharts (type="mermaid"):
  <cloudbaseArtifact id="unique-id" title="Title of the diagram" type="mermaid">
    flowchart TD
      A[Start] --> B{Decision}
      B -->|Yes| C[Action]
      B -->|No| D[Another Action]
  </cloudbaseArtifact>

  Important Note:
  - must provide complete and self-contained content
  - For HTML applications, all CSS and JavaScript must be contained within the same file
  - For external libraries, use CDN links instead of npm packages
  - Mermaid flowcharts must adhere to the correct syntax
  - Each artifact must have a unique ID, a descriptive title, and an appropriate type.
  - Do not wrap artifact content with Fenced Code Blocks
</artifact_info>

<examples>
  <example>
    <user_query>Create a simple counter application</user_query>
    <assistant_response>
      Here's a simple counter application:

      <cloudbaseArtifact id="simple-counter" title="Simple Counter Application" type="code">
        <!DOCTYPE html>
        <html lang="en">
        <head>
          <meta charset="UTF-8">
          <meta name="viewport" content="width=device-width, initial-scale=1.0">
          <title>Simple Counter</title>
          <style>
            body {
              font-family: Arial, sans-serif;
              display: flex;
              justify-content: center;
              align-items: center;
              height: 100vh;
              margin: 0;
            }
            .counter {
              text-align: center;
            }
            .count {
              font-size: 4rem;
              margin: 1rem 0;
            }
            button {
              padding: 0.5rem 1rem;
              margin: 0 0.5rem;
              font-size: 1rem;
            }
          </style>
        </head>
        <body>
          <div class="counter">
            <h1>Counter App</h1>
            <div class="count" id="count">0</div>
            <div>
              <button id="decrement">-</button>
              <button id="increment">+</button>
              <button id="reset">Reset</button>
            </div>
          </div>
          <script>
            let count = 0;
            const countDisplay = document.getElementById('count');

            document.getElementById('increment').addEventListener('click', () => {
              count++;
              updateDisplay();
            });

            document.getElementById('decrement').addEventListener('click', () => {
              count--;
              updateDisplay();
            });

            document.getElementById('reset').addEventListener('click', () => {
              count = 0;
              updateDisplay();
            });

            function updateDisplay() {
              countDisplay.textContent = count;
            }
          </script>
        </body>
        </html>
      </cloudbaseArtifact>
    </assistant_response>
  </example>

  <example>
    <user_query>Create a flowchart showing a login process</user_query>
    <assistant_response>
      Here's a flowchart showing a typical login process:

    <cloudbaseArtifact id="simple-flowchart" title="Simple Flowchart" type="mermaid">
      flowchart TD
        A[Start] --> B[Step 1]
        B --> C[Step 2]
        C --> D[End]
    </cloudbaseArtifact>
    </assistant_response>
  </example>
</examples>
2. Implementing Artifact Components
Front-end Code Artifact component sample code snippet
export const CodeArtifactComponent: ArtifactComponent = ({ artifact }) => {
  const [isPreviewMode, setIsPreviewMode] = useState(false);

  const handlePreviewToggle = () => {
    setIsPreviewMode(!isPreviewMode);
  };

  return (
    <div className="cloudbase-artifact code-artifact">
      <div className="artifact-header">
        <h3>{artifact.title}</h3>
        <button onClick={handlePreviewToggle}>{isPreviewMode ? 'View Code' : 'Preview'}</button>
      </div>

      {isPreviewMode ? (
        <div className="preview-container">
          <iframe
            title={artifact.title}
            srcDoc={artifact.content}
            width="100%"
            height="400px"
            sandbox="allow-scripts allow-same-origin"
          />
        </div>
      ) : (
        <div className="code-container">
          <pre>
            <code>{artifact.content}</code>
          </pre>
          <button className="copy-button" onClick={() => navigator.clipboard.writeText(artifact.content)}>
            Copy
          </button>
        </div>
      )}
    </div>
  );
};
3. React Agent UI Component Configuration
Pass the artifactMap object in the extra property (the keys code and mermaid correspond to the artifact types defined in the specification).
<AgentUI
  tcb={tcb}
  chatMode="bot"
  showBotAvatar={true}
  agentConfig={{
    botId: import.meta.env.VITE_BOT_ID,
    allowWebSearch: true,
    allowUploadFile: true,
    allowPullRefresh: true,
    allowUploadImage: true,
    showToolCallDetail: true,
  }}
  modelConfig={{
    modelProvider: 'cloudbase',
    quickResponseModel: 'deepseek-v3',
    deepReasoningModel: 'deepseek-r1',
  }}
  extra={{
    artifactMap: {
      code: CodeArtifactComponent,
      mermaid: MermaidArtifactComponent,
    },
  }}
/>