Google Login
Google social login currently only supports Web platforms (PC/H5), and does not support Mini Program platforms.
Use Google account to quickly log in to your application or website without separate registration
Effect Preview
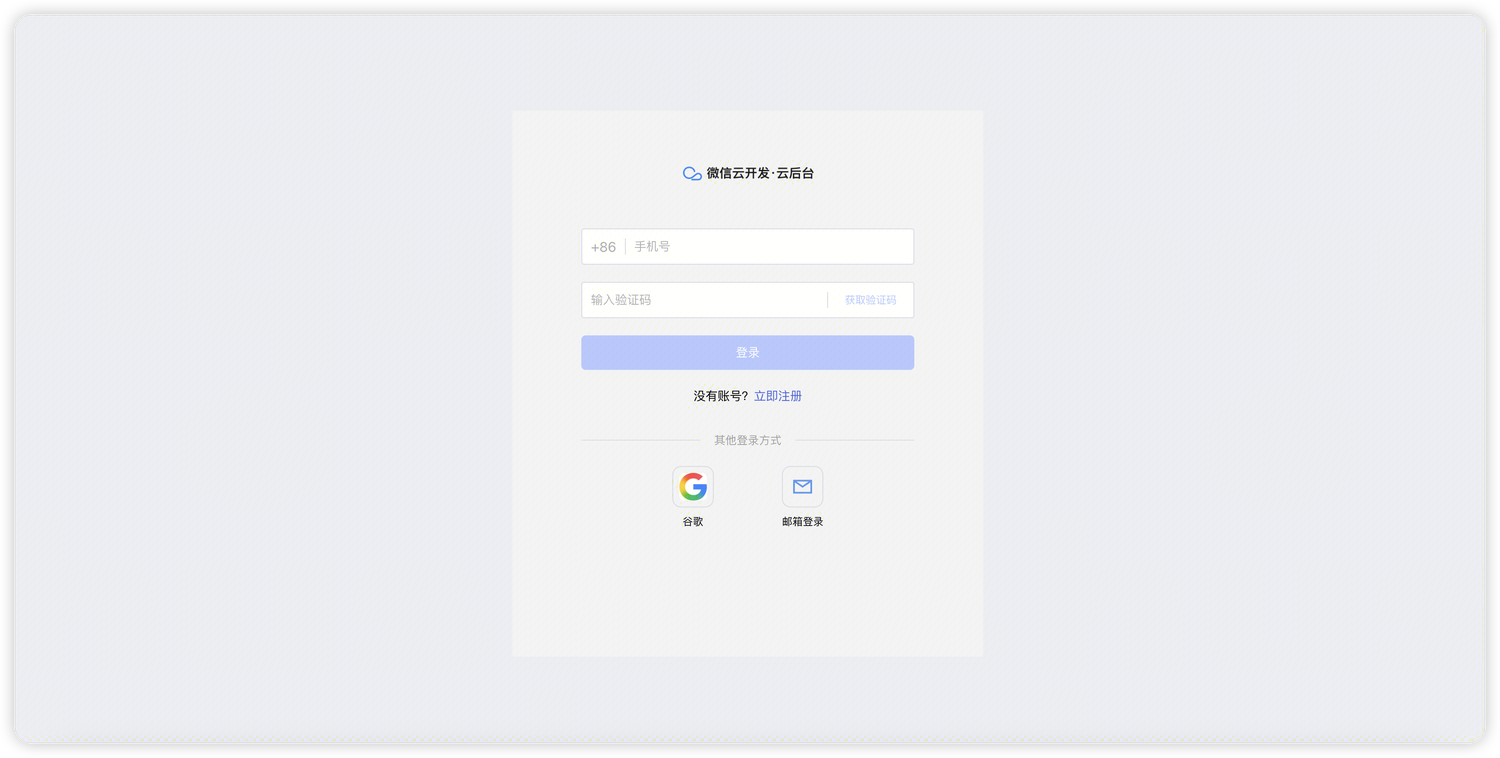
Login Page Display
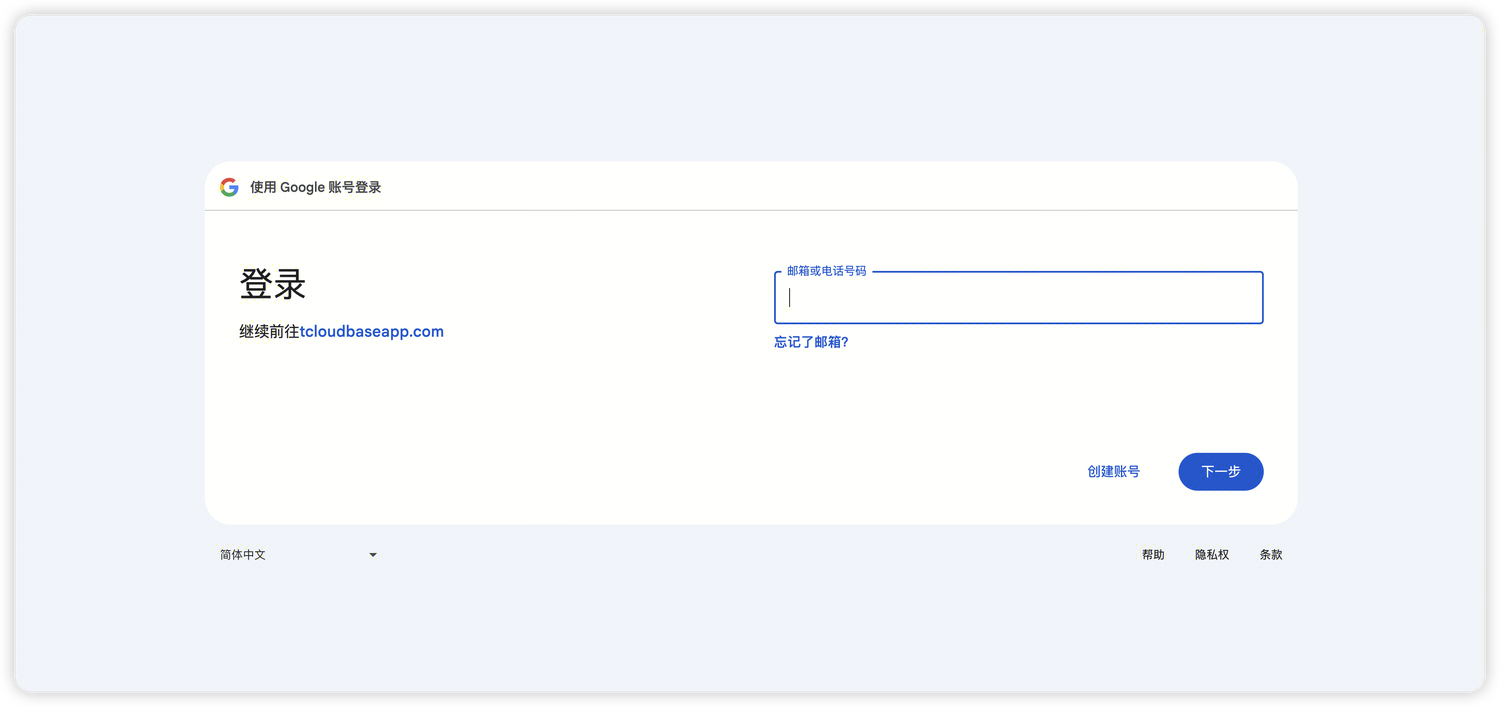
Login Authorization Page
After users click Google Login, they will be redirected to the Google authorization page:
Configuration Guide
Google Login configuration requires back-and-forth operations between the "CloudBase Console" and "Google Developer Console". It is recommended to complete the configuration according to the following steps:
Configuration Flow Overview
CloudBase Console (Get Callback Address) → Google Console (Create Application and Configure Callback Address) → CloudBase Console (Complete Configuration)
Step 1: Get Callback Address in CloudBase Console
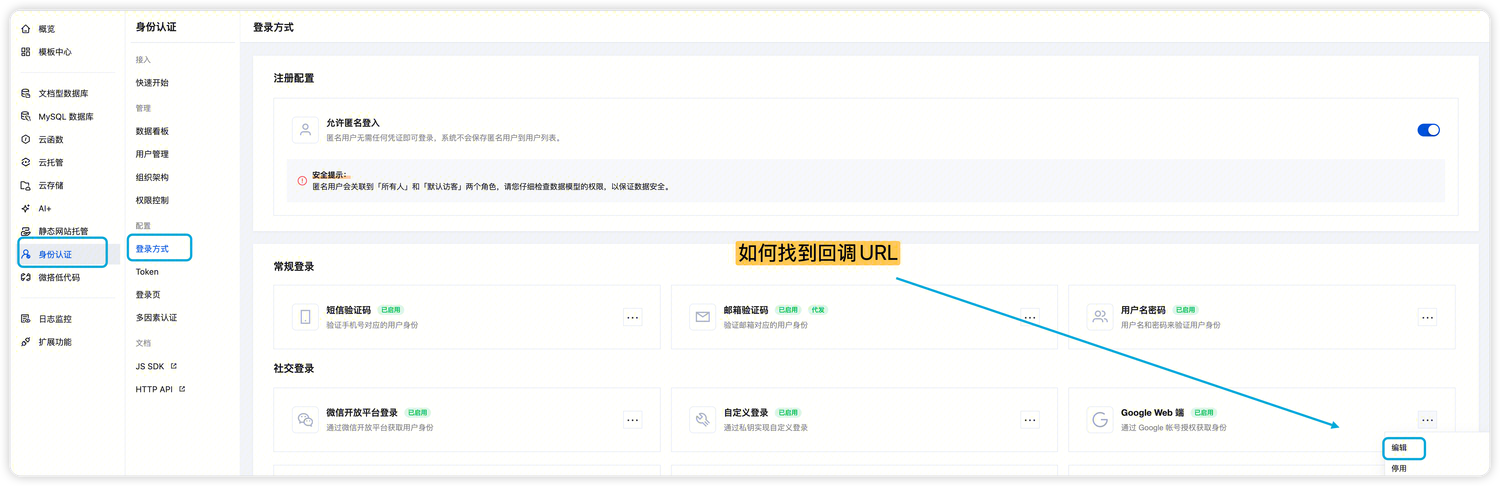
1.1 Enter Authentication Configuration Page
- Log in to CloudBase Console/Authentication/Login Methods
- Find the "Google Web" card and click the "Configure" button
1.2 Customize Login Page Display
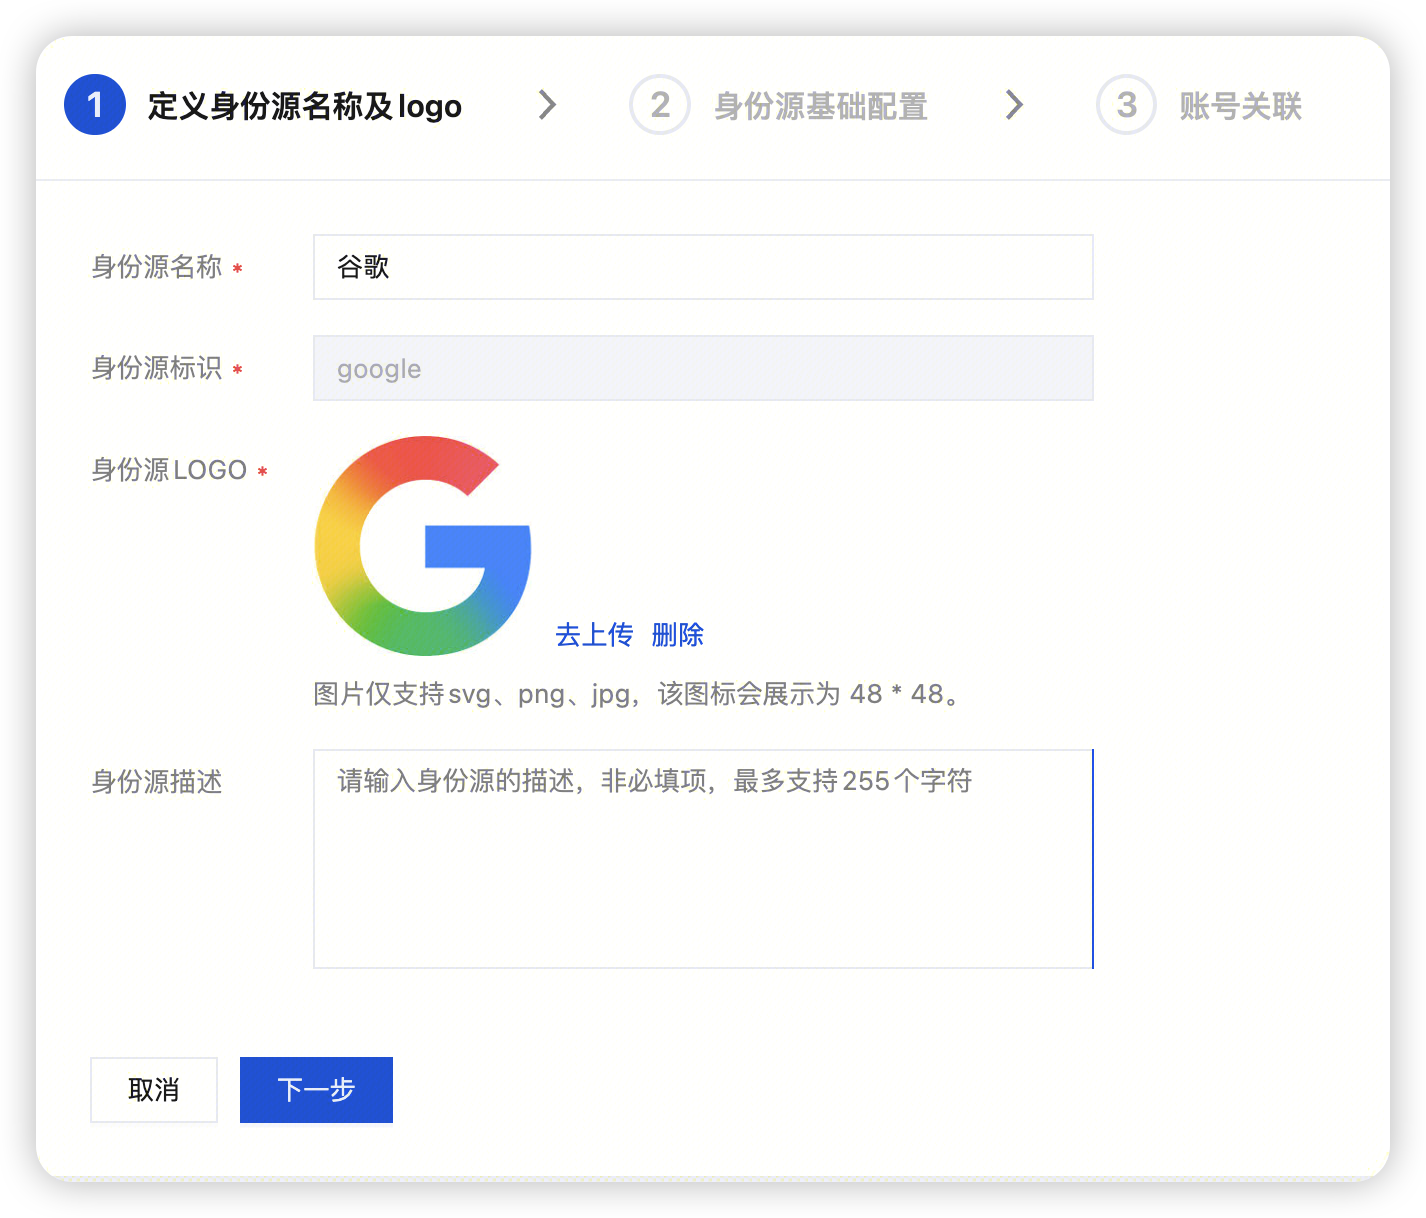
Configure the display information of the identity source, which will affect what users see on the login page:
- Identity Source Name: It is recommended to fill in "Google Login" or "Sign in with Google"
- Logo Icon: You can upload a custom icon or use the default Google icon
1.3 Copy Callback Address
After entering the configuration page, you can see the callback address in the "Identity Source Basic Configuration" area (format: https://xxx.tcloudbaseauth.com/xxx):
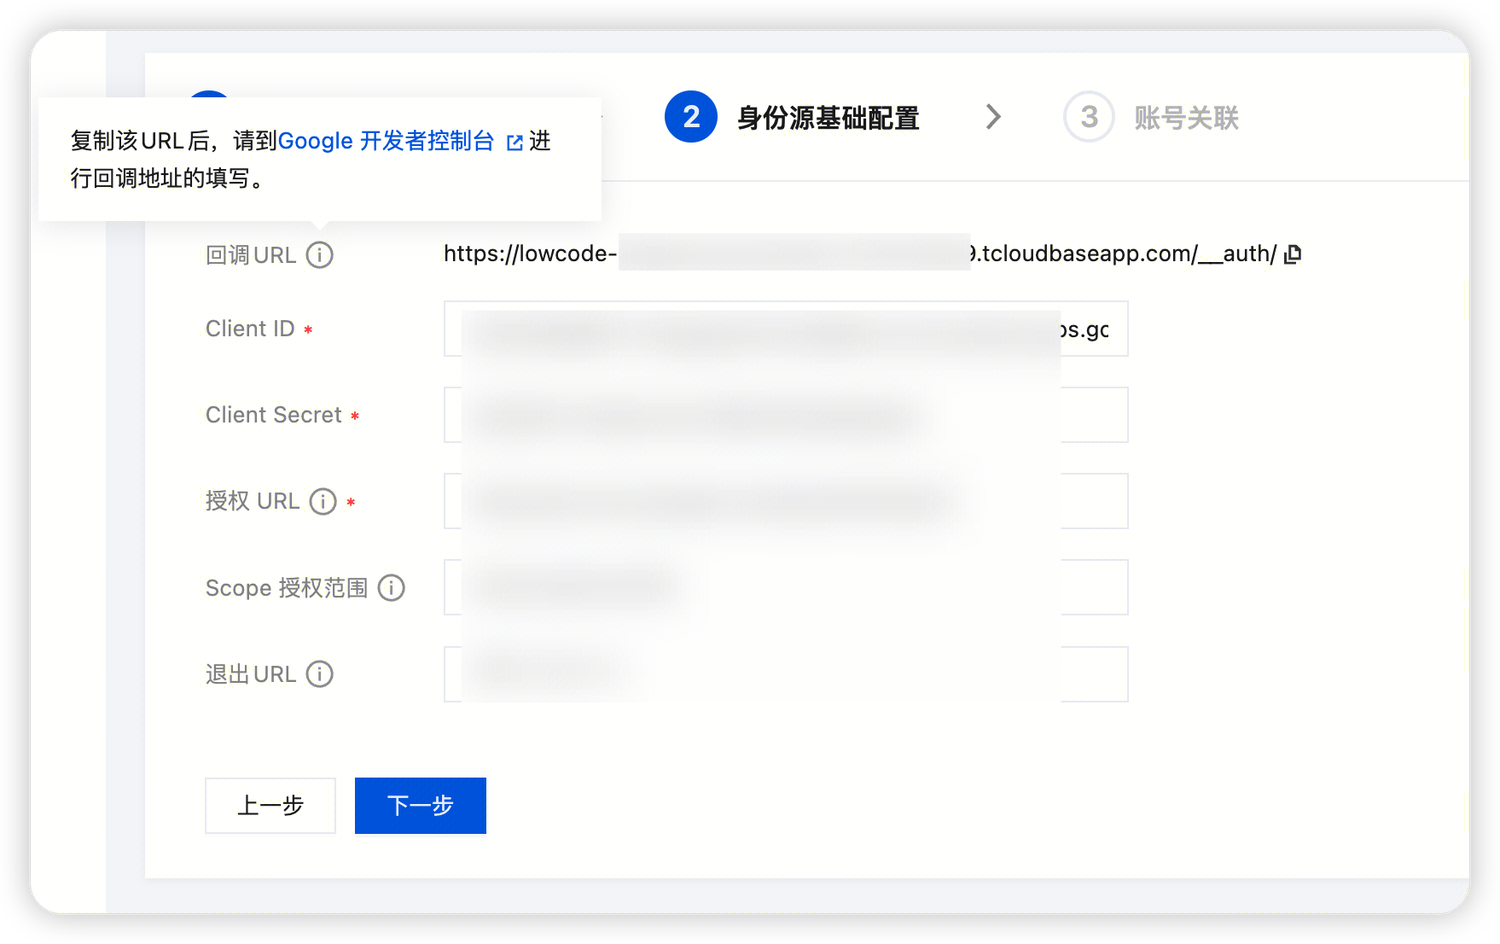
Copy this callback address, which will be needed in the Google Console later.
⚠️ Note: Do not close the CloudBase Console page for now, you will need to return here to complete the configuration later.
Step 2: Create OAuth Application in Google Developer Console
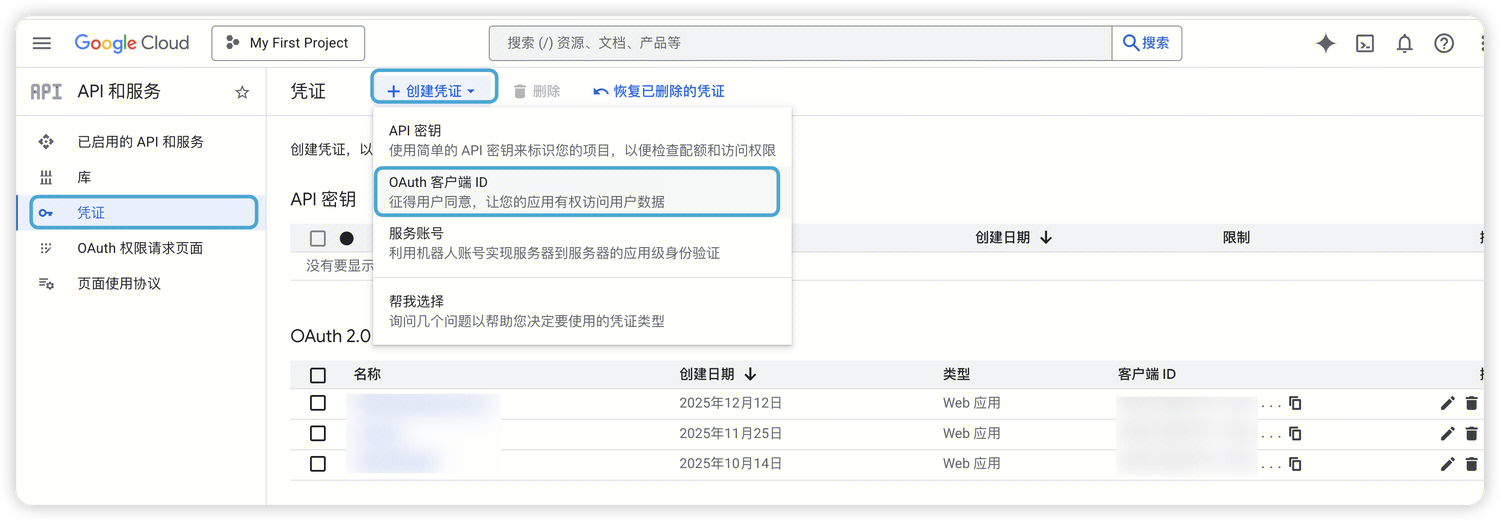
2.1 Enter Google API Console
Go to Google API Console Credentials console.
💡 Tip: If you don't have a Google Cloud project yet, you need to create a project first.
2.2 Create OAuth Client ID
Click the "Create Credentials" button and select "OAuth Client ID":
2.3 Configure OAuth Client
Fill in the following configuration information:
- Application Type: Select "Web Application"
- Name: Name your application (e.g., My CloudBase Application)
- Authorized Redirect URIs: Paste the callback address copied in step 1.2
⚠️ Important: The redirect URI must exactly match the callback address provided by the CloudBase Console, otherwise login will fail.
2.4 Get Credential Information
After clicking the "Create" button, Google will generate credential information for the OAuth client:
- Client ID
- Client Secret
Copy and save these two values, which will be needed to fill in the CloudBase Console later.
Step 3: Return to CloudBase Console to Complete Configuration
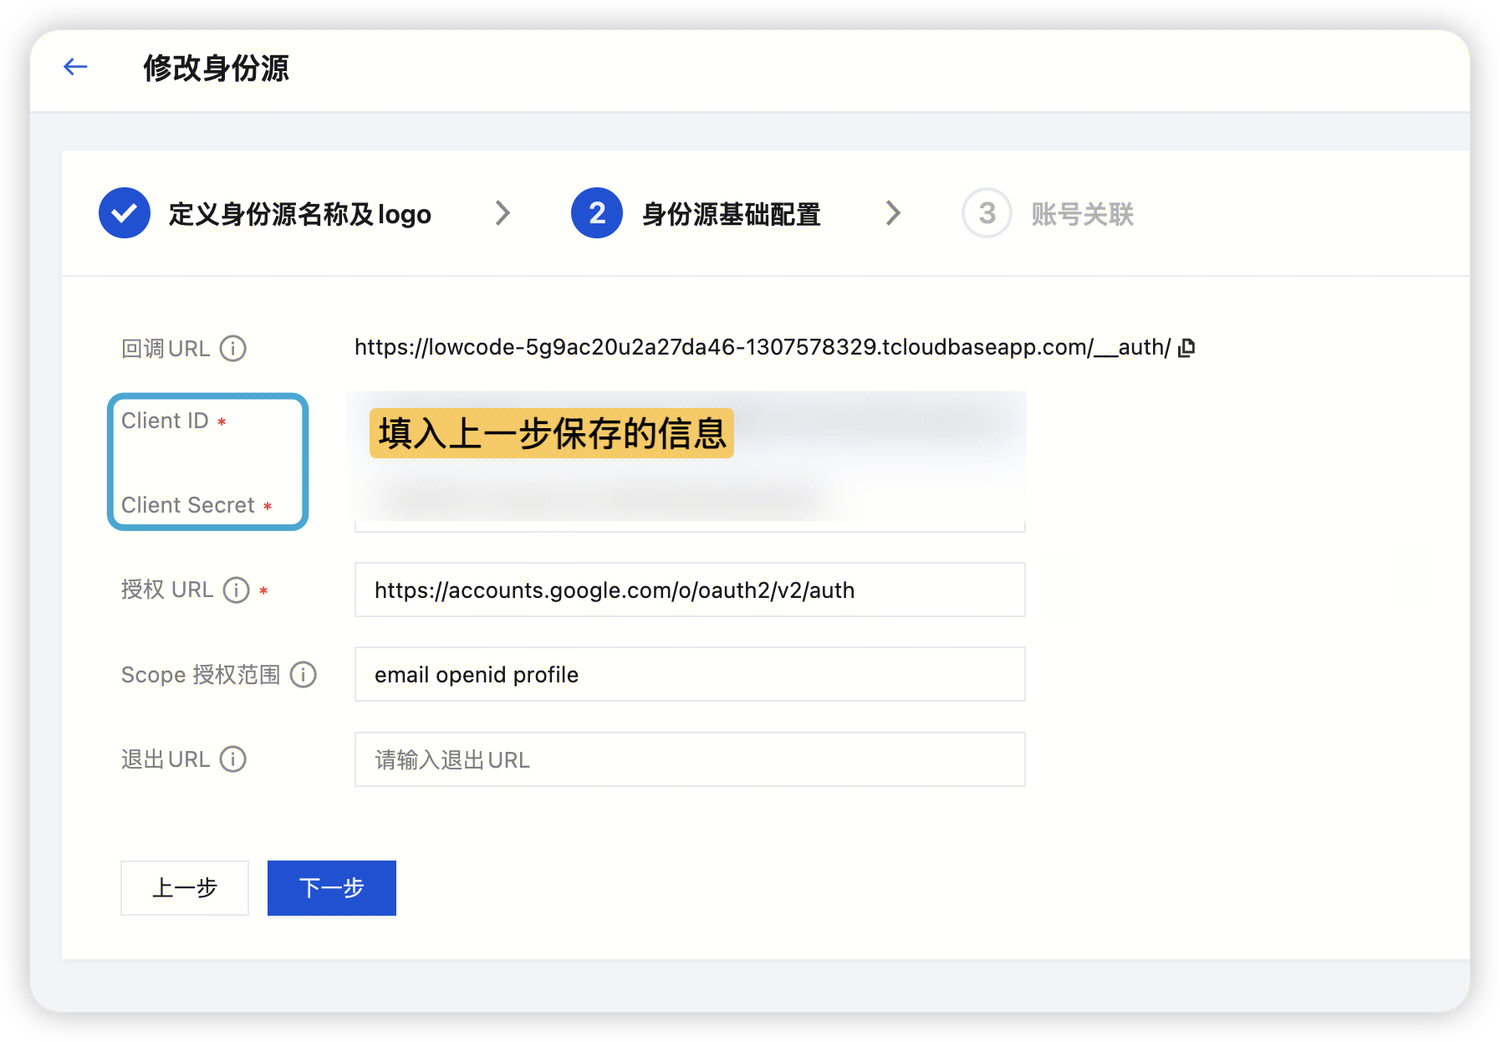
3.1 Fill in Identity Source Basic Configuration
Return to the CloudBase Console configuration page opened in step 1, and fill in the following information in "Identity Source Basic Configuration":
- Client ID: Fill in the Client ID saved in step 2.4
- Client Secret: Fill in the Client Secret saved in step 2.4
- Authorization URL: Use the default value
https://accounts.google.com/o/oauth2/v2/auth - Scope Authorization Range: Use the default value or adjust according to needs (such as
openid profile email)
💡 Tip: For detailed explanation of Scope authorization range, please refer to Google OAuth 2.0 Documentation.
3.2 Save Configuration
After filling in, click the "Save" button to complete the configuration.
Integration Guide
Method 1: Use Hosted Login Page (Recommended)
CloudBase provides a ready-to-use hosted login page, allowing you to quickly integrate Google Login without writing login interface code.
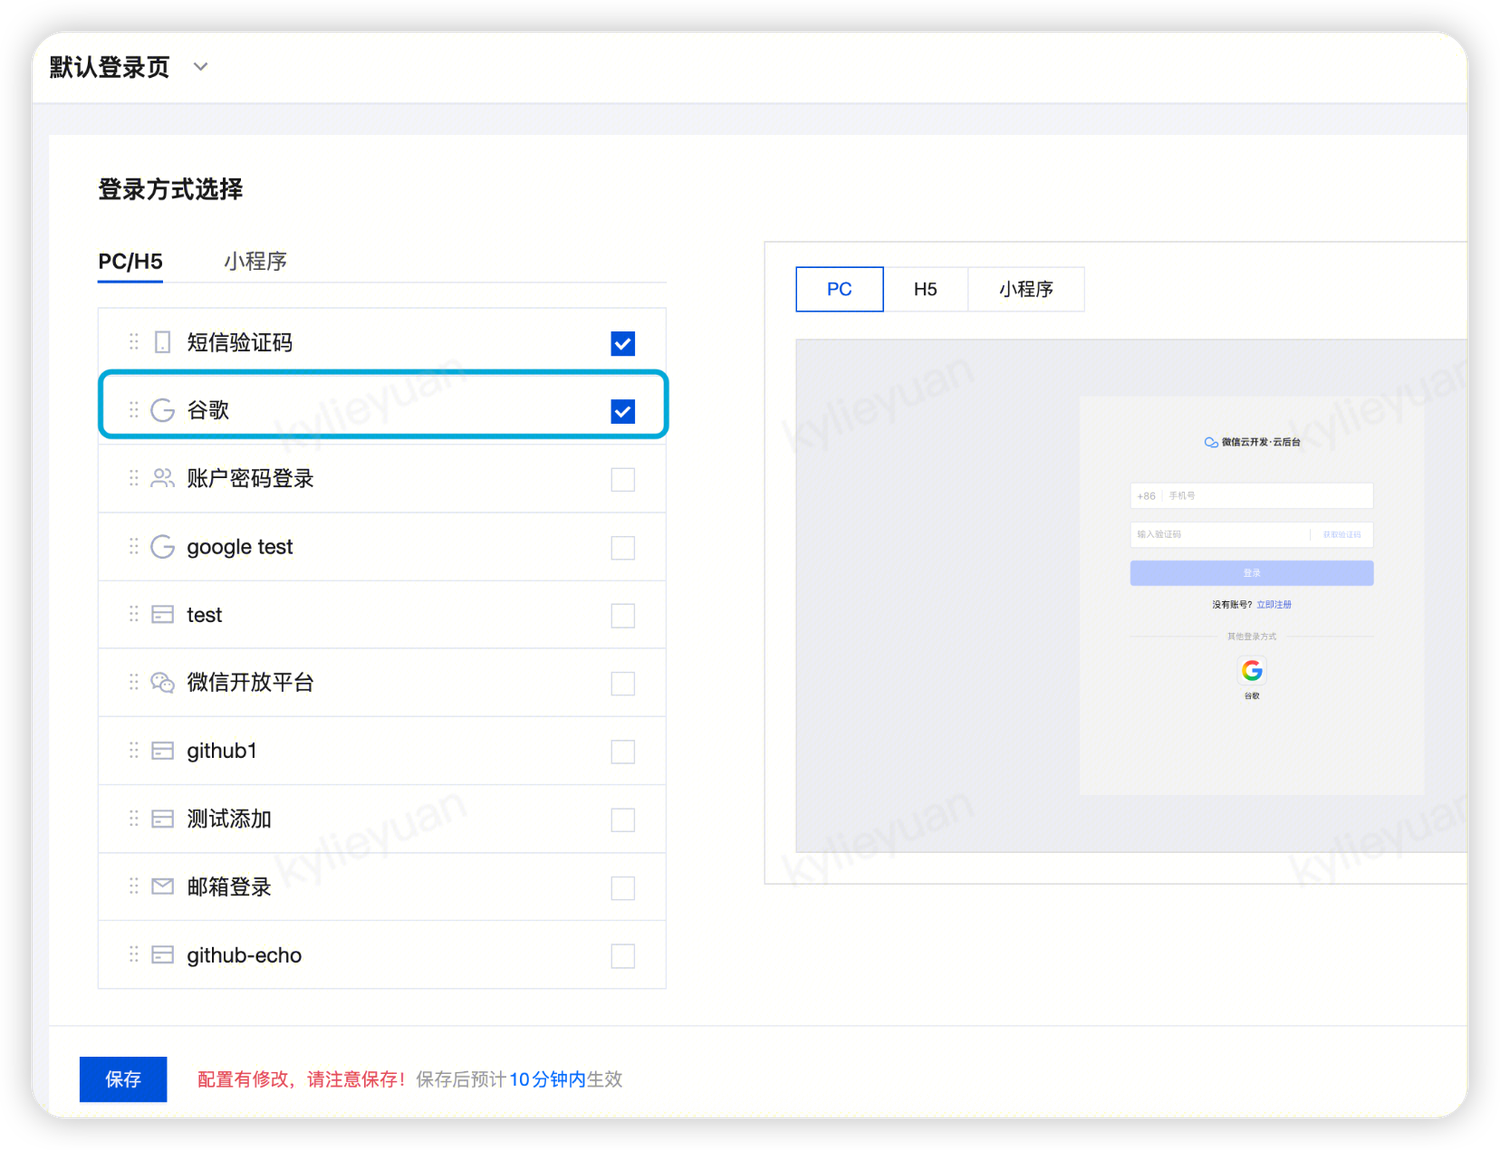
- Go to CloudBase Console/Authentication/Login Page
- Check "Google Login" in "Login Method Configuration"
- Click "Save"
Method 2: Use SDK Custom Login
If you need to customize the login interface and process, you can use the API provided by the CloudBase Web SDK for login
Get Third-Party Platform Authorization Page Address
Auth.genProviderRedirectUri is used to generate the third-party platform authorization page URL
import cloudbase from "@cloudbase/cloudbase";

const app = cloudbase.init({
  env: "your-env-id",
  region: "ap-shanghai", // Default is Shanghai region if not specified
});

const auth = app.auth();

const { uri } = await auth.genProviderRedirectUri({
  provider_id: "google", // google platform
  provider_redirect_uri: providerUri, // Redirect URI
  state: state, // Custom state identifier
  other_params: otherParams, // Other parameters
});
After Accessing URI and Authorization, Callback to Specified Address and Get Third-Party Platform Token
Redirect users to the URI, for example location.href = uri; after users complete authorization, they will be redirected to the specified provider_redirect_uri address.
// At this time, the URL query carries authorization code, state and other parameters
// 1. Check if state meets expectations (such as set parameters)

// 2. Get the code parameter carried in the URL param when the third-party platform redirects back to the page
const provider_code = "your_provider_code";

// 3. If it meets expectations, get the third-party platform Token
const { provider_token } = await auth.grantProviderToken({
  provider_id: "google",
  provider_redirect_uri: "curpage", // Specify the URL address that the third-party platform redirects back to
  provider_code: provider_code, // The code parameter carried in the URL param when the third-party platform redirects back to the page
});
Login with Third-Party Platform Token
Auth.signInWithProvider method is used for third-party platform login
await auth.signInWithProvider({
  provider_token: provider_token,
});