Email Verification Code Login
Using email verification code login, you can allow users to log in with "email + email verification code".
Prerequisites
Enable Email Login
- Built-in Email Service (Recommended)
- Custom SMTP
CloudBase provides a zero-configuration email service that requires no third-party email service application or SMTP parameter configuration, allowing you to complete the setup in just 1 minute.
Configuration Steps:
- Go to CloudBase Console / Identity Authentication / Login Methods
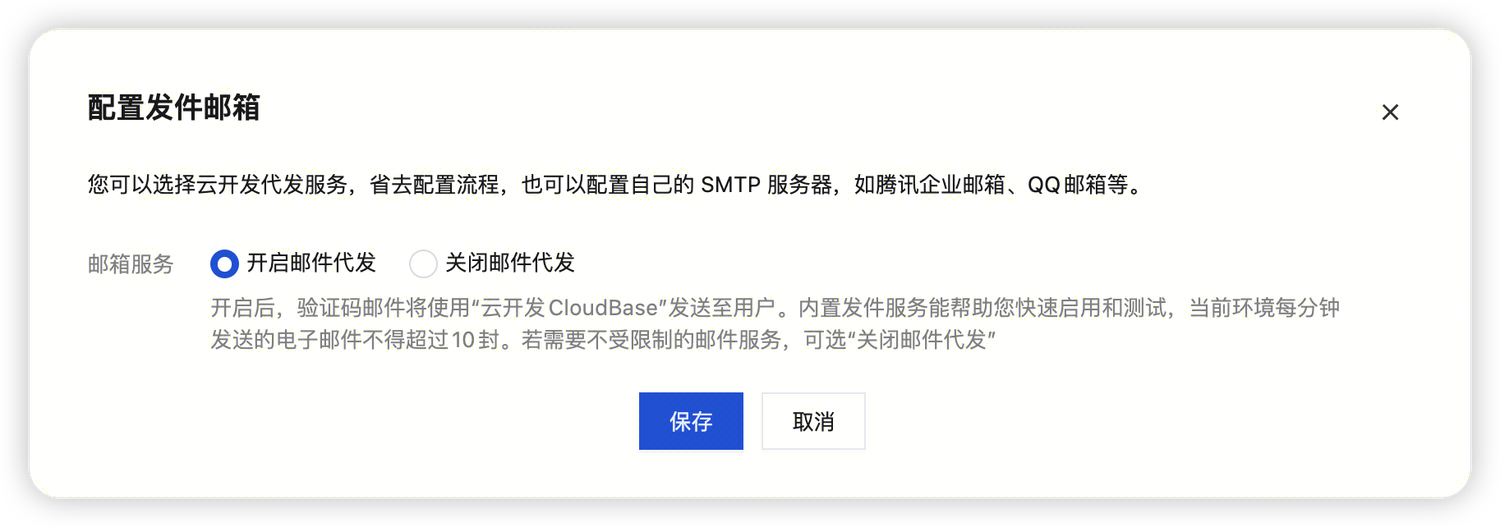
- Find the "Email Verification Code" card and click "Configure Sender Email"
- Select "Enable Email Proxy"
- Save the configuration, which takes effect immediately
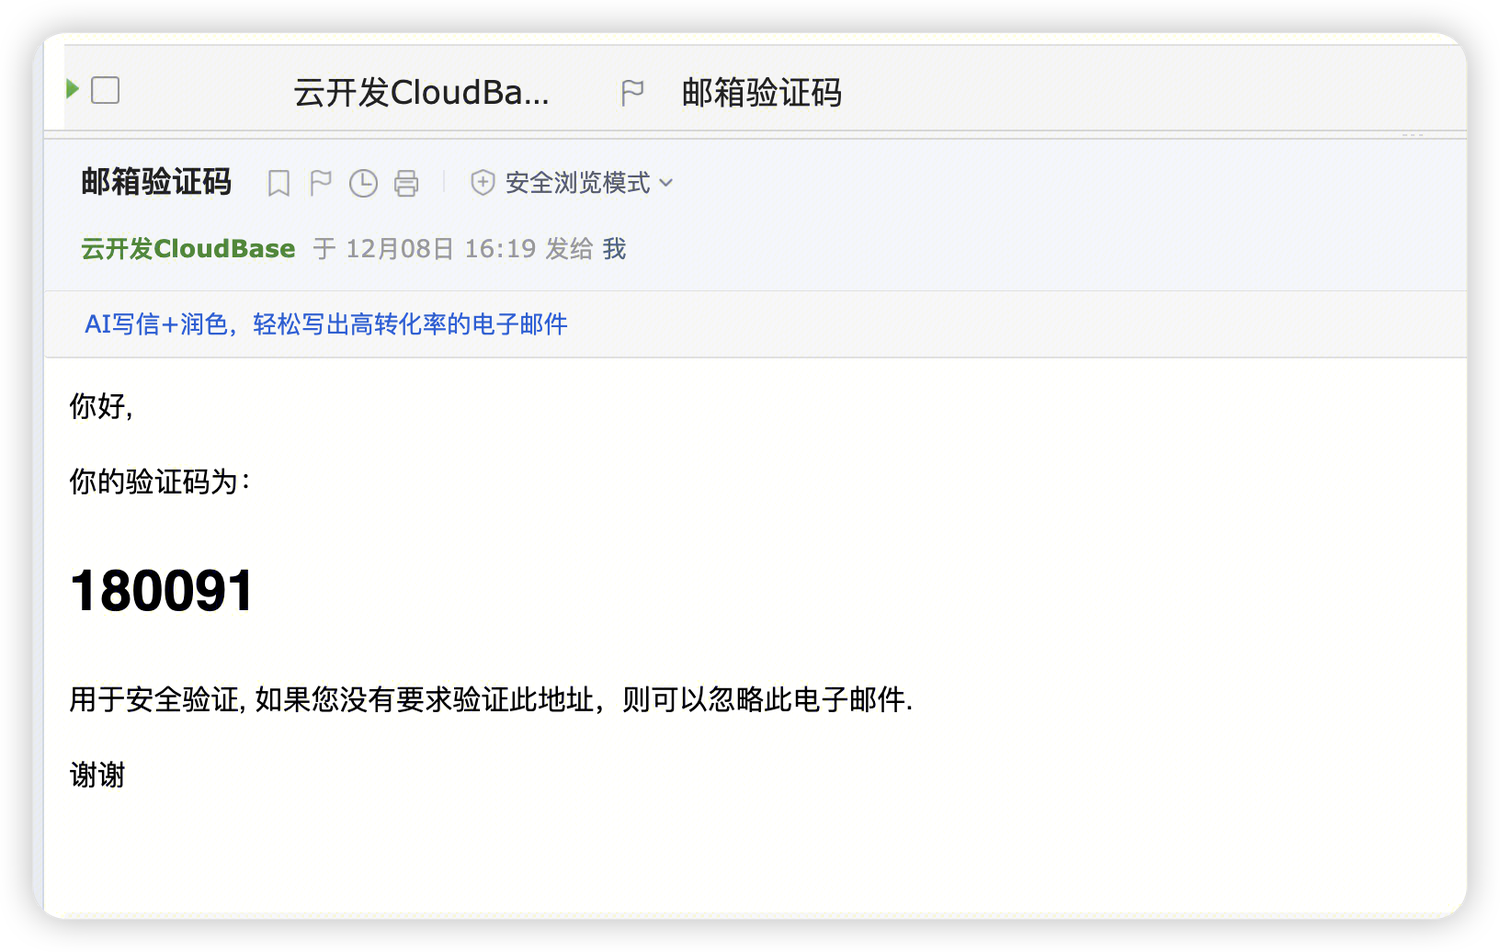
After configuration, the email effect received by users:
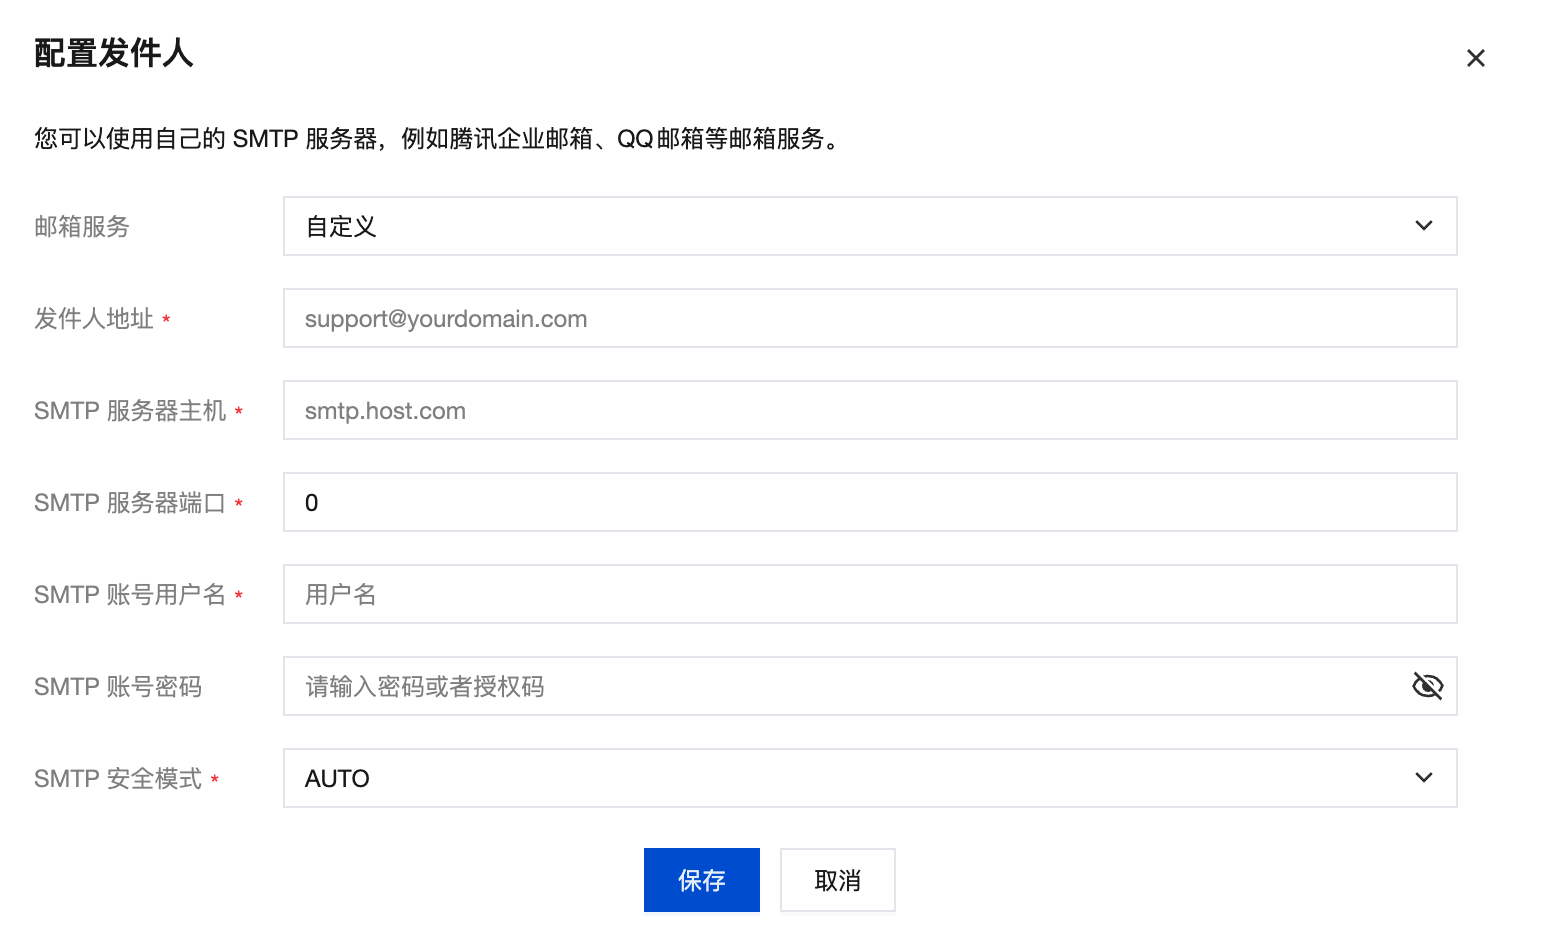
If you need to use your enterprise's own email service or customize sender information, you can configure SMTP parameters.
Configuration Steps:
- Go to CloudBase Console / Identity Authentication / Login Methods
- Find the "Email Verification Code" card and click "Configure Sender Email"
- Select "Custom SMTP" and fill in the email server configuration
- Save the configuration
Common Email SMTP Configuration Reference:
| Email Provider | SMTP Server Host | SMTP Server Port | SMTP Security Mode |
|---|---|---|---|
| QQ Mail | smtp.qq.com | 465/587 | SSL(465)/STARTTLS(587) |
| Tencent Exmail | smtp.exmail.qq.com | 465 | SSL |
| 163 Mail | smtp.163.com | 465 | SSL |
| Gmail | smtp.gmail.com | 465/587 | SSL(465)/STARTTLS(587) |
For detailed SMTP configuration guidelines, please refer to the Custom SMTP Configuration Guide section.
User Registration
For user registration process, please refer to User Registration.
Email Verification Code Login
The Auth.signInWithEmail method is used for email verification code login.
const app = cloudbase.init({
  env: "xxxx-yyy",
  region: "ap-shanghai", // Defaults to Shanghai region if not specified
});

const auth = app.auth();

const email = "test@example.com";

// Step 1: When the user clicks to get the verification code, call the following method to send the email verification code, and store verificationInfo globally for use as a parameter in step 3
const verificationInfo = await auth.getVerification({
  email: email,
});

// Step 2: Wait for the user to enter the email verification code on the page
const verificationCode = userInputCode; // 6-digit verification code

// Step 3: After the user enters the verification code, verify the email verification code and log in
await auth.signInWithEmail({
  verificationInfo,
  verificationCode, // Email verification code entered by the user
  email: email, // User's email
});
Custom SMTP Configuration Guide
If you choose to use a custom SMTP email service, this section will help you complete the configuration for common email services.
QQ Mail
Step 1: Log in to QQ Mail
Go to QQ Mail Homepage and log in to your QQ mailbox.
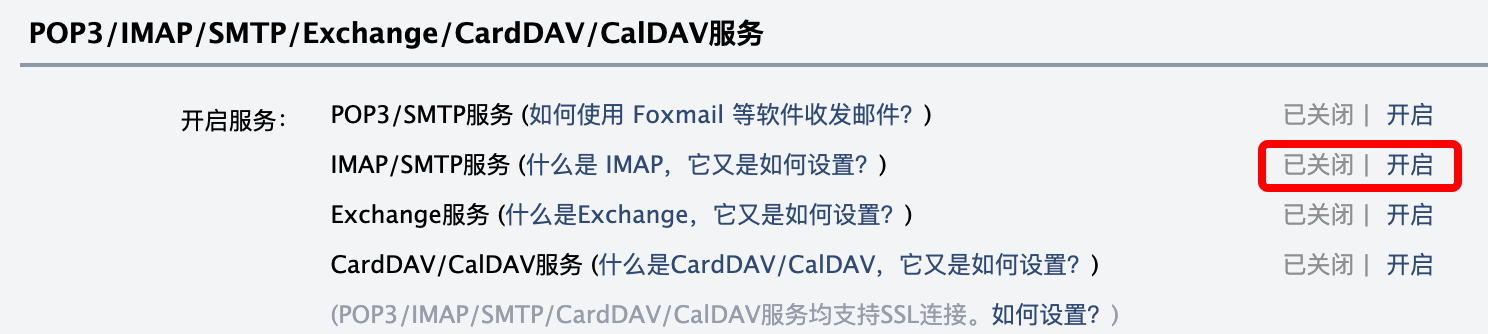
Step 2: Enable IMAP/SMTP Service
After logging in to the mailbox, go to "Settings - Account":

Then, in the "Account" settings, find the "Enable Services" setting item and enable the IMAP/SMTP service:
After successful activation, please save your email login authorization code:
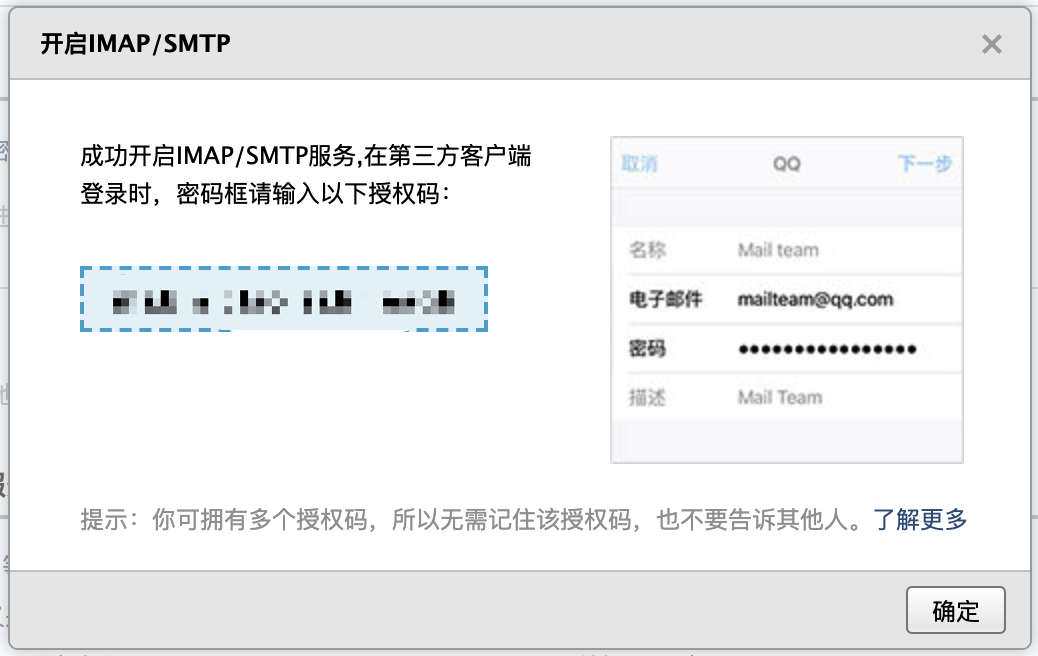
You can also enable the POP3/SMTP service. The authorization codes for both services can be used as the SMTP account password in Step 3.
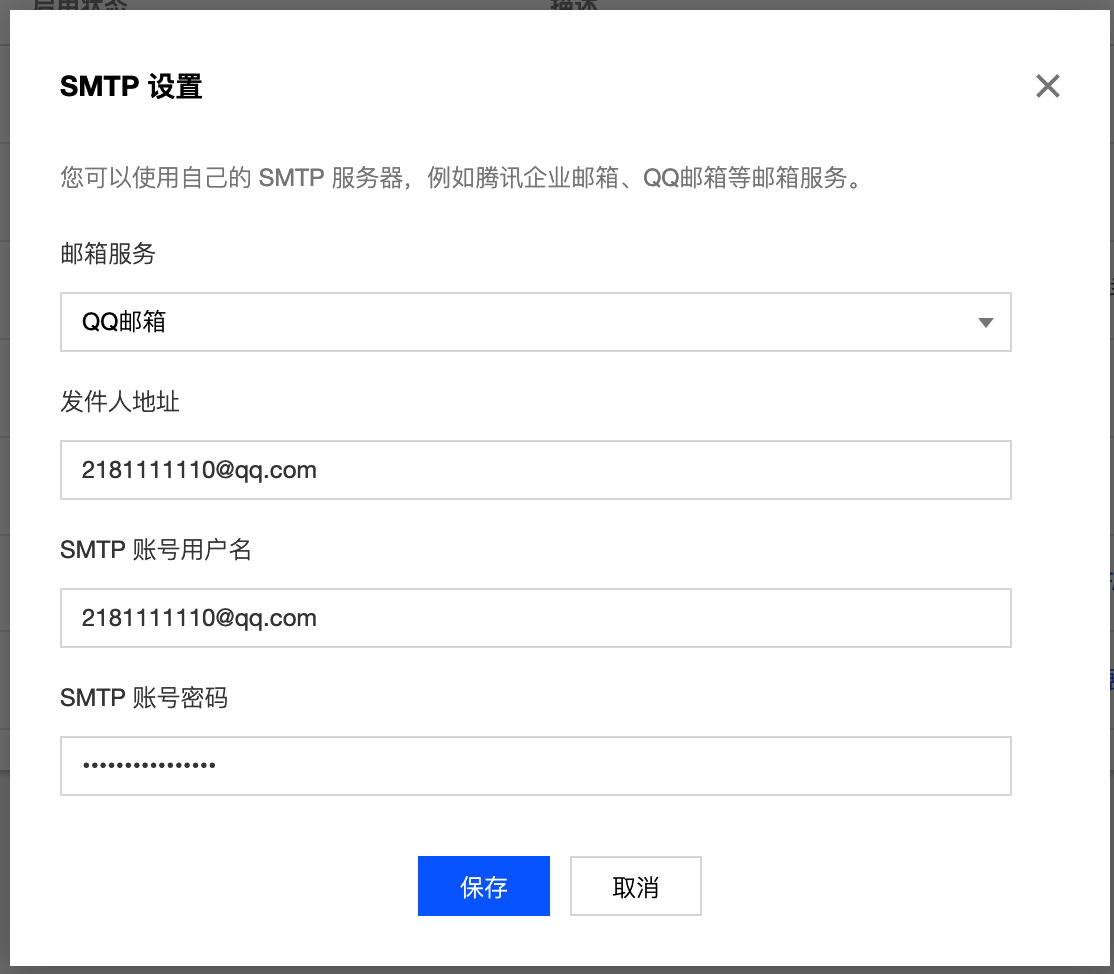
Step 3: Configure QQ Mail as Sender
Use your QQ mailbox as the sender address and SMTP account username, and use the authorization code from Step 2 as the SMTP account password.
Gmail
Step 1: Log in to Gmail
Gmail has IMAP/SMTP service enabled by default. This step verifies that the mailbox is available.
Step 2: Enable Google Account Two-Step Verification
Visit Google Account Security Settings, click "Security" → "2-Step Verification" to enable it.
Step 3: Enable Google Account App-Specific Password
Visit App-Specific Password Settings to generate an app-specific password.
Step 4: Configure CloudBase Console Email Login SMTP
| Configuration Item | Configuration Value |
|---|---|
| Sender | Your Gmail address |
| SMTP Server Host | smtp.gmail.com |
| Port | 465 |
| SMTP Account Username | Your Gmail address |
| SMTP Account Password | App-specific password from Step 3 |
| SMTP Security Mode | SSL |