自定义 Artifact 解析
通过 Artifact,用户可以轻松创建和管理多种类型的内容,如代码架构图、流程图、网页设计、SVG 图形和交互式组件。Artifact 特别适合开发人员、设计师、产品经理和营销人员,用于将创意快速转化为实际产品。
提示
当前**Agent UI React 组件** 已支持自定义 Artifact 能力
效果
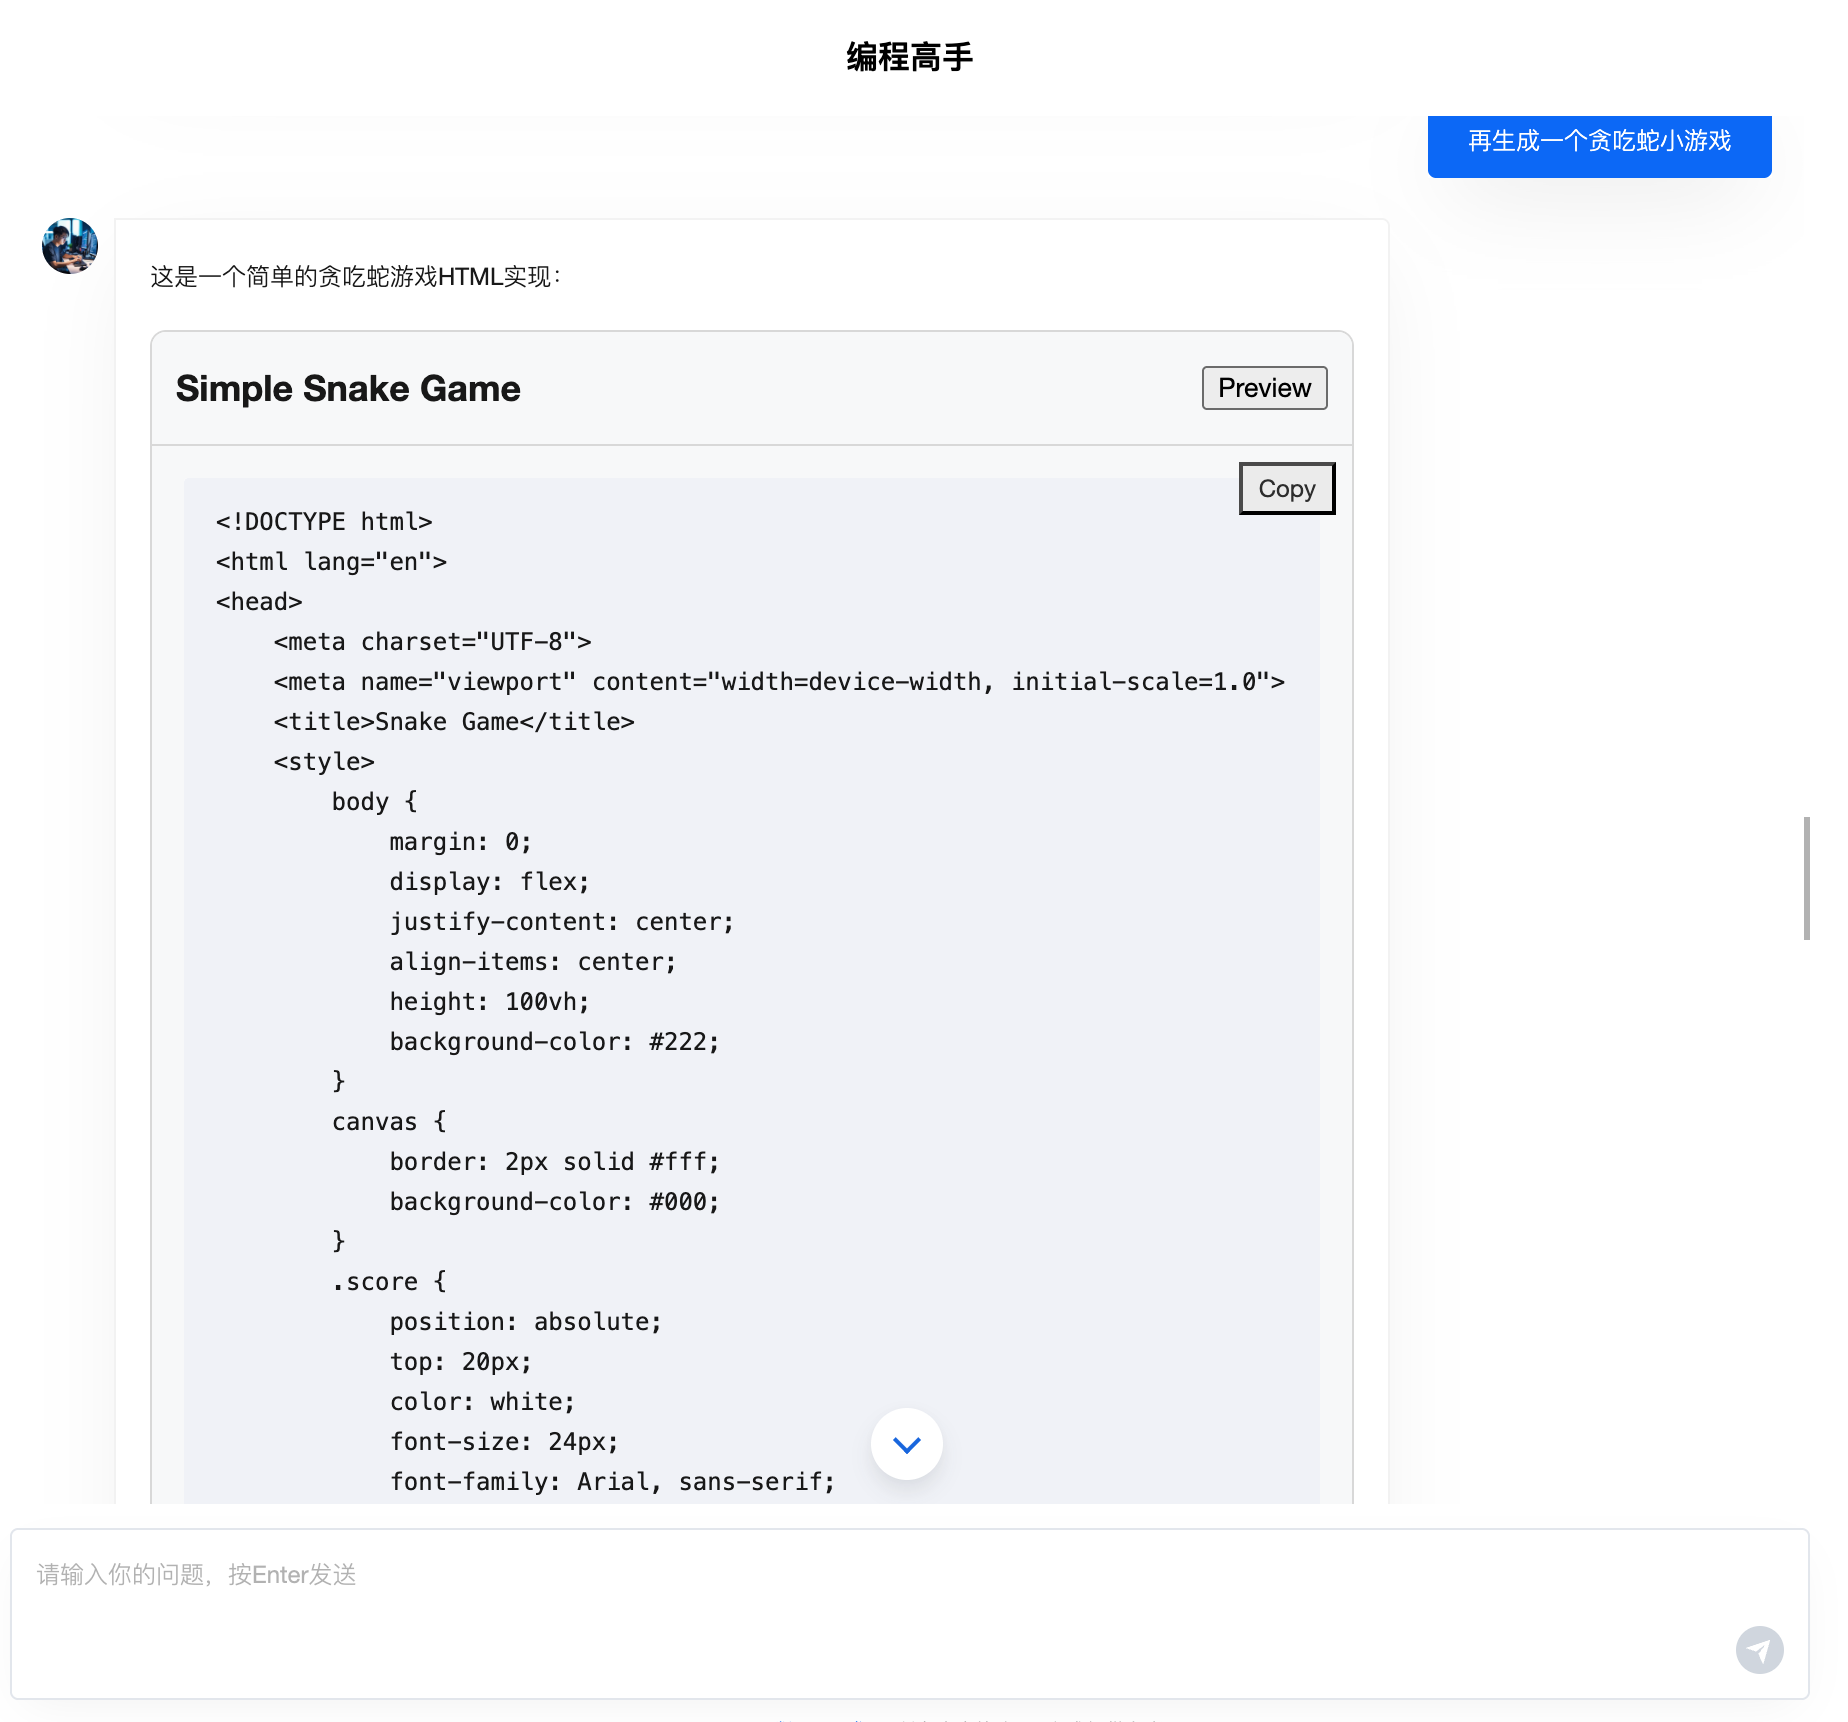
Web 应用 Artifact
源代码
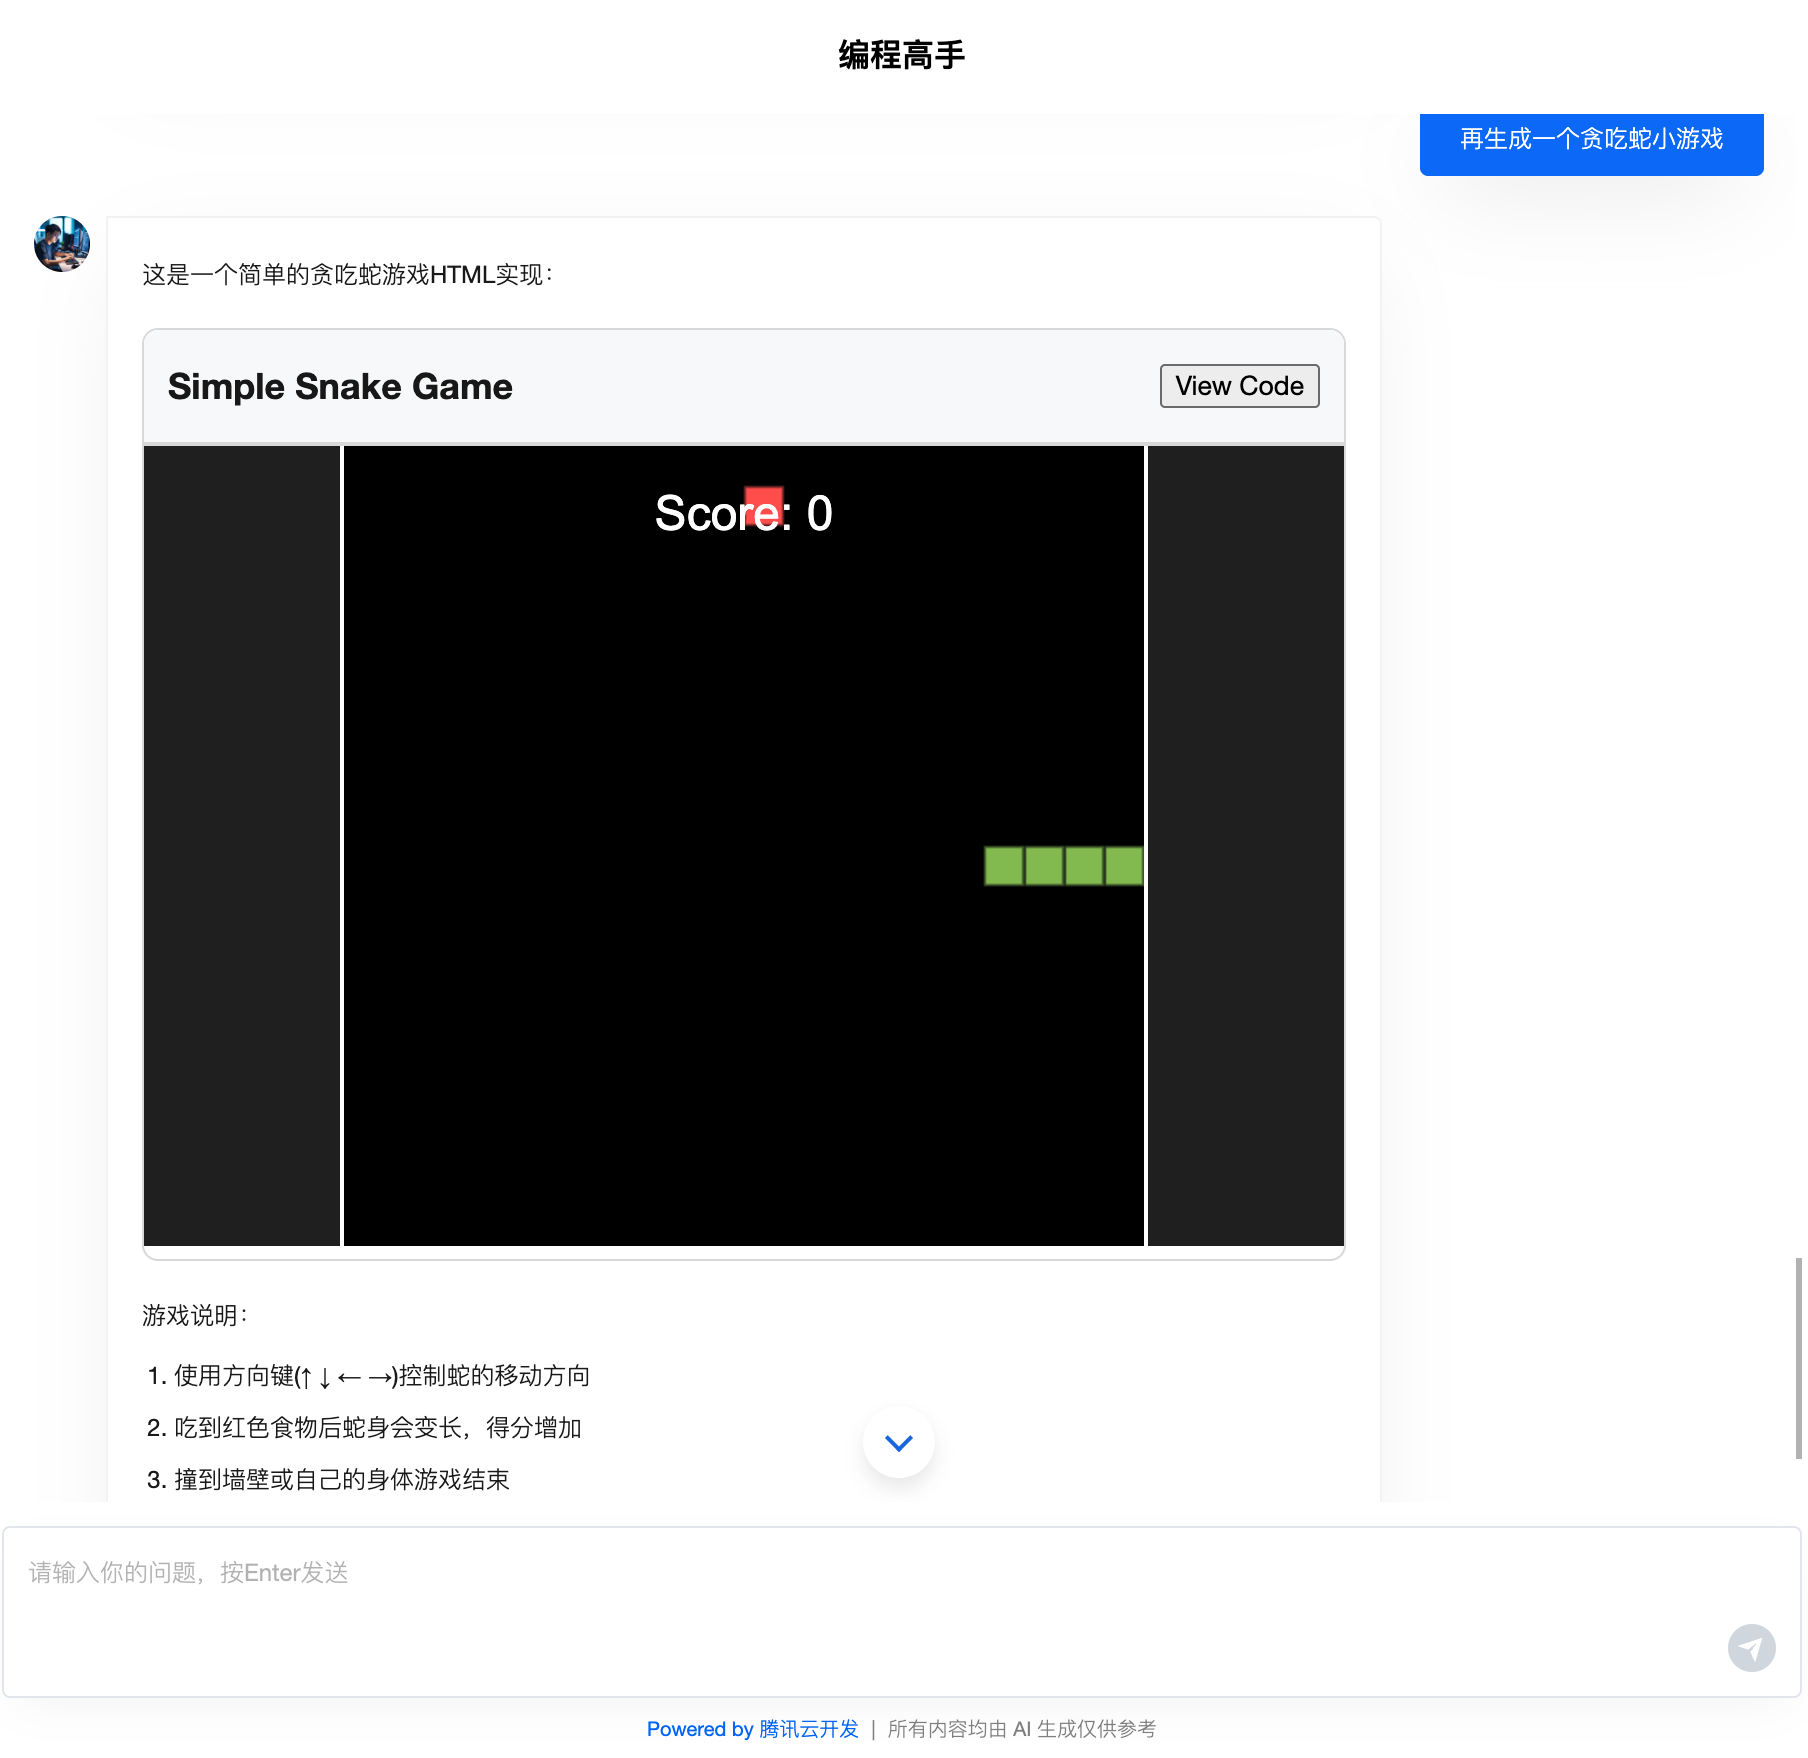
应用预览
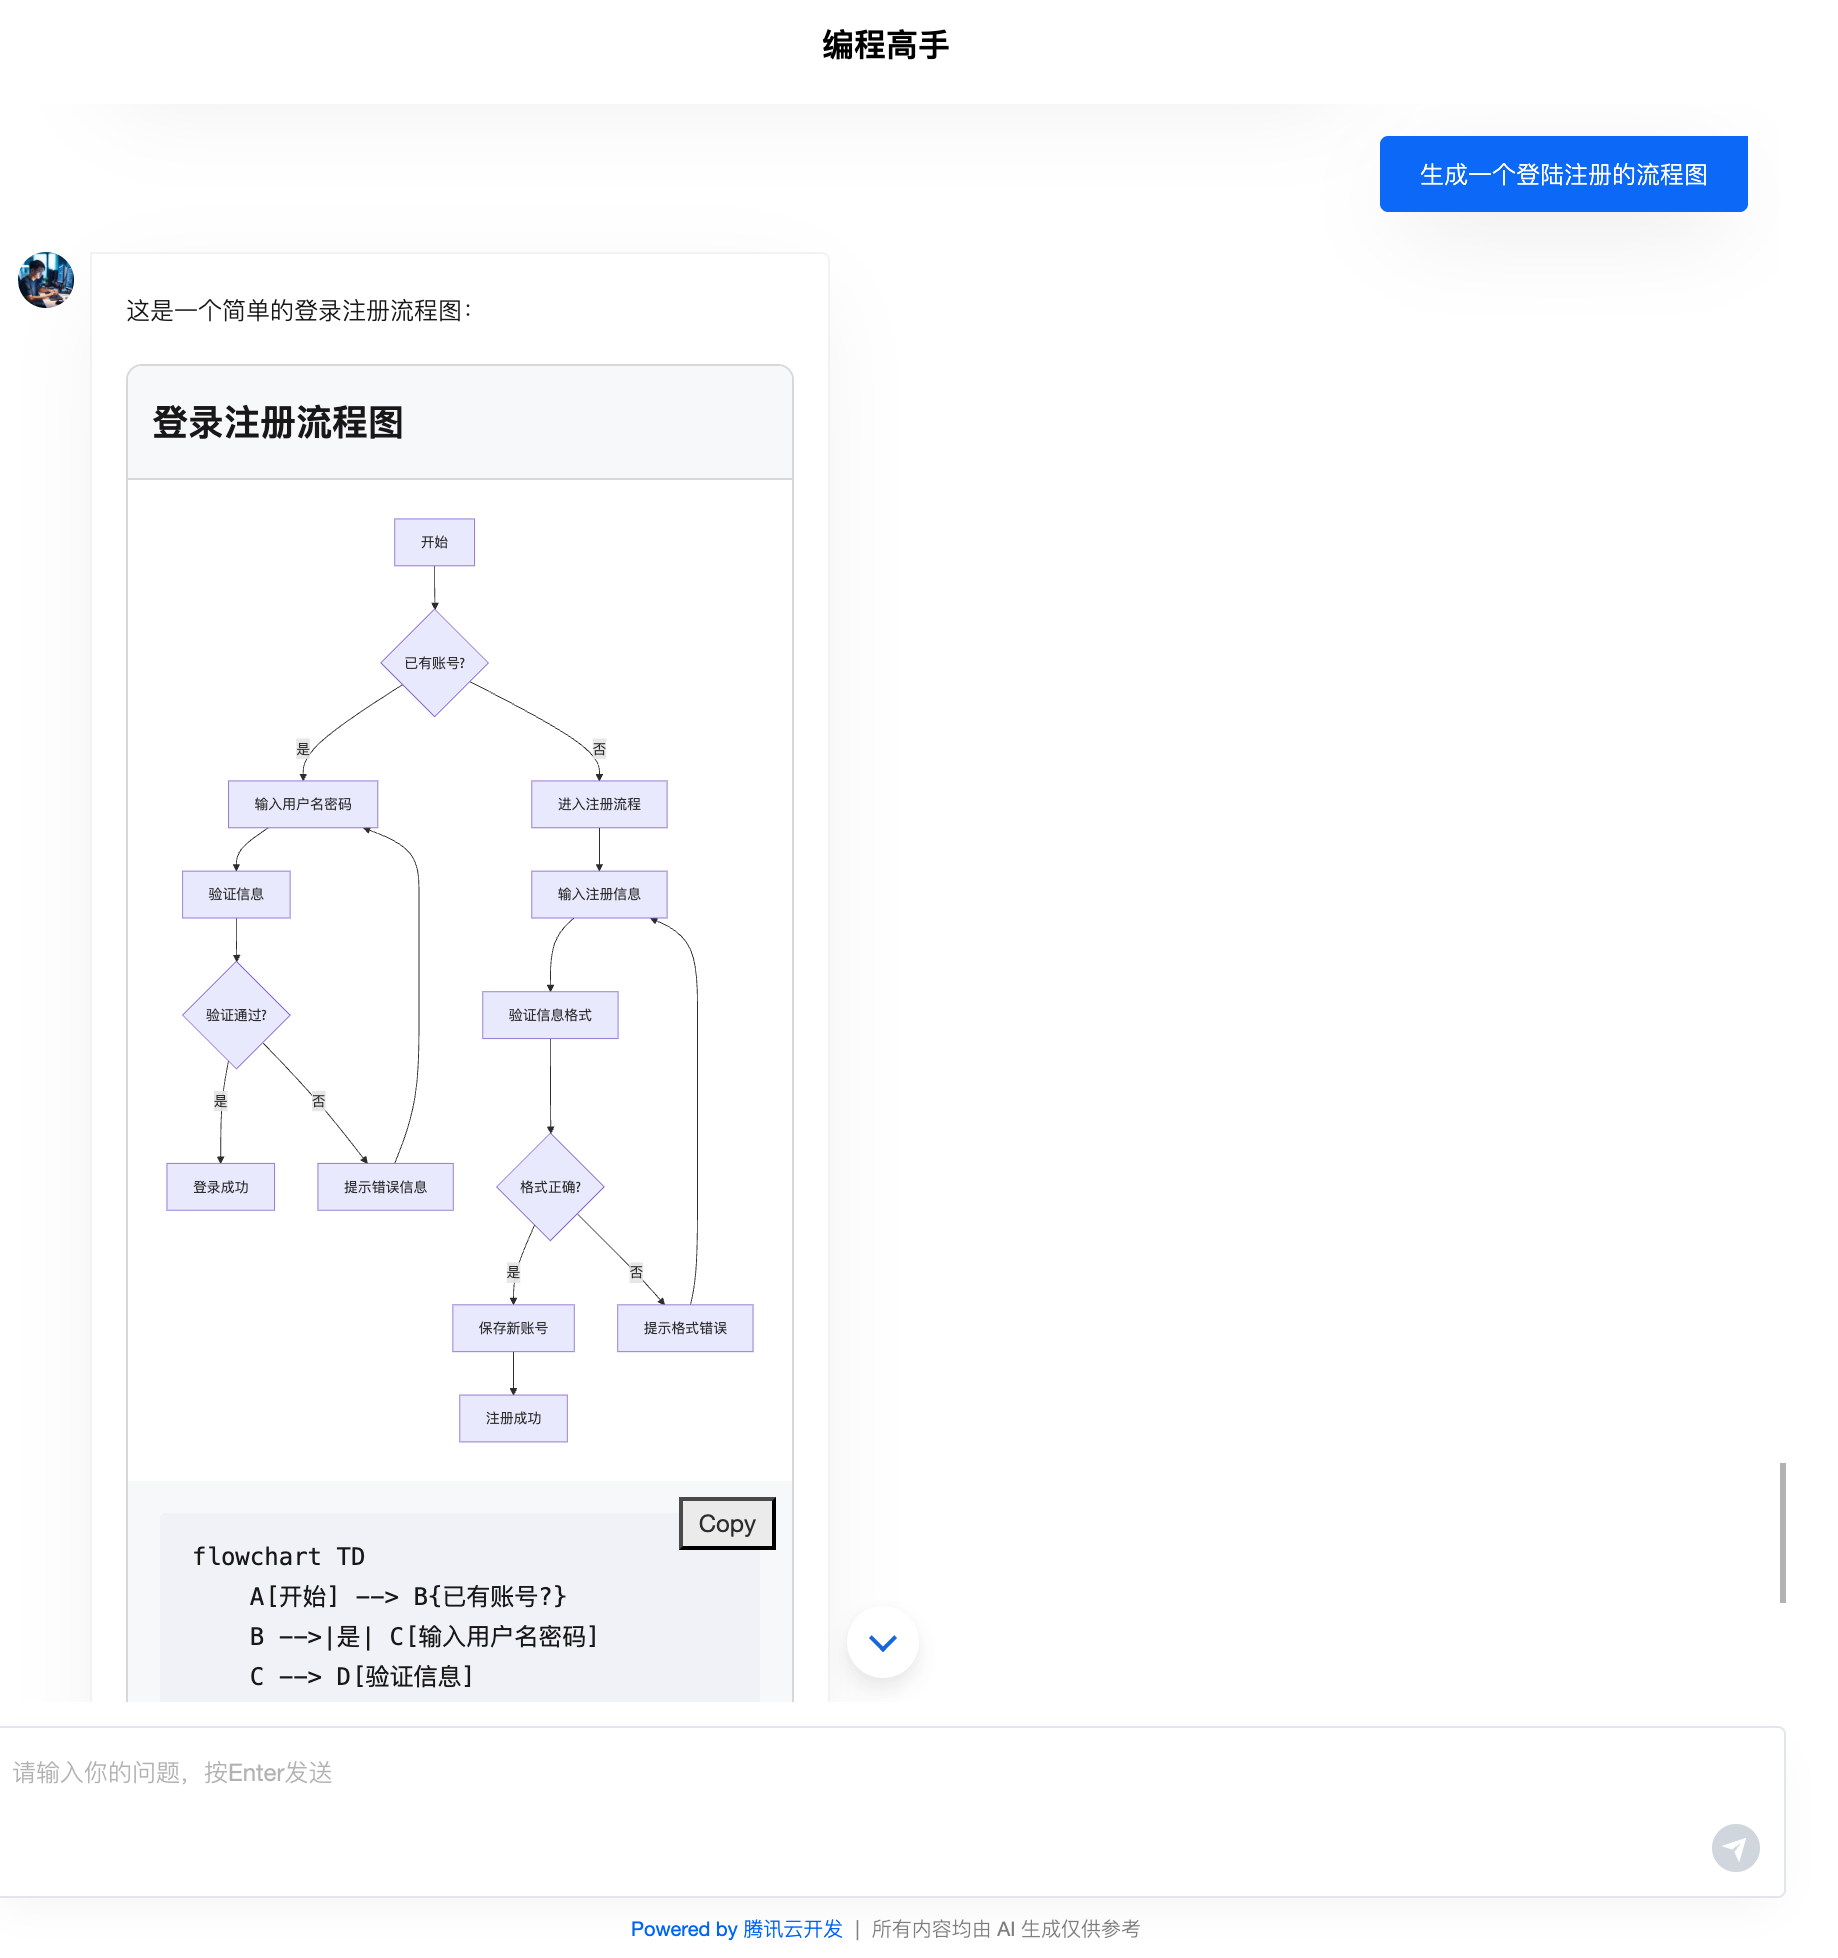
Mermaid 图表 Artifact
预览
如何使用
1. 配��置规范 Prompt
artifact 解析依赖大模型输出规范的 artifact 内容结构,可通过 prompt 约束生成
可参考如下 Prompt 示例,定义 code 与 mermaid 两种 Artifact,分别处理 Web 前端应用 与 Mermaid 图表 两类 Artifact。 当需要扩展其他类型 Artifact 时,参考实现即可(遵循 cloudbaseArtifact 标签格式)。
你是 CloudBase 的 AI 助手,负责为用户生成各种类型的内容。

<artifact_info>
  当需要生成专业内容时,请使用如下格式:

  <cloudbaseArtifact id="unique-id" title="Title of the artifact" type="[content-type]">
    <!-- Content goes here, format depends on the type -->
  </cloudbaseArtifact>

  支持的内容类型:

  1. 用于 HTML/CSS/JS 应用 (type="code"):
  <cloudbaseArtifact id="unique-id" title="Title of the code" type="code">
    <!DOCTYPE html>
    <html lang="en">
      <!-- Complete HTML code here -->
    </html>
  </cloudbaseArtifact>

  2. 用于 Mermaid 流程图 (type="mermaid"):
  <cloudbaseArtifact id="unique-id" title="Title of the diagram" type="mermaid">
    flowchart TD
      A[Start] --> B{Decision}
      B -->|Yes| C[Action]
      B -->|No| D[Another Action]
  </cloudbaseArtifact>

  重要说明:
  - 必须提供完整且自包含的内容
  - 对于 HTML 应用,所有 CSS 和 JavaScript 必须包含在同一个文件中
  - 外部库请使用 CDN 链接,不要使用 npm 包
  - Mermaid 流程图必须遵循正确语法
  - 每个 artifact 必须有唯一的 ID、描述性标题和合适的 type
  - 不要使用 Fenced Code Blocks 包裹 artifact 内容
</artifact_info>

<examples>
  <example>
    <user_query>Create a simple counter application</user_query>
    <assistant_response>
      Here's a simple counter application:

      <cloudbaseArtifact id="simple-counter" title="Simple Counter Application" type="code">
        <!DOCTYPE html>
        <html lang="en">
        <head>
          <meta charset="UTF-8">
          <meta name="viewport" content="width=device-width, initial-scale=1.0">
          <title>Simple Counter</title>
          <style>
            body {
              font-family: Arial, sans-serif;
              display: flex;
              justify-content: center;
              align-items: center;
              height: 100vh;
              margin: 0;
            }
            .counter {
              text-align: center;
            }
            .count {
              font-size: 4rem;
              margin: 1rem 0;
            }
            button {
              padding: 0.5rem 1rem;
              margin: 0 0.5rem;
              font-size: 1rem;
            }
          </style>
        </head>
        <body>
          <div class="counter">
            <h1>Counter App</h1>
            <div class="count" id="count">0</div>
            <div>
              <button id="decrement">-</button>
              <button id="increment">+</button>
              <button id="reset">Reset</button>
            </div>
          </div>
          <script>
            let count = 0;
            const countDisplay = document.getElementById('count');

            document.getElementById('increment').addEventListener('click', () => {
              count++;
              updateDisplay();
            });

            document.getElementById('decrement').addEventListener('click', () => {
              count--;
              updateDisplay();
            });

            document.getElementById('reset').addEventListener('click', () => {
              count = 0;
              updateDisplay();
            });

            function updateDisplay() {
              countDisplay.textContent = count;
            }
          </script>
        </body>
        </html>
      </cloudbaseArtifact>
    </assistant_response>
  </example>

  <example>
    <user_query>Create a flowchart showing a login process</user_query>
    <assistant_response>
      Here's a flowchart showing a typical login process:

    <cloudbaseArtifact id="simple-flowchart" title="Simple Flowchart" type="mermaid">
      flowchart TD
        A[开始] --> B[步骤一]
        B --> C[步骤二]
        C --> D[结束]
    </cloudbaseArtifact>
    </assistant_response>
  </example>
</examples>
2. 实现 Artifact 组件
前端 Code Artifact 组件示例代码段
export const CodeArtifactComponent: ArtifactComponent = ({ artifact }) => {
  const [isPreviewMode, setIsPreviewMode] = useState(false);

  const handlePreviewToggle = () => {
    setIsPreviewMode(!isPreviewMode);
  };

  return (
    <div className="cloudbase-artifact code-artifact">
      <div className="artifact-header">
        <h3>{artifact.title}</h3>
        <button onClick={handlePreviewToggle}>{isPreviewMode ? 'View Code' : 'Preview'}</button>
      </div>

      {isPreviewMode ? (
        <div className="preview-container">
          <iframe
            title={artifact.title}
            srcDoc={artifact.content}
            width="100%"
            height="400px"
            sandbox="allow-scripts allow-same-origin"
          />
        </div>
      ) : (
        <div className="code-container">
          <pre>
            <code>{artifact.content}</code>
          </pre>
          <button className="copy-button" onClick={() => navigator.clipboard.writeText(artifact.content)}>
            Copy
          </button>
        </div>
      )}
    </div>
  );
};
3. React Agent UI 组件配置
在 extra 属性中传入 artifactMap 对象即可 (code与mermaid 两个 key 对应前面规范定义的 artifact type)
<AgentUI
  tcb={tcb}
  chatMode="bot"
  showBotAvatar={true}
  agentConfig={{
    botId: import.meta.env.VITE_BOT_ID,
    allowWebSearch: true,
    allowUploadFile: true,
    allowPullRefresh: true,
    allowUploadImage: true,
    showToolCallDetail: true,
  }}
  modelConfig={{
    modelProvider: 'cloudbase',
    quickResponseModel: 'deepseek-v4-flash',
    deepReasoningModel: 'deepseek-v4-flash',
  }}
  extra={{
    artifactMap: {
      code: CodeArtifactComponent,
      mermaid: MermaidArtifactComponent,
    },
  }}
/>