Update Custom Domain Binding
This document describes how to update and bind custom domains in the WeDa Low-Code Platform, including the complete operation process for initial configuration and subsequent modifications.
1. Applicable Scenarios
The following situations can use the operation steps in this document:
- Initial Installation Not Configured: Custom domain was not set during installation and needs to be added later
- Domain Change Requirements: Need to modify an already bound custom domain
- Cloud Server Configuration: Configure custom domains in cloud servers like Lighthouse
2. Prerequisites
2.1 Domain Preparation
- Ensure you own an available custom domain
- Domain DNS resolution has been configured to point to the server IP address
- If using non-standard ports, ensure domain resolution includes port configuration
2.2 License Preparation
License Acquisition Method
Visit the Tencent Cloud WeDa Console to view and copy the License used during installation activation
3. Operation Steps
3.1 Access Installation Interface
Choose the access method based on your current configuration:
Method 1: IP + Port Access
http://<Server Real IP>:38080
Examples:
http://192.168.1.100:38080http://123.456.789.012:38080
Method 2: Bound Domain Access
http://<Already Bound Custom Domain>:38080
Examples:
http://my-domain.com:38080http://app.example.com:38080
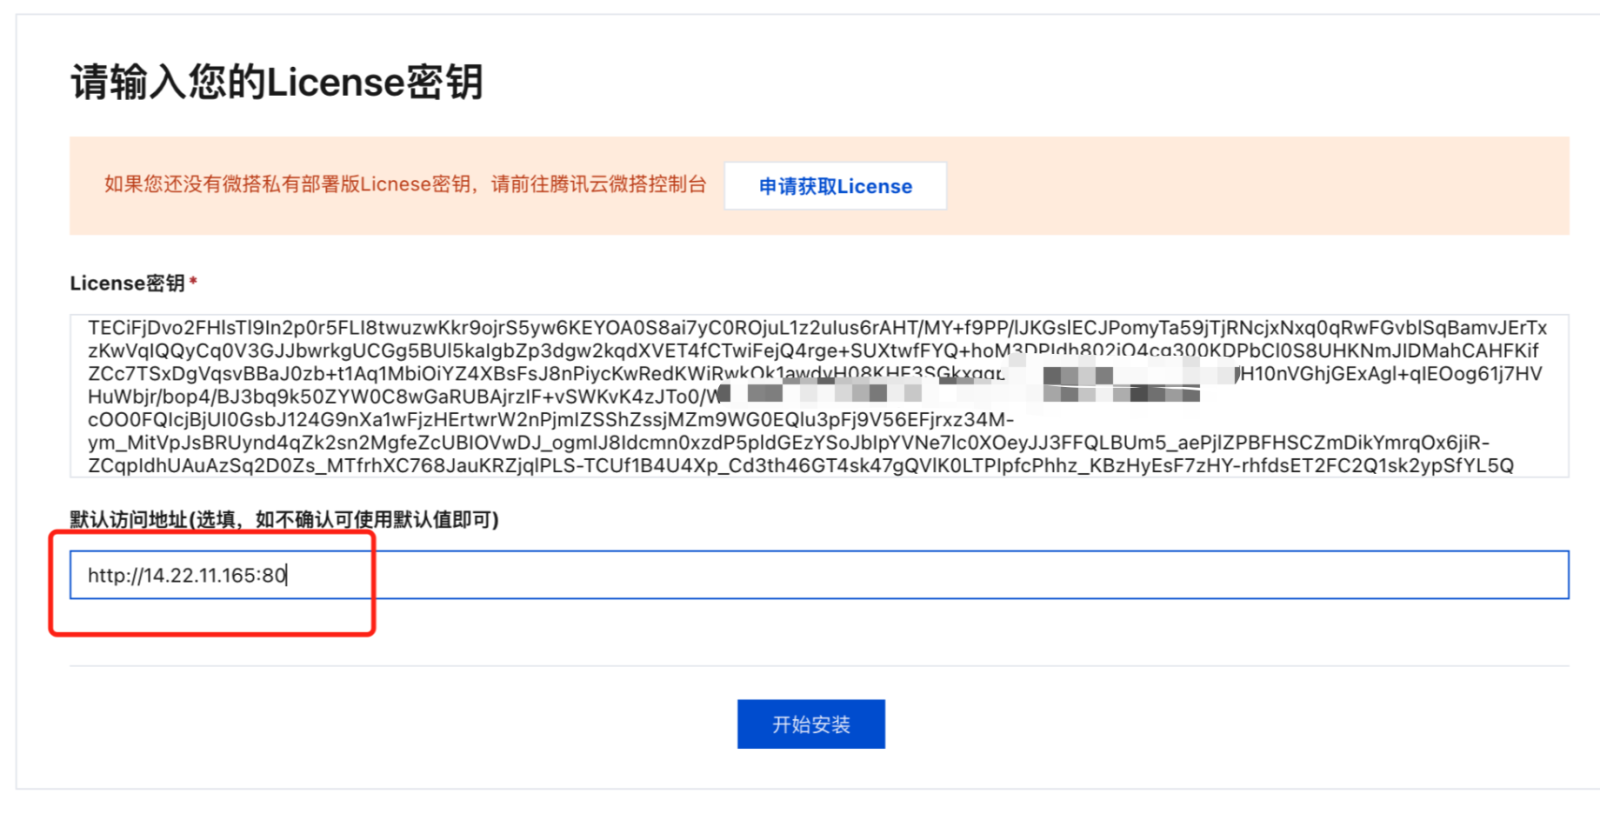
3.2 License Verification
- After entering the installation interface, the system will require License input
- Enter the License key used for previous activation
- Click the verify button to complete identity confirmation
Security Notice
To protect user privacy and security, License verification is required each time you access the installation interface
3.3 Configure Custom Domain
- Fill in Domain Address: Enter the custom domain to be bound in the domain configuration area
- Port Configuration:
- Using default port 80: No need to fill in port number
- Using custom port: Need to add port number after domain
- Confirm Configuration: Check if the domain format is correct
- Save Settings: Click the save button to apply configuration
3.4 Verify Configuration
After configuration is complete, it is recommended to perform the following verification:
- DNS Resolution Verification: Confirm the domain can correctly resolve to the server IP
- Access Testing: Use the new domain to access the platform and confirm normal access
- Function Testing: Log into the platform and test basic functions for normal operation
4. Common Issues
4.1 Domain Cannot Be Accessed
Possible Causes:
- DNS resolution not effective or misconfigured
- Firewall blocking related ports
- Incorrect domain format input
Solutions:
- Check DNS resolution configuration
- Confirm firewall port open status
- Verify domain format is correct
4.2 License Verification Failed��
Possible Causes:
- Incorrect License key input
- License expired or revoked
- Network connection issues
Solutions:
- Re-copy the correct License from console
- Check License validity period
- Confirm network connection is normal
5. Important Notes
5.1 Operation Recommendations
- Backup Configuration: Recommend backing up current configuration before modifying domain
- Maintenance Window: Recommend performing domain changes during low business traffic periods
- Step-by-step Verification: Gradually verify all functions work normally after configuration
5.2 Security Considerations
- Regularly update License and keep it secure
- Ensure domain resolution security
- Monitor domain access logs to detect anomalies promptly
5.3 Performance Optimization
- Choose DNS service providers with fast response times
- Consider using CDN to accelerate domain access
- Regularly check domain resolution stability