Custom CDN
Cloud Storage supports configuring custom CDN to quickly distribute static resources to global users through the CDN network, achieving lower latency and more cost-effective resource acceleration.
Prerequisites
- Have a custom domain name that has completed ICP filing
- Have activated Tencent Cloud CDN Service
Configuration Steps
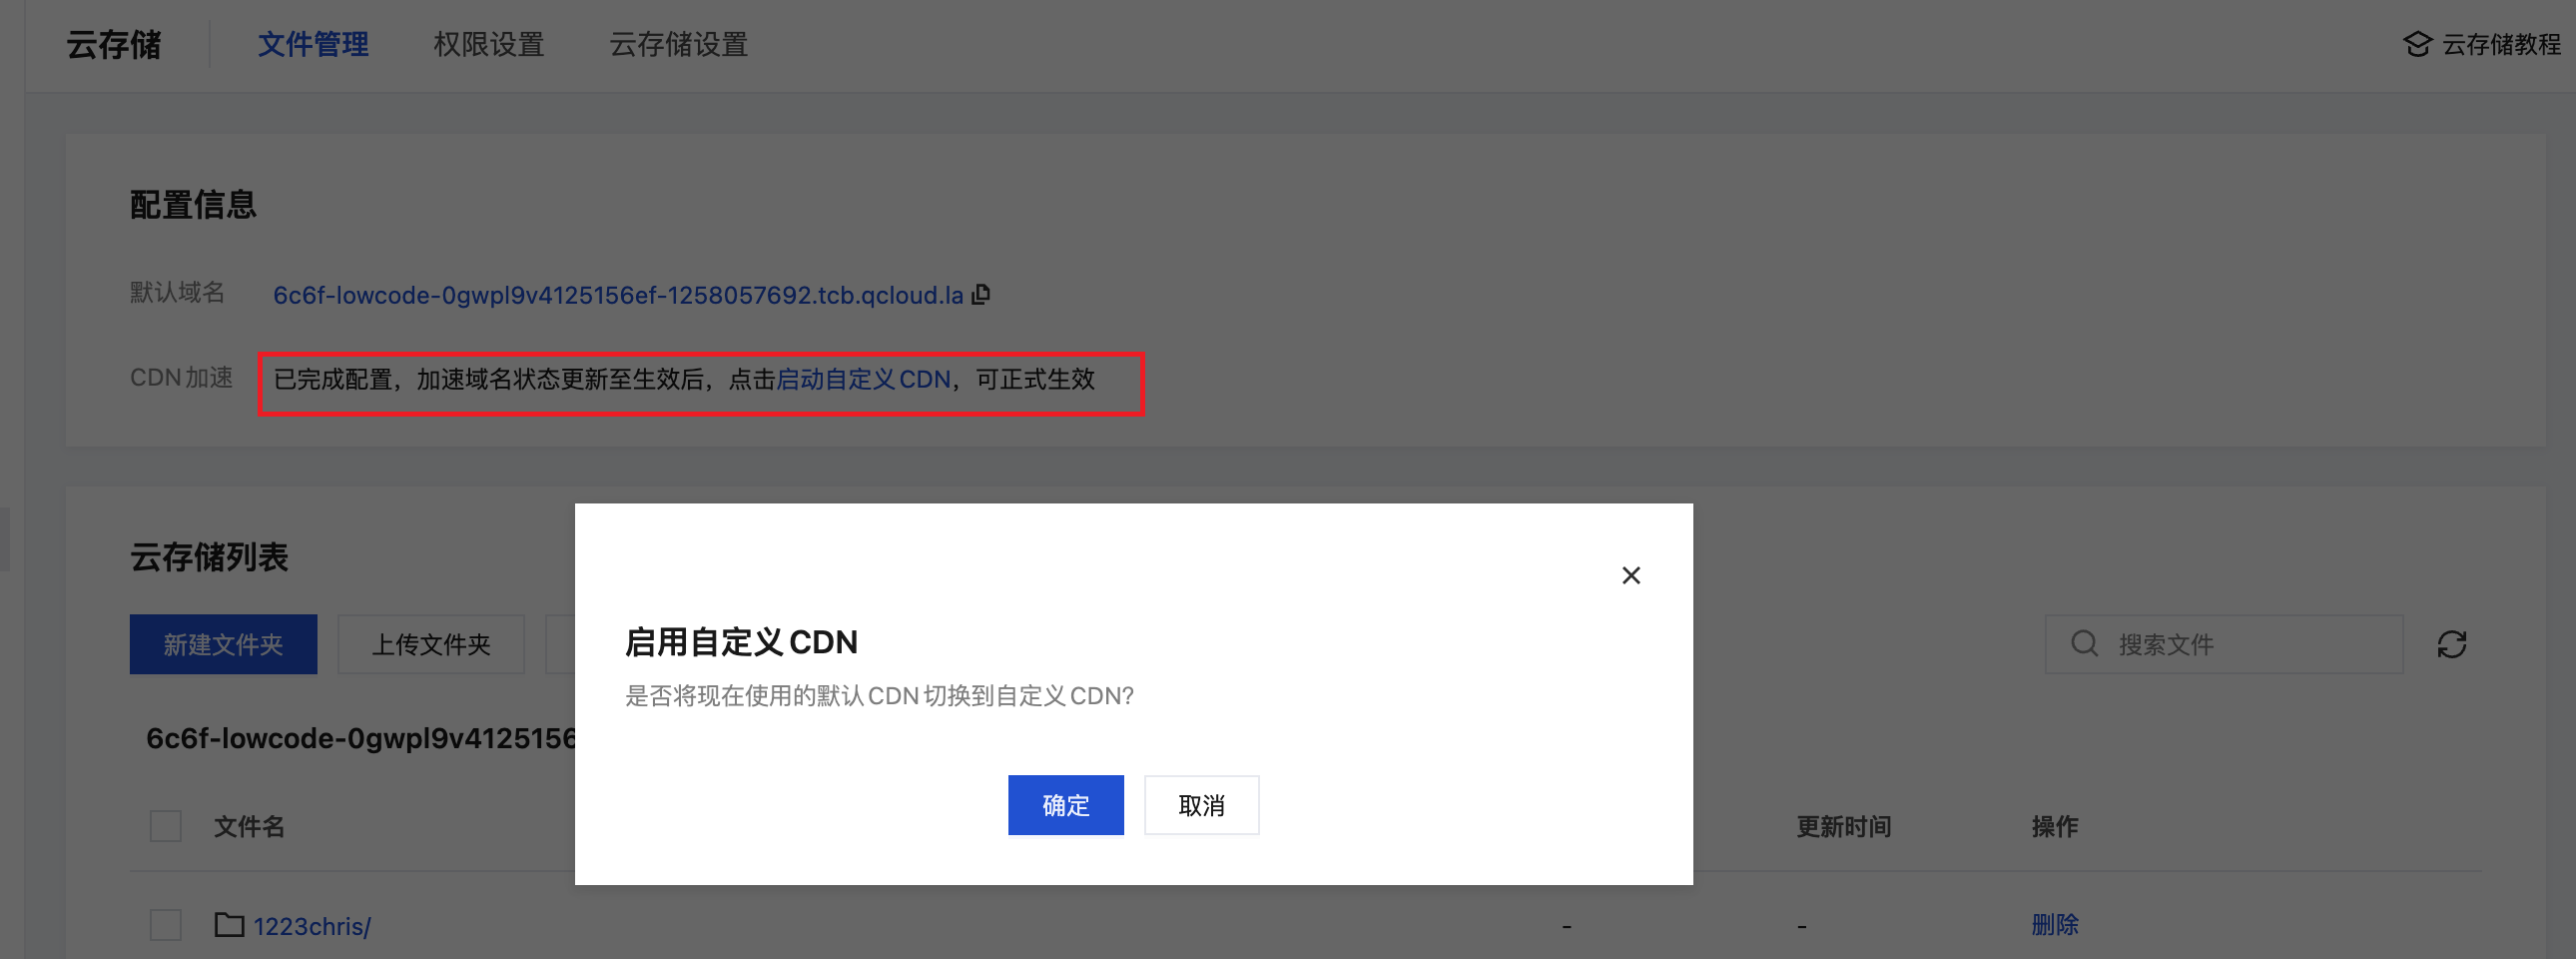
1. Access Cloud Storage File Management
Go to CloudBase Console - Cloud Storage File Management
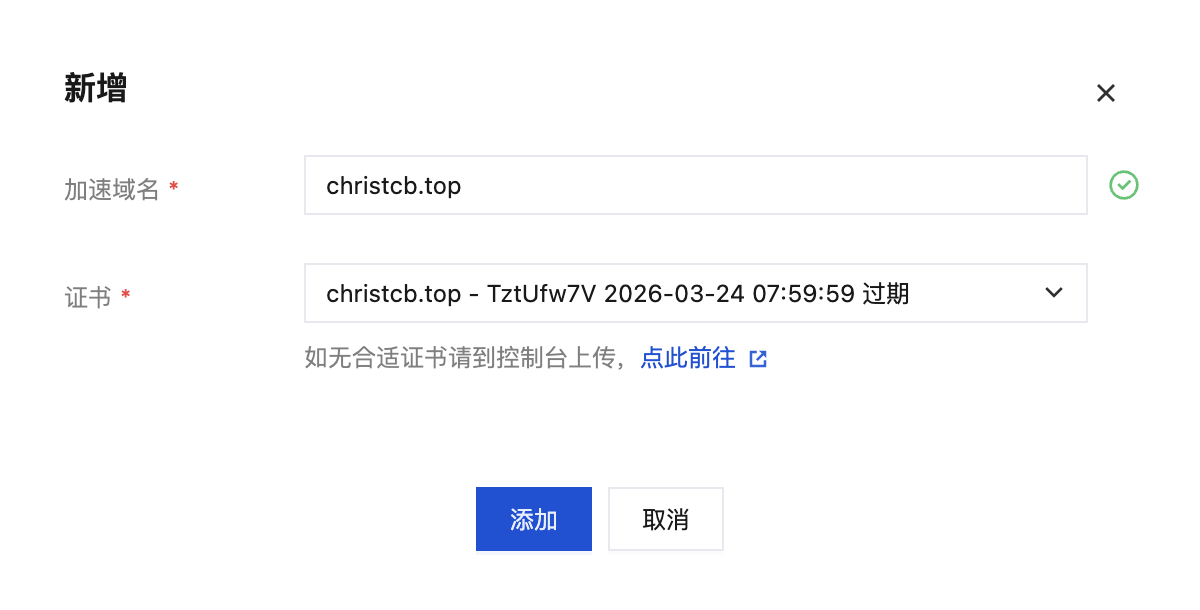
2. Add Custom CDN
Click "Add Custom CDN", enter the acceleration domain name (your custom domain name), and select an SSL certificate. If you don't have a certificate, you can apply for one at the SSL Certificate Console.
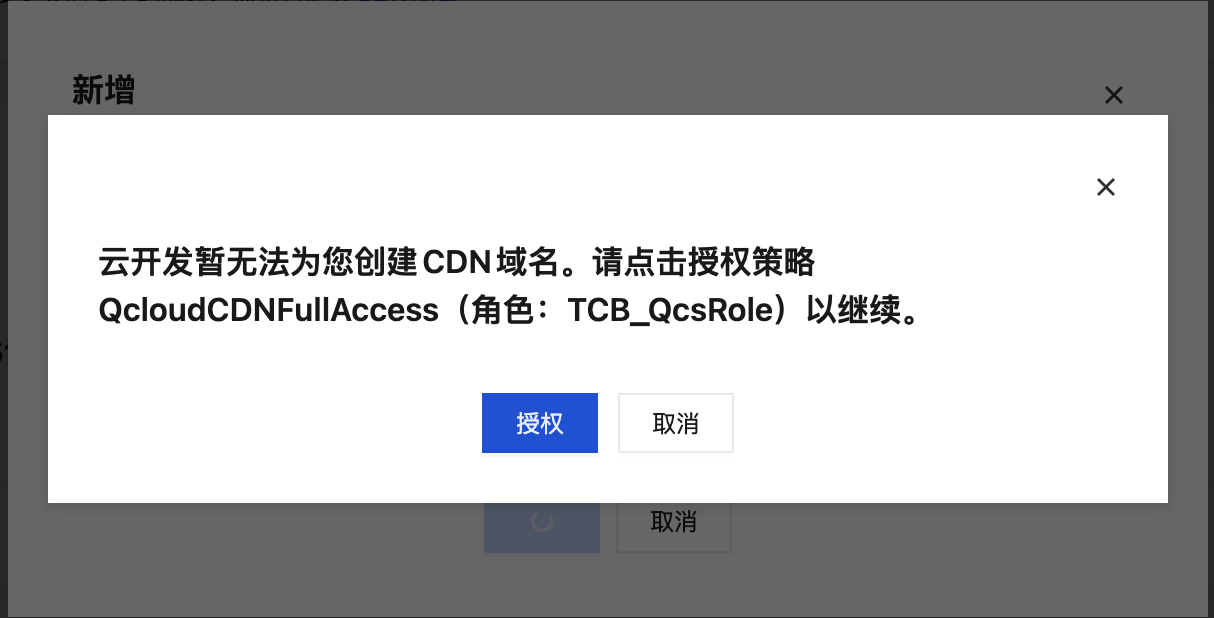
3. Complete Authorization Configuration
Click "Add" to complete the authorization configuration.
4. Enable CDN Configuration
Enable the CDN configuration.
5. Manage CDN Domain Names
You can view authorized CDN domain names in "Custom CDN" and manage them.
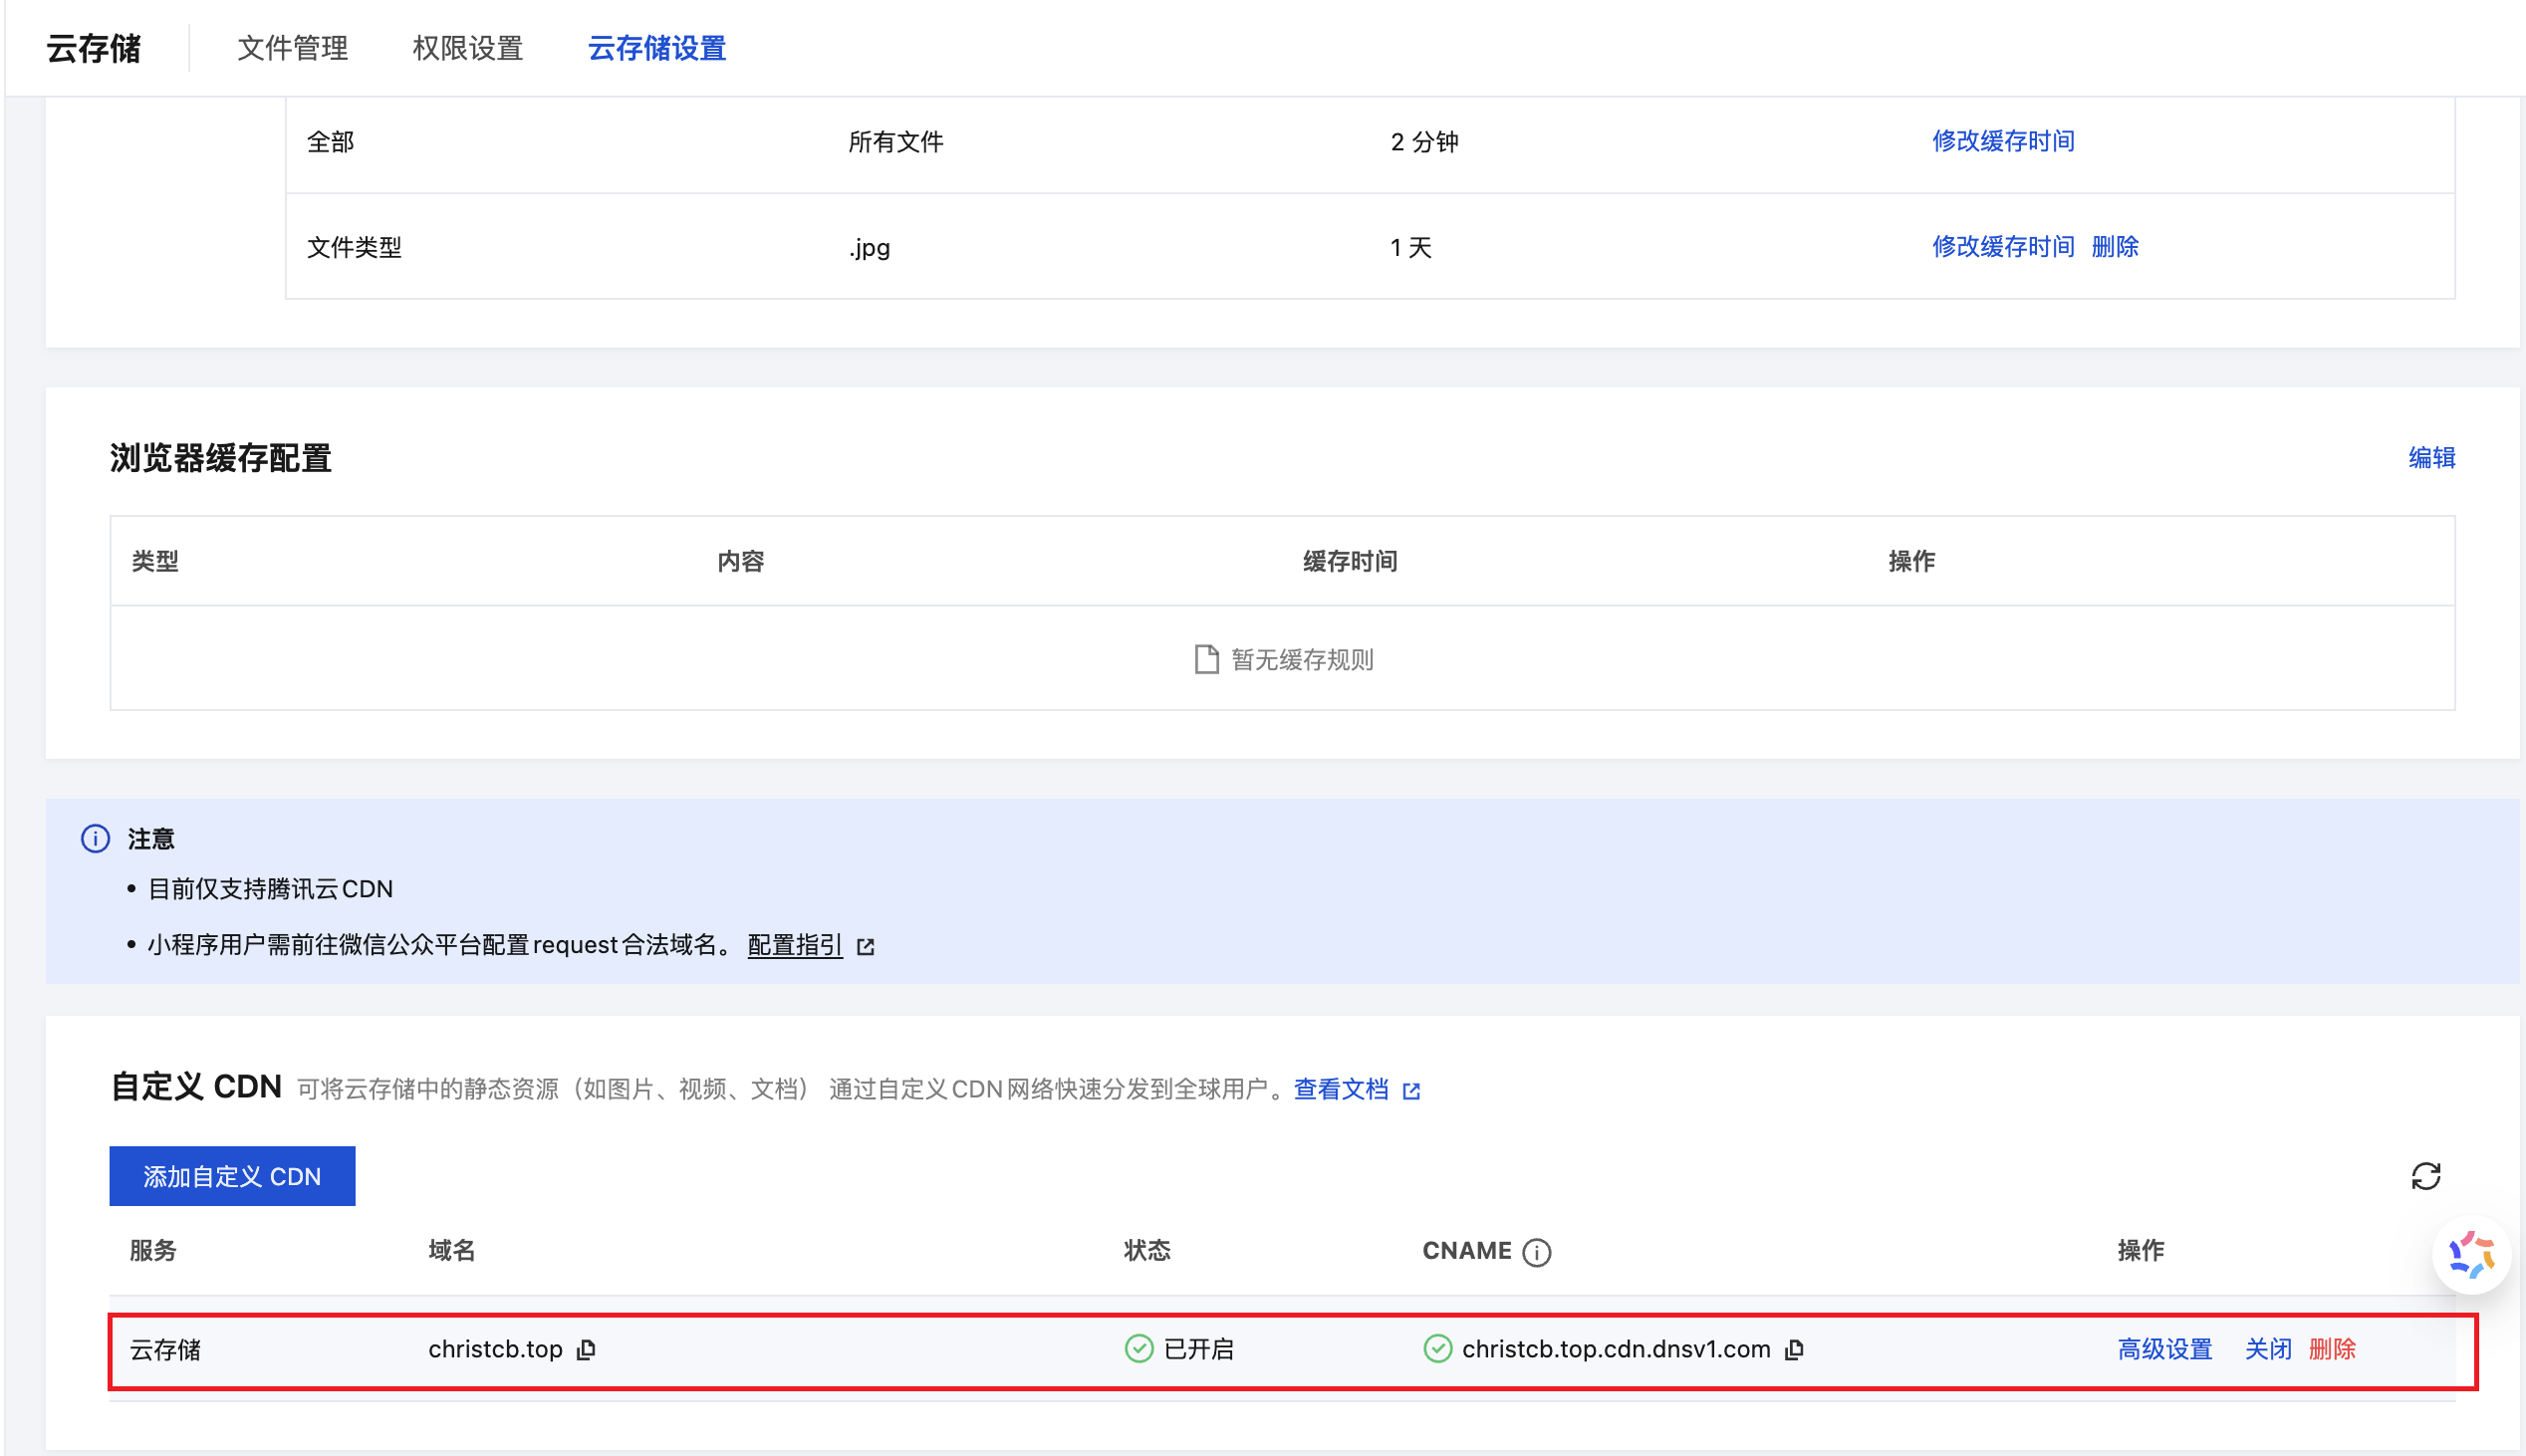
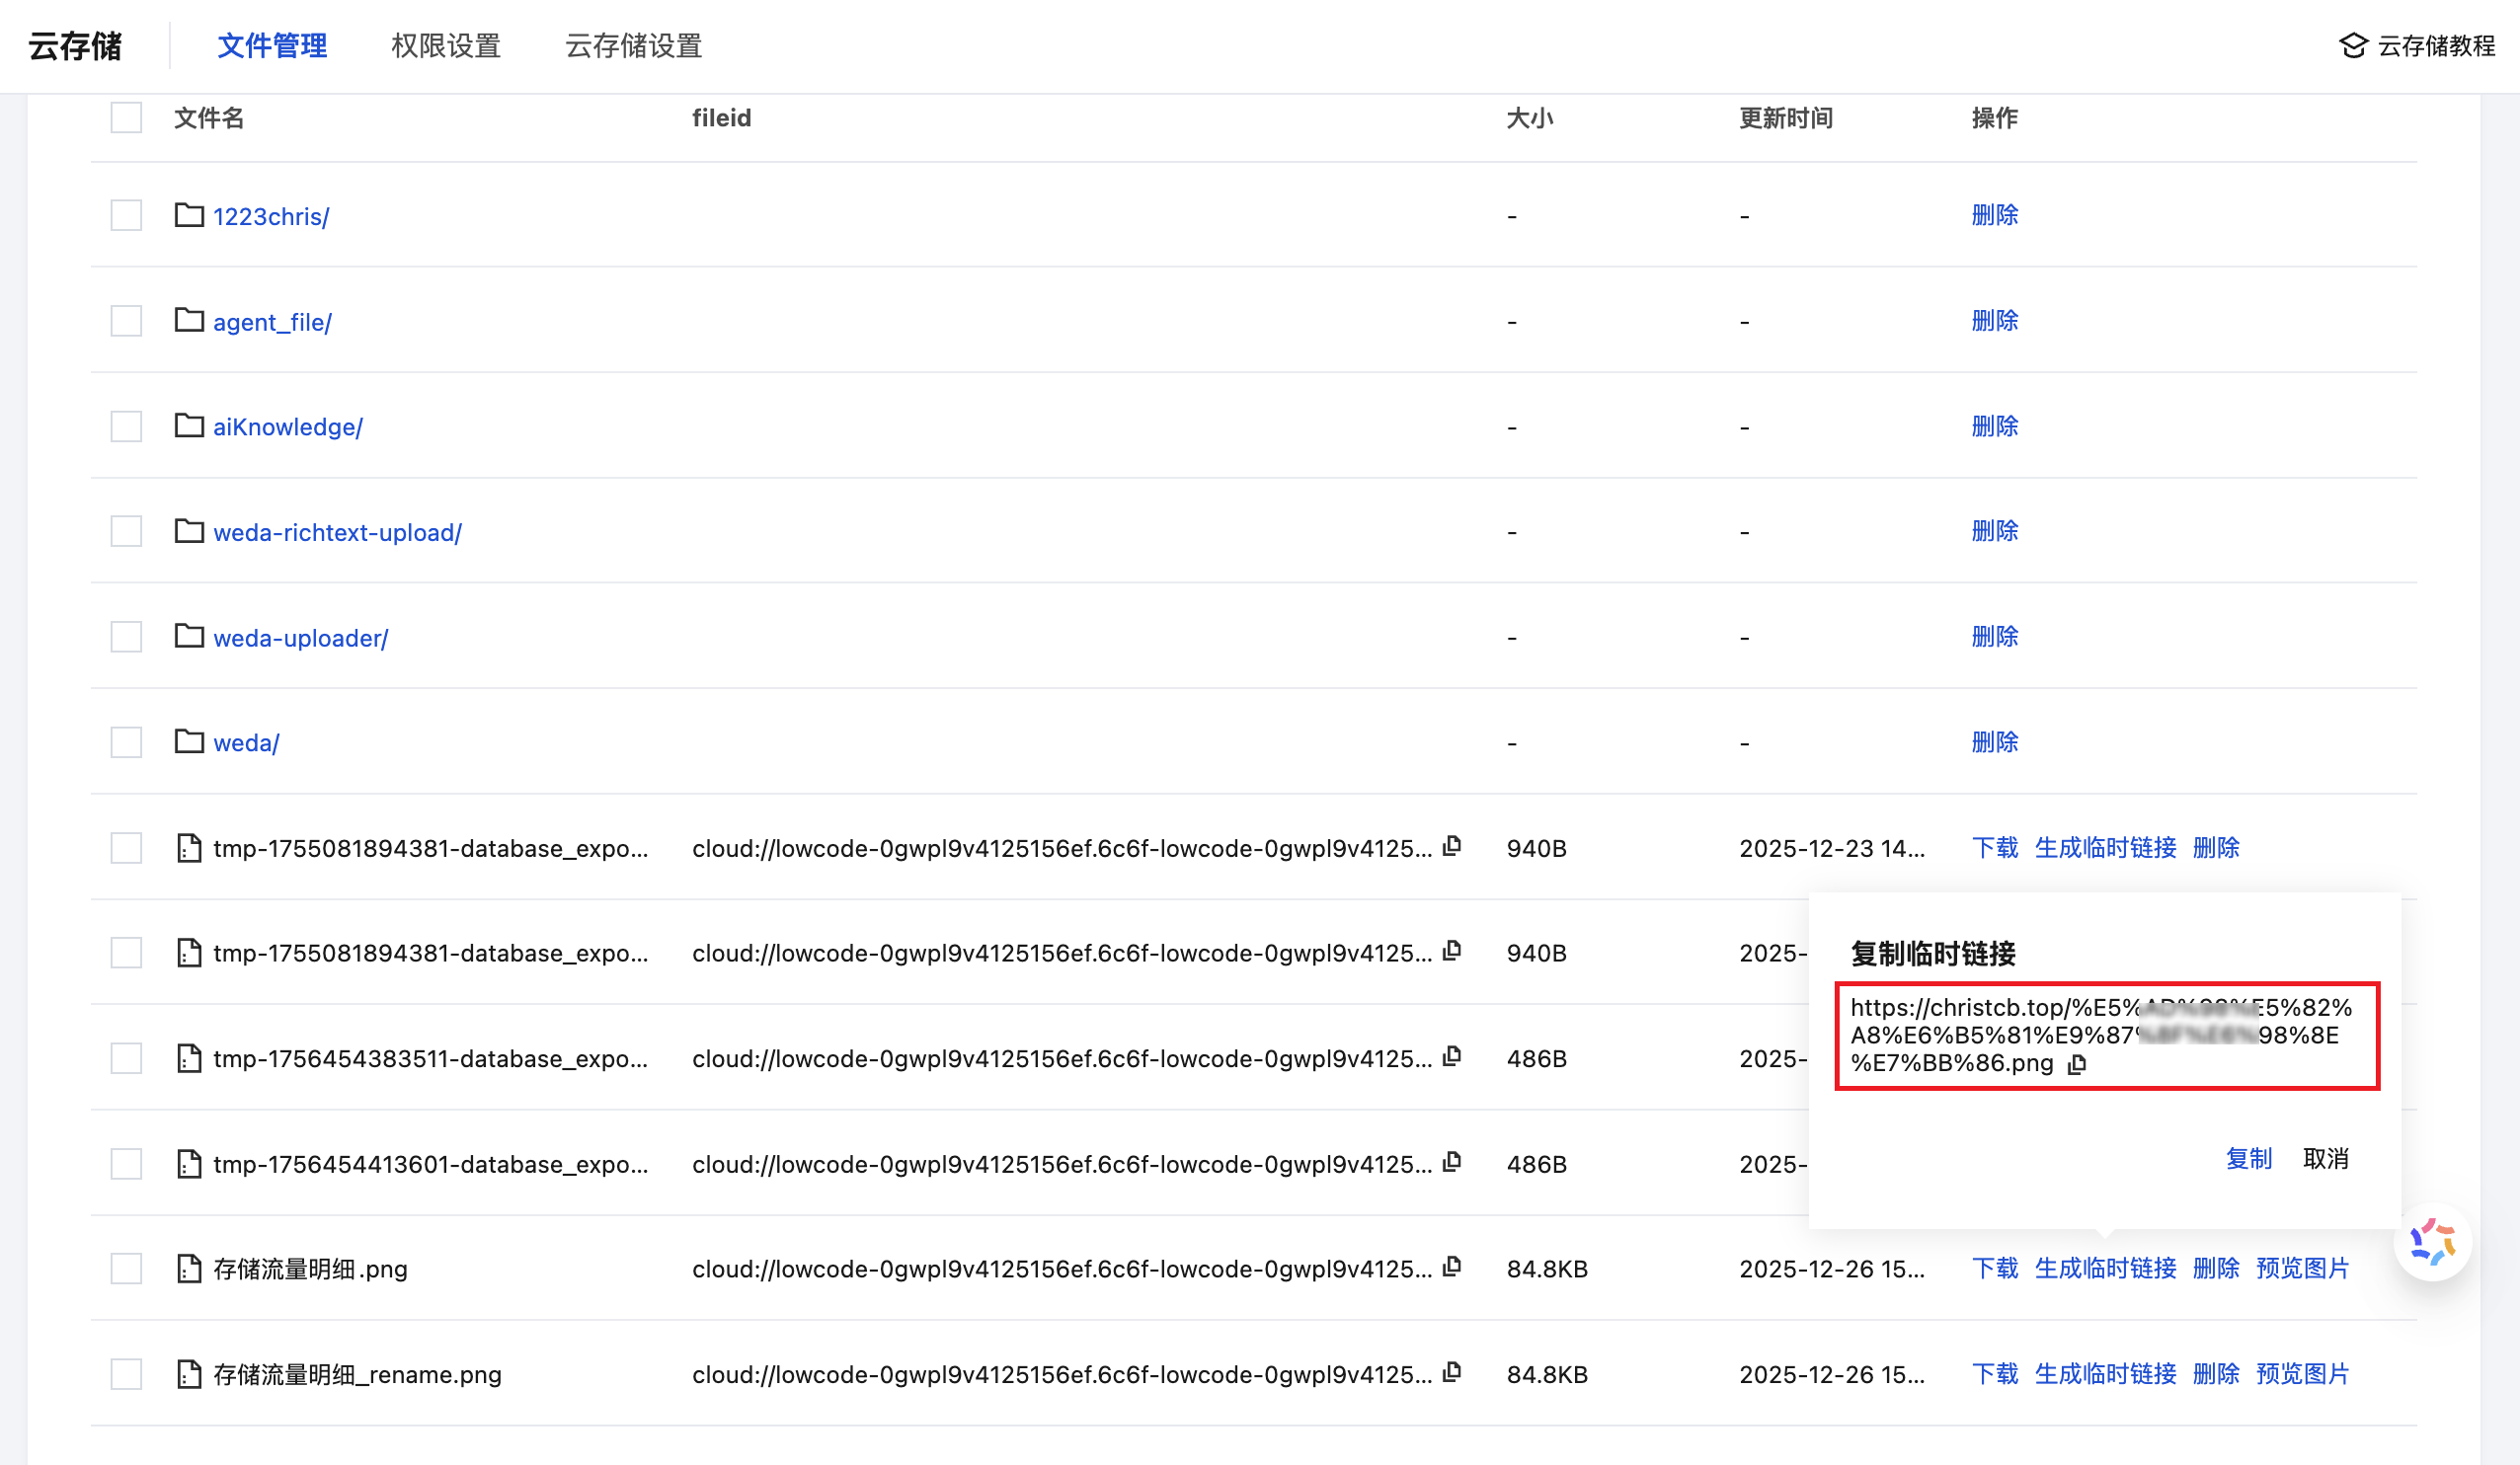
6. Access Cloud Storage Files
Access files in Cloud Storage through the custom CDN domain name.
Important Configuration Instructions
Authentication Configuration
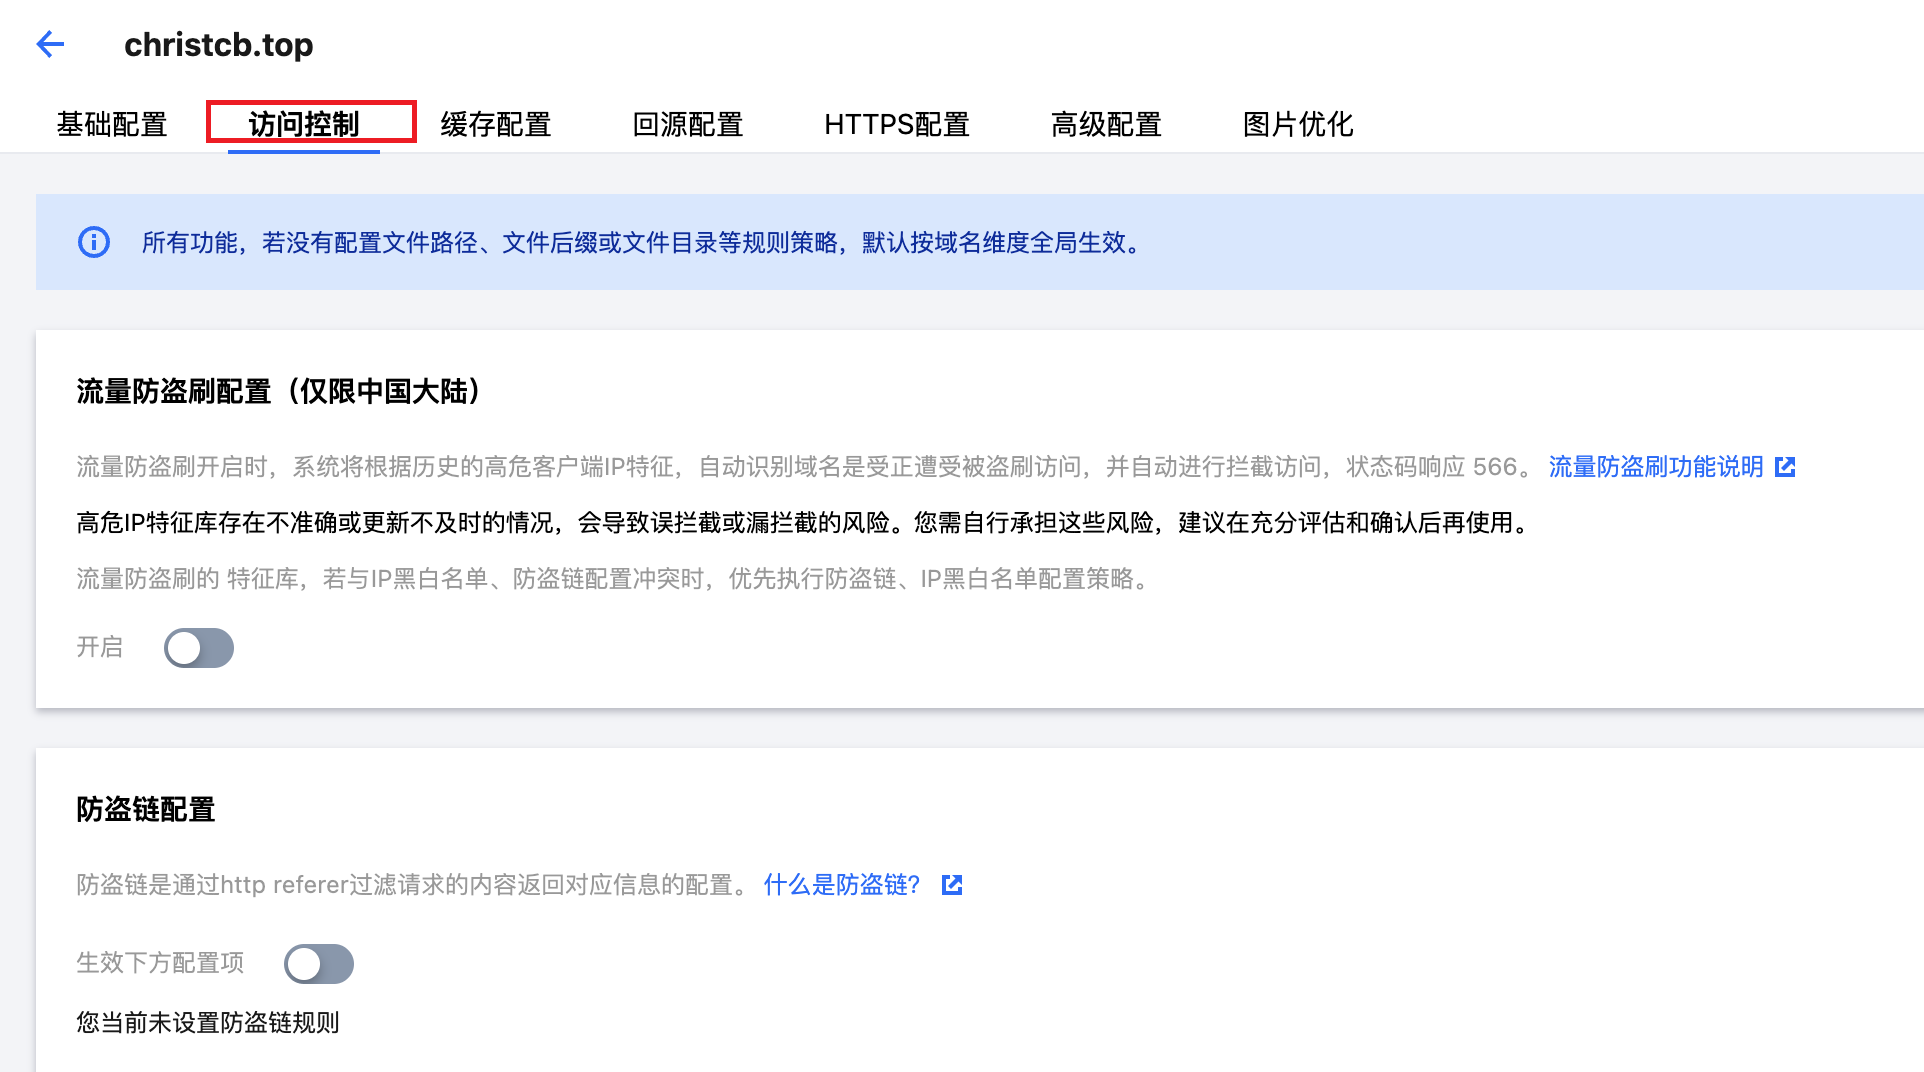
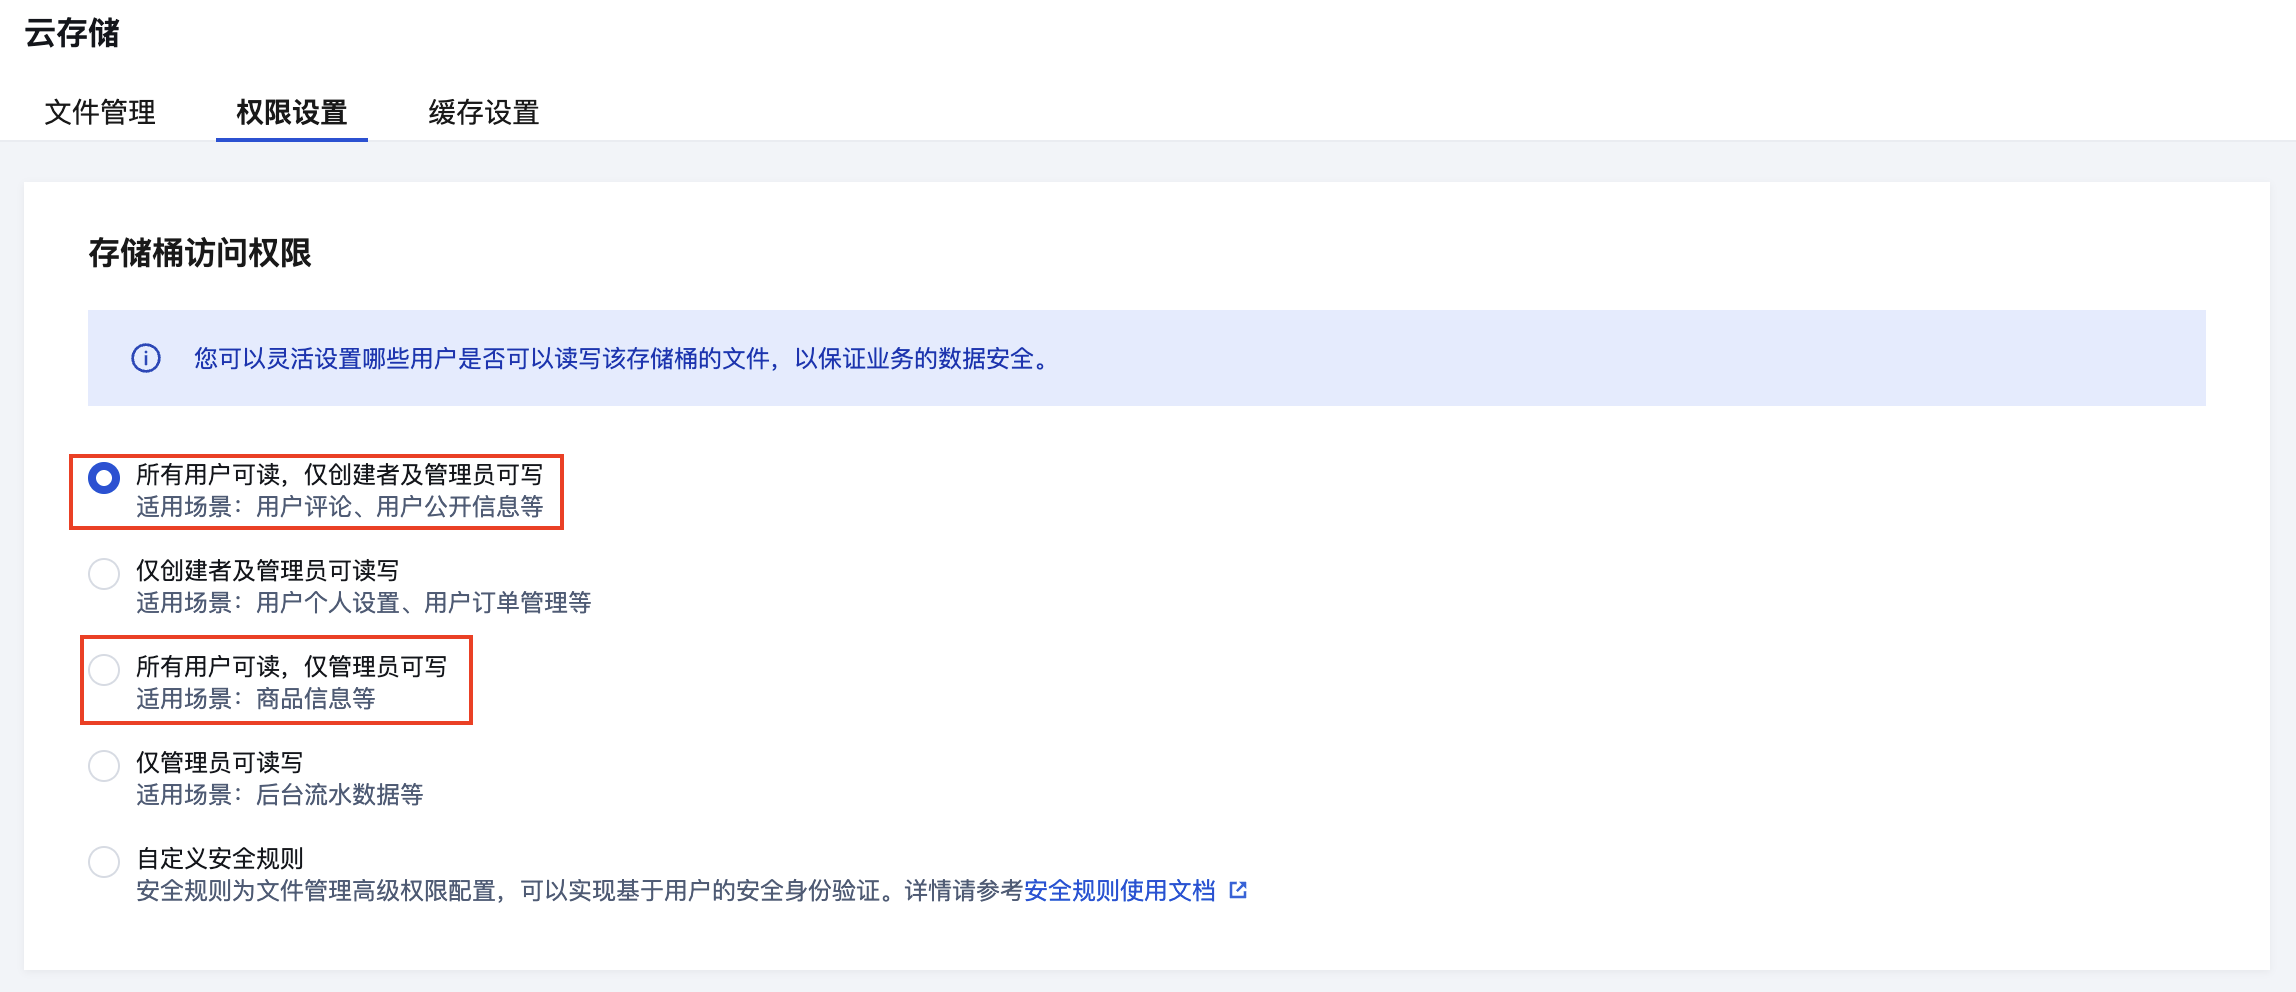
After enabling custom CDN, file access requires both Cloud Storage authentication and CDN authentication. If the Cloud Storage permission is public read, you need to go to CDN Console - Domain Management - Access Control and disable Hotlink Protection and Authentication Configuration.
CNAME Resolution
Complete the custom domain CNAME resolution in the CDN console and wait for deployment to complete.

Public Read Scenario Configuration Example
Scenario Description:
Disable CDN Hotlink Protection and Authentication:


FAQ
CNAME Configuration Failed
When CNAME verification fails, custom CDN cannot be enabled. Please refer to Configure CNAME to complete domain name resolution.
Billing Instructions
After configuring custom CDN, related fees are charged by Tencent Cloud CDN. For details, see Billing Overview.
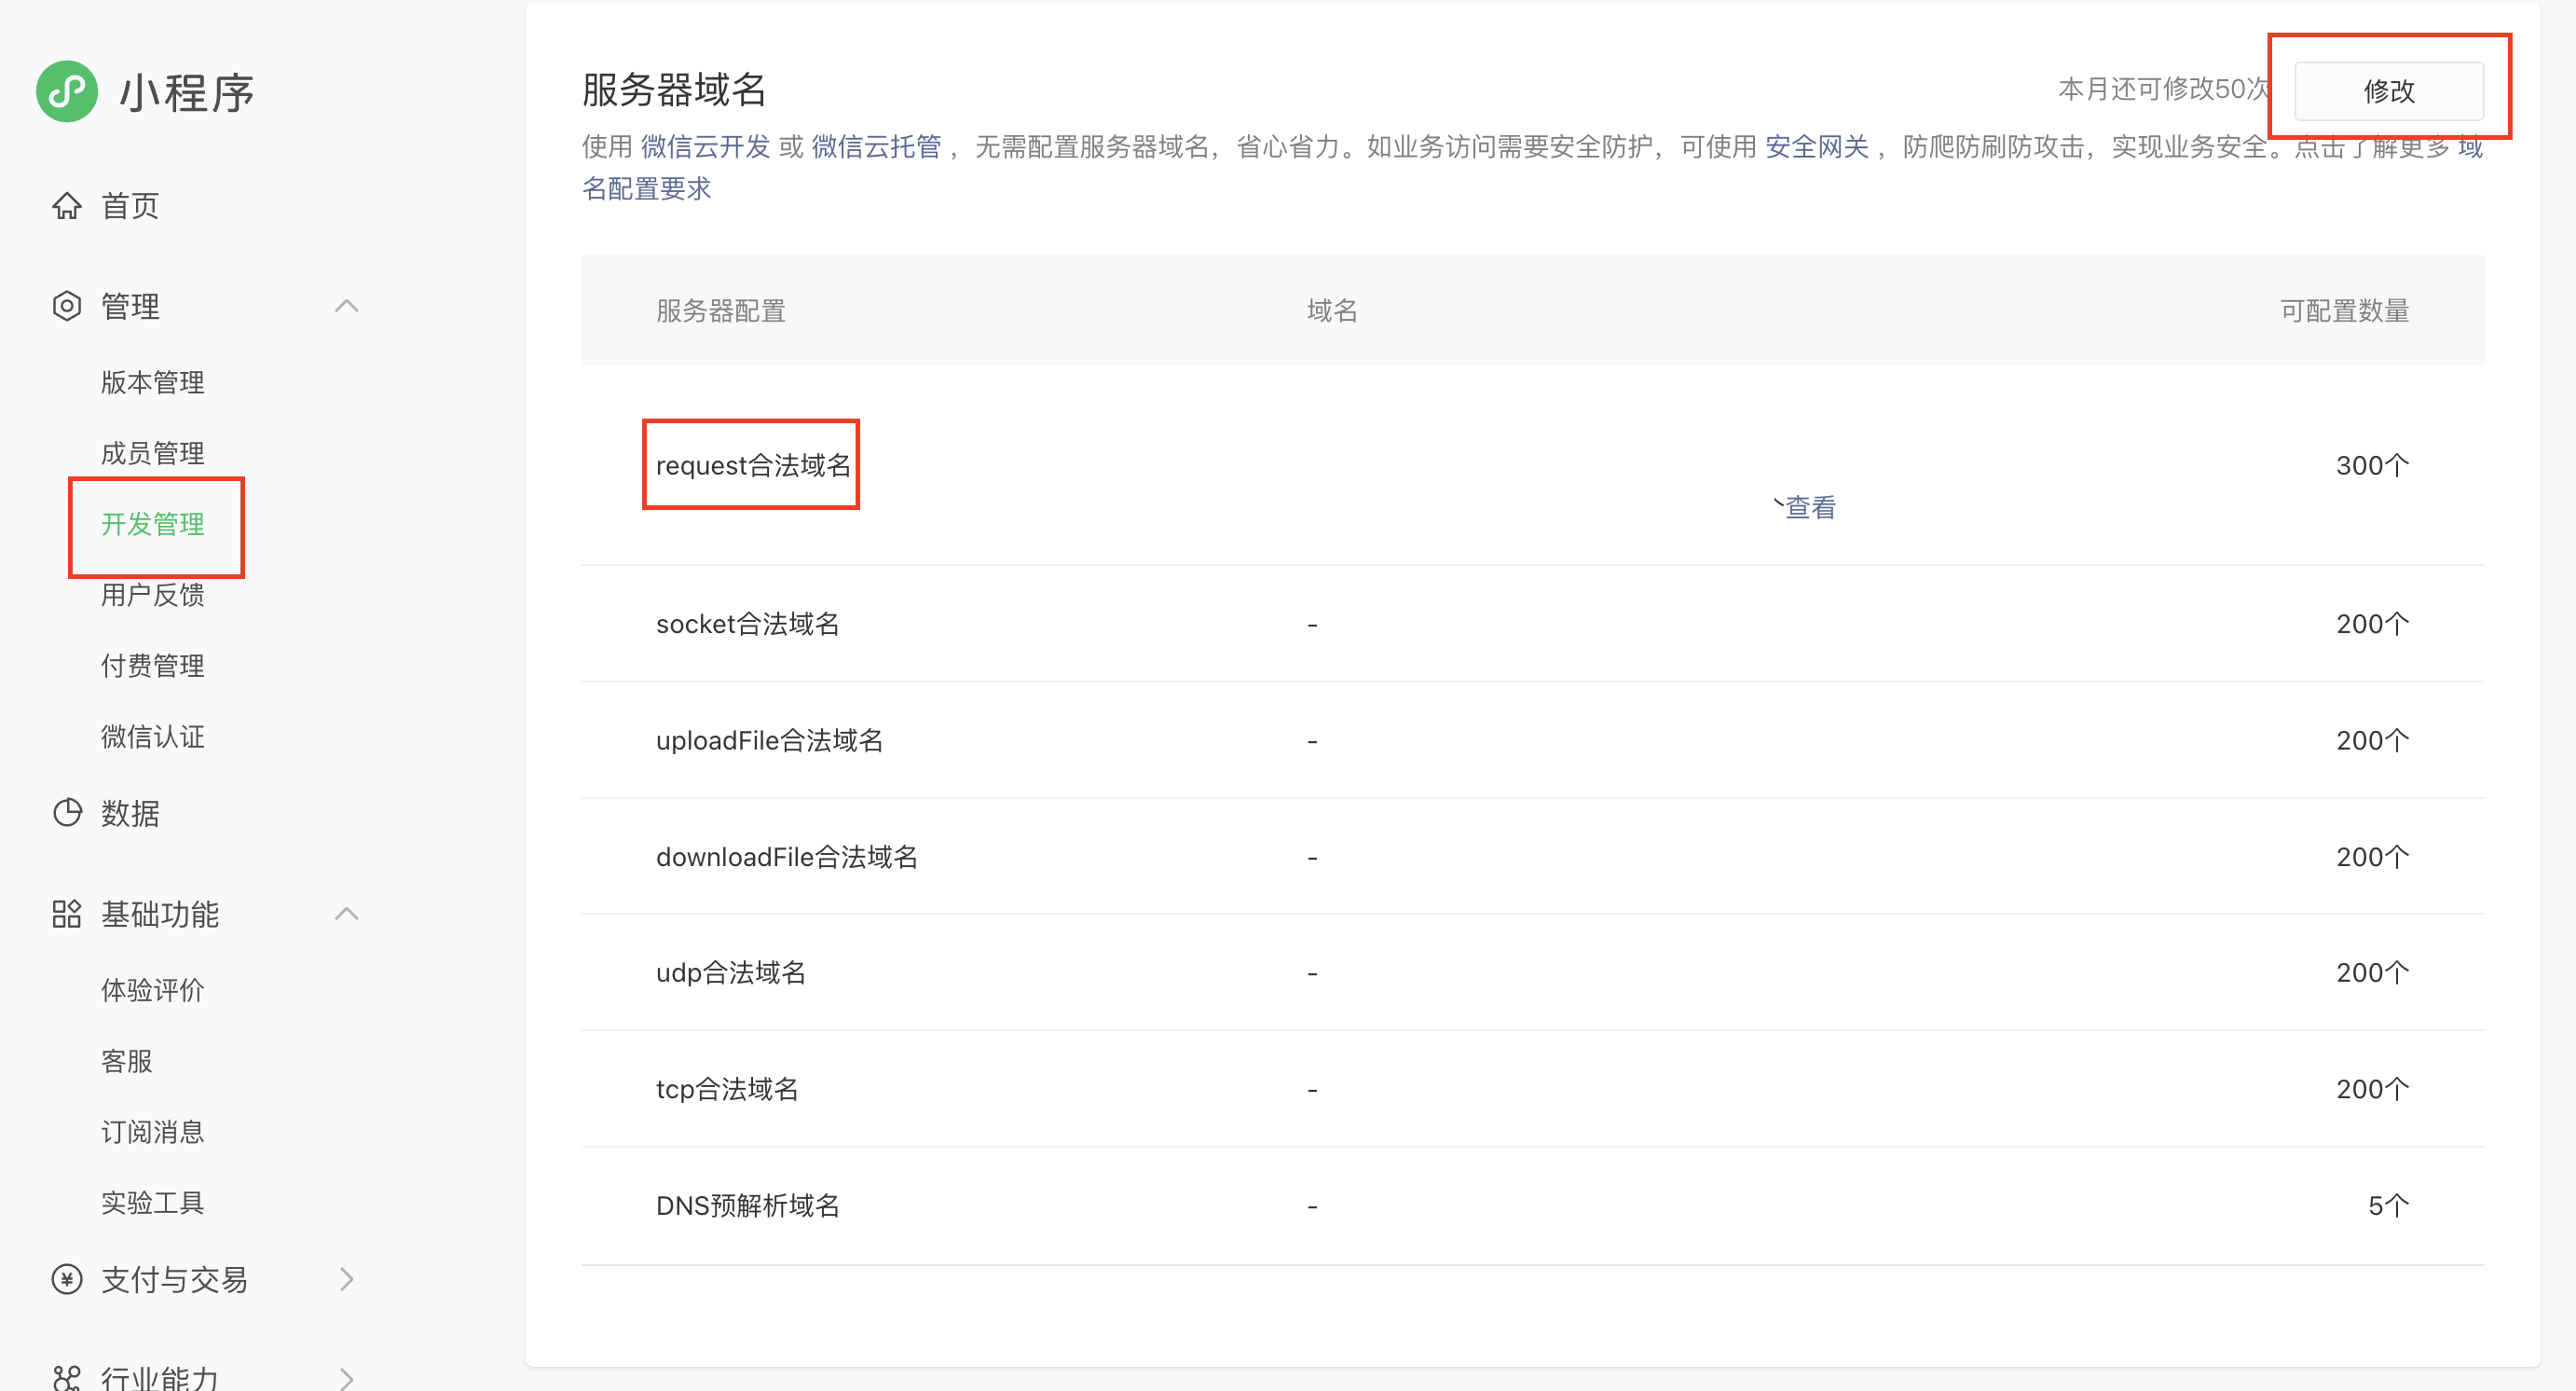
Mini Program Domain Configuration
Mini programs using custom CDN need to configure the request whitelist domain:
- Log in to WeChat Official Accounts Platform and enter the Mini Program management console
- Find "Server Domain" in "Development Management"
- Add the custom CDN domain name to "request whitelist domain"
- Save the settings