WorkBuddy Configuration Guide
After configuration, you can directly operate CloudBase services through WorkBuddy's AI conversations.
For example:
- "Create a user table" — AI automatically creates a database collection
- "Deploy this function" — AI automatically uploads and configures cloud functions
- "Deploy frontend to CDN" — AI automatically uploads files and configures hosting
No need to switch to the cloud console — all operations can be done in WorkBuddy using natural language.
Prerequisites
Before configuring, ensure the following conditions are met:
Node.js environment and CloudBase environment ready
Node.js Environment: Make sure Node.js v18.15.0 or later is installed:
node --version
If not installed, download from the Node.js website.
CloudBase Environment: See the guide Create a CloudBase Environment. New users can try it for free.
Configure your AI tool to connect with CloudBase capabilities. Supports local and hosted connection. See connection modes.
Step 1: Install / Configure CloudBase
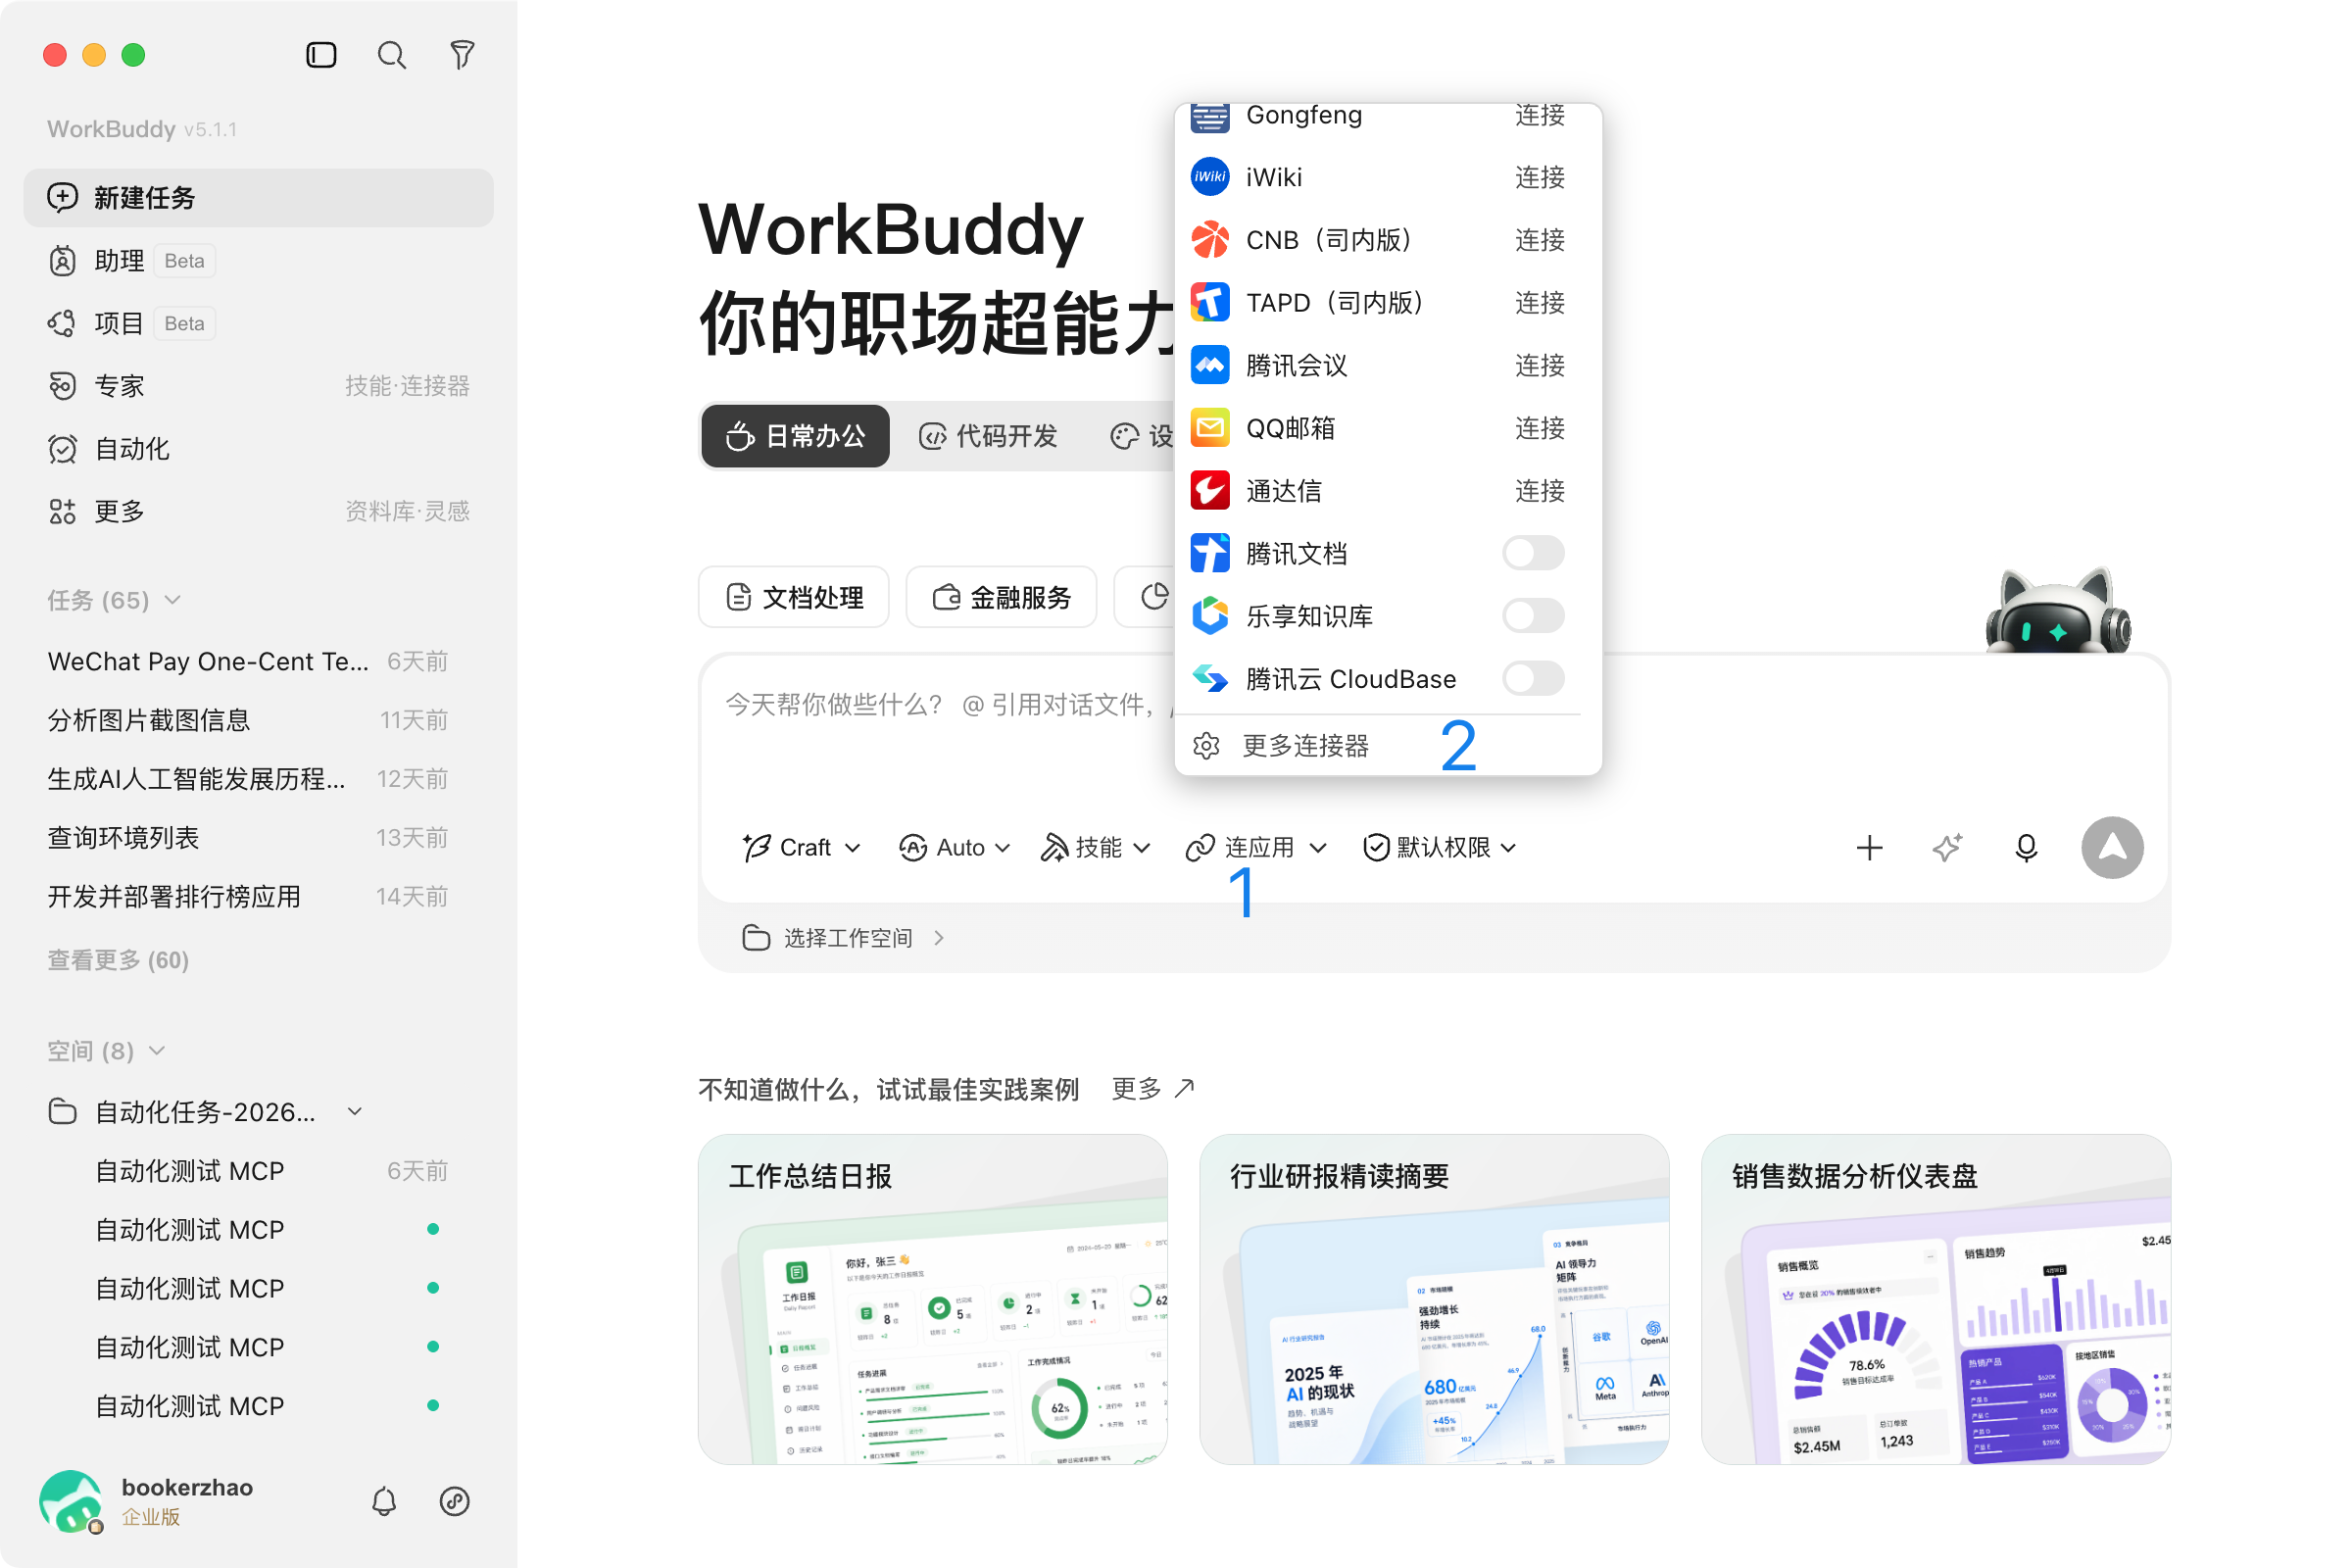
使用内置连接器
1. 在 WorkBuddy 对话界面中,点击输入框左下角的 连接器 按钮 2. 在弹窗中找到 腾讯云 CloudBase,点击进入详情页,点击 连接 启用
启用后,即可在对话中直接使用 CloudBase 的各项能力。
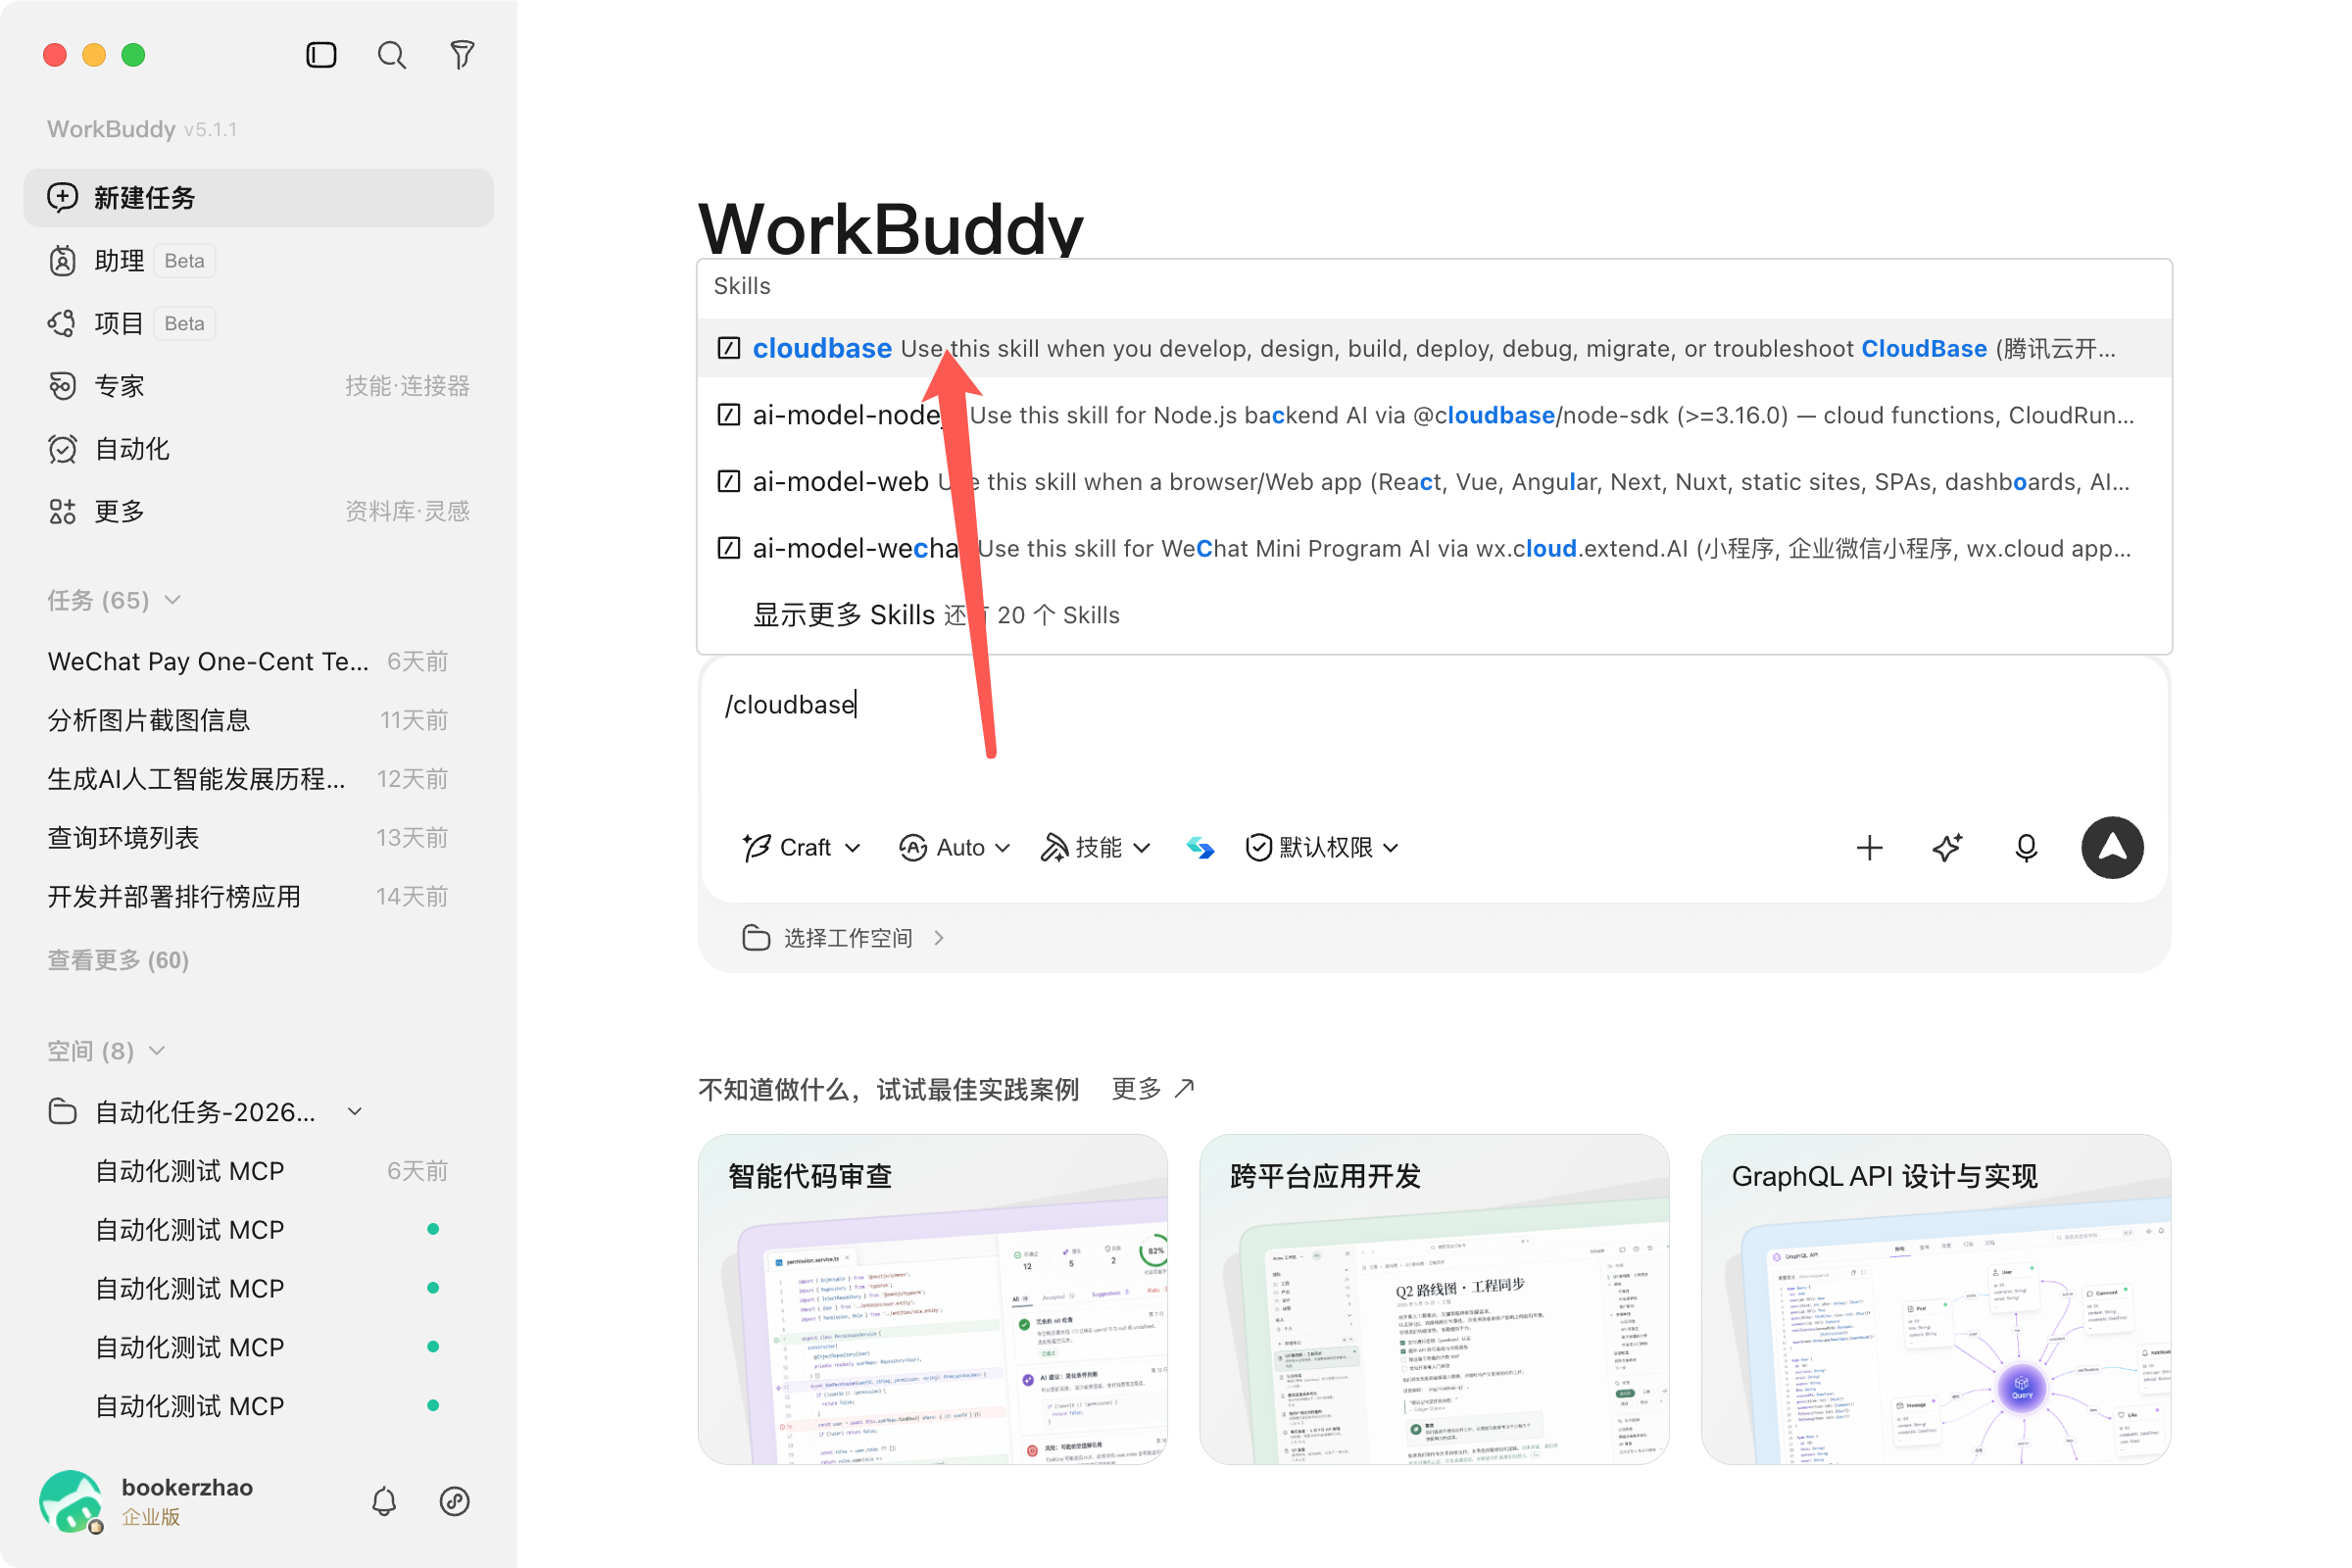
使用快捷命令
在对话中直接输入 `/cloudbase` 选择 CloudBase Skill,然后输入需求即可。
Step 2: Chat with AI
Enter the following in your AI chat in order:
Install CloudBase Skills: run npx skills add tencentcloudbase/cloudbase-skills -yUse CloudBase Skills: 在 Web 应用中创建一个使用 CloudBase Auth 的手机号注册和登录功能Using the Built-in Connector (Recommended)
WorkBuddy has a built-in CloudBase MCP connector that can be enabled through the conversation interface:
- In the WorkBuddy conversation interface, click the Connect App button at the bottom left of the input box
- Find Tencent CloudBase in the popup, click to enter the detail page, and click Connect to enable
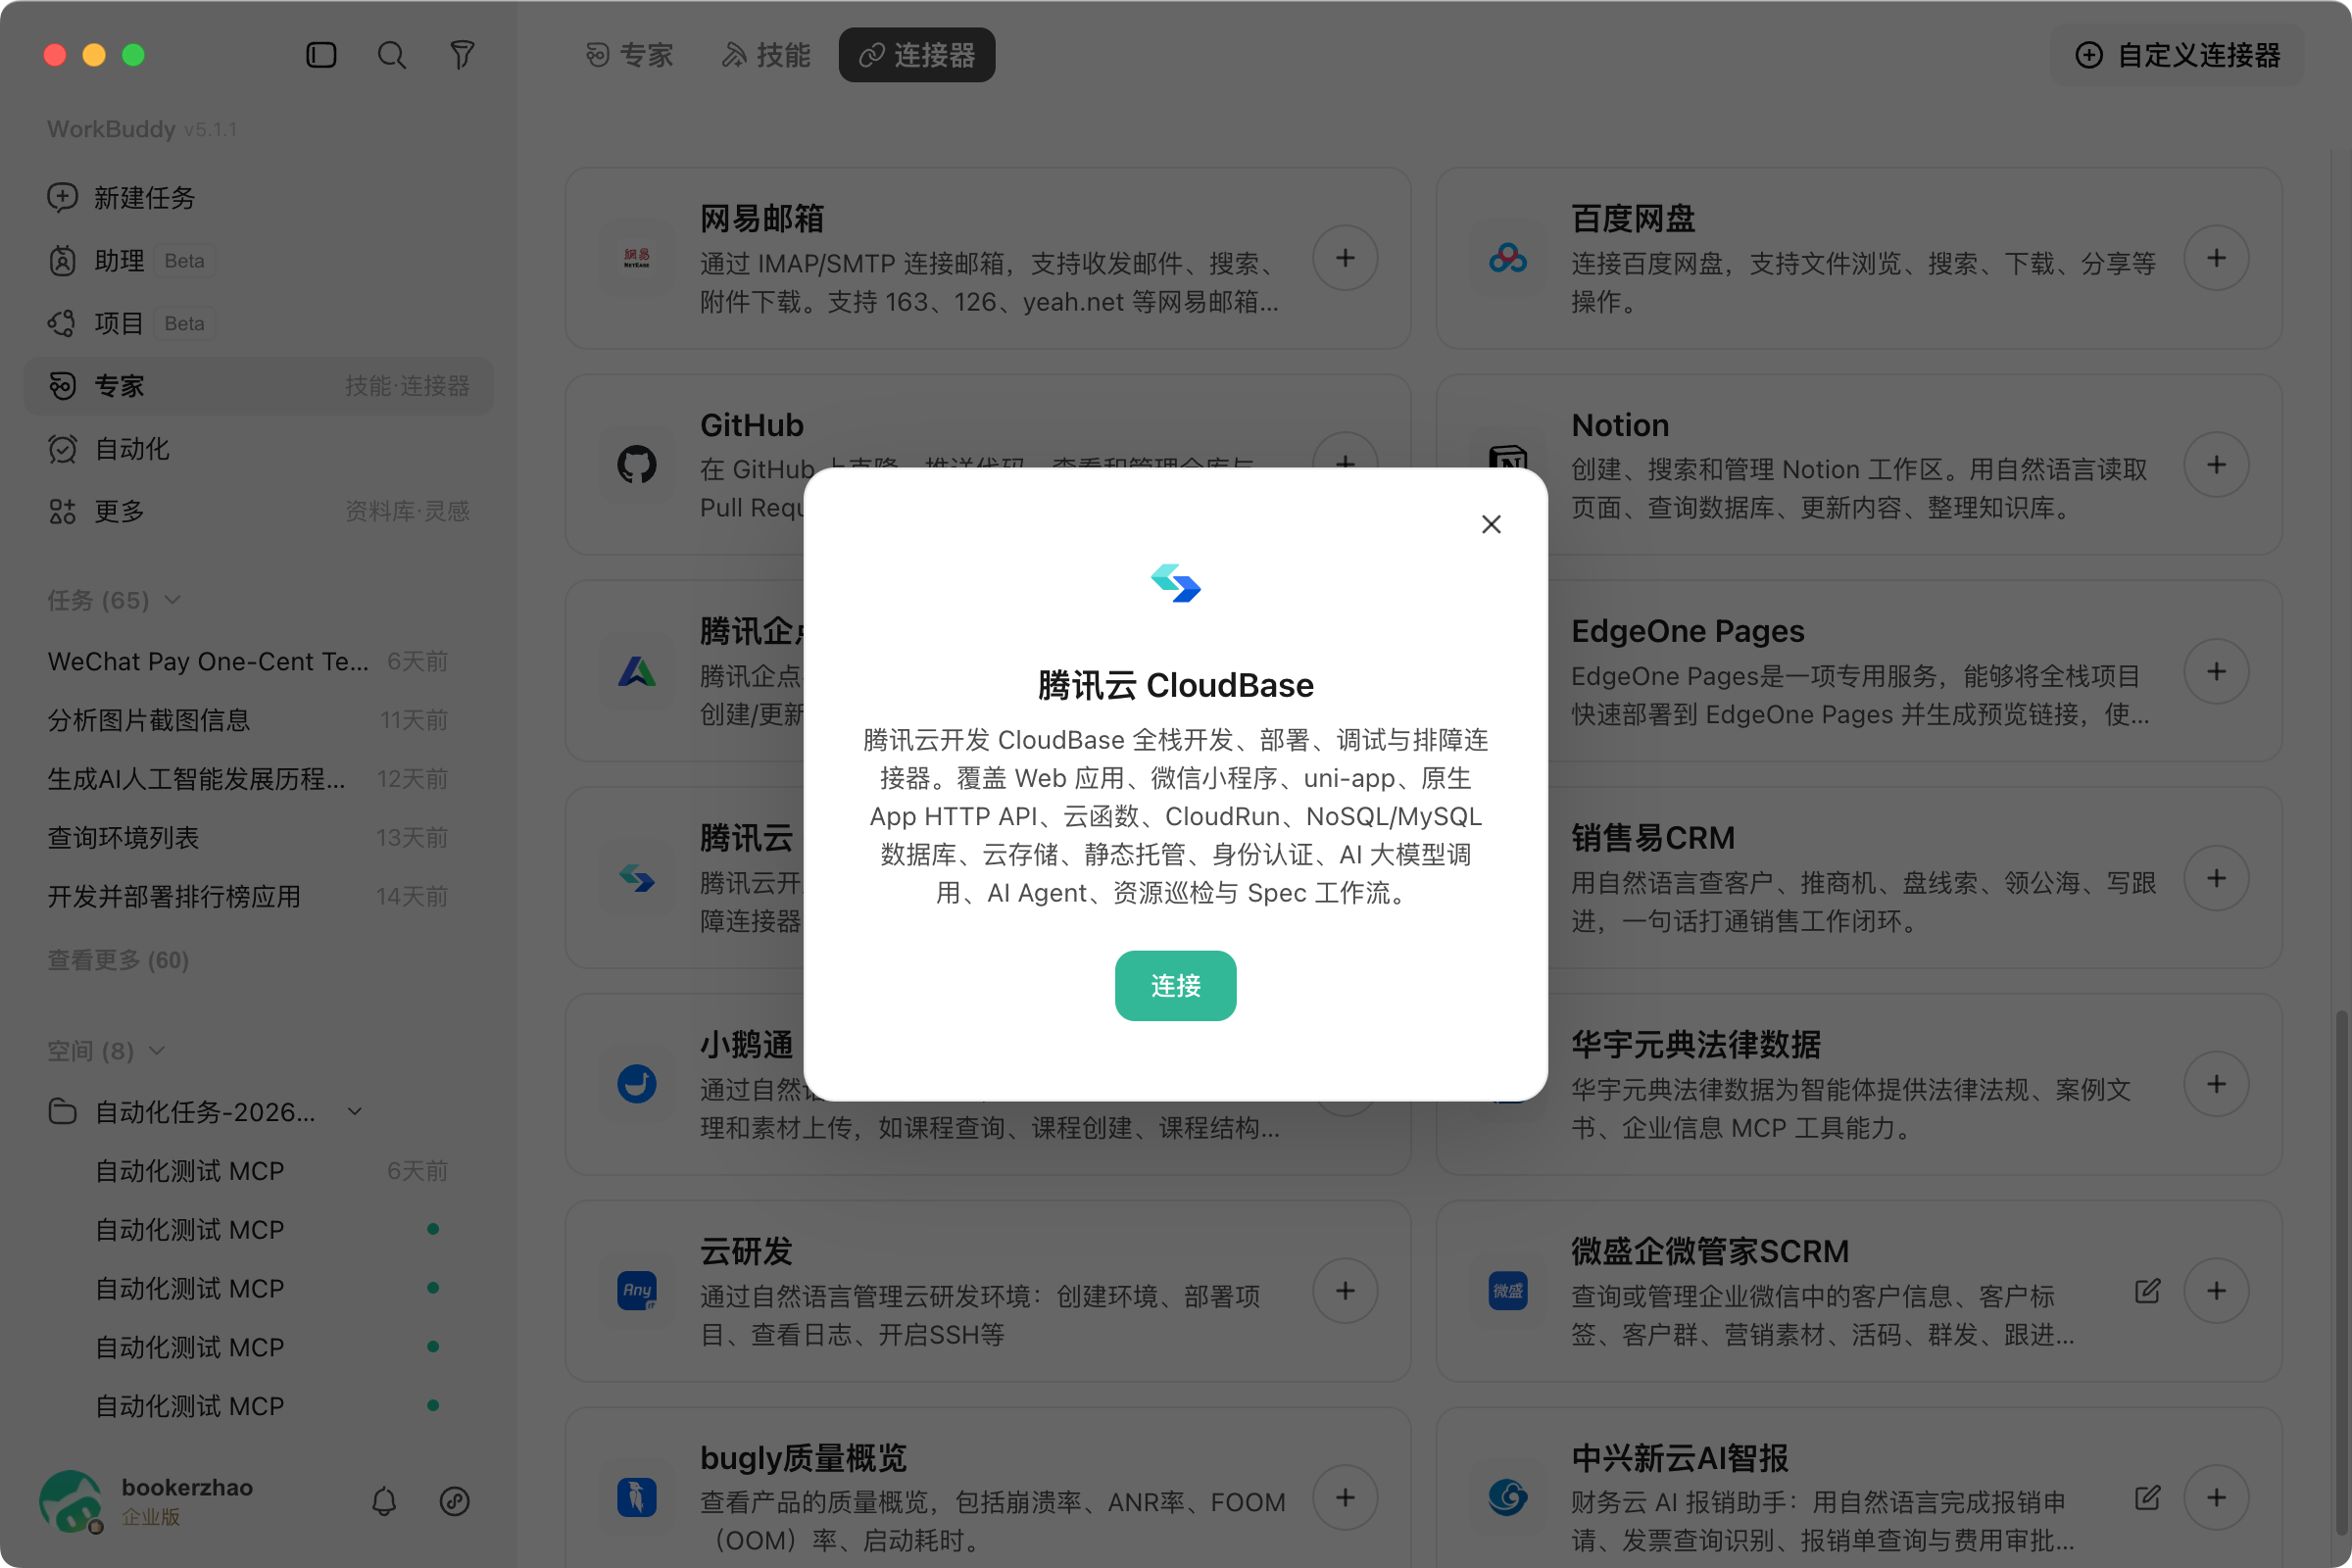
Once enabled, you can directly use CloudBase capabilities in your conversations.
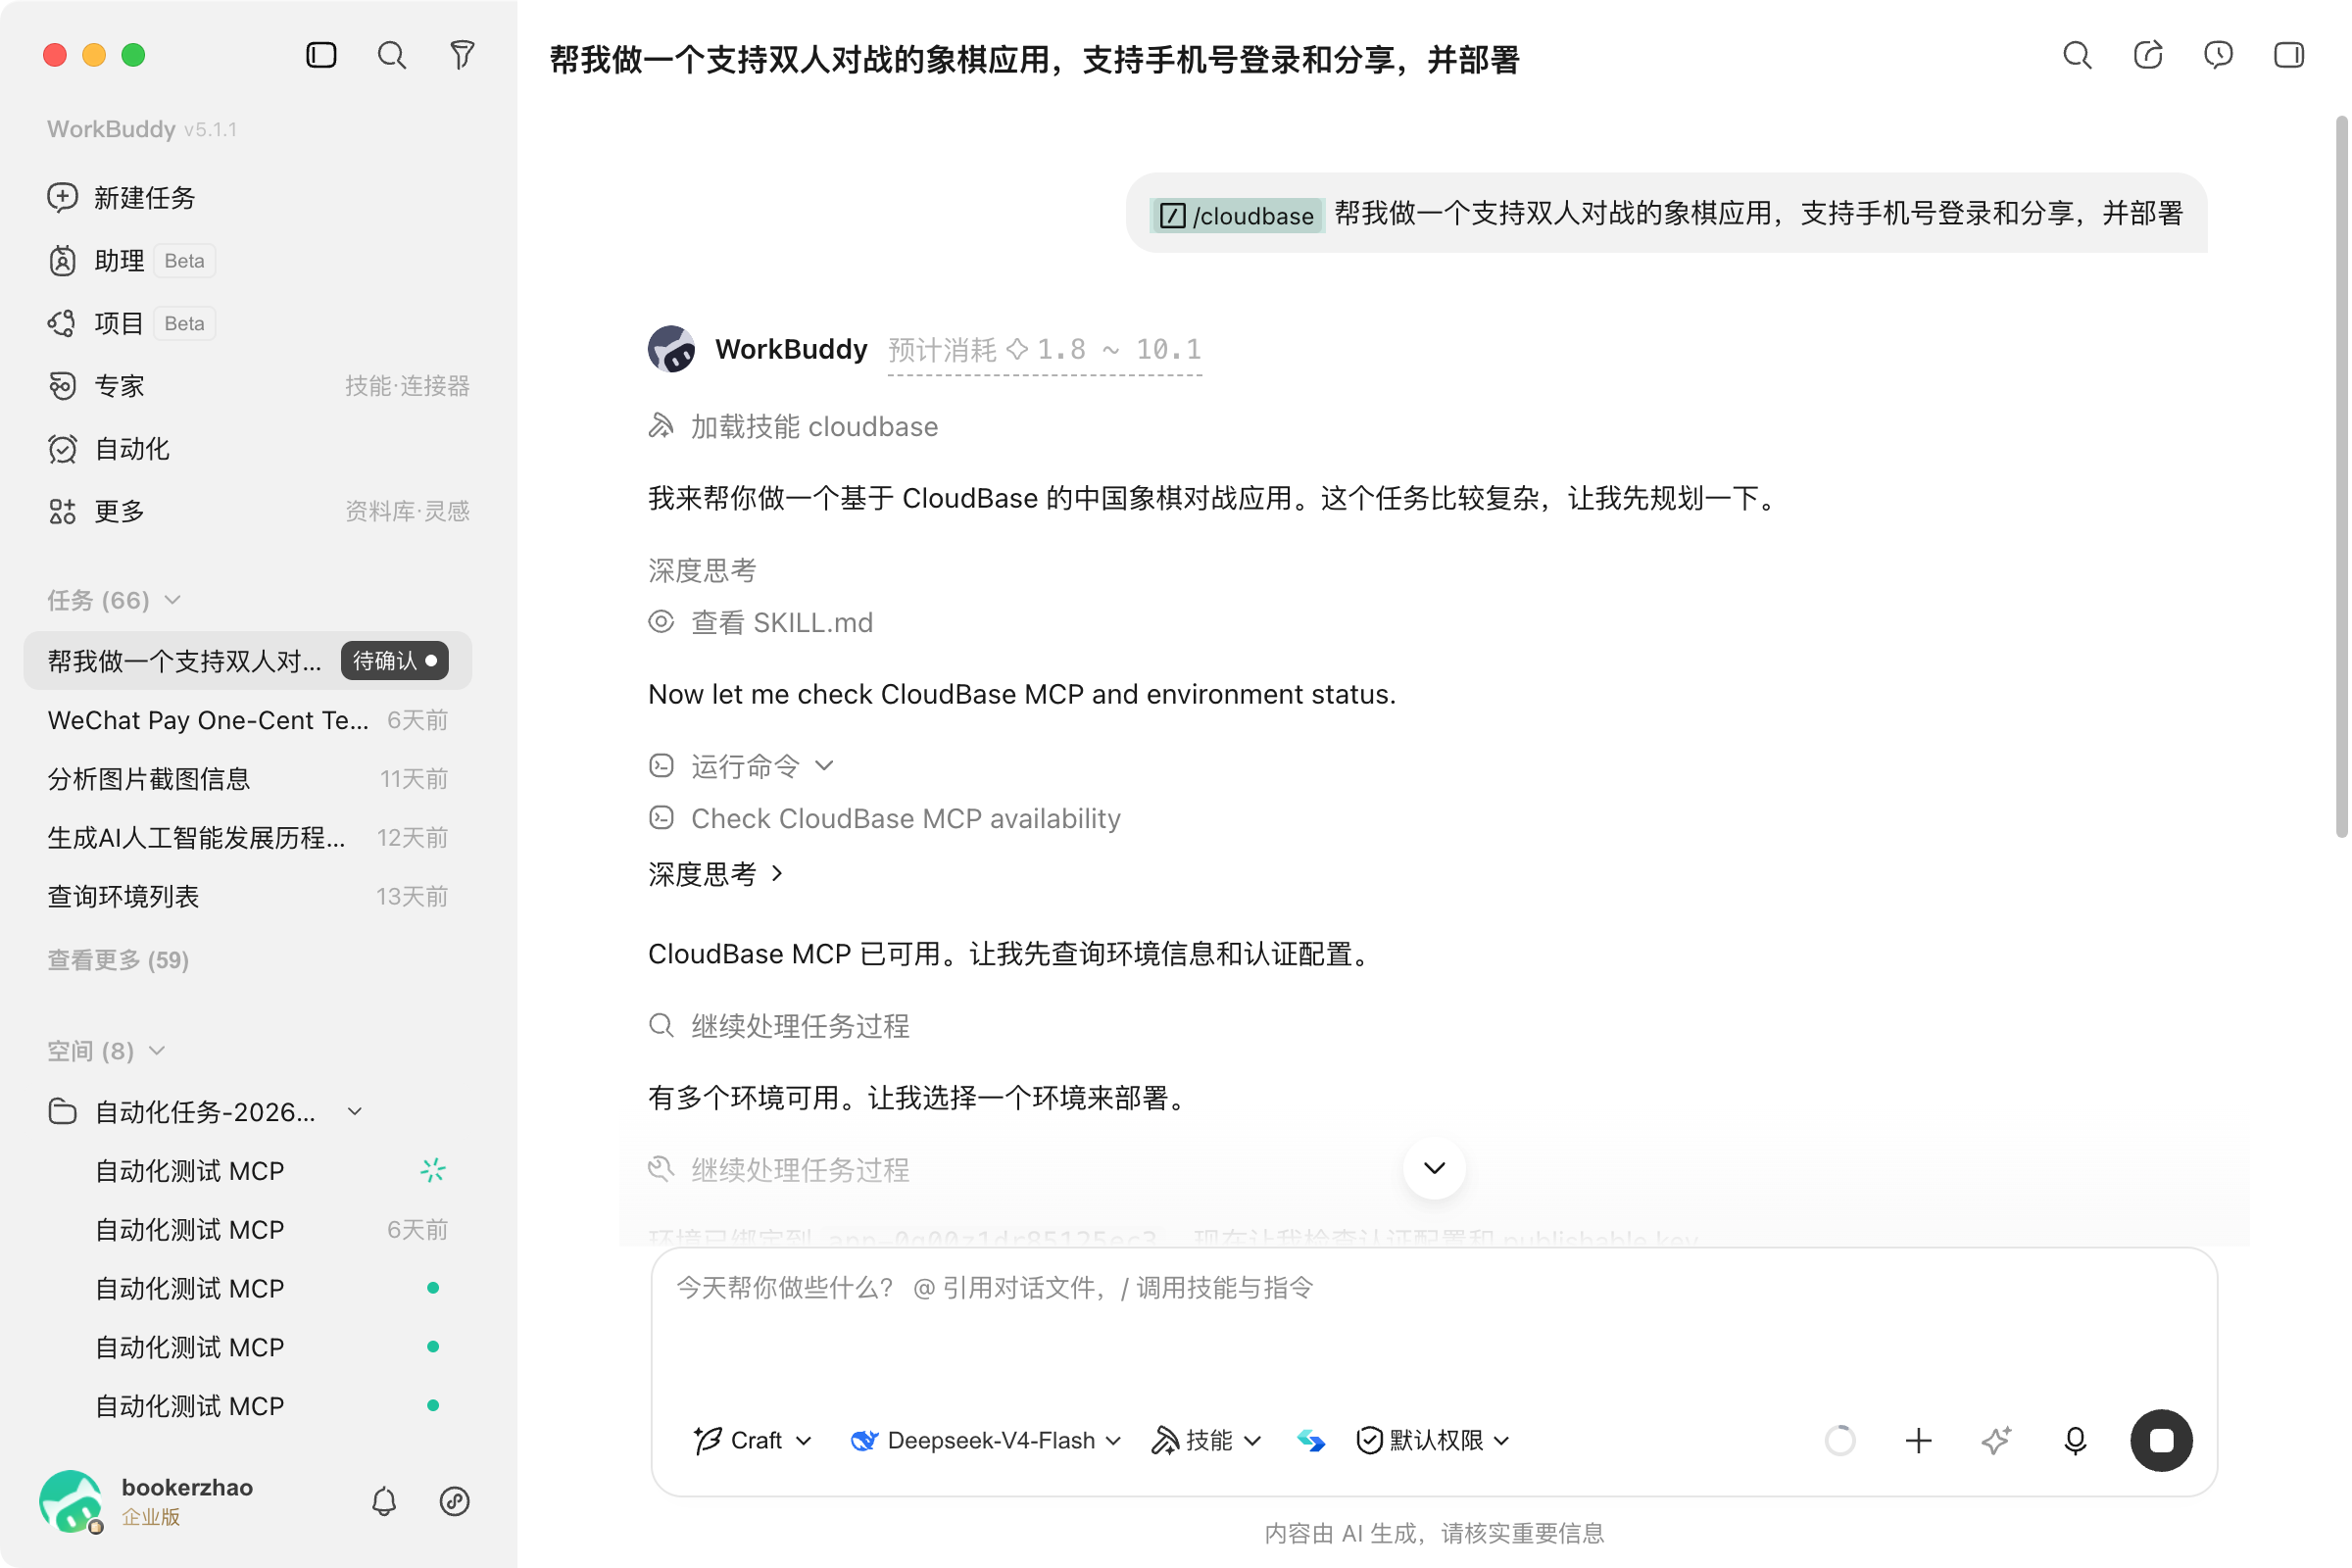
Using Quick Commands
You can also type /cloudbase in the conversation to select a CloudBase Skill, then describe what you want to build:
After selecting the CloudBase Skill, enter your requirements to start development:
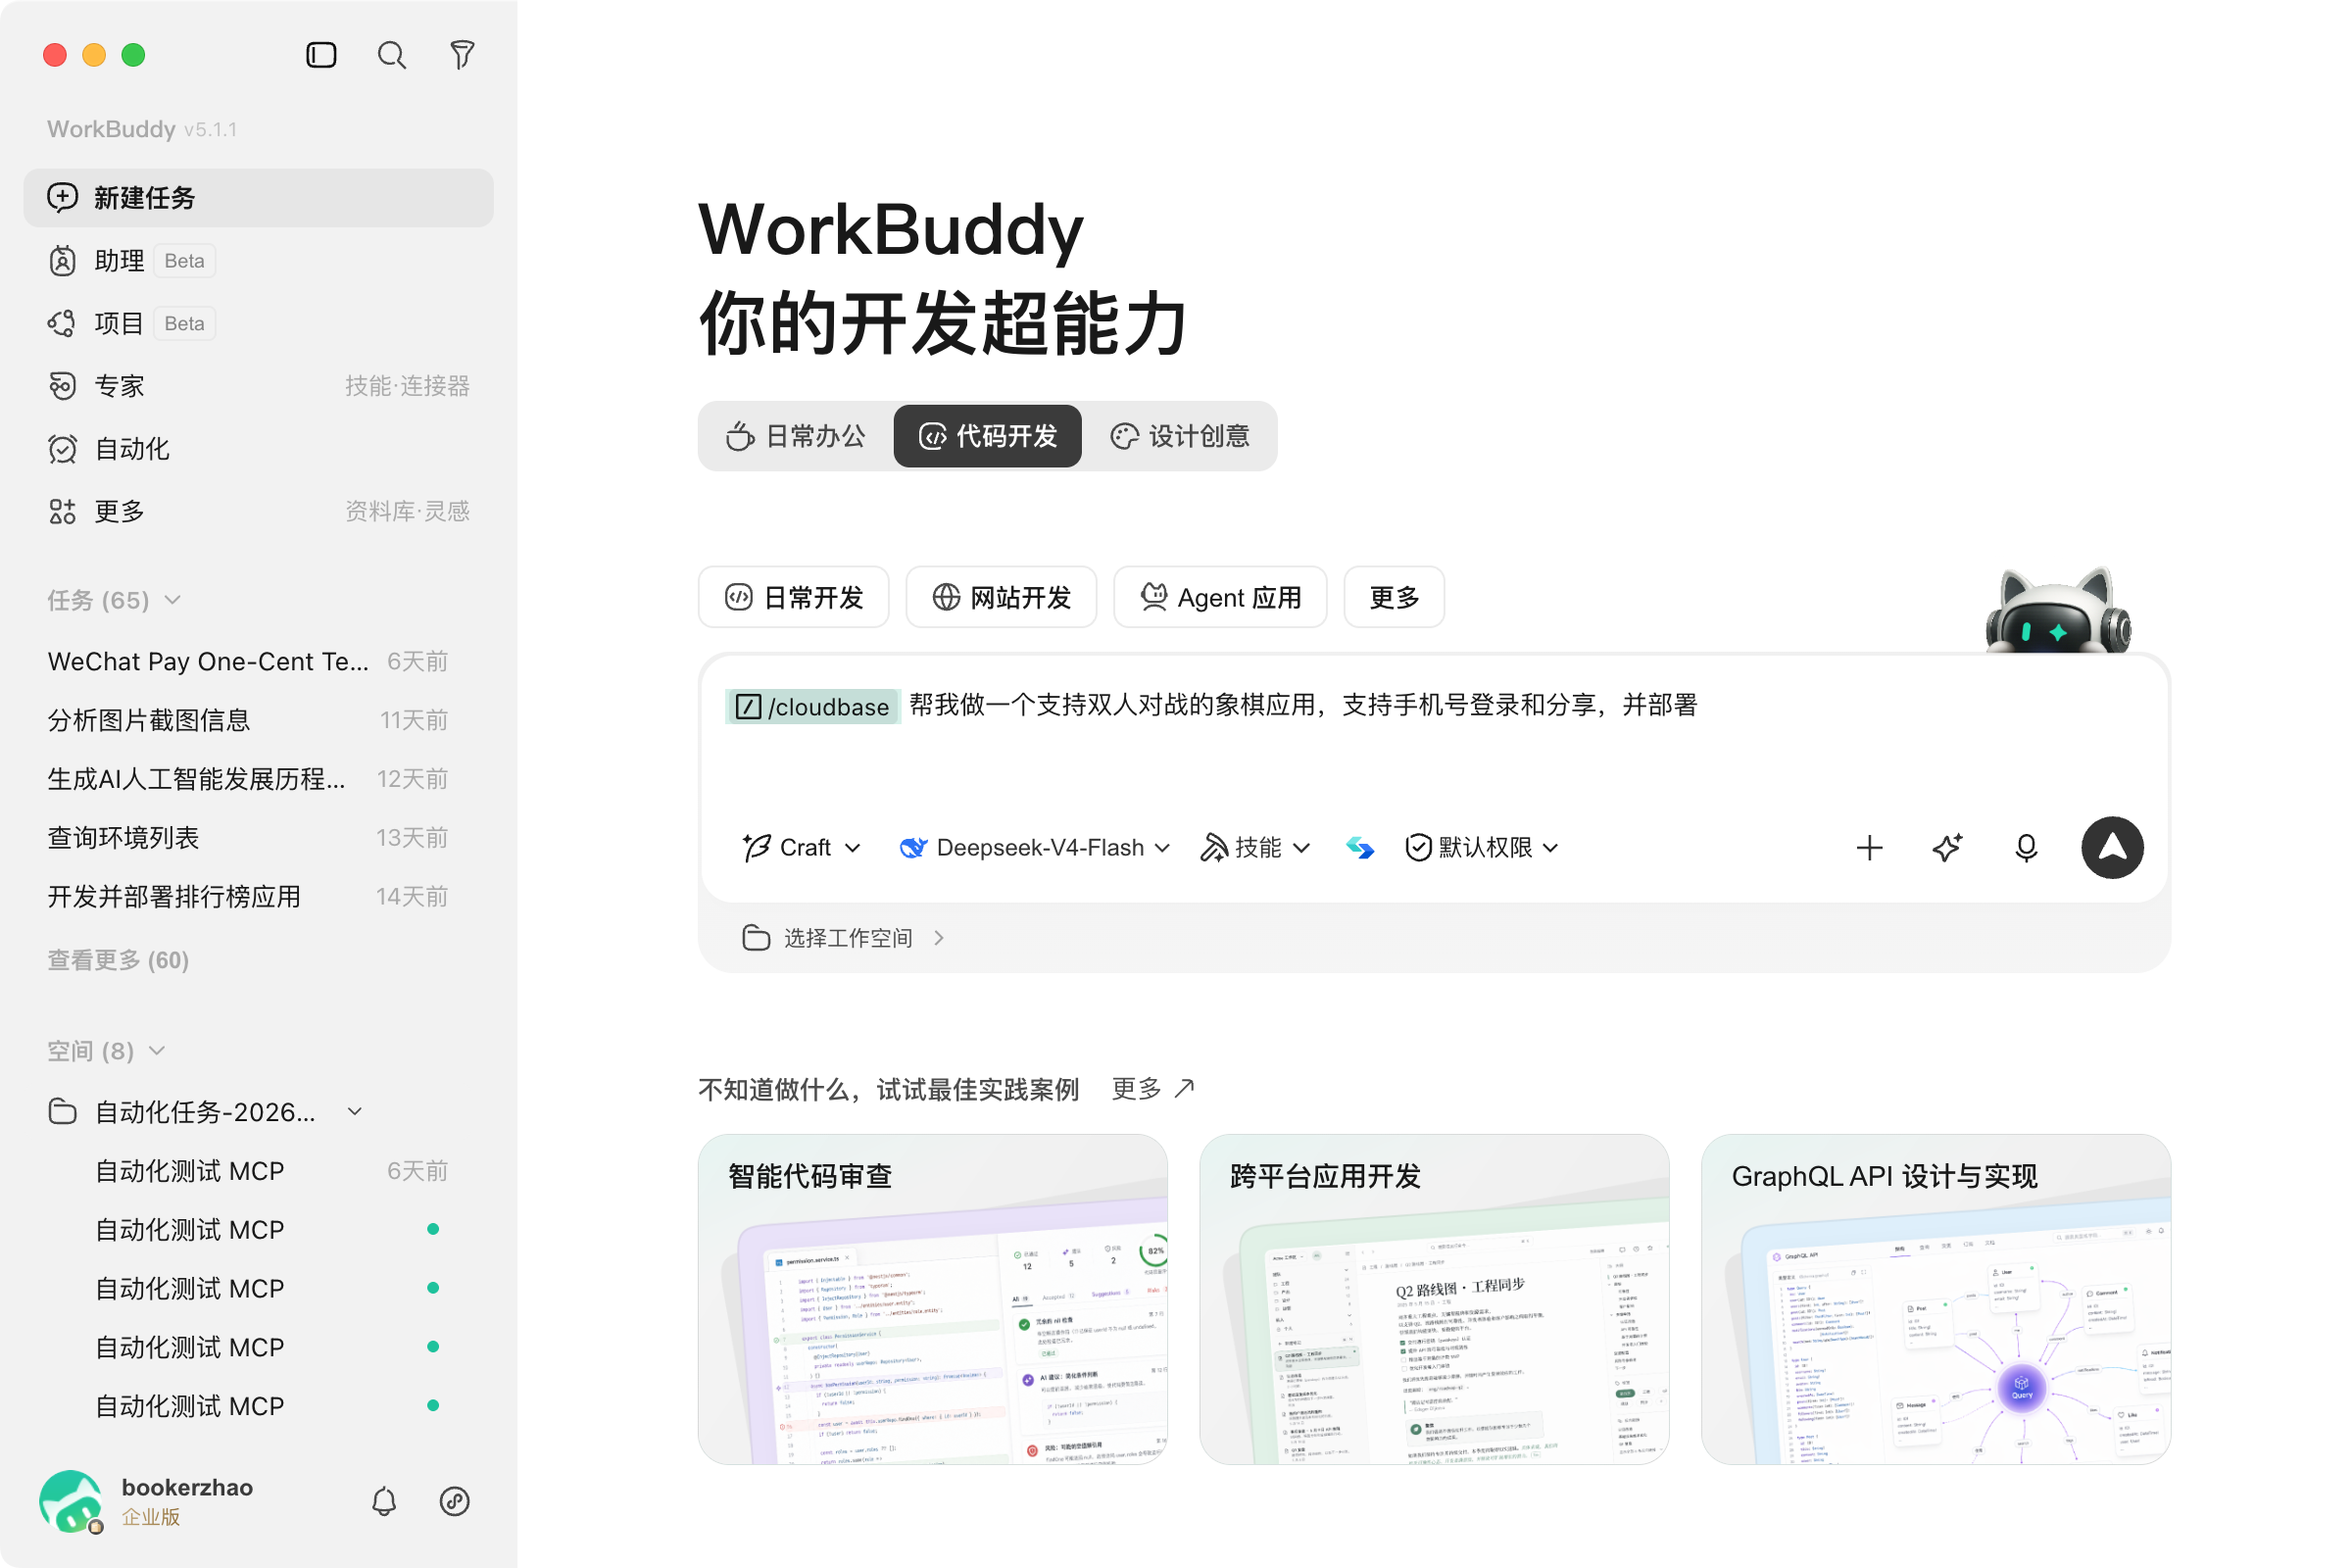
WorkBuddy will automatically load CloudBase MCP capabilities, query your environment, and begin executing your requirements:
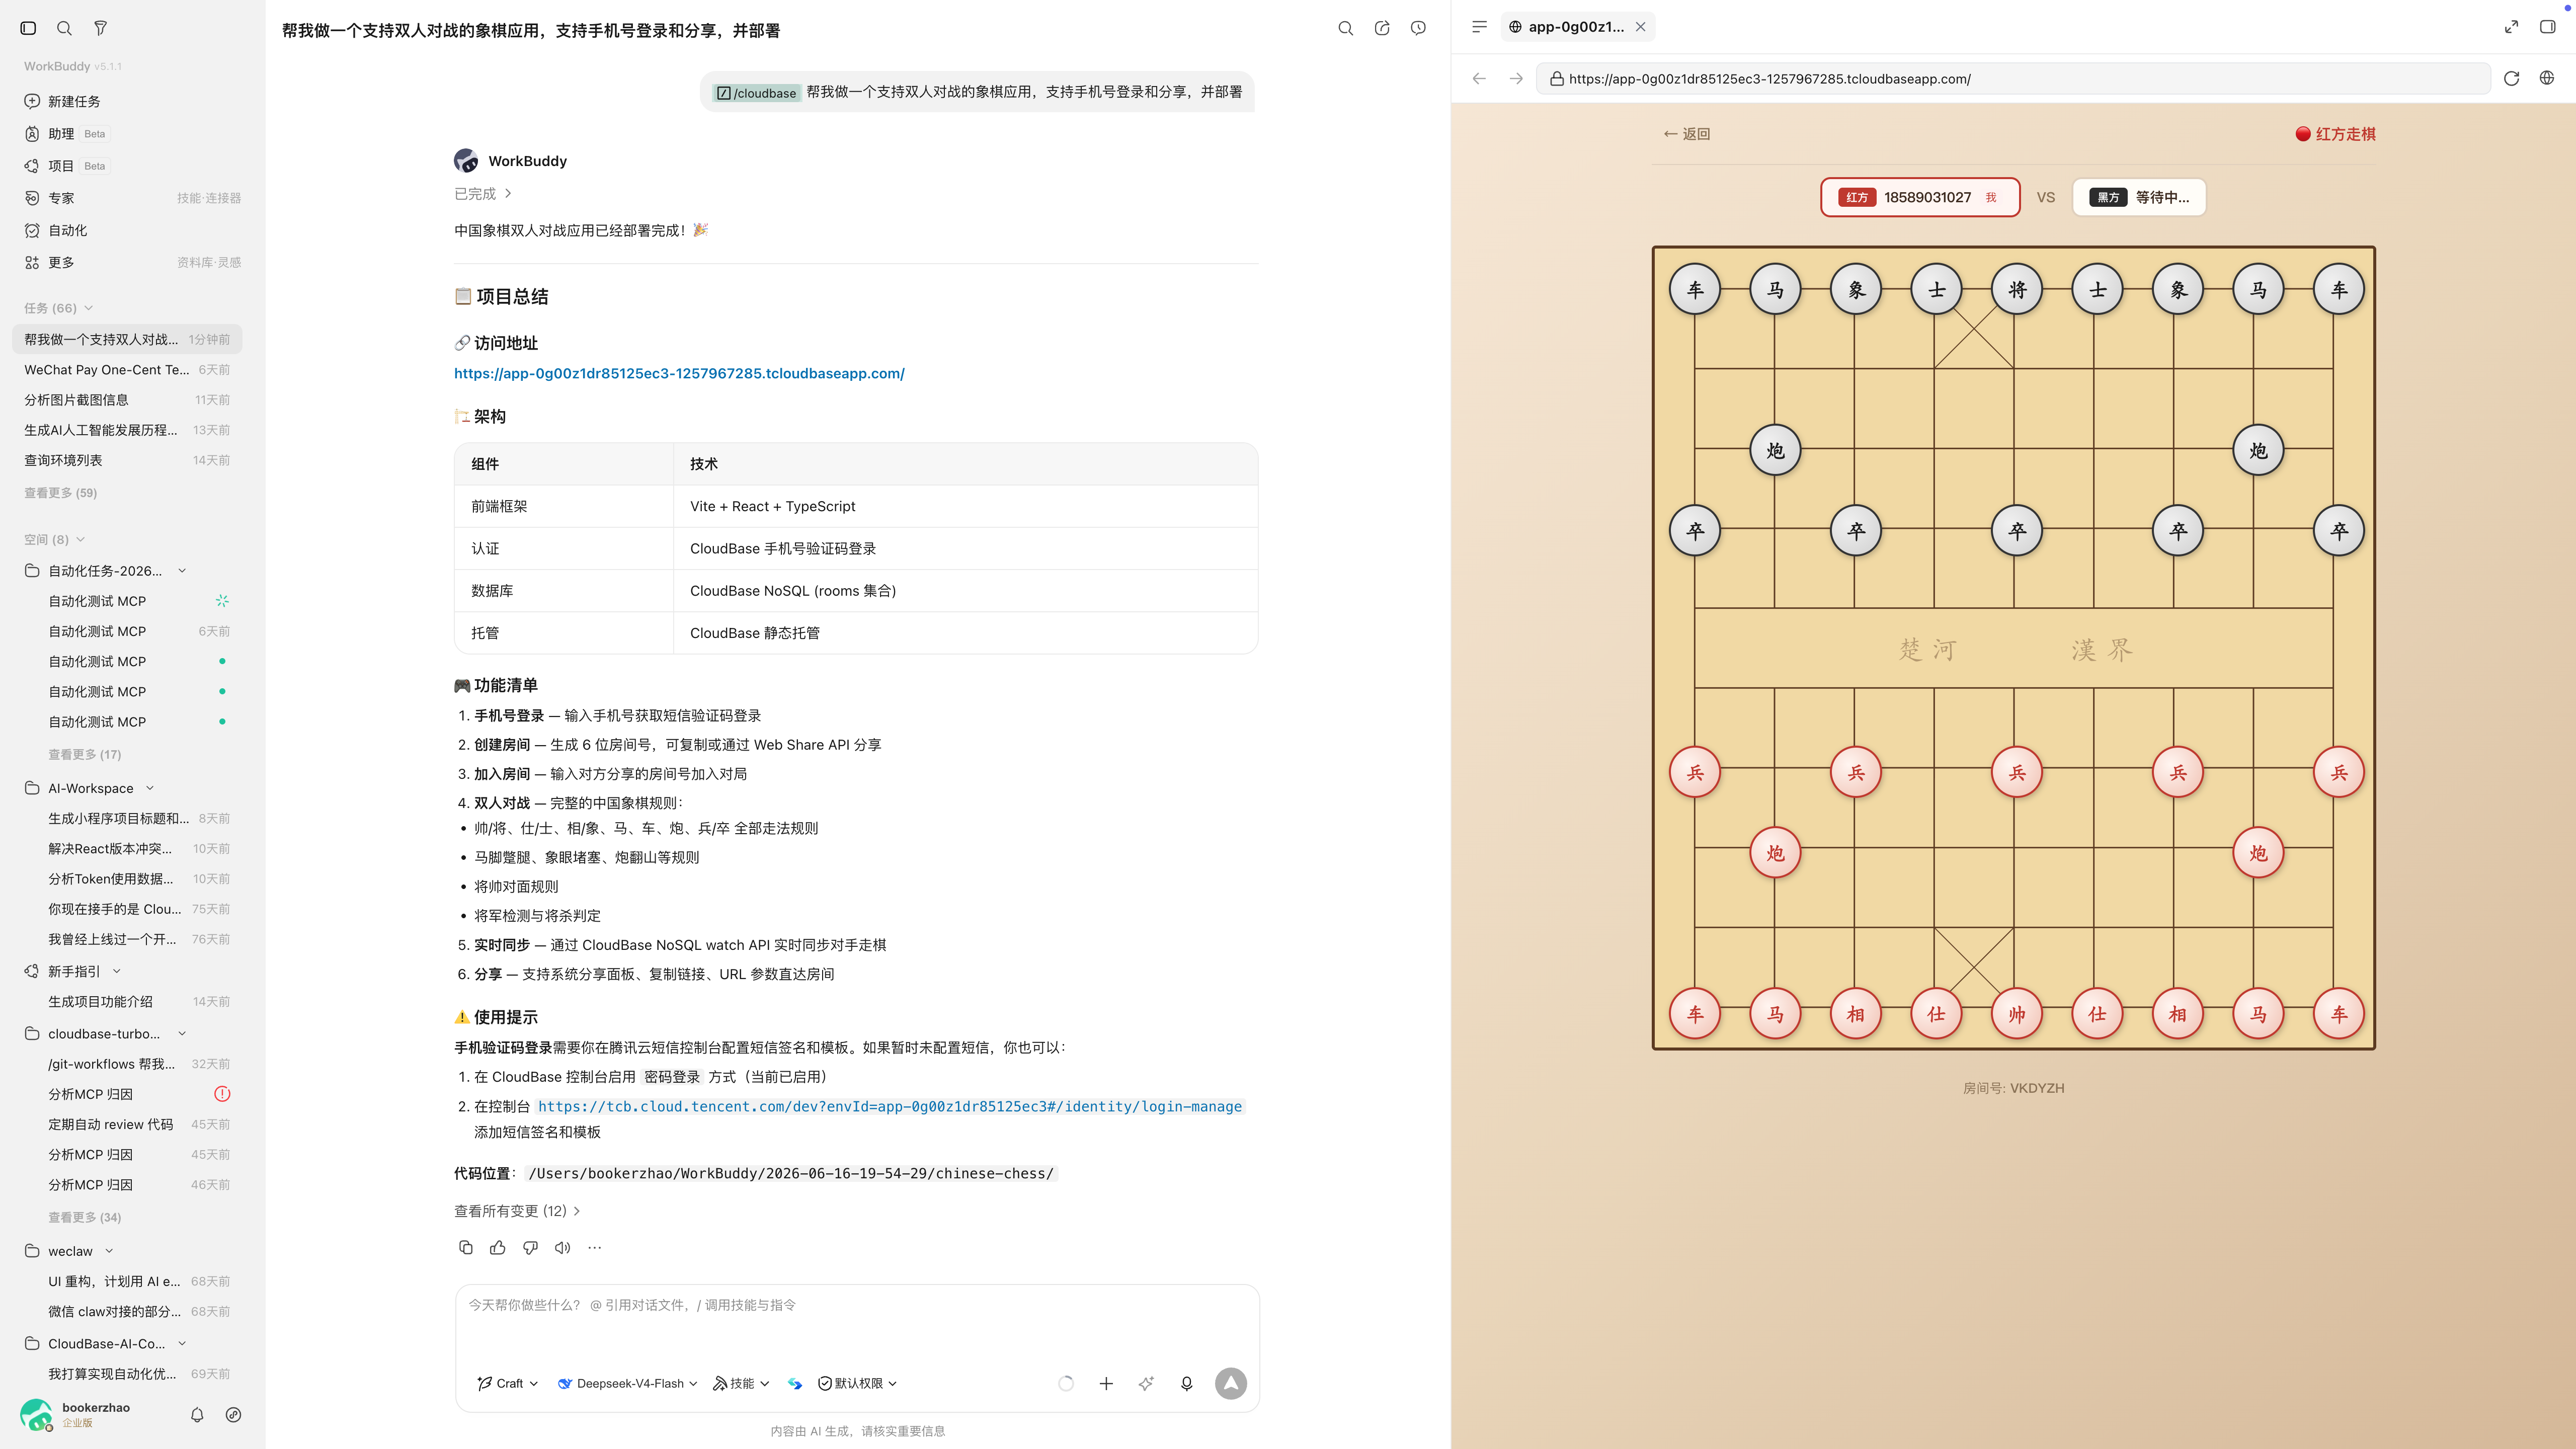
When development is complete, WorkBuddy will display a project summary including architecture, feature list, and deployment URL:
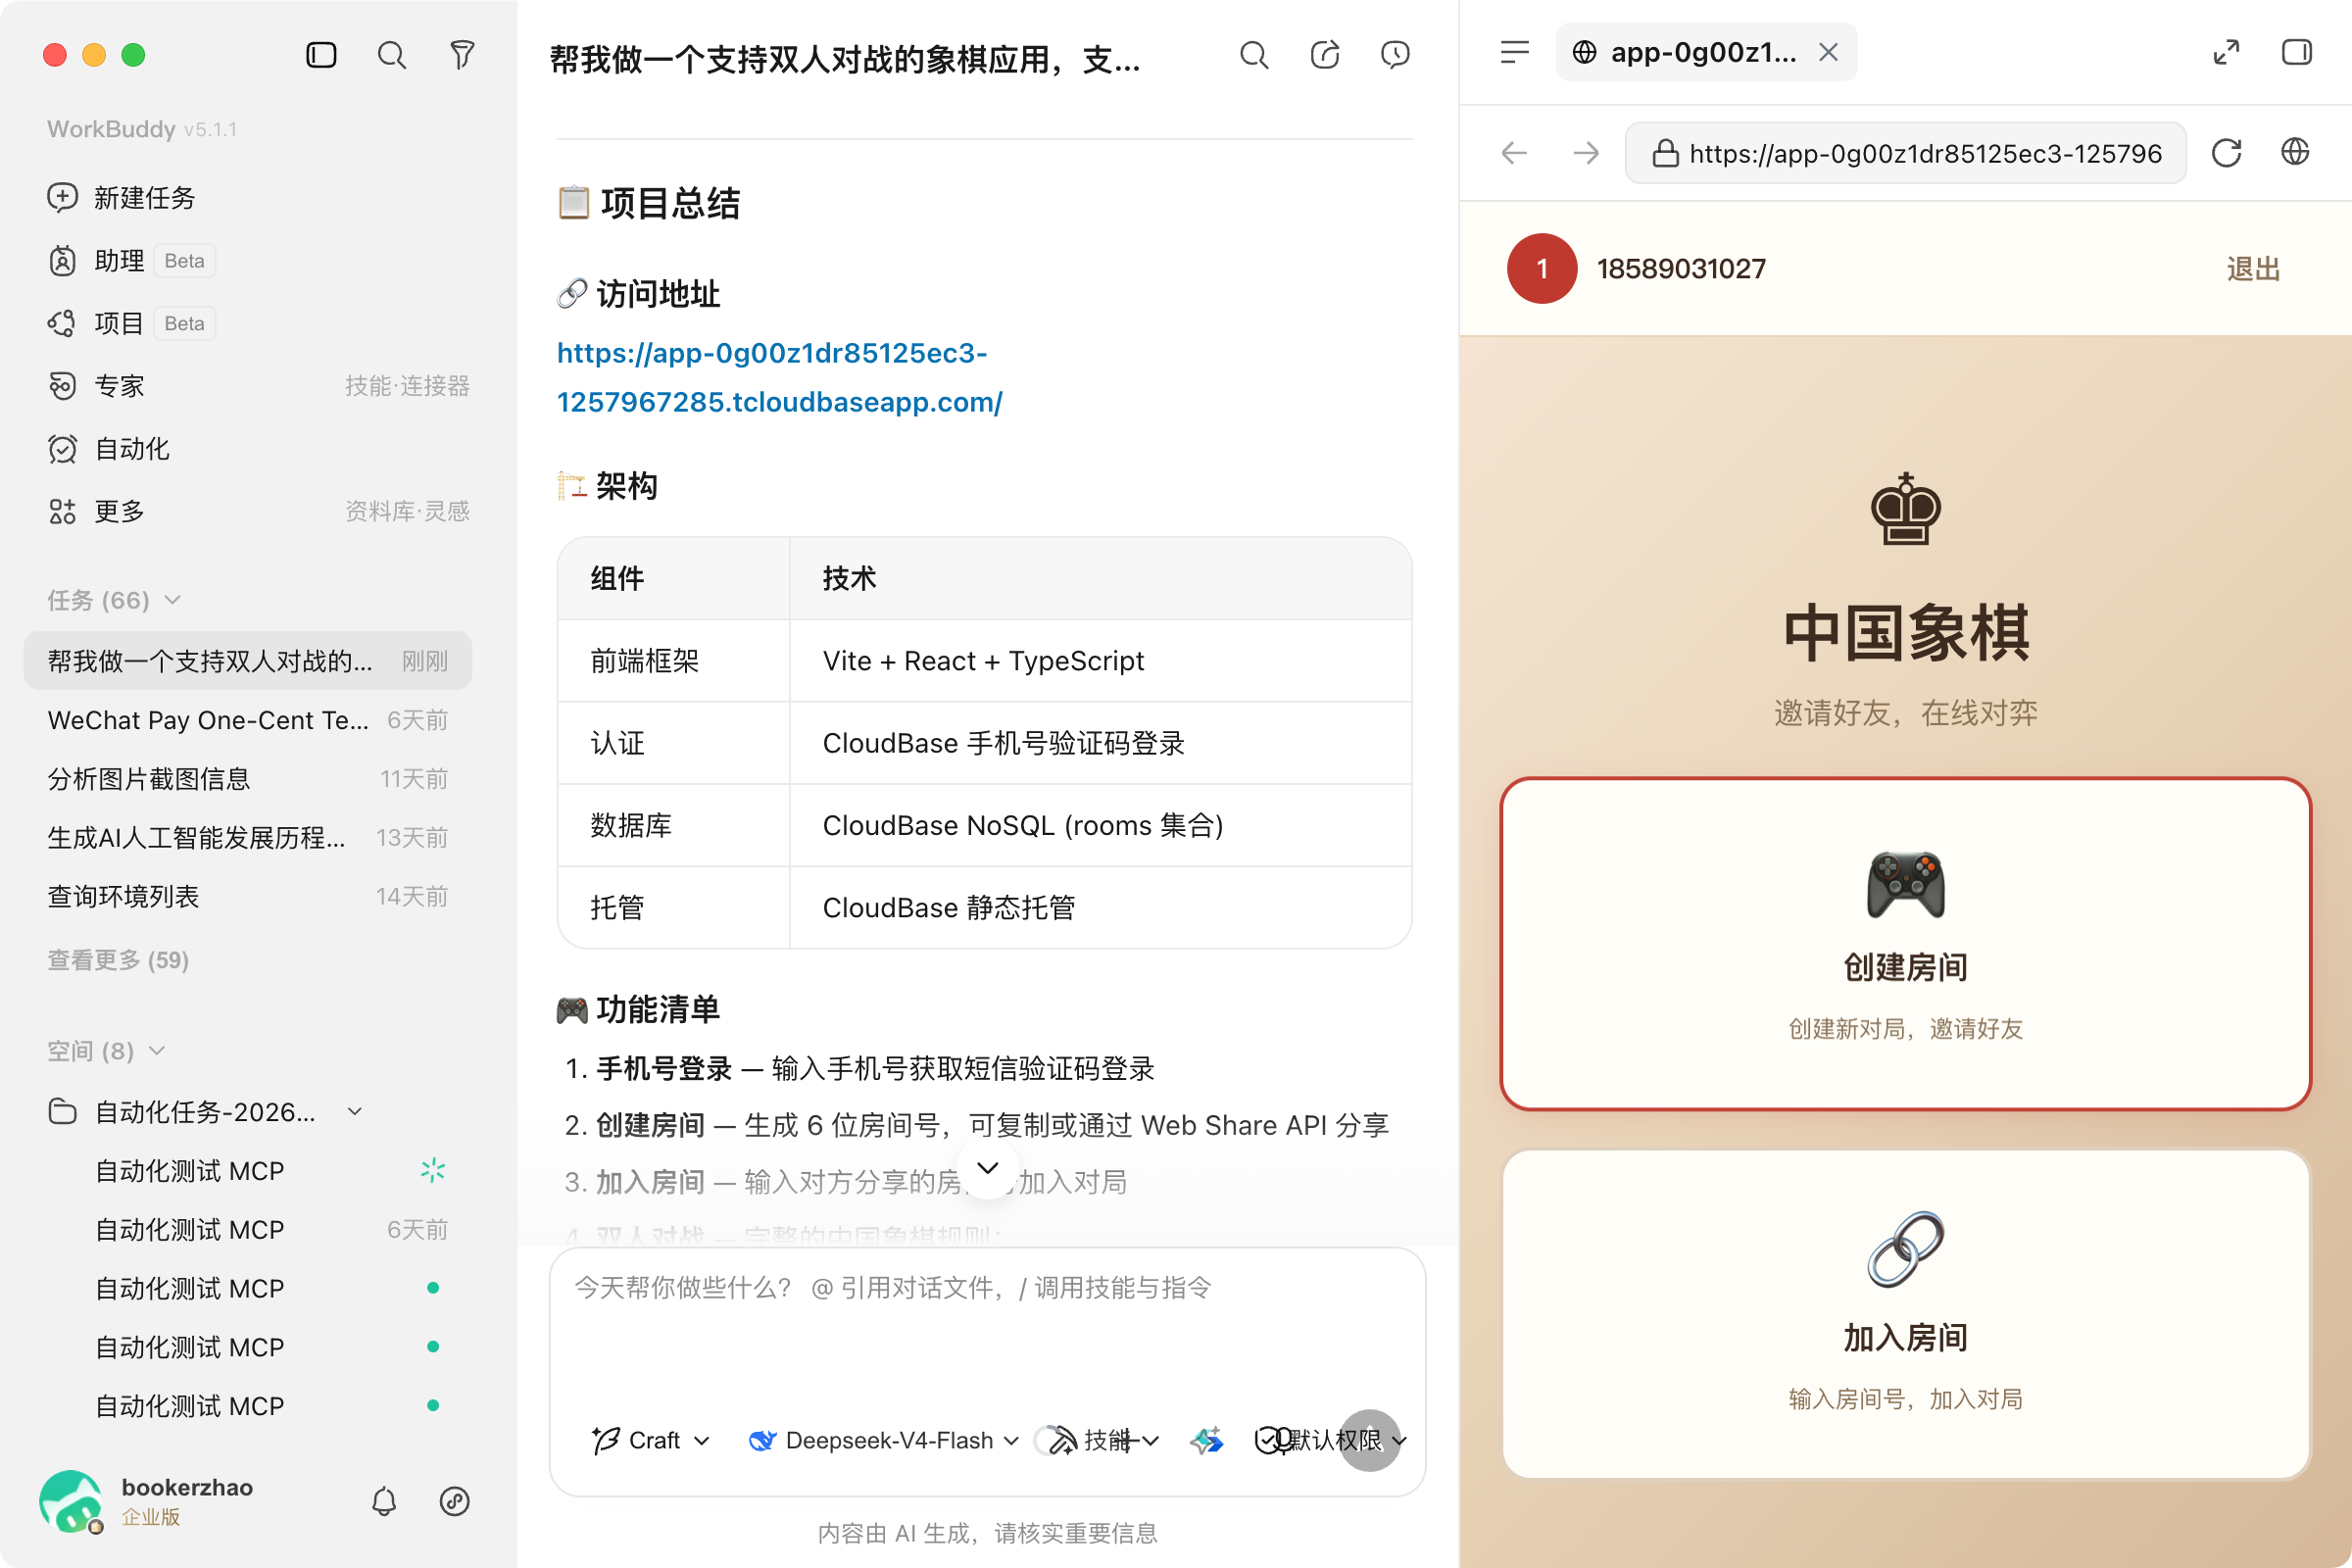
Click the deployment URL to access the final deployed application:
Manual MCP Configuration (Alternative)
If you need project-level or custom configuration, create a workbuddy.mcp.json file in the project root:
{
  "mcpServers": {
    "cloudbase": {
      "command": "npx",
      "args": ["@cloudbase/cloudbase-mcp@latest"],
      "env": {
        "INTEGRATION_IDE": "WorkBuddy"
      }
    }
  }
}
FAQ
Q: MCP connection failed? A: Check if the config file format is correct, restart WorkBuddy, and verify your network connection.
Q: Showing 0 tools? A: See the FAQ.
More questions: Full FAQ