CloudBase Resources Migration Guide
This document provides data and configuration migration solutions between CloudBase environments, helping you migrate resources from one environment to another.
Overview
CloudBase currently does not support one-click migration functionality. Data and configurations need to be manually migrated module by module. The migration process involves the following modules:
- Document Database: Data models, collection data
- MySQL Database: Data models, data tables
- Cloud Functions: Function code and configuration
- Cloud Run: Service code and configuration
- Cloud Storage: Storage bucket files
- Static Website Hosting: Hosted files
- WeDa Applications: Low-code applications
Pre-migration Preparation
Before starting the migration, please ensure:
- Confirm Target Environment: The target CloudBase environment has been created and the environment ID has been obtained
- Permission Check: Ensure you have the corresponding operation permissions in both the source and target environments
- Install CLI Tool (Optional): Some migration operations require the use of CloudBase CLI Tool
⚠️ Important Note:
- The migration process will not automatically delete data from the source environment, so you can operate with confidence
- Some resources (such as database permissions, indexes) need to be manually reconfigured in the target environment
Document Database Migration
Document database supports two data organization methods, and the migration methods differ accordingly:
Method 1: Data Model Migration
If you created data sources through "Data Models", you only need to export and import the data model table structure and data, which is simple and efficient.
1. Export Data Model
- Visit CloudBase Platform/Document Database/Data Model
- Select the data model to be migrated
- Export Data:
- Switch to the "Manage Data" tab
- Click "Batch Export Data" and select "All Data"
- If the data volume exceeds 100,000 records, you need to export in batches (single export limit is 100,000 records)
- Export Model Configuration:
- Switch to the "Configure Model" tab
- Click the "Export Model Configuration" button
2. Import Data Model
- Enter the target environment's Data Model Management Page
- Import in reverse order of export:
- First import "Model Configuration"
- Then import "Data"
⚠️ Relational Field Considerations:
If your data models contain relational fields (such as many-to-one or one-to-many), you must import them in dependency order, otherwise errors will occur:
- Referenced models: Must be imported first (e.g., User model)
- Models with relational fields: Import later (e.g., Order model referencing User)
Example: If the Order model has a "User" field (many-to-one relationship with User model), the import order should be:
- First import the "User" model
- Then import the "Order" model
Method 2: Data Collection Migration
If you directly created collections for operations, you need to export collection data.
1. Export Collection Data
- Visit CloudBase Platform/Document Database/Collection Management
- Select the collection to be exported and click the "Export" button
- Export Format: Select JSON format (required)
- If the exported data file exceeds 50 MB, you need to export in batches:
- It is recommended to export in batches based on fields such as creation time
- Ensure that a single data file is less than 50 MB
2. Import Collection Data
- Enter the target environment's collection management page
- Create a collection with the same name (if it doesn't exist)
- Select the collection, click the "Import" button, and upload the exported JSON file
⚠️ Note:
- Database permission rules need to be manually reconfigured in the target environment
- Database indexes need to be manually recreated in the target environment
- It is recommended to migrate a small amount of data for testing first, and then migrate in batches after confirming there are no errors
MySQL Database Migration
MySQL database also supports two migration methods. Choose the corresponding migration method based on your data organization method.
Method 1: Data Model Migration
If you created data sources through "Data Models", you can use the data model's import and export functions for migration.
Operation steps refer to Document Database/Data Model Migration, the process is exactly the same.
Method 2: Data Table Migration
If you directly created data tables for operations, you need to export and import through the DMC database management platform.
1. Export Data Tables
- Visit CloudBase Platform/MySQL Database/Database Settings
- Create a database account in the "Account Management" module (skip if already created)
- Click the "Database Management" button to enter the DMC database management platform
- Perform data export operations in the DMC platform
For detailed import and export operation methods, please refer to MySQL Database/DMC Database Management/Import and Export
2. Import Data Tables
- Enter the target environment's DMC database management platform
- Use the import function to upload the exported data file
⚠️ Note:
- Database permission rules need to be manually reconfigured in the target environment
- Database indexes need to be manually recreated in the target environment
- Before importing, please ensure that the target database has sufficient storage space
Cloud Functions Migration
Cloud function migration includes migration of function code and configuration, supporting both console operations and CLI commands.
Method 1: Console Operations
1. Export Cloud Function Code
- Visit CloudBase Platform/Cloud Functions
- Click the "Function Name" to be migrated to enter the function details page
- Switch to the "Function Code" tab
- In the "Grayscale Configuration" area below, select the
$LATESTversion - Click the "Download" button to download the function code package (
.zipformat)
2. Import Cloud Function Code
- Enter the target environment's Cloud Functions Management Page
- Click "Create Cloud Function"
- Select "Create from Code Package" method
- Upload the exported code package (
.zipfile) - Configure the function's runtime environment, memory, timeout, and other parameters
- Click "Complete" to create the function
💡 Tip: If the function uses environment variables, they need to be reconfigured in the target environment.
Method 2: CLI Command Operations
Using CLI tools can more efficiently migrate cloud functions in batches.
1. Download Cloud Function Code
Use CLI commands to download function code:
# Download to default directory
tcb fn code download <functionName>

# Download to specified directory
tcb fn code download <functionName> <destPath>
Example:
# Download login function to current directory
tcb fn code download login

# Download to specified directory
tcb fn code download login ./functions/login
For detailed instructions, please refer to CLI/Cloud Function Code Management
2. Deploy Cloud Function Code
Deploy cloud functions in the target environment:
# Deploy specified function
tcb fn deploy <functionName>

# Deploy all functions in the functions directory
tcb fn deploy
Example:
# Switch to target environment
tcb env:switch <target environment ID>

# Deploy function
tcb fn deploy login
For detailed instructions, please refer to CLI/Cloud Function Deployment
⚠️ Note:
- Before migration, please confirm whether the function's runtime version is supported in the target environment
- Function triggers need to be reconfigured in the target environment
- Function environment variables need to be reset in the target environment
Cloud Run Service Migration
Cloud Run service migration requires exporting service code and then redeploying in the target environment.
Method 1: CLI Command Export
1. Export Cloud Run Code
Use CLI commands to download Cloud Run service code:
tcb cloudrun download -s <service name> --targetPath <target path> --force
Parameter Description:
-s: Specify the service name to download--targetPath: Specify the local path to save the code--force: Force overwrite existing files
Example:
# Download api-service to ./cloudrun/api-service directory
tcb cloudrun download -s api-service --targetPath ./cloudrun/api-service --force
For detailed instructions, please refer to CLI/Cloud Run Code Management
2. Deploy to Target Environment
Method 1: Console Upload Code Package
- Enter the target environment's Cloud Run Management Page
- Create a new Cloud Run service
- Select "Create from Code Package" method
- Upload the exported code package (
.zipformat) - Configure the service's CPU, memory, instance count, and other parameters
- Complete creation and deployment
Method 2: CLI Command Deployment
# Switch to target environment
tcb env:switch <target environment ID>

# Execute deployment command in the service code directory
cd ./cloudrun/api-service
tcb cloudrun deploy
For detailed instructions, please refer to CLI/Cloud Run Code Deployment
⚠️ Note:
- Cloud Run service environment variables need to be reconfigured in the target environment
- Service access paths and domain name configurations need to be reset
- Ensure that the target environment has sufficient quota to support the new service's operation
Cloud Storage File Migration
Cloud storage uses Tencent Cloud Object Storage (COS) as the underlying storage service. Files can be migrated through COS data migration tools. For migration methods, please refer to Migrate Data to Cloud Storage. Below is an example of using the cloud migration tool:
Migration Steps
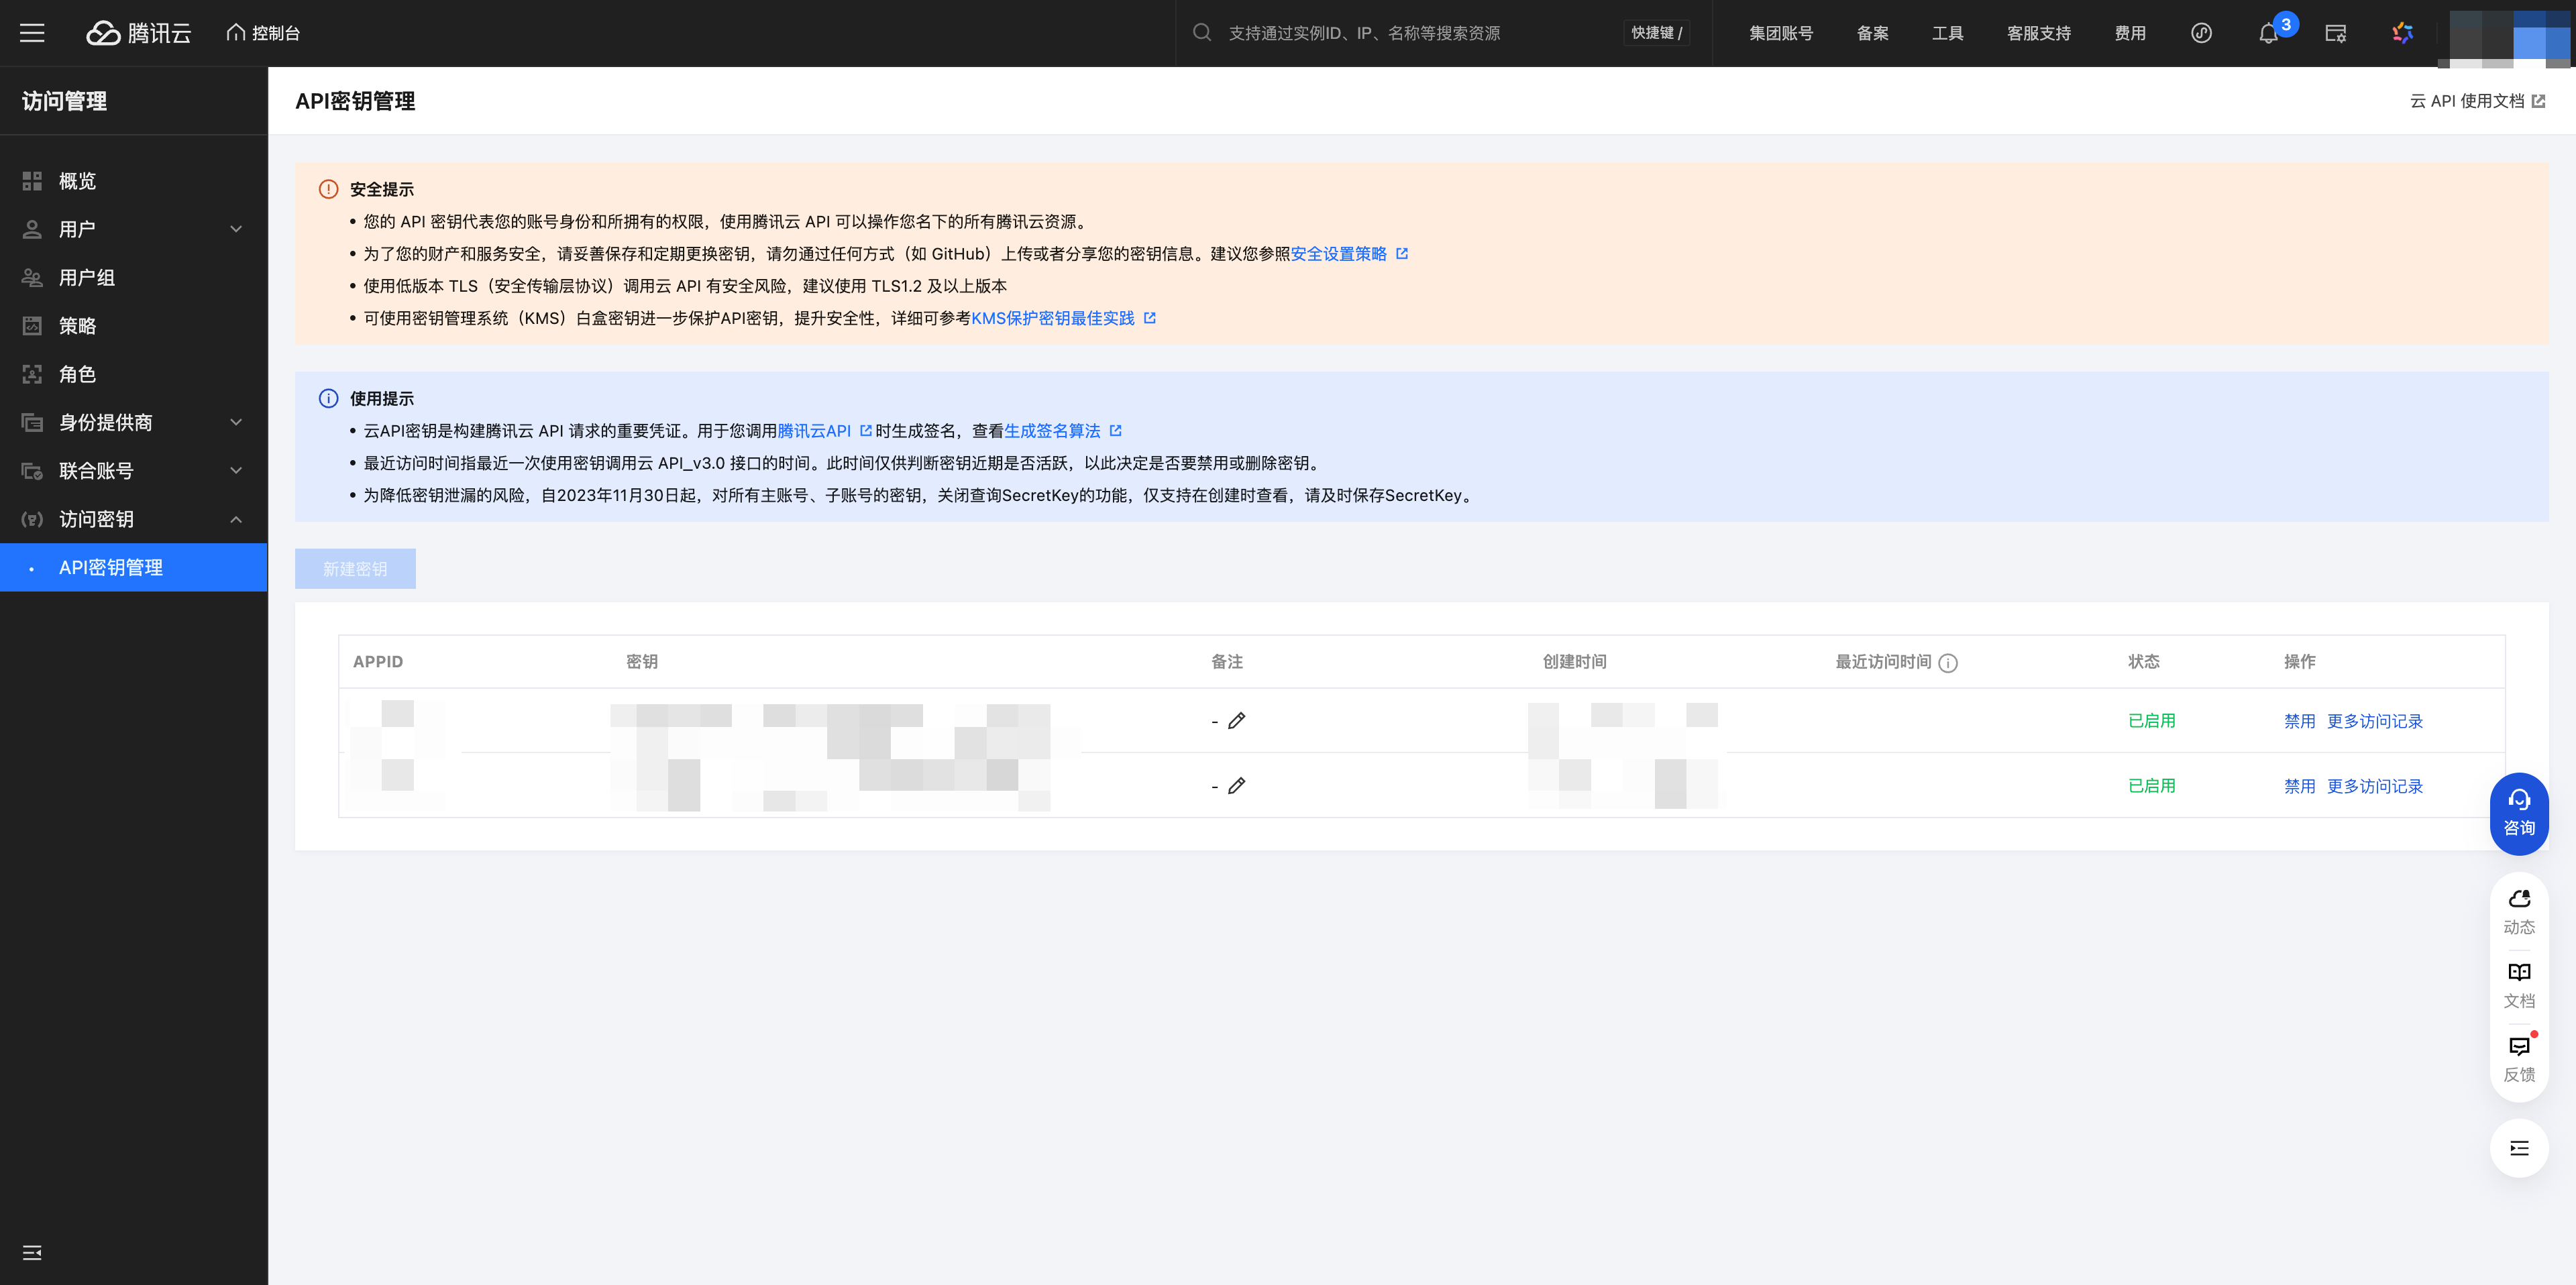
1. Obtain Key Parameters
-
Log in to the Tencent Cloud account corresponding to the environment
-
Obtain the Tencent Cloud account's SecretId, SecretKey, appid
In the Tencent Cloud console Account/Access Management/Access Key, create a new API key and record it properly. Also note that the account used is an administrator account or an account with COS management permissions. Also record the appid
2. Obtain Bucket Parameters
- Log in to CloudBase/Cloud Storage to get the bucket name
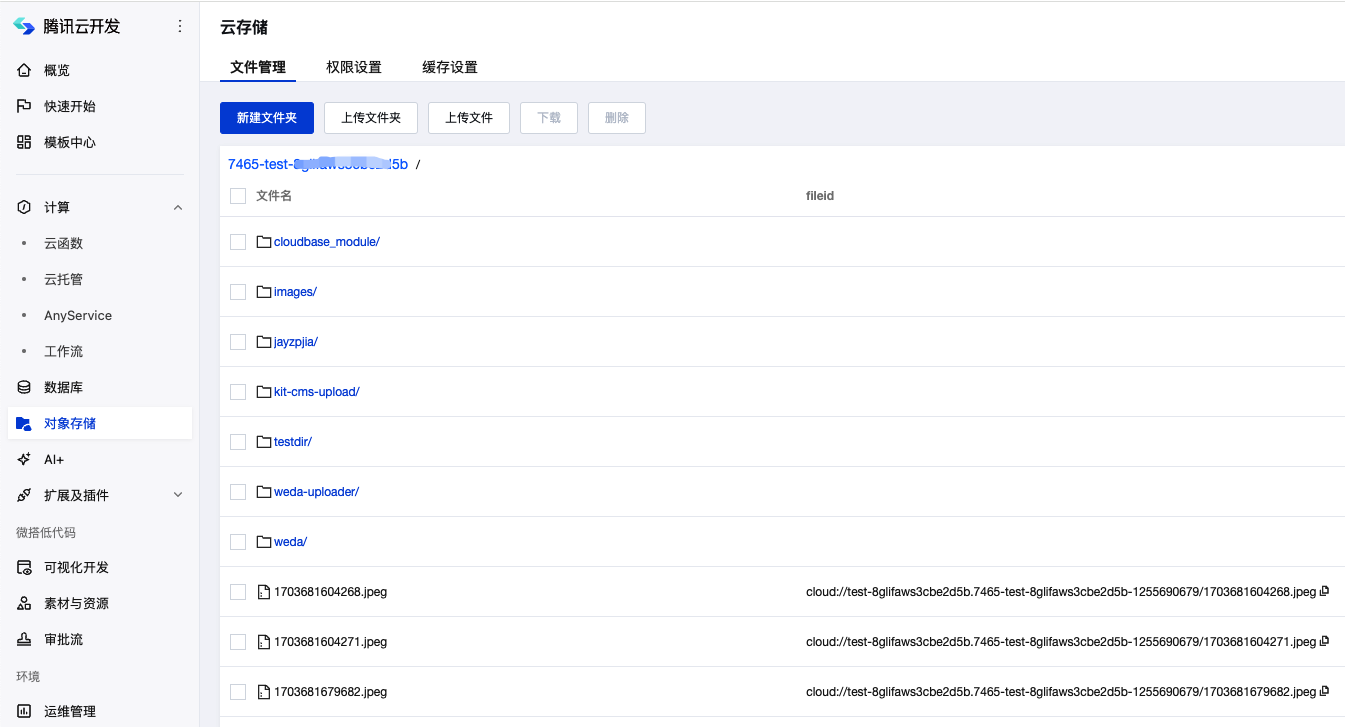
- Concatenate the obtained bucket name with "-appid", for example:
    Bucket name test-8glifaws3cbexxxx
    appid 1255690679
    -------------------------
    Concatenated bucket name is test-8glifaws3cbexxxx-1255690679
3. Execute Data Migration
For details, refer to the Data Migration Between COS document
- Log in to Cloud Migration Console
- Click "Object Storage Migration" in the left navigation bar to enter the object storage migration page
- Click "Create Task" to create a migration task and configure task information
- Start the task
⚠️ Note: For the migration bucket name, select "Enter source bucket name", and obtain the name from step 2
Static Website Hosting Migration
Static website hosting also uses Tencent Cloud Object Storage (COS) service, and the migration method is similar to cloud storage.
Migration Steps
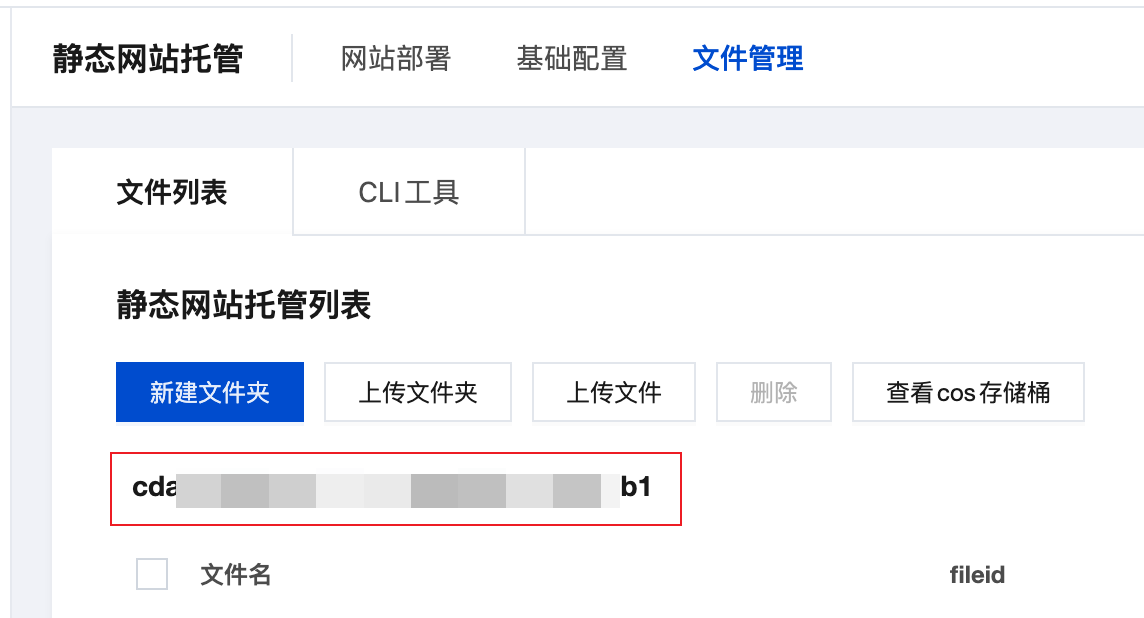
1. View Source Environment Hosting Bucket Name
- Visit CloudBase Platform/Static Website Hosting/File Management
- Record the "Bucket Name" displayed on the page
2. Execute Data Migration
Refer to the Data Migration Between COS document for file migration.
3. Reconfigure Domain Name (if applicable)
If you have configured a custom domain name for static website hosting, you need to reconfigure the domain name in the target environment:
- Enter the static website hosting settings of the target environment
- Add a custom domain name
- Configure DNS resolution to point the domain name to the target environment
⚠️ Note:
- After migration, you need to reconfigure custom domain names and SSL certificates
- If CDN acceleration is used, it needs to be reconfigured in the target environment
WeDa Application Migration
WeDa low-code applications support migration through templates.
Migration Steps
1. Export WeDa Application Template
- Visit CloudBase Platform/WeDa Low-Code/Custom Template Management
- Click the "Create" button to create a new template
- Enter the "Template Details" page and add the application resources to be exported
- Return to the template list page and click the "Export" button for the corresponding template
- Select "Export Standardized Deployment Package"
- In "Template Details", switch to the "Version" tab
- Click the "Download" button for the latest version to download the deployment package
2. Import to Target Environment
- Enter the target environment's WeDa Low-Code Console
- Use the downloaded deployment package to create a new application
- Configure the application's related parameters and resource bindings
- Publish the application