Backend Management System Development Guide
Preface
This tutorial will guide you to use the Cloud Development Platform, follow the steps in the tutorial, and in just 5 minutes, you can implement a complete backend management system from scratch.
Target Result:
Through this tutorial, you will learn:
✅ Three Core Capabilities
- Data Model Design and Implementation
- Building Management System Pages
- Permissions and Layout Configuration
Before starting, it is recommended to clarify:
- Data Management Objects (such as products/orders/users)
- Core Feature Pages (such as data list/form)
- Usage Scenarios (e.g., PC-side management/data display)
Additionally, a complete backend system should also include features such as login authentication and user permission management. This tutorial will follow the development process step by step:

Designing the Data Model Based on Requirements
A data model is like a table, used to store and manage your data. You can think of it as an Excel sheet, where each column represents a field, and each row represents a piece of data.
Design the Data Model
Below are the simple steps for designing the data model:
-
Define the Purpose of the Table
First, clarify what this table is used for. For example:
- If it is for managing user information, the table can be named User Table
- If it is for managing product information, the table can be named Product Table
-
Design Fields (Columns)
Fields are the columns of a table, used to store different types of data. Common field types in the Cloud Development Platform include:
- Text: Used to store text, such as name, address
- Number: Used to store numerical values, such as age, price
- Date: Used to store time information, such as registration time, birthday
- Boolean: Used to store "Yes/No" or "True/False", such as activation status.
- Enum: Used to store fixed options, such as status (Pending, Completed).
Example: We can design a Product Table as follows:
| Field Name | Field Type | Description |
|---|---|---|
| Product Name | Text | The name of the product |
| Product Price | Number | The unit price of the product |
| Inventory Quantity | Number | The inventory quantity of the product |
| Product Category | Text | The category of the product |
| Product Description | Text | The detailed description of the product |
| Product Image | Text/Image | The URL of the product image |
| Product Status | Enum | The status of the product (On Shelf/Off Shelf) |
Create the Data Model
Cloud Development Platform provides multiple types of databases to meet diverse development needs:
| Database Type | Description |
|---|---|
| Document | Uses CloudBase's default document database, suitable for rapid development, and supports database operation methods |
| MySQL Type | Uses Cloud Development's MySQL database, supports structured data development, and allows direct use of native SQL commands |
| Self-managed MySQL | Connect to self-managed MySQL databases; simply ensure the database is accessible via public network to use it. |
If you are unsure which database type to select, use the default configuration.
Given that the current business scenario is a Management System, it is more recommended to select the mysql Type database.
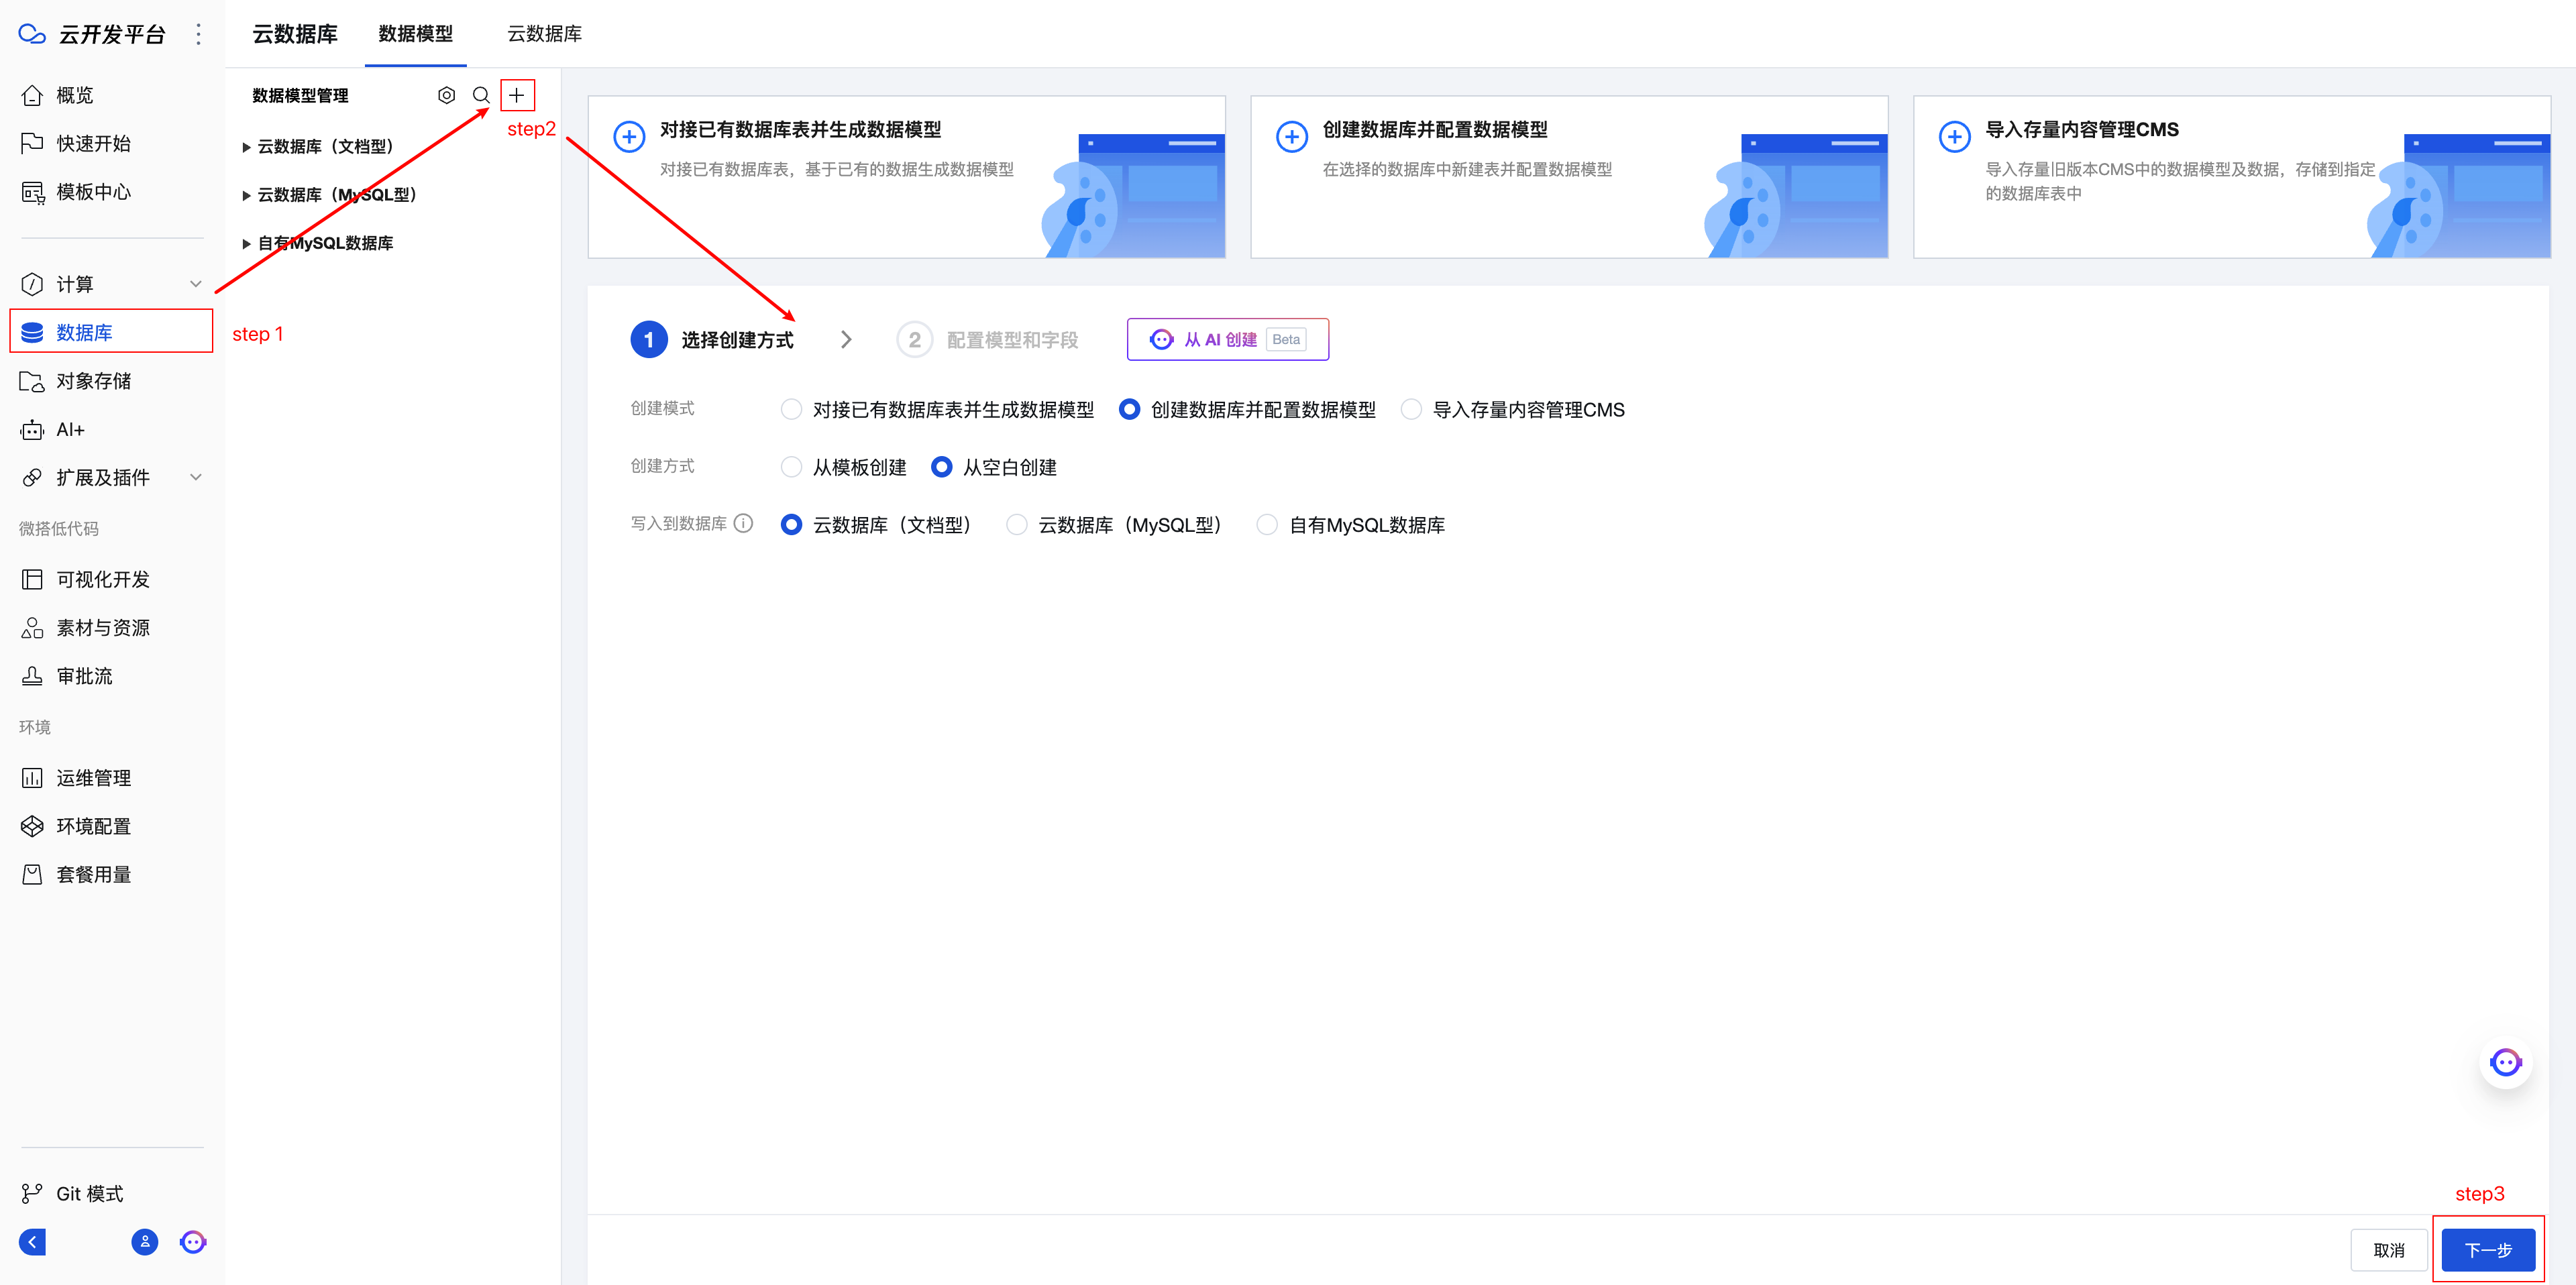
Manual Creation
-
In the Cloud Development Platform, select the Database module and click the "Add" button to start creating a data model.
-
Select the database type and click "Next"
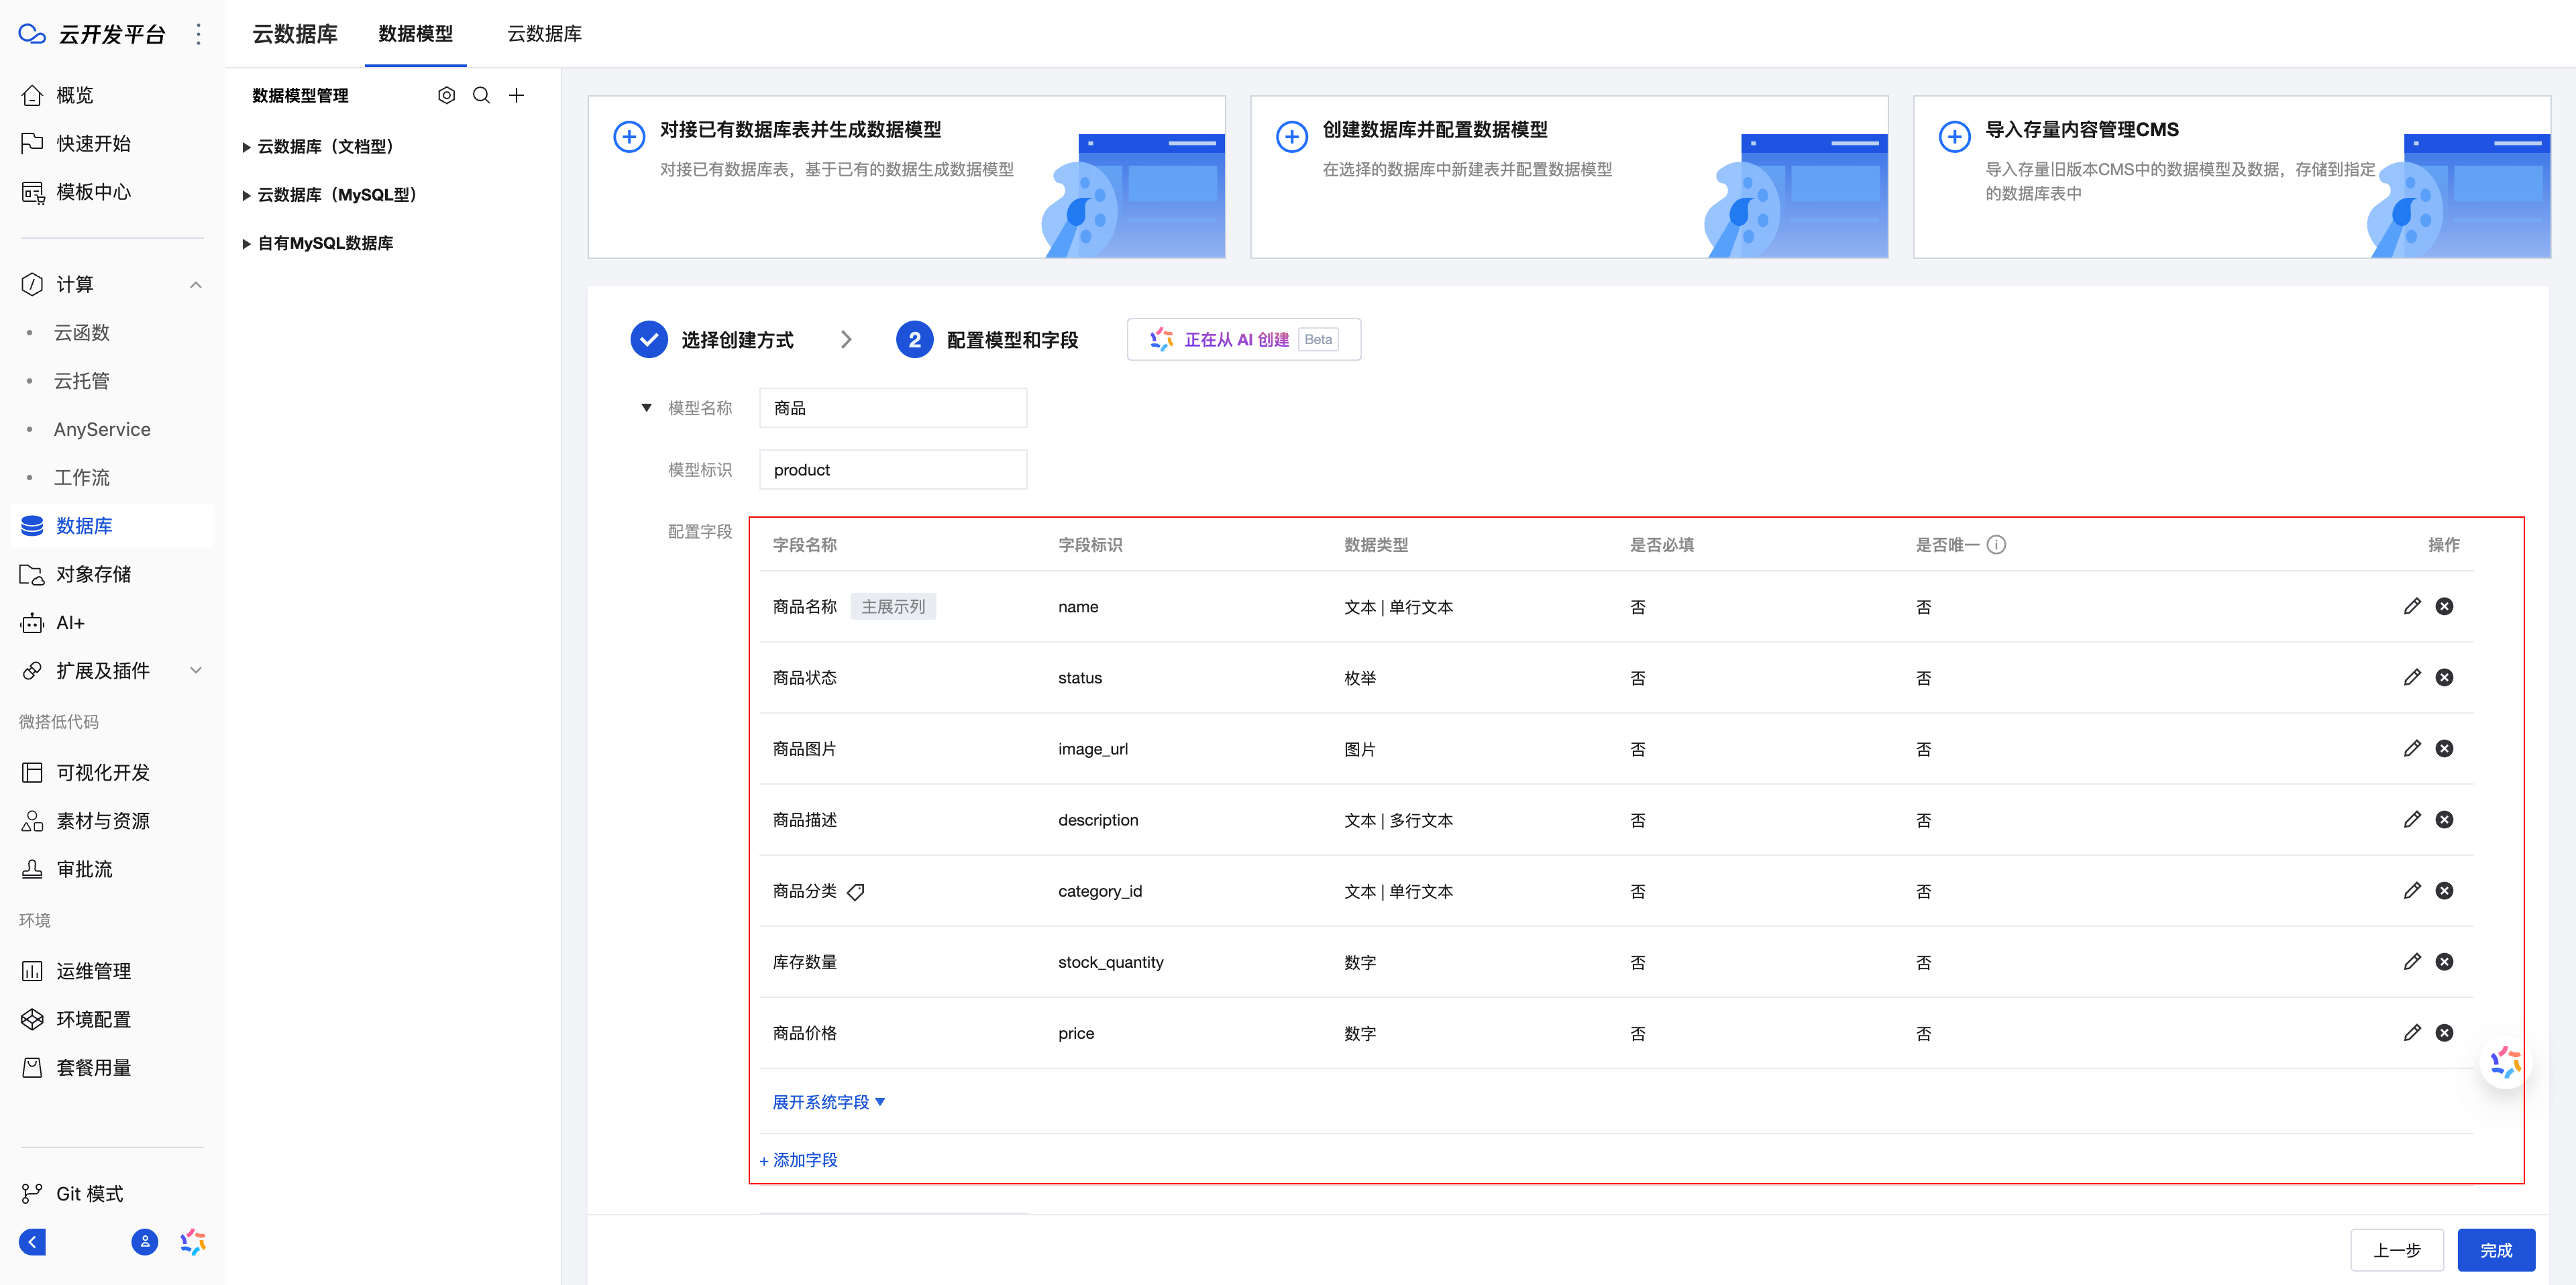
- Enter the Model Name, add Model Fields, and click "Complete" to finish the creation
Product Table Example:
AI Creation
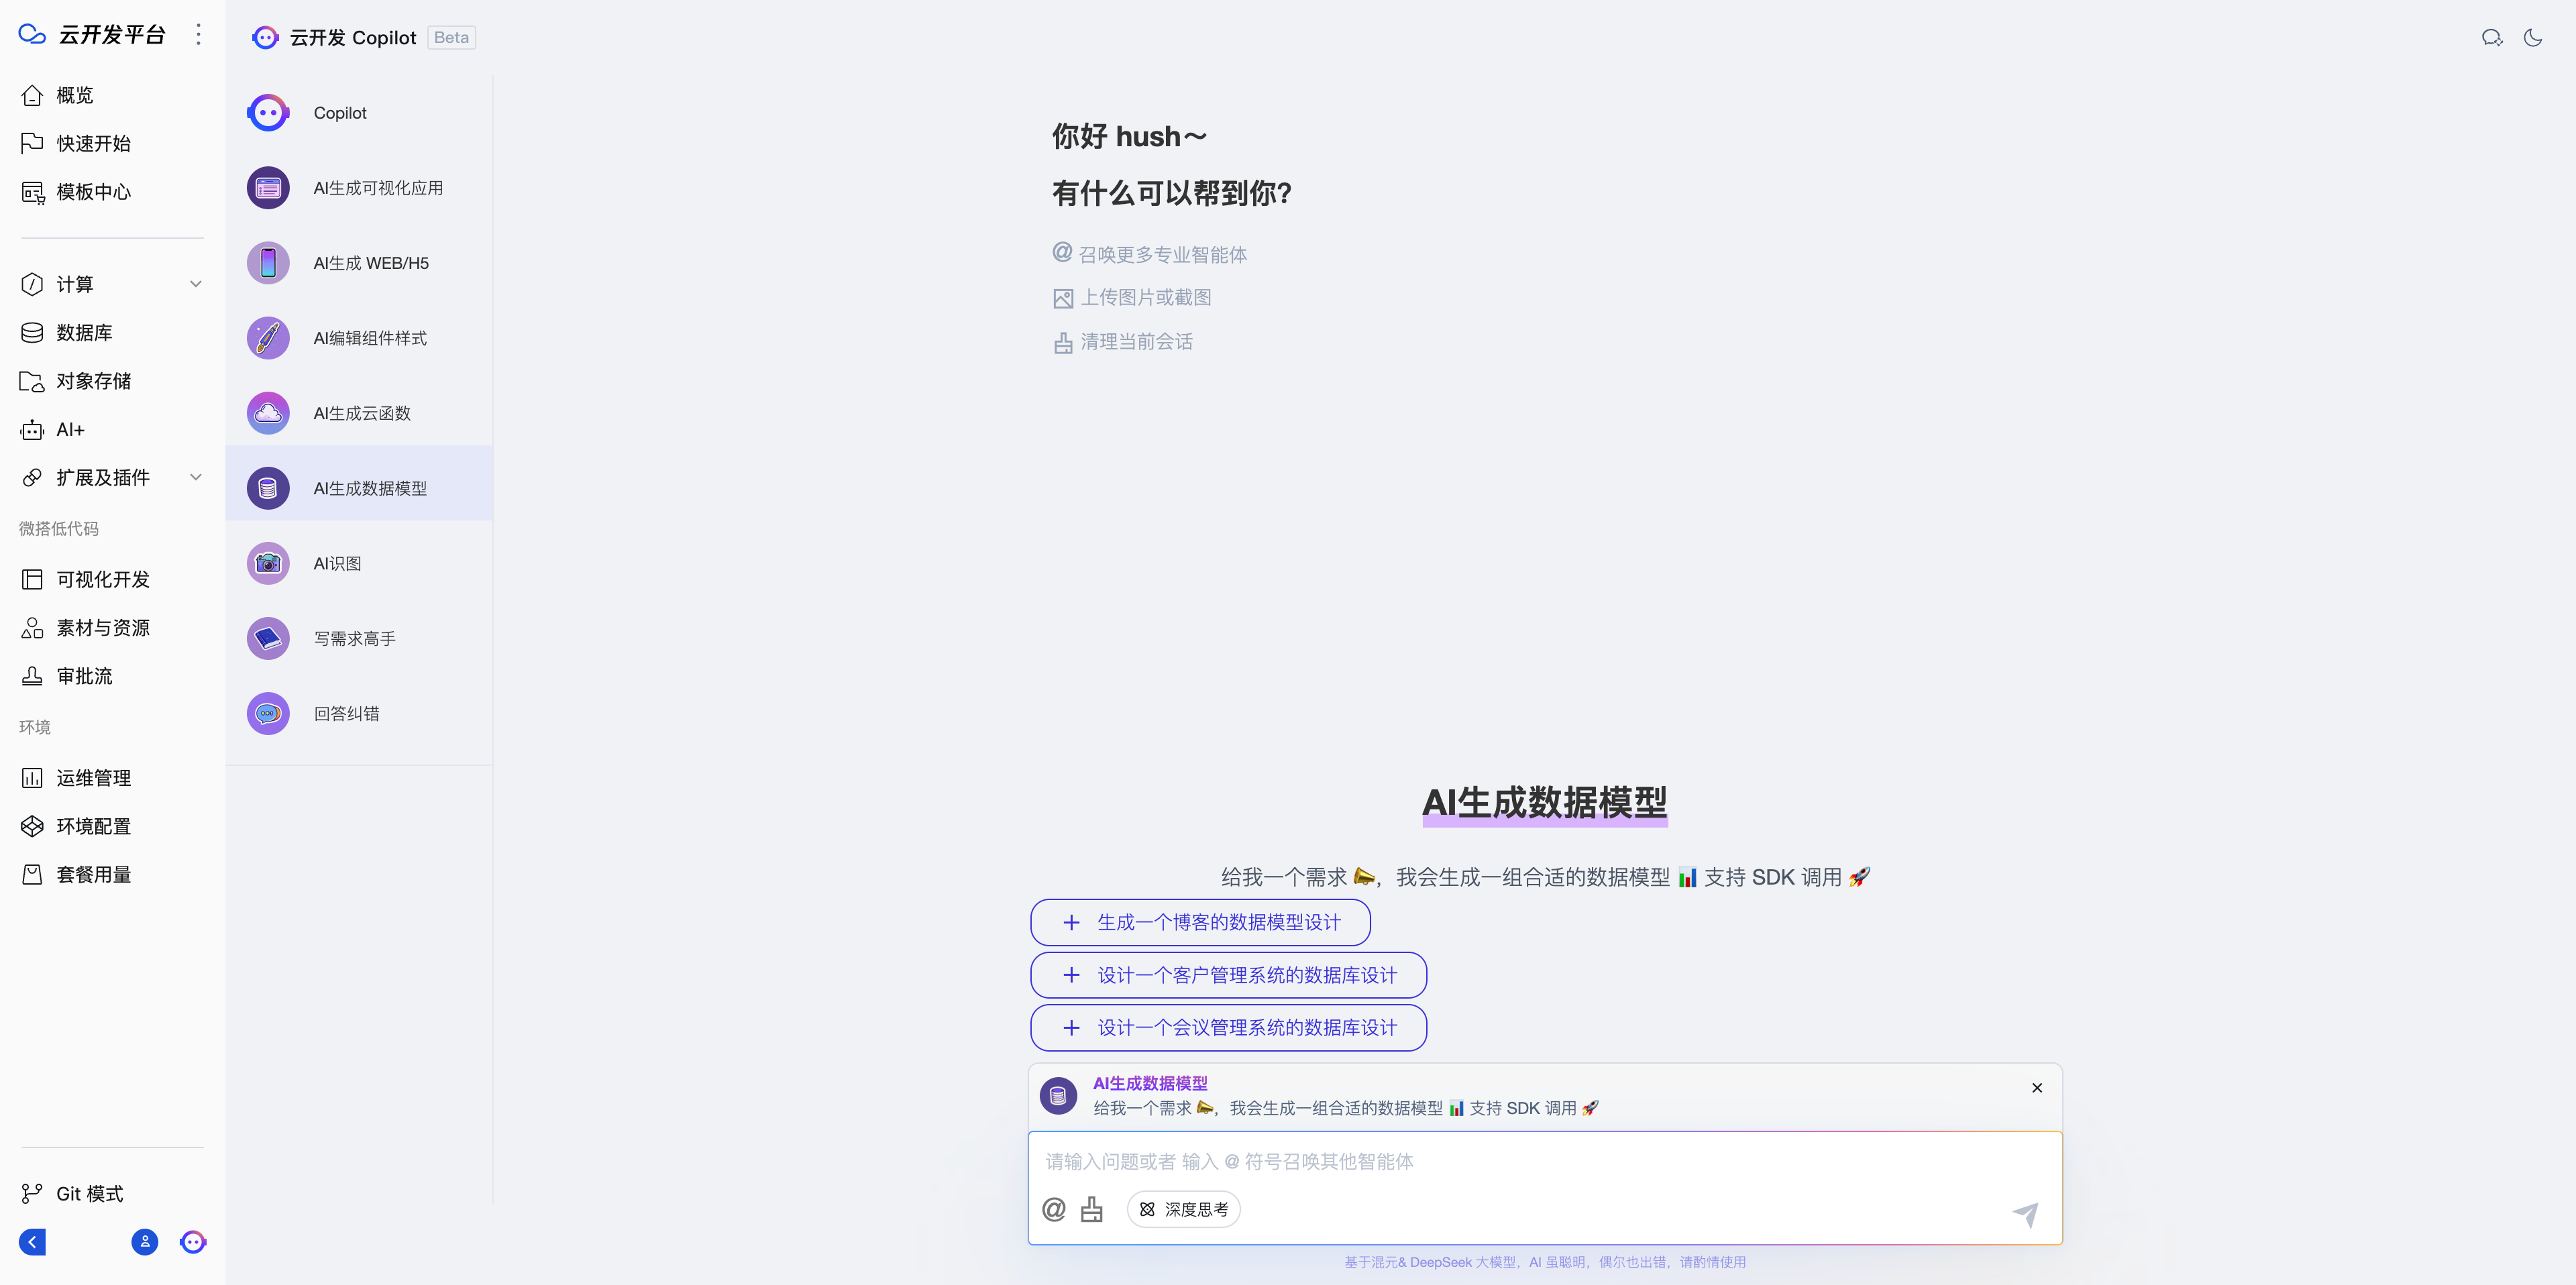
Cloud Development Platform also supports quickly generating data models via AI:
- Directly describe your requirements, AI will generate the corresponding data model based on the scenario.
- Alternatively, you can copy Excel spreadsheet data to the AI to quickly generate a matching data model
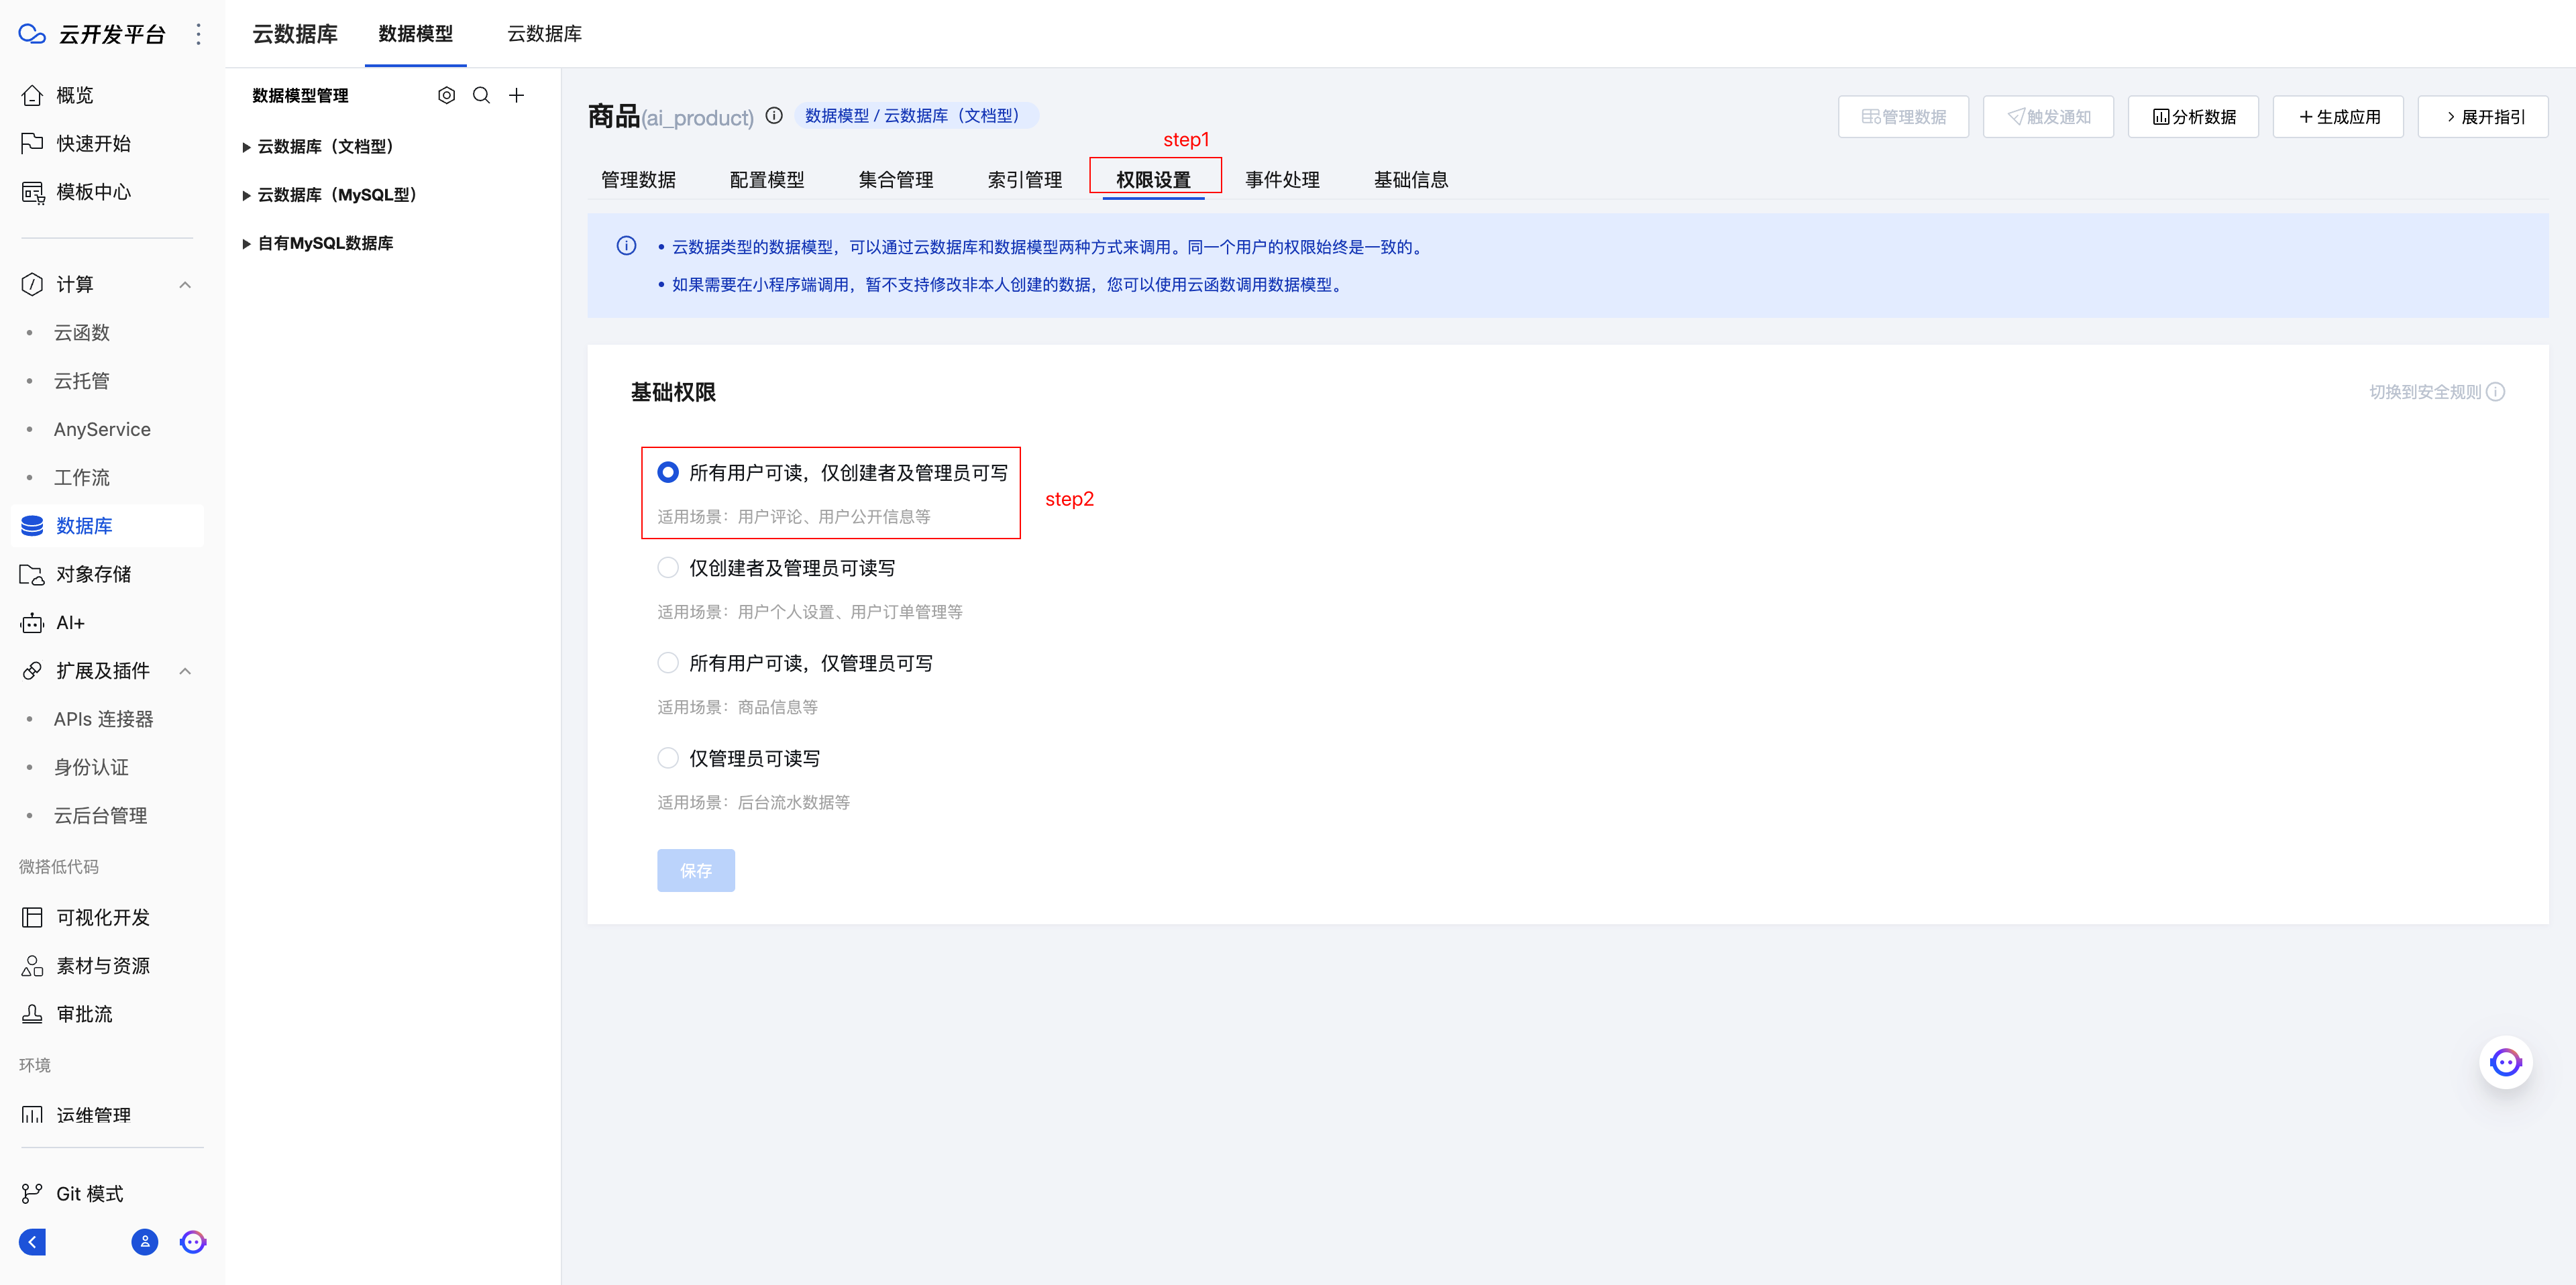
⚠️ Caution
After creation, the default permissions for a data model are "read and write access only for the creator and administrators". If you want the data to be readable by everyone, you need to set the permissions to "readable by all users, writable only by the creator and administrators".
Management Page Implementation
Quick Creation
Based on the requirements of the management system, we recommend using the Quick Creation method. The specific steps are as follows:
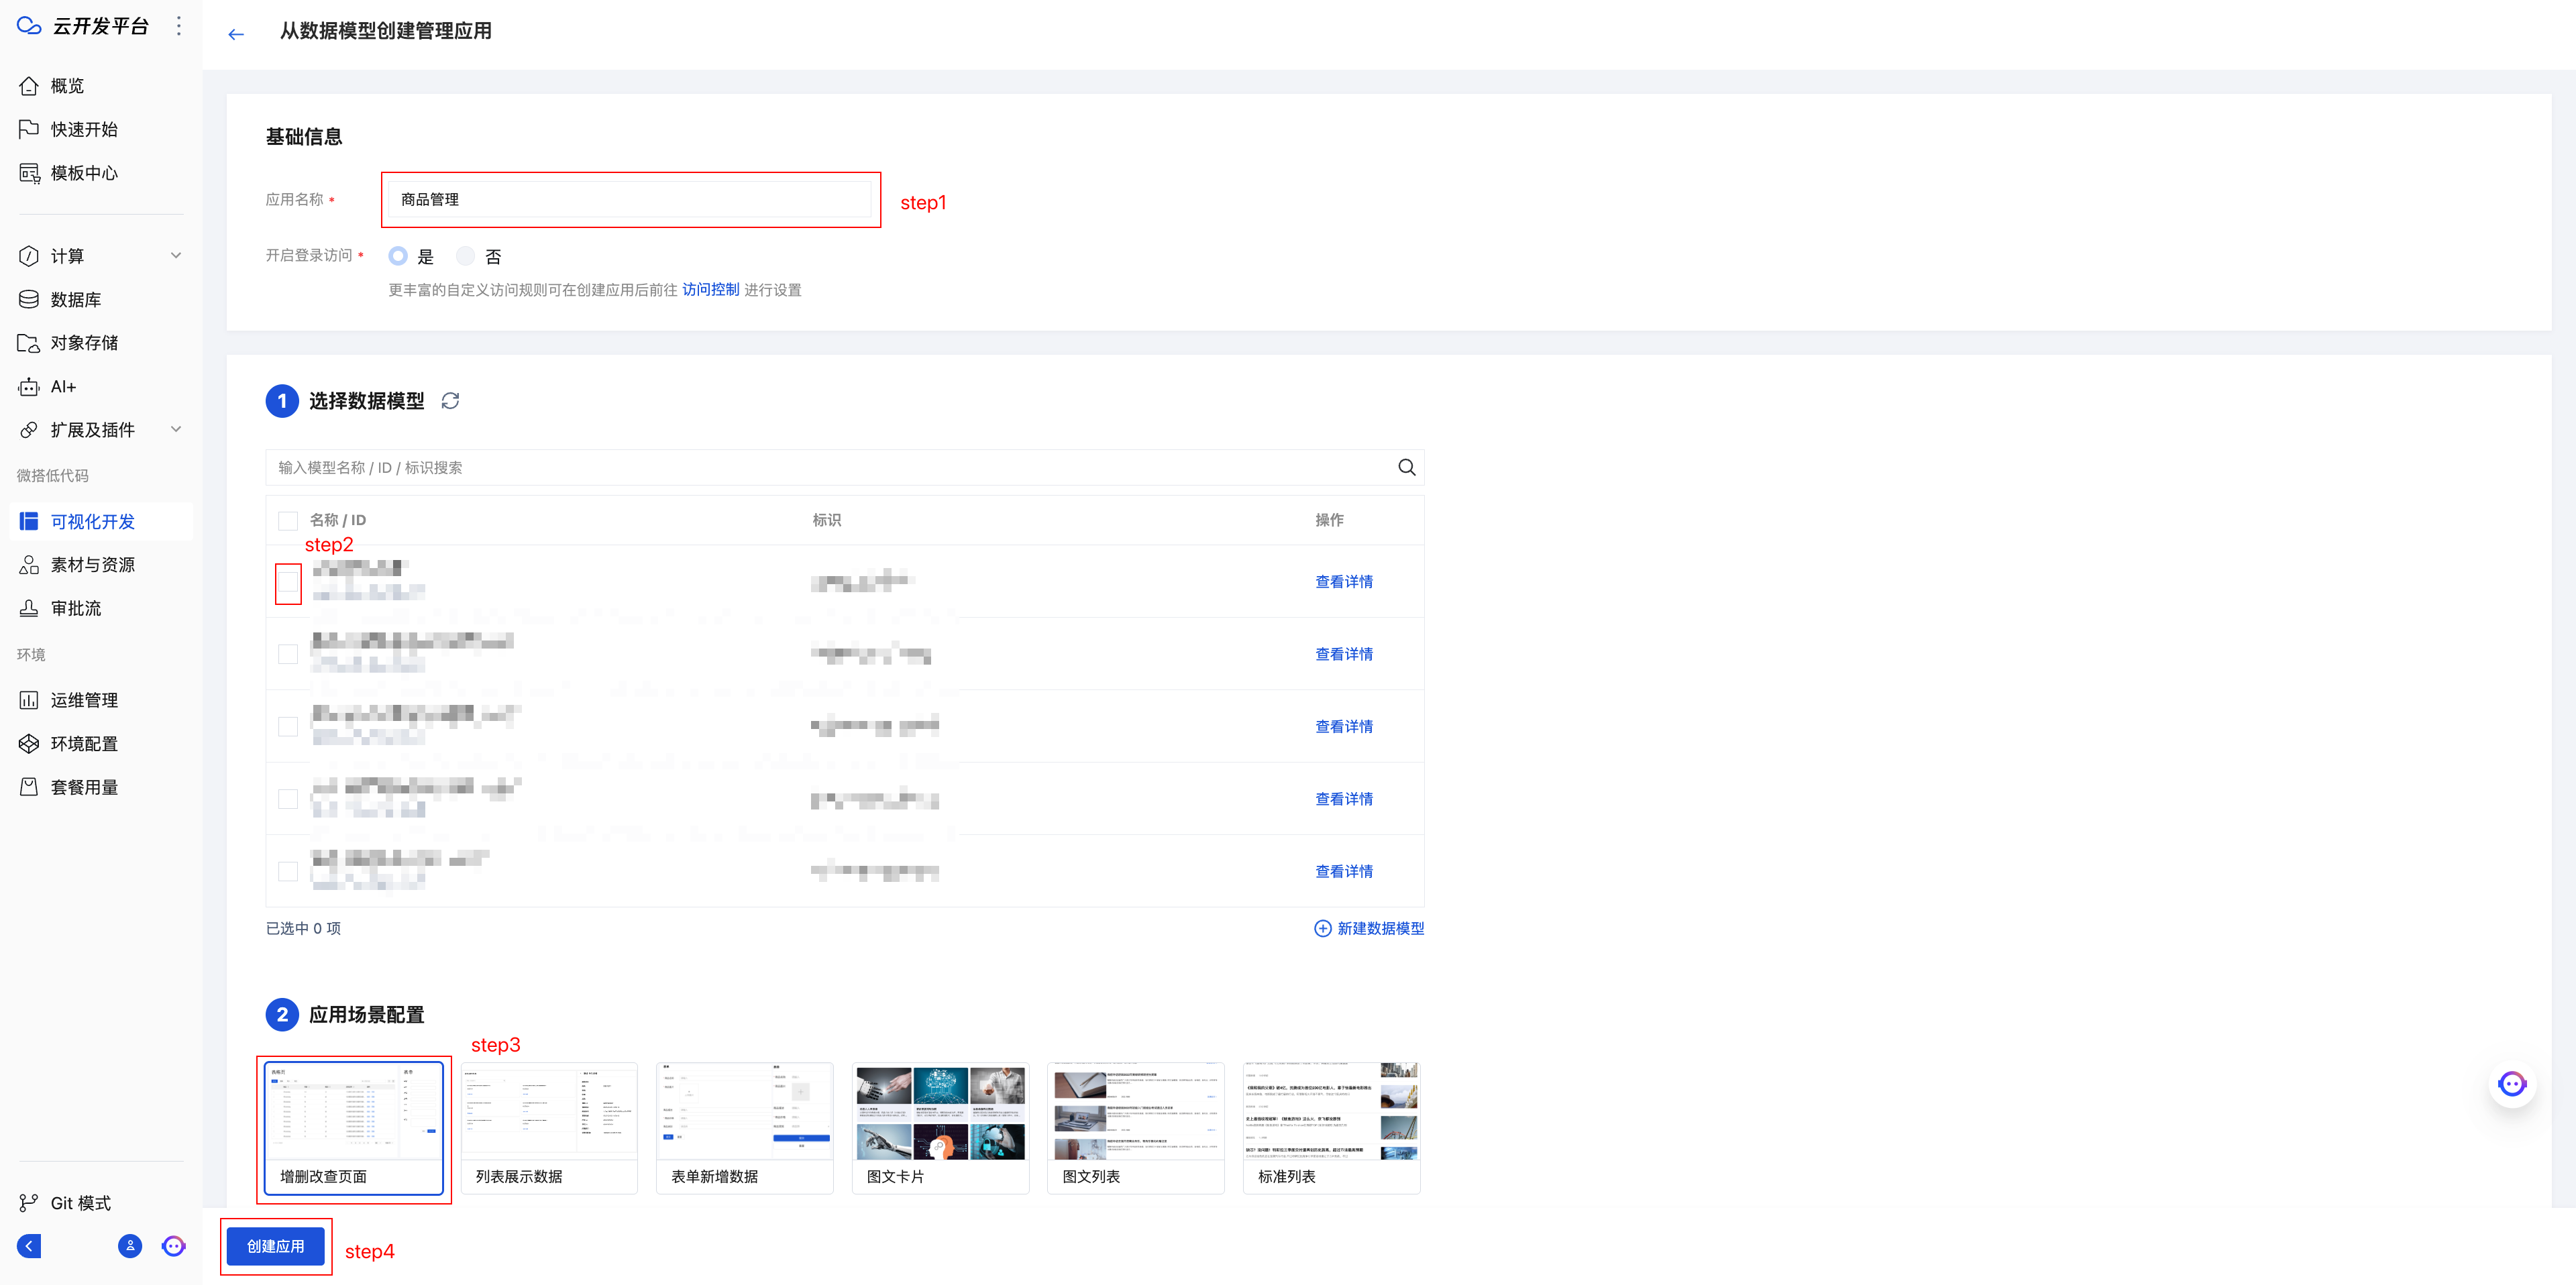
- Open the Cloud Development Platform, select the Visual Development module, switch to 'Management Applications', and click 'Create from Data Model'.
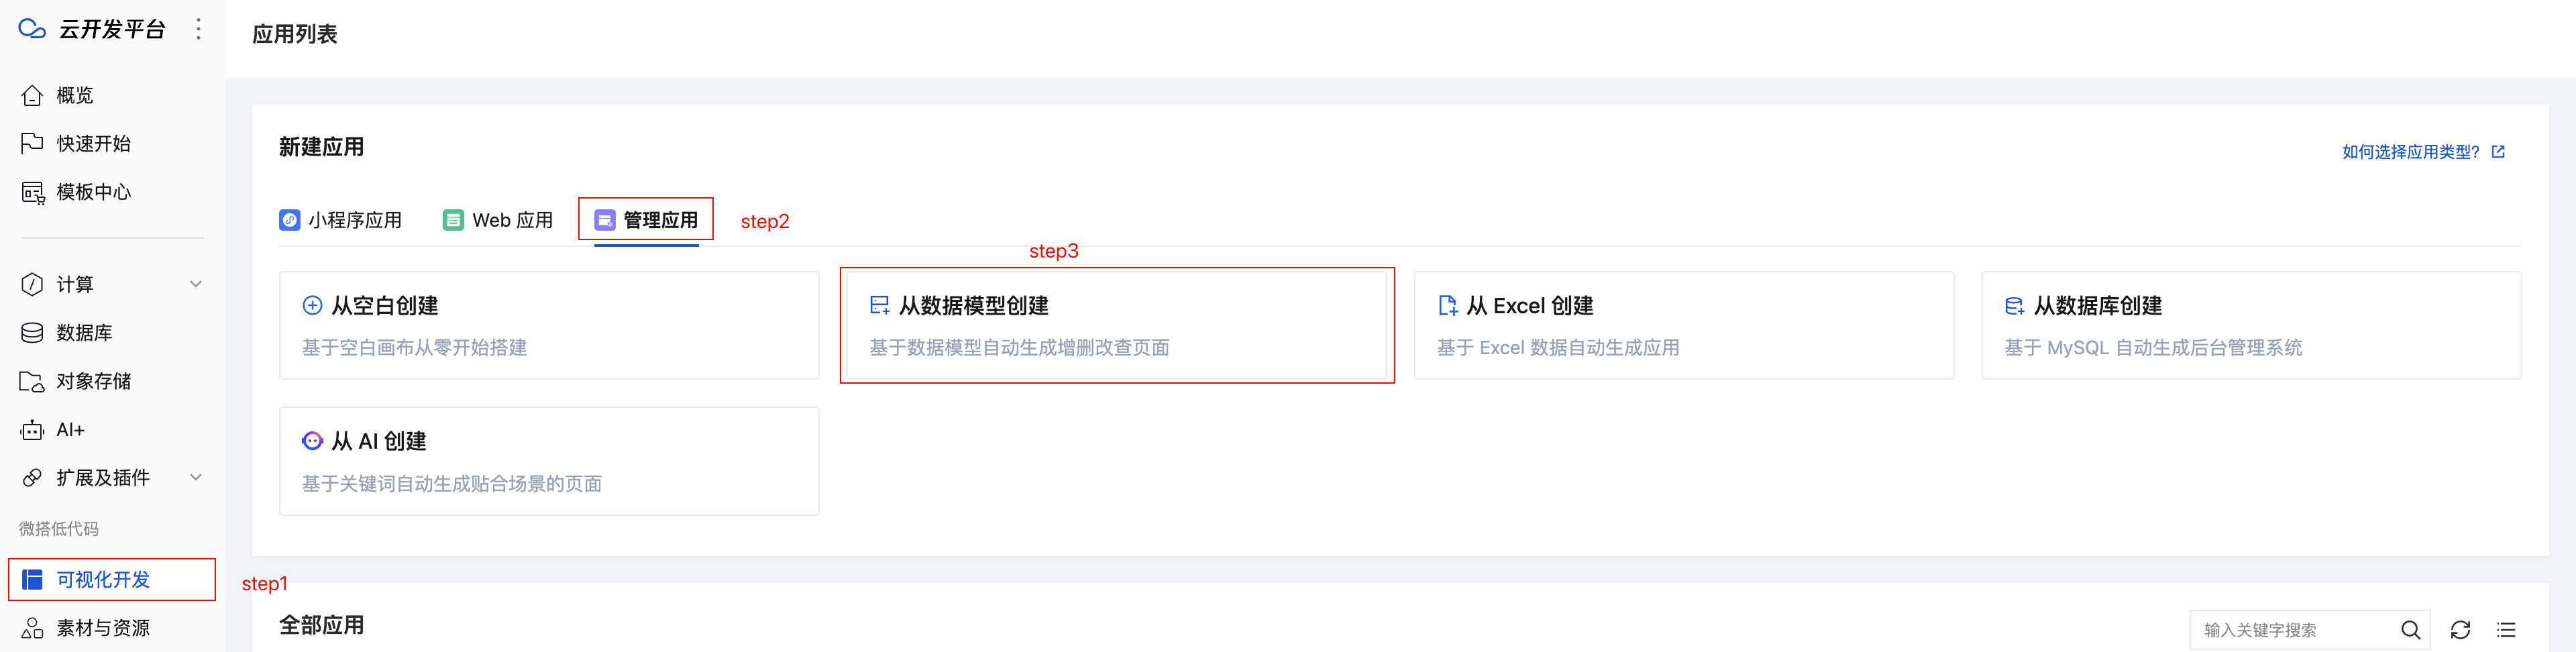
- Fill in the application name, select the data model, select the CRUD page for the application scenario, then quickly generate the management system.
Page Preview
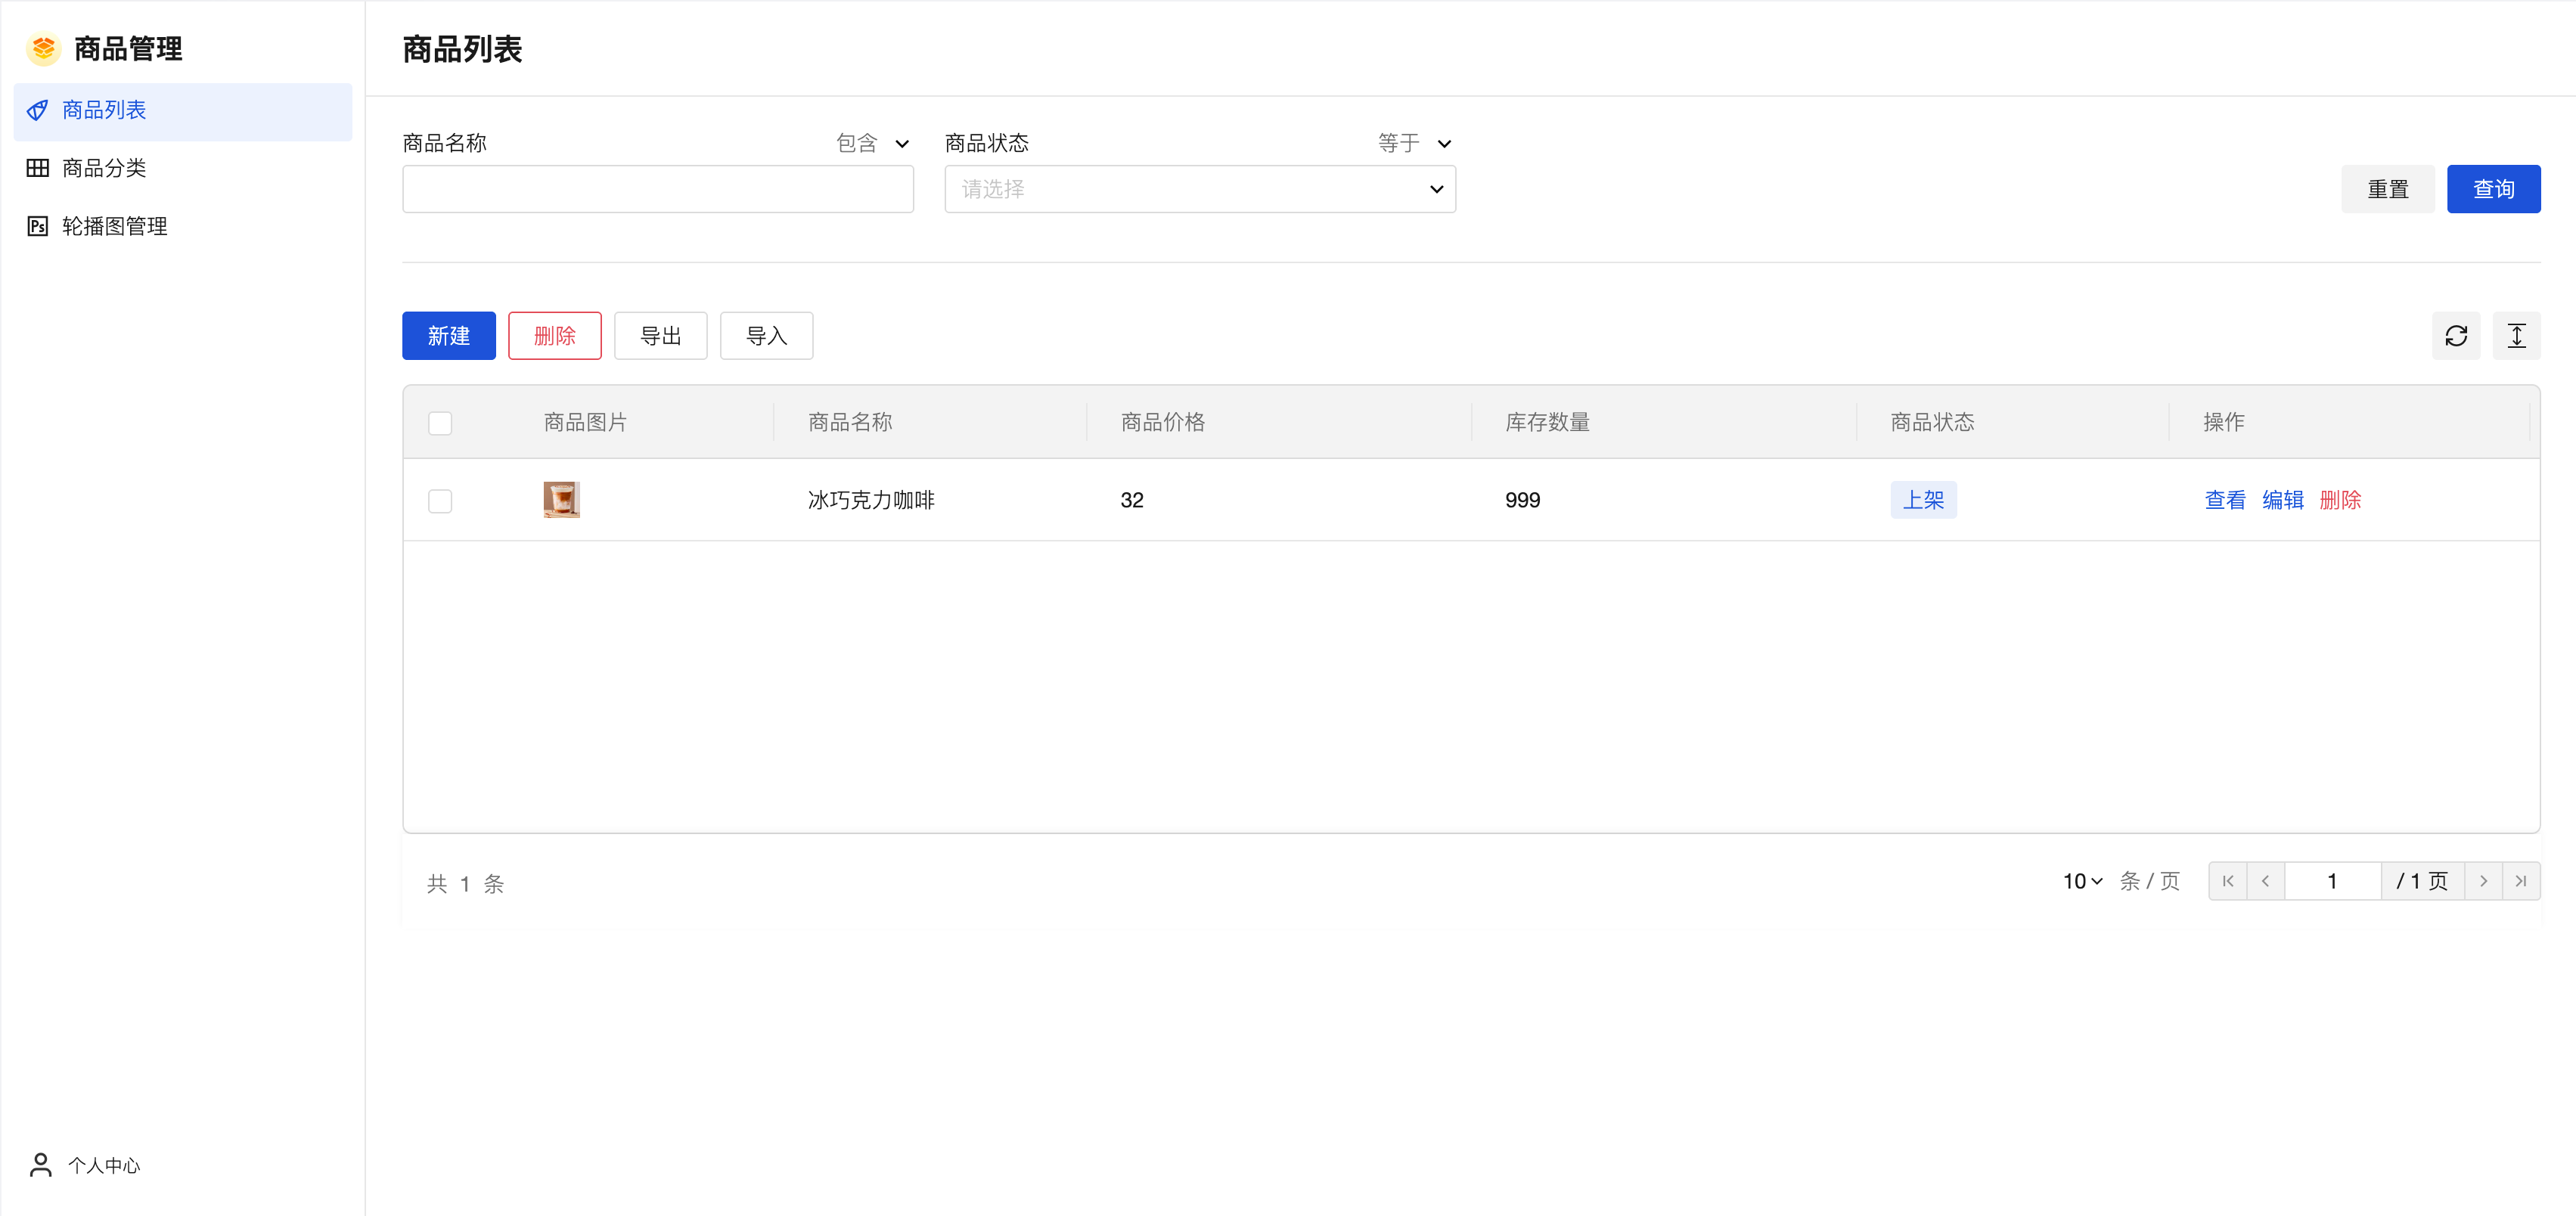
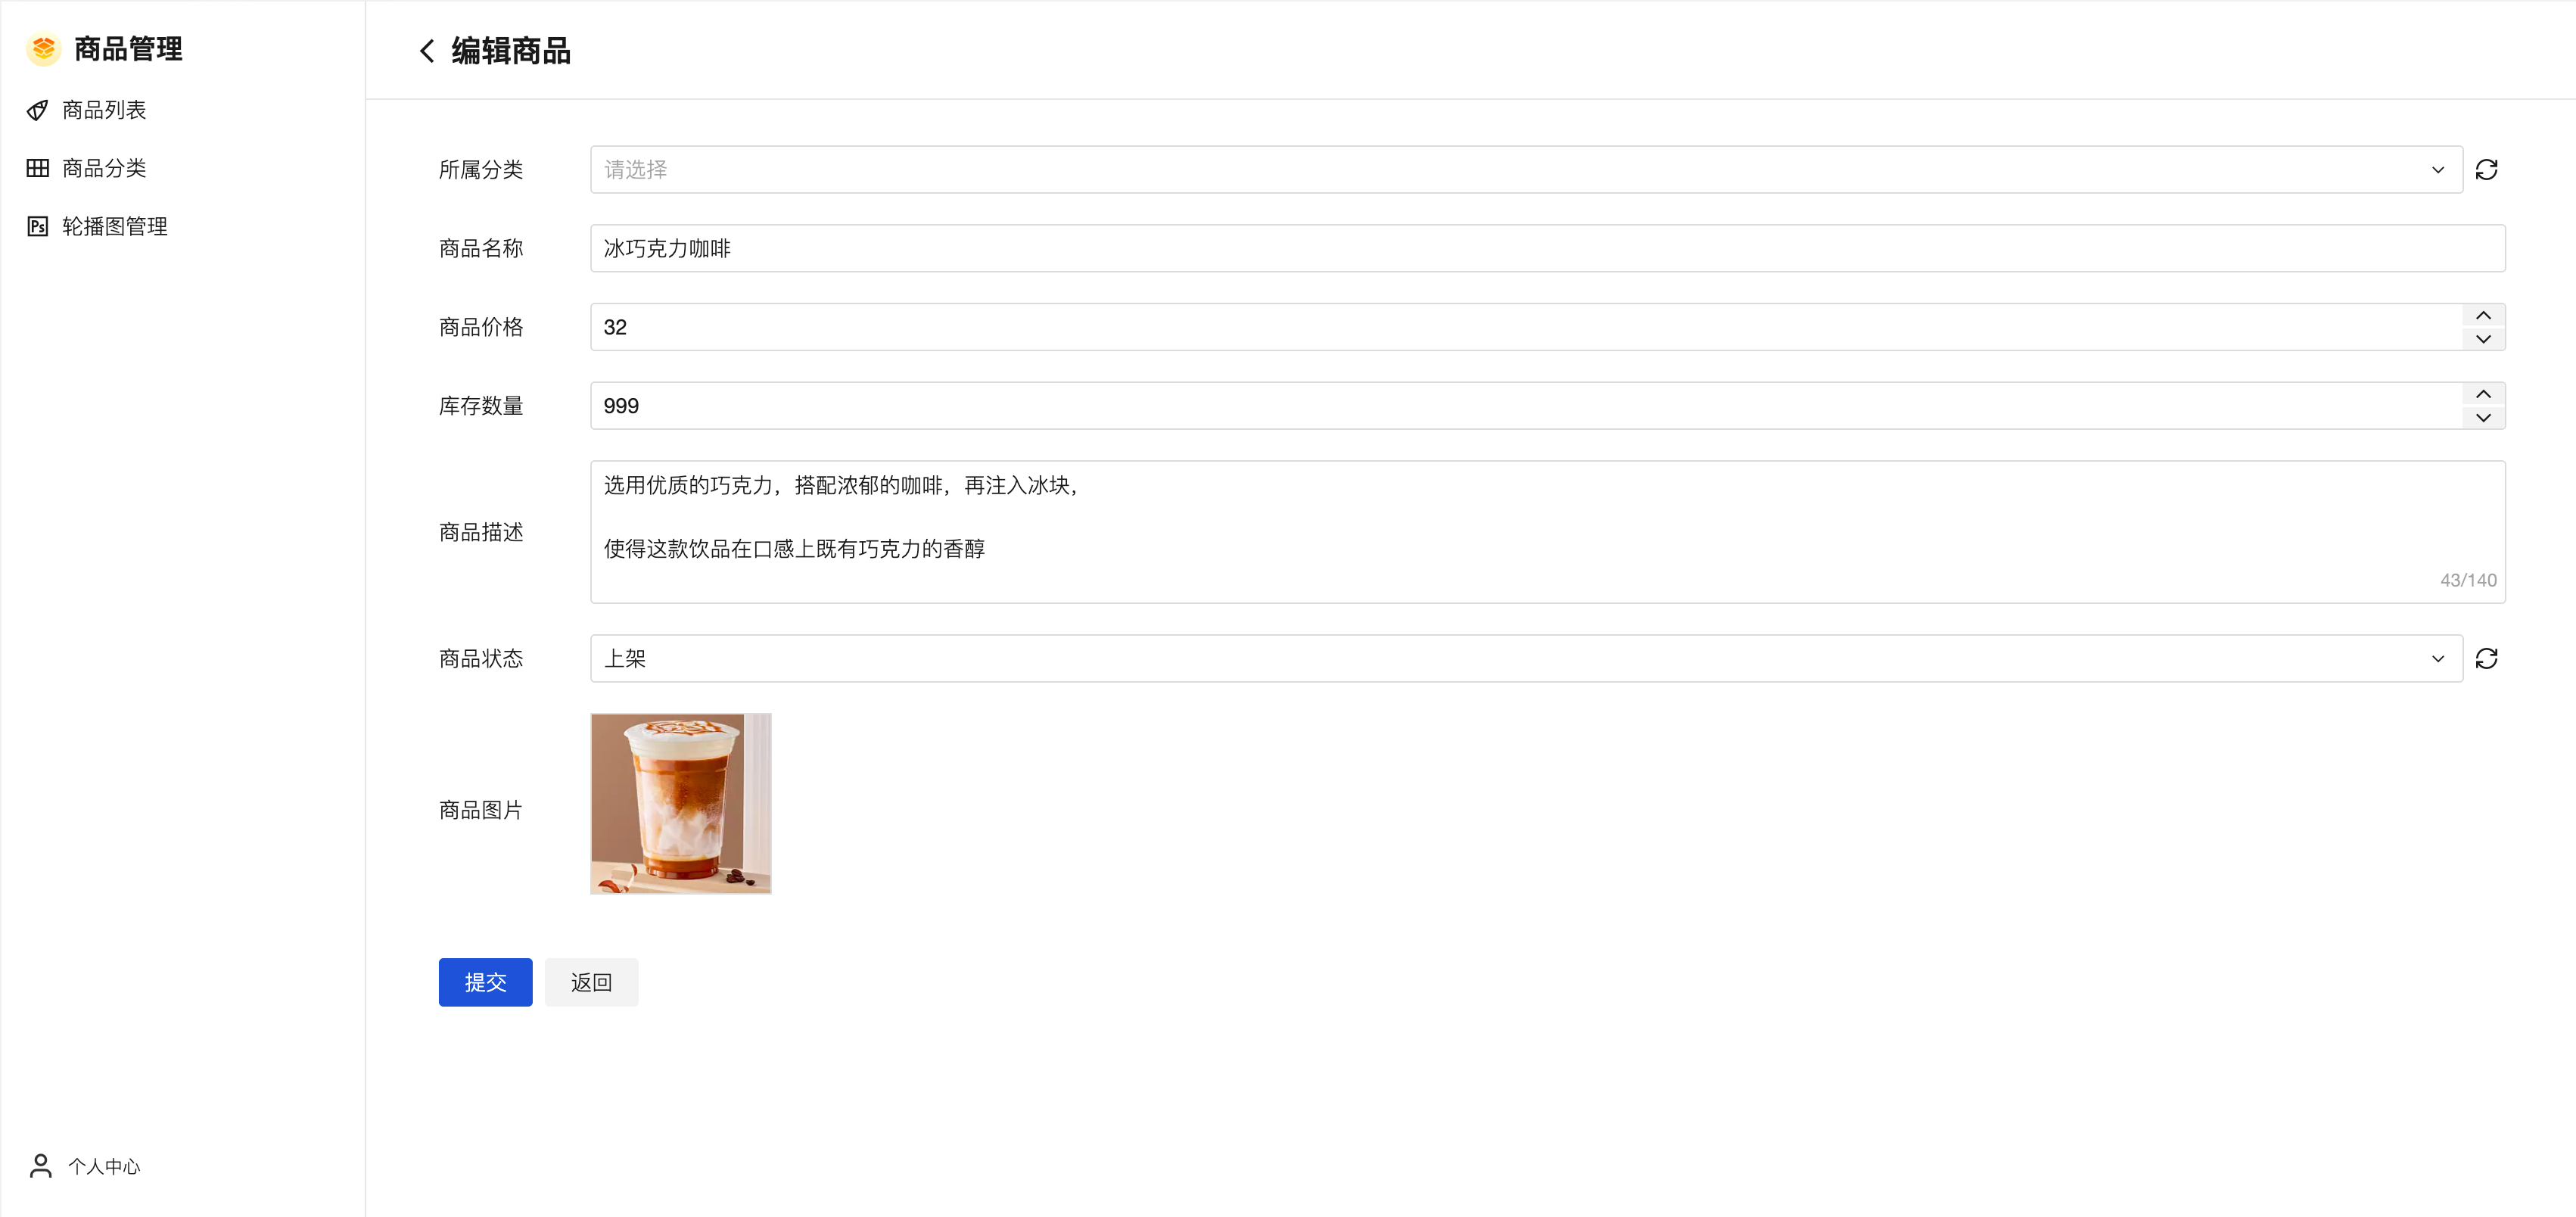
After creation is successful, you can immediately preview the generated management system page. The system includes CRUD functionality for products by default.
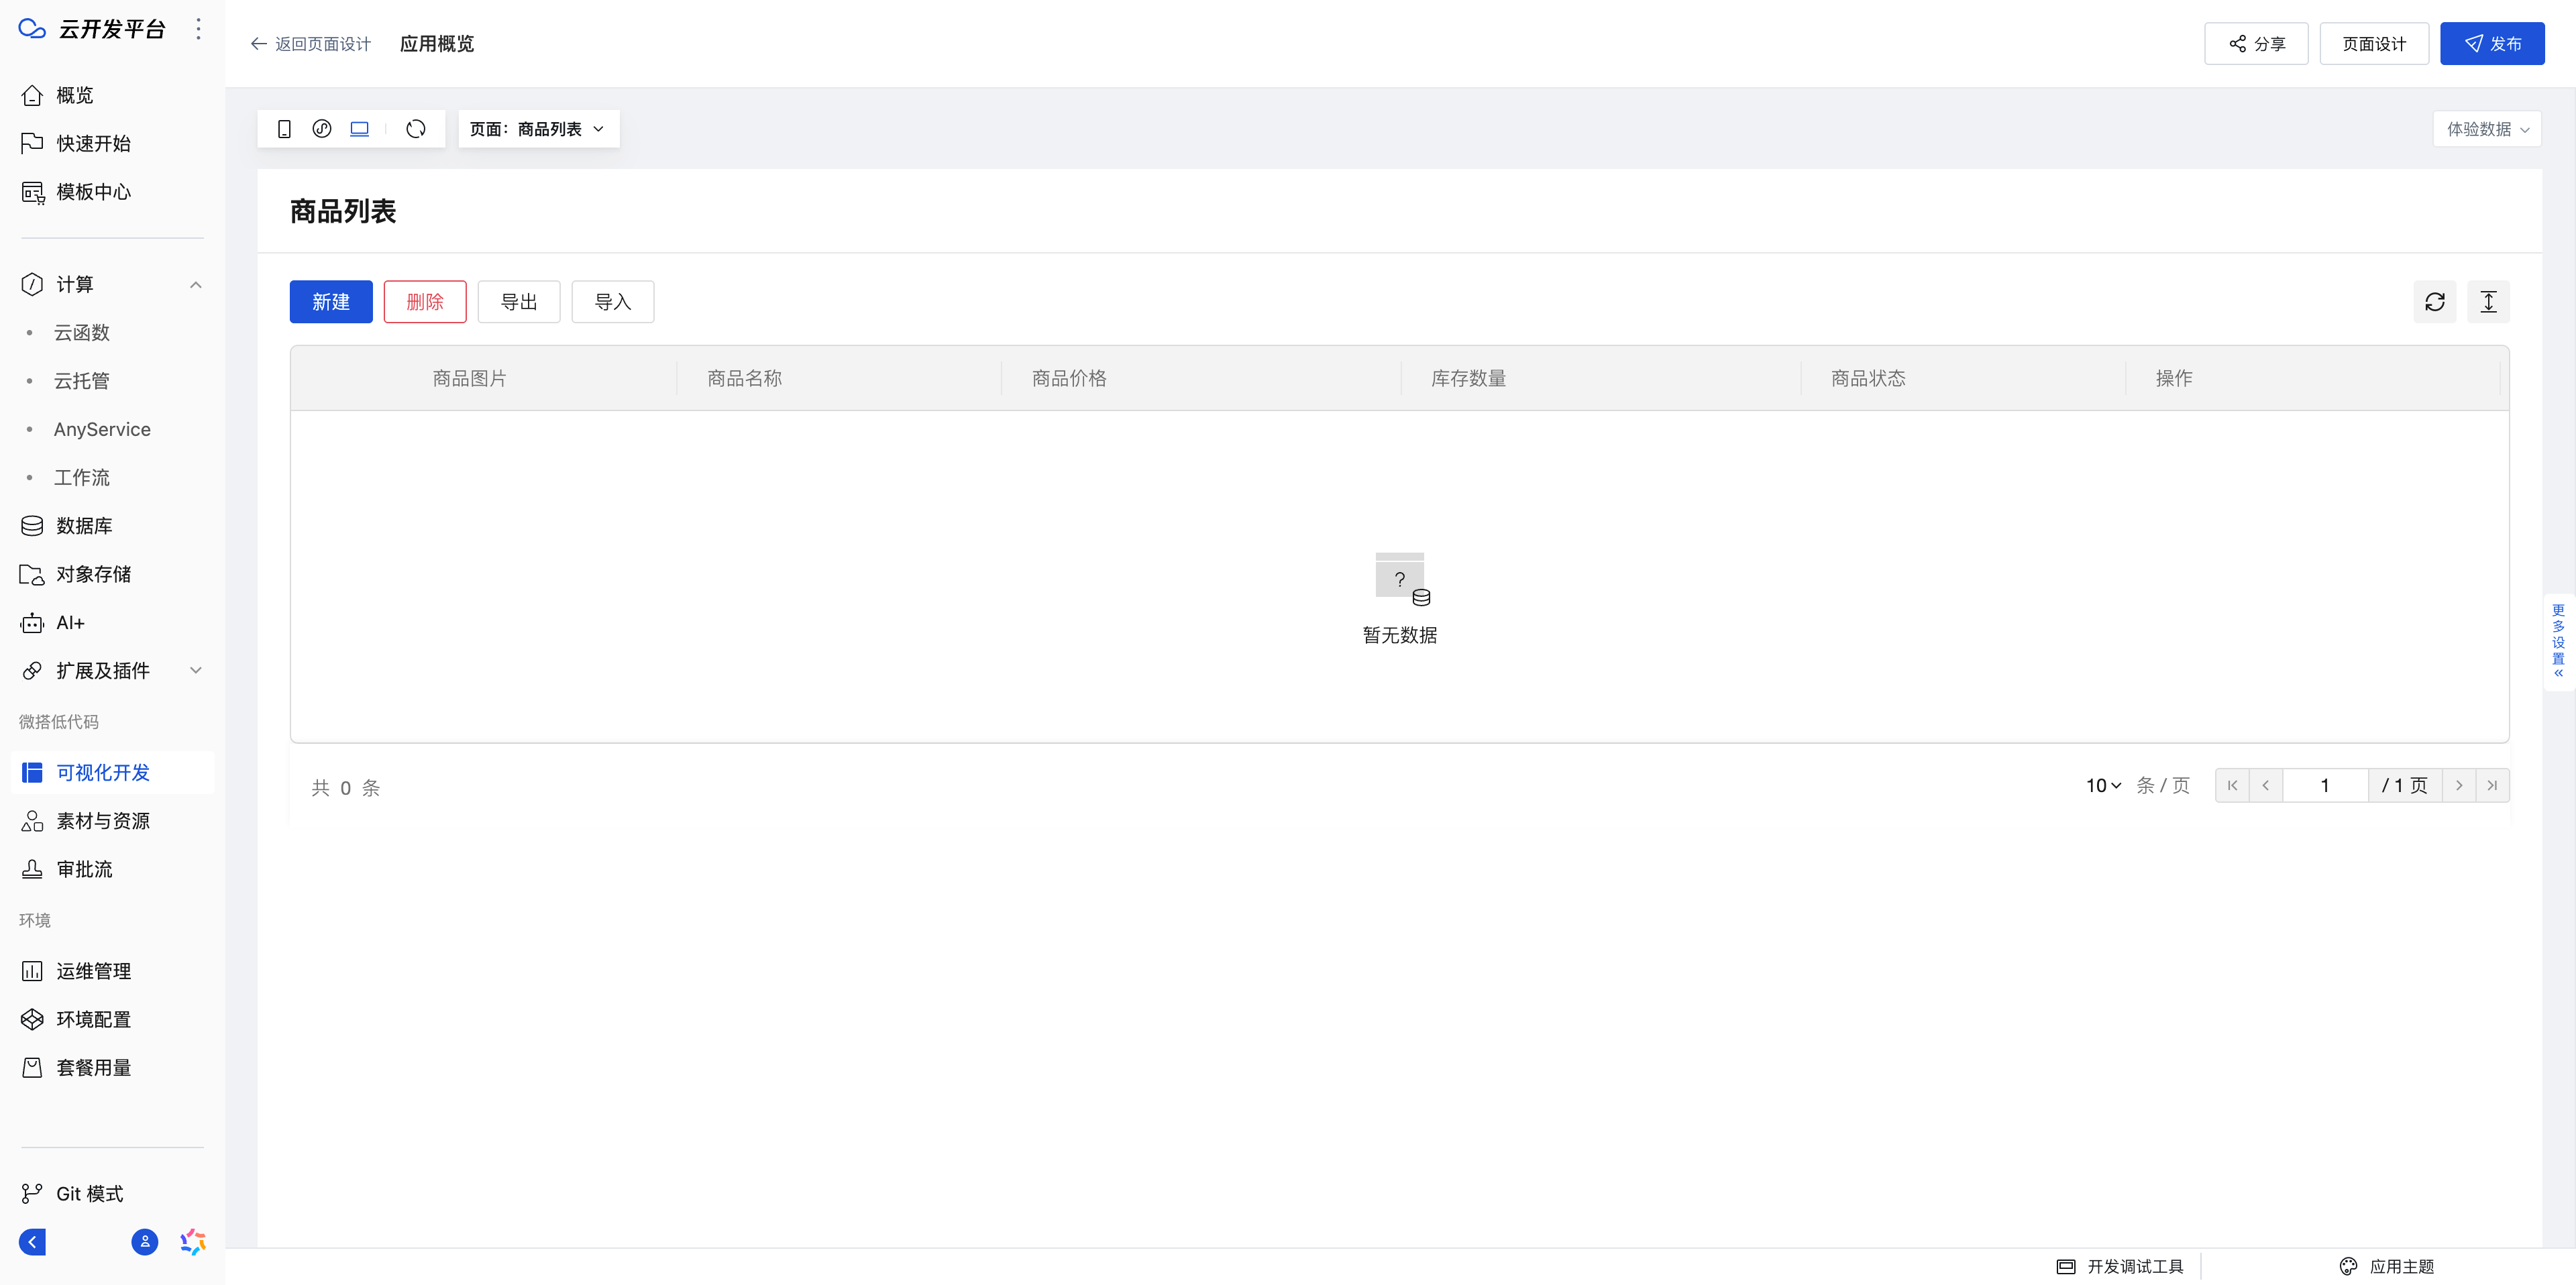
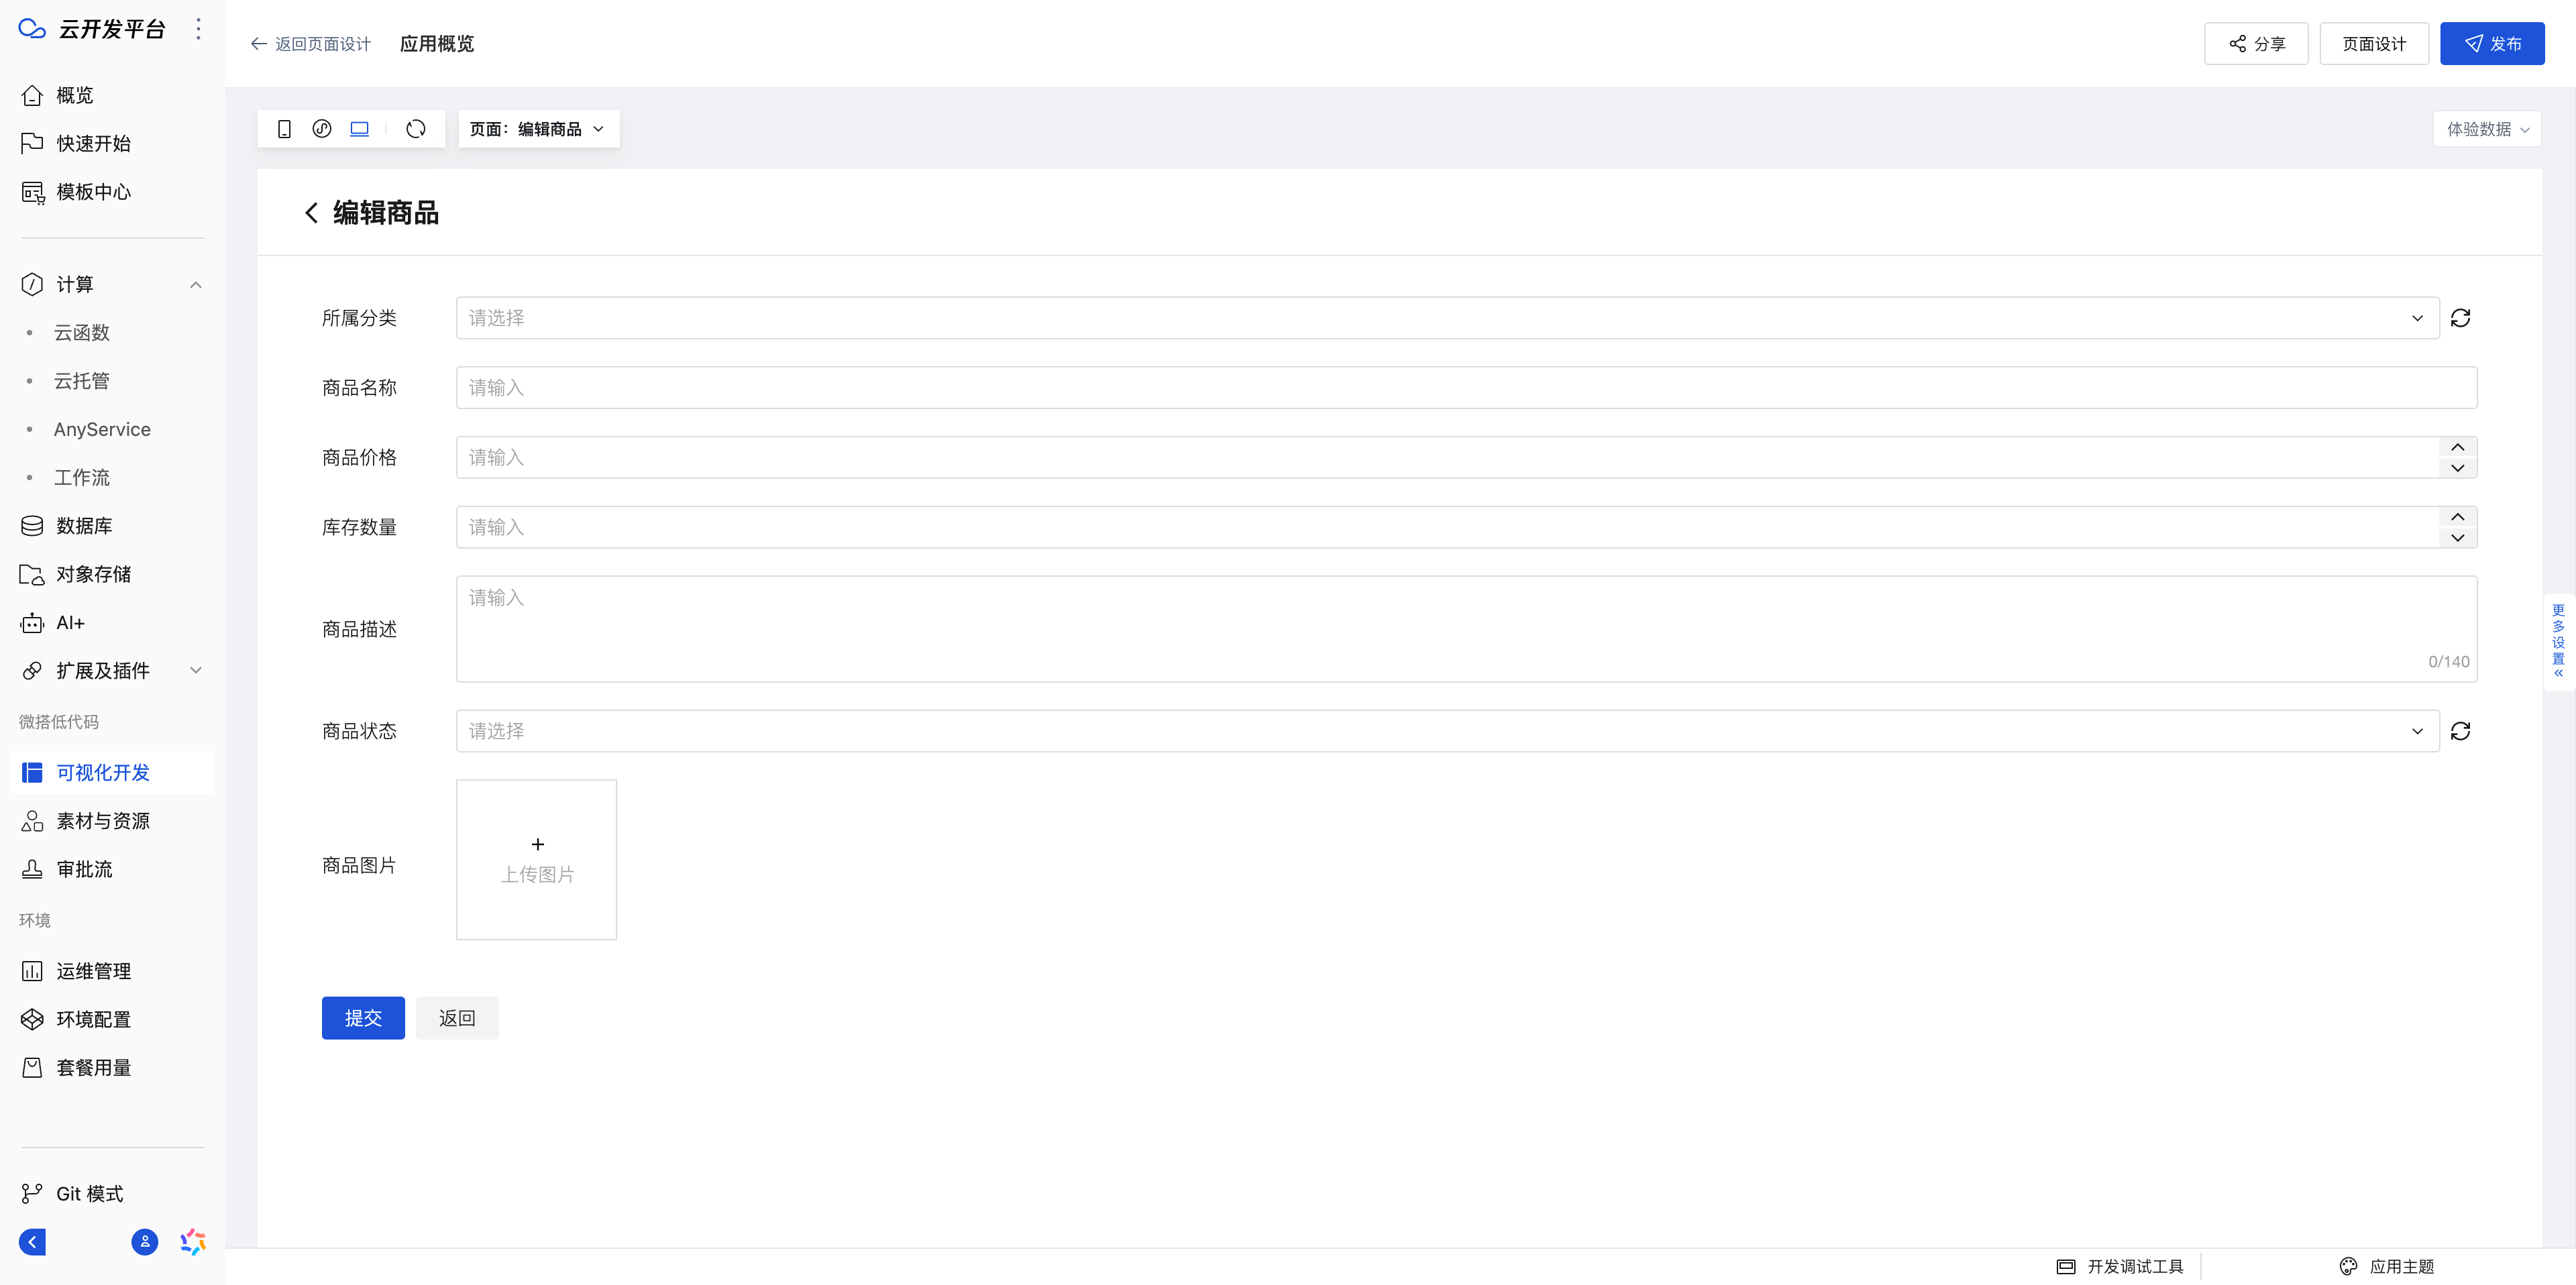
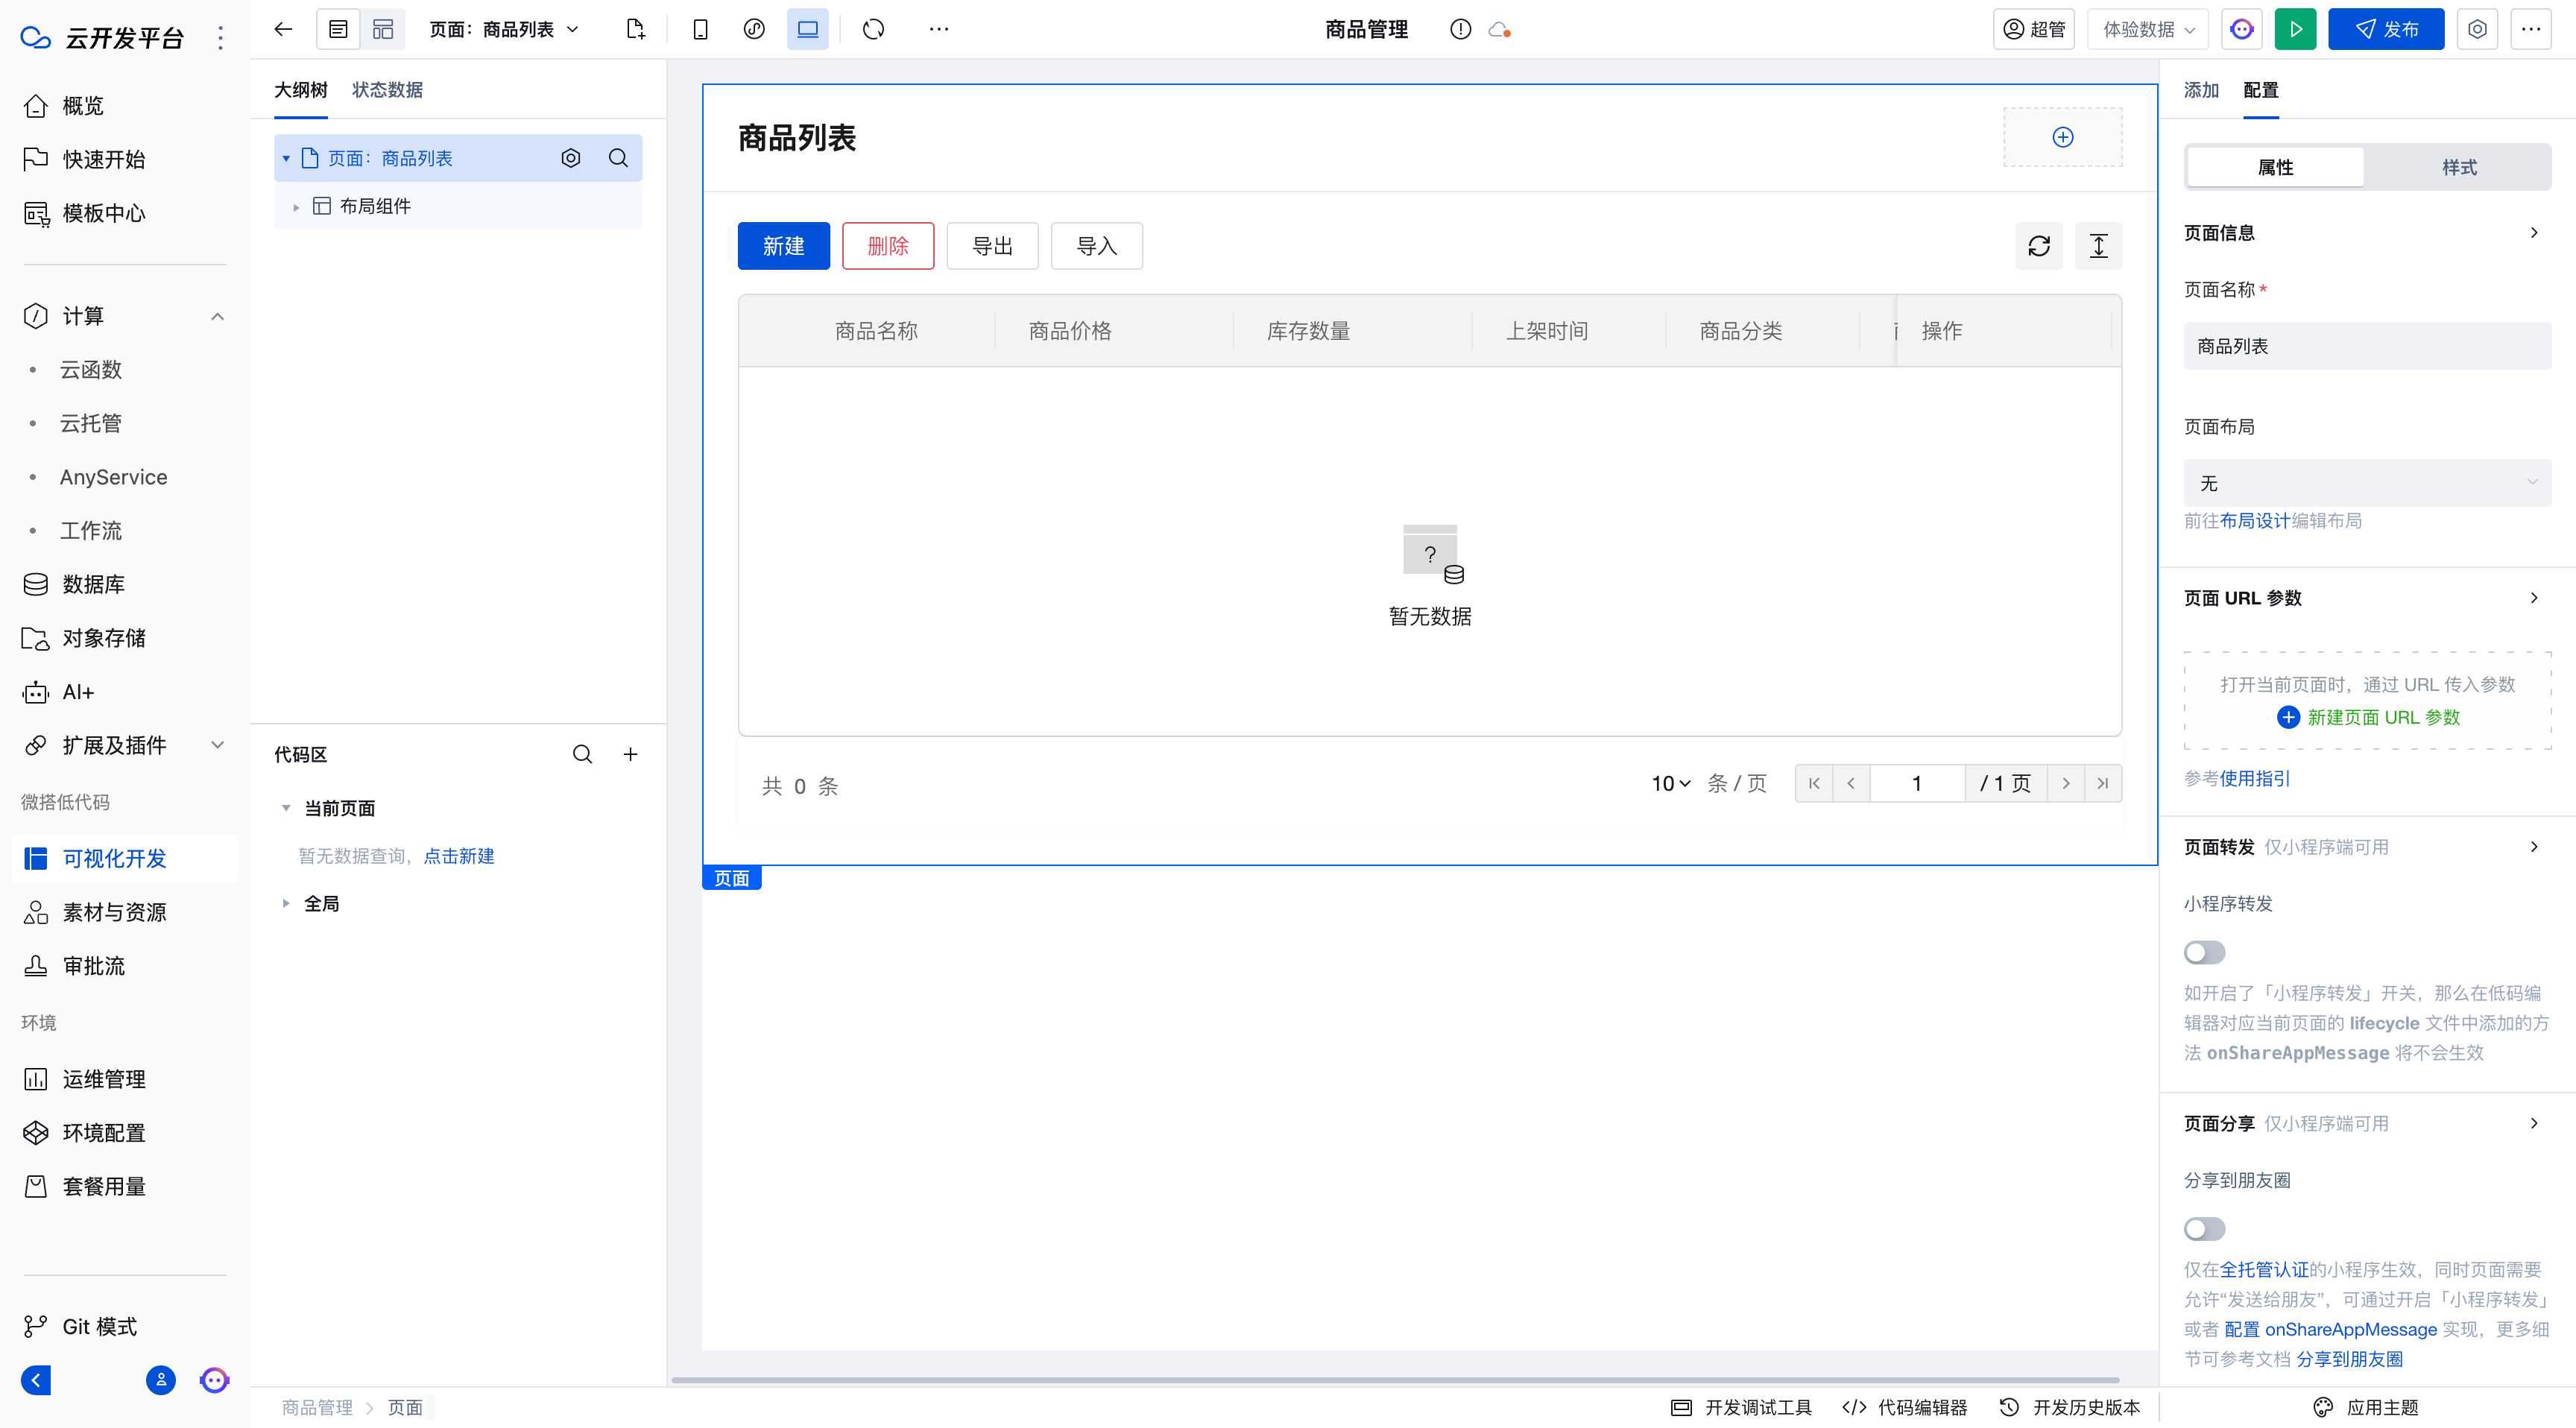
- Click "Back to Page Design" in the upper left corner to go to the visual editing page.
For more editor-related introductions, please refer to Tencent Cloud WeDa Low-Code Editor Introduction_Tencent Cloud
Page Navigation Layout Adjustment
After the application development is completed, you can add a unified menu bar and adjust the page layout through the following steps to better meet your requirements.
For more layout-related introductions, please refer to Tencent Cloud WeDa Low-Code Application Layout_Tencent Cloud
1. Switch to Layout Design
After completing application development, click the 'Layout Design' module to go to the layout settings page.

2. Choose a layout template
On the layout design page, choose a suitable layout template. Take "Left Navigation Layout" as an example:
- Left: You can adjust the icons and text in the header and footer
- Right: You can configure the menu bar content
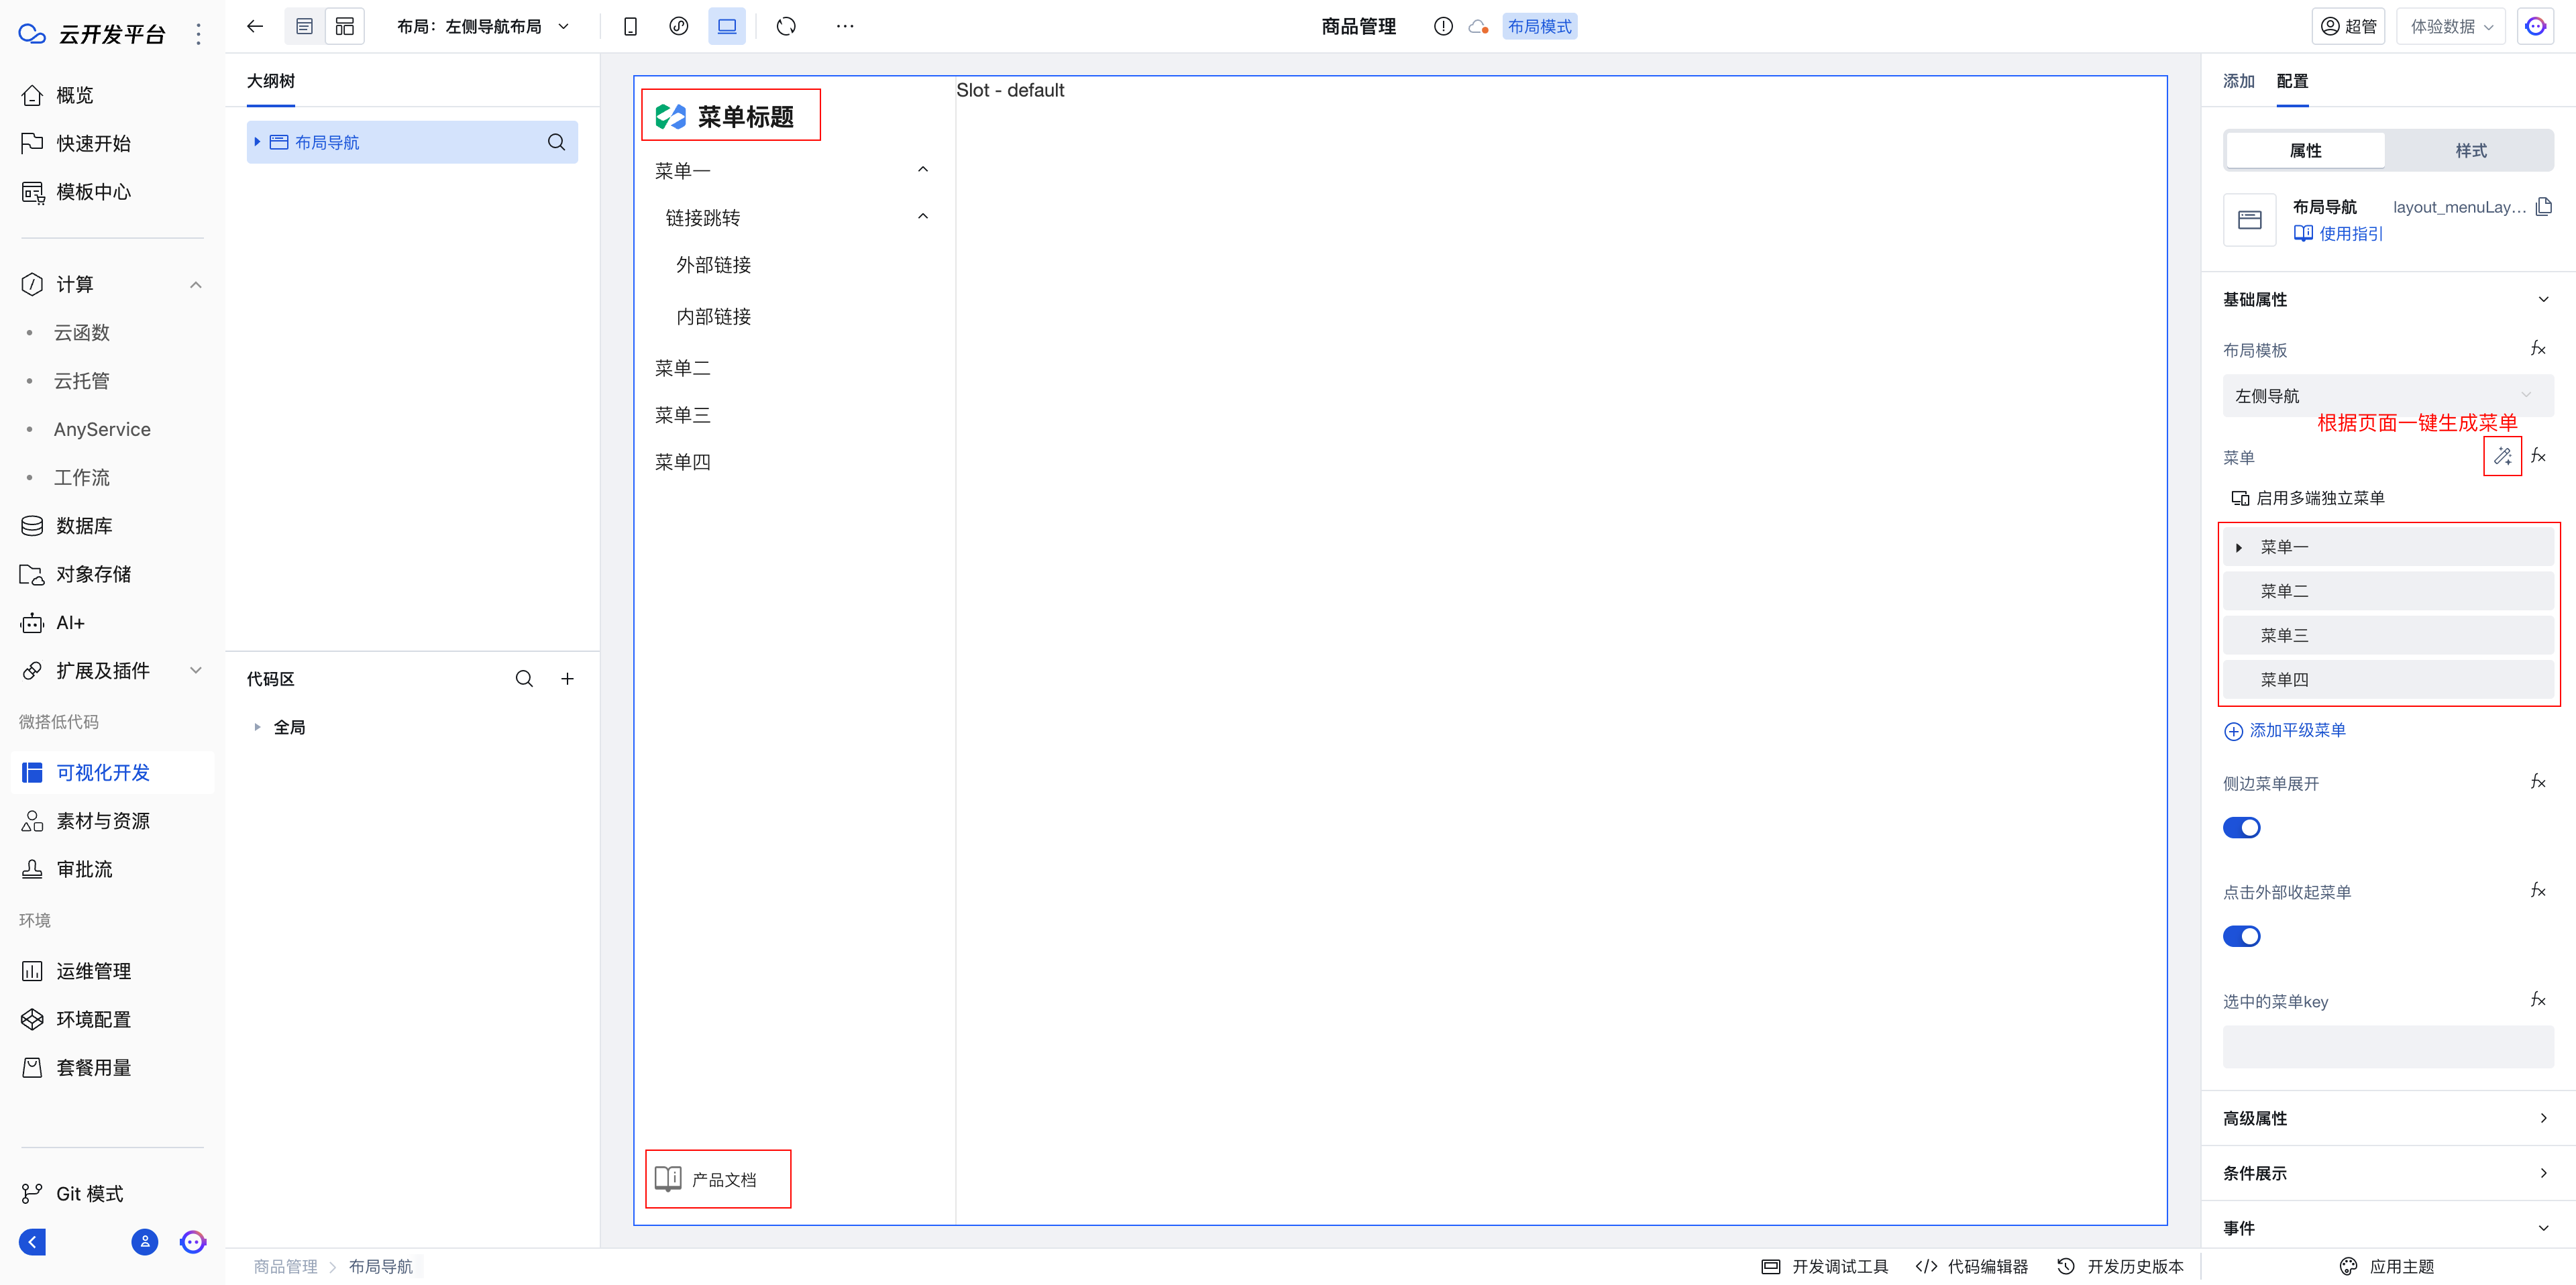
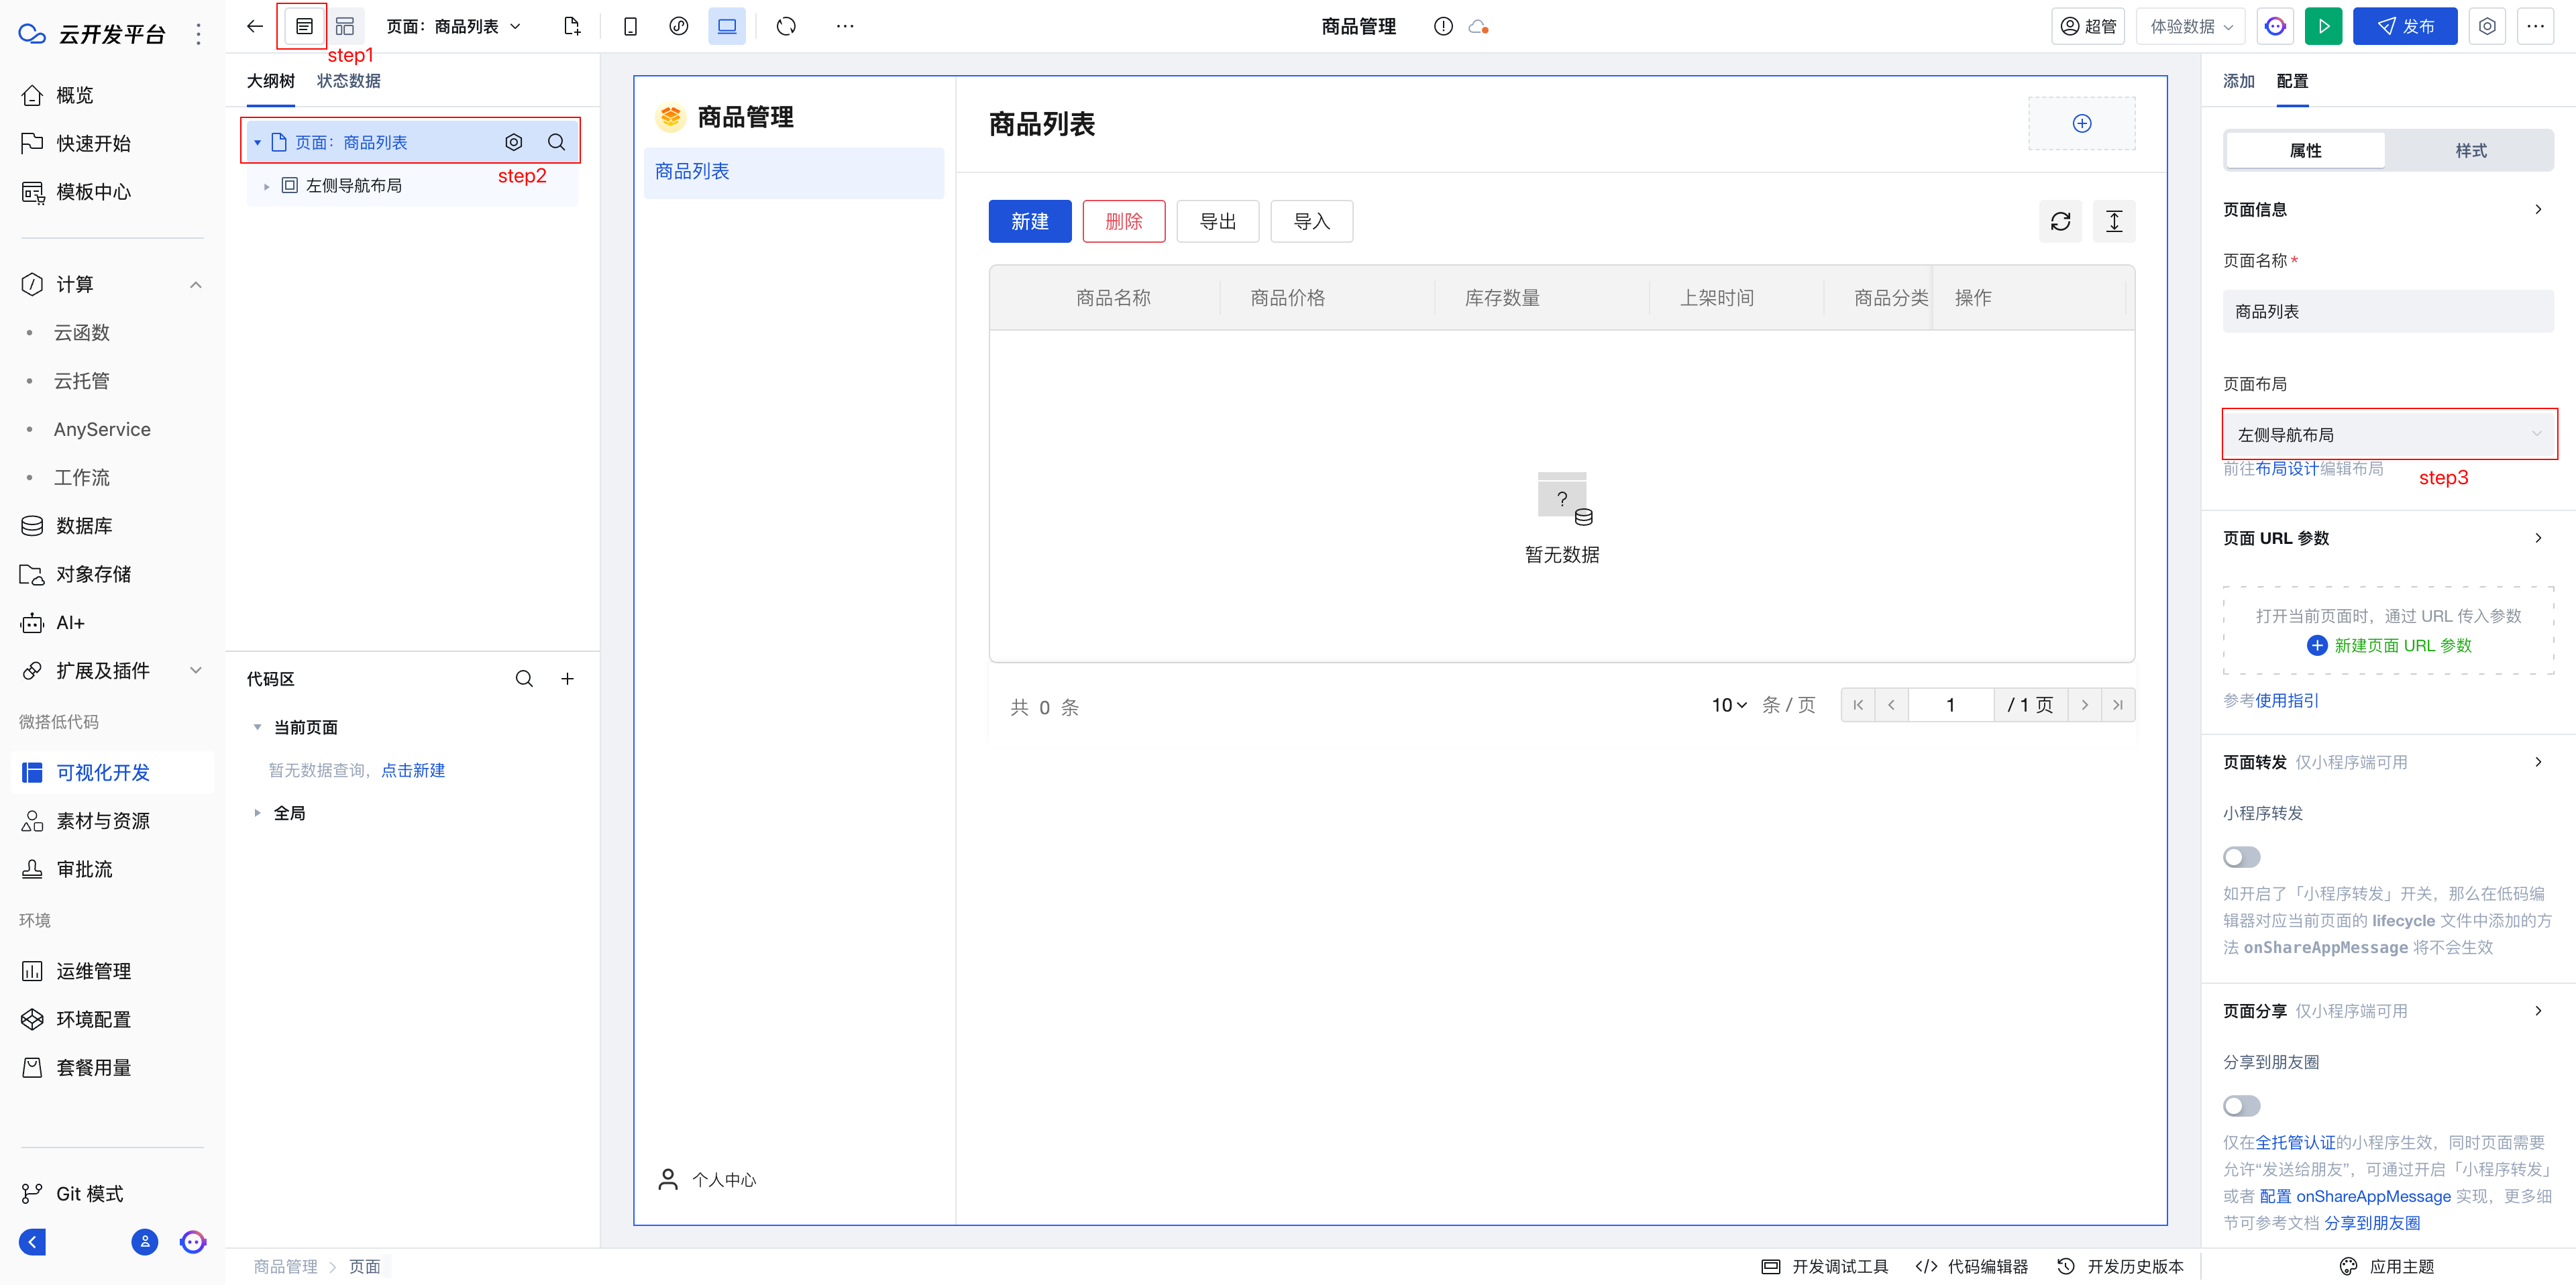
3. Configure the page layout
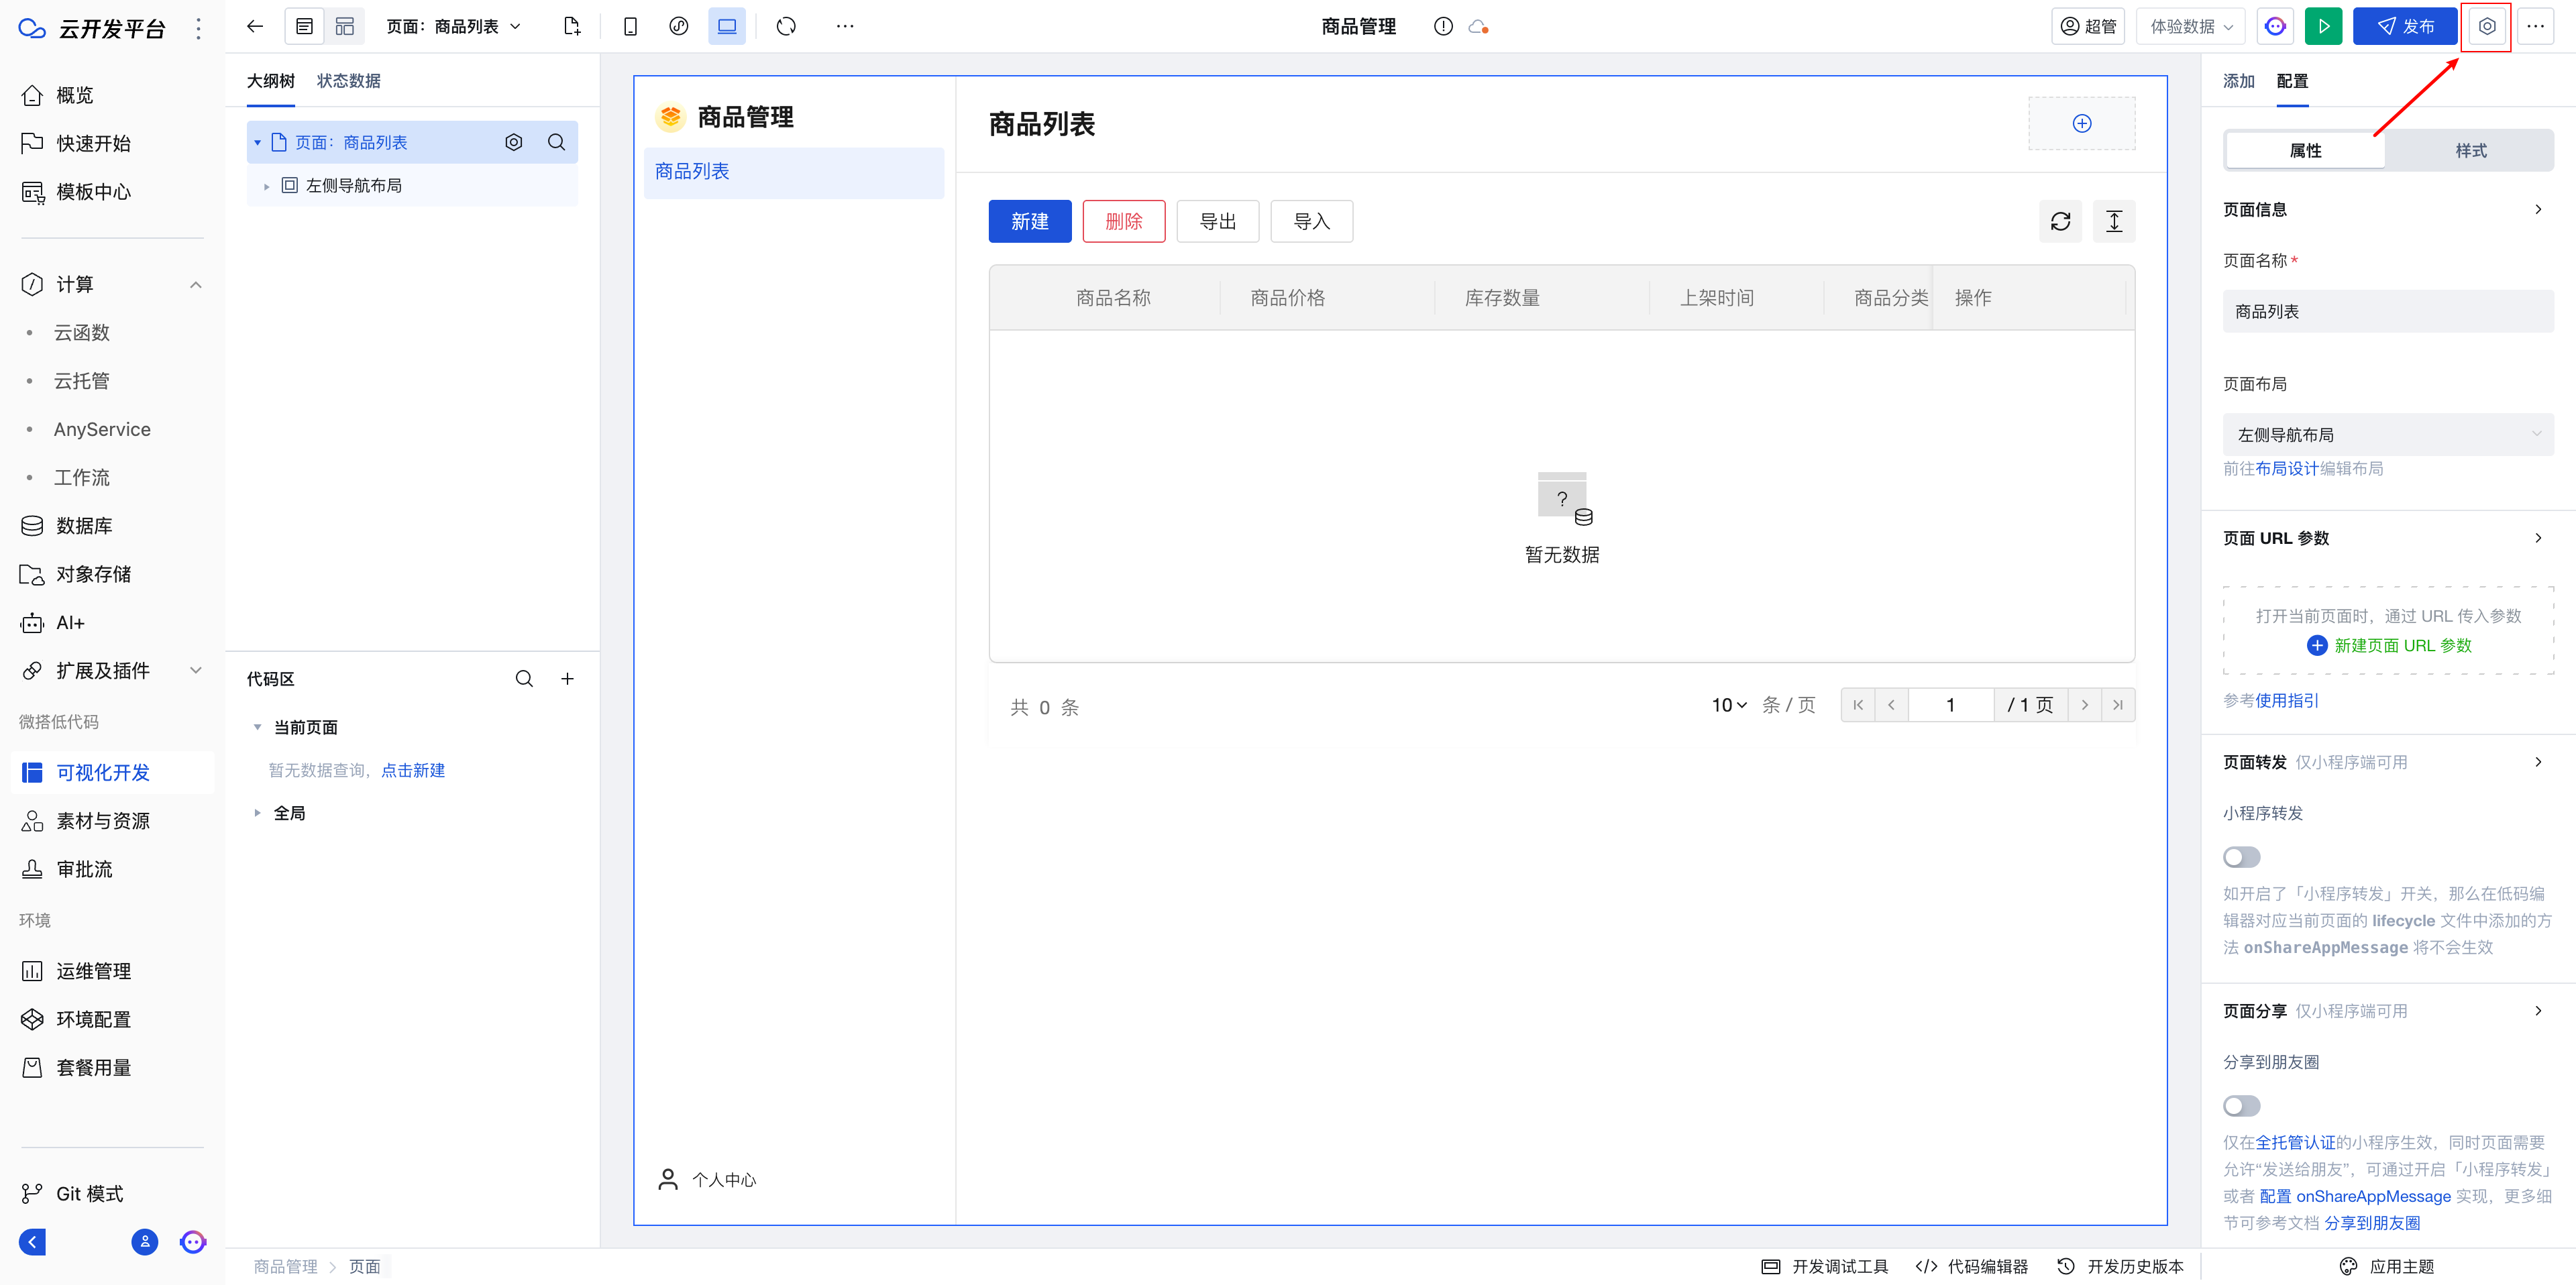
After setting the layout, return to the page design, select the page node, and configure the page layout properties to take effect.
Example as follows:
Page Components Adjustment
If you need to adjust the page components, you can refer to the following steps:
For more editor-related introductions, please refer to Tencent Cloud Official Documentation
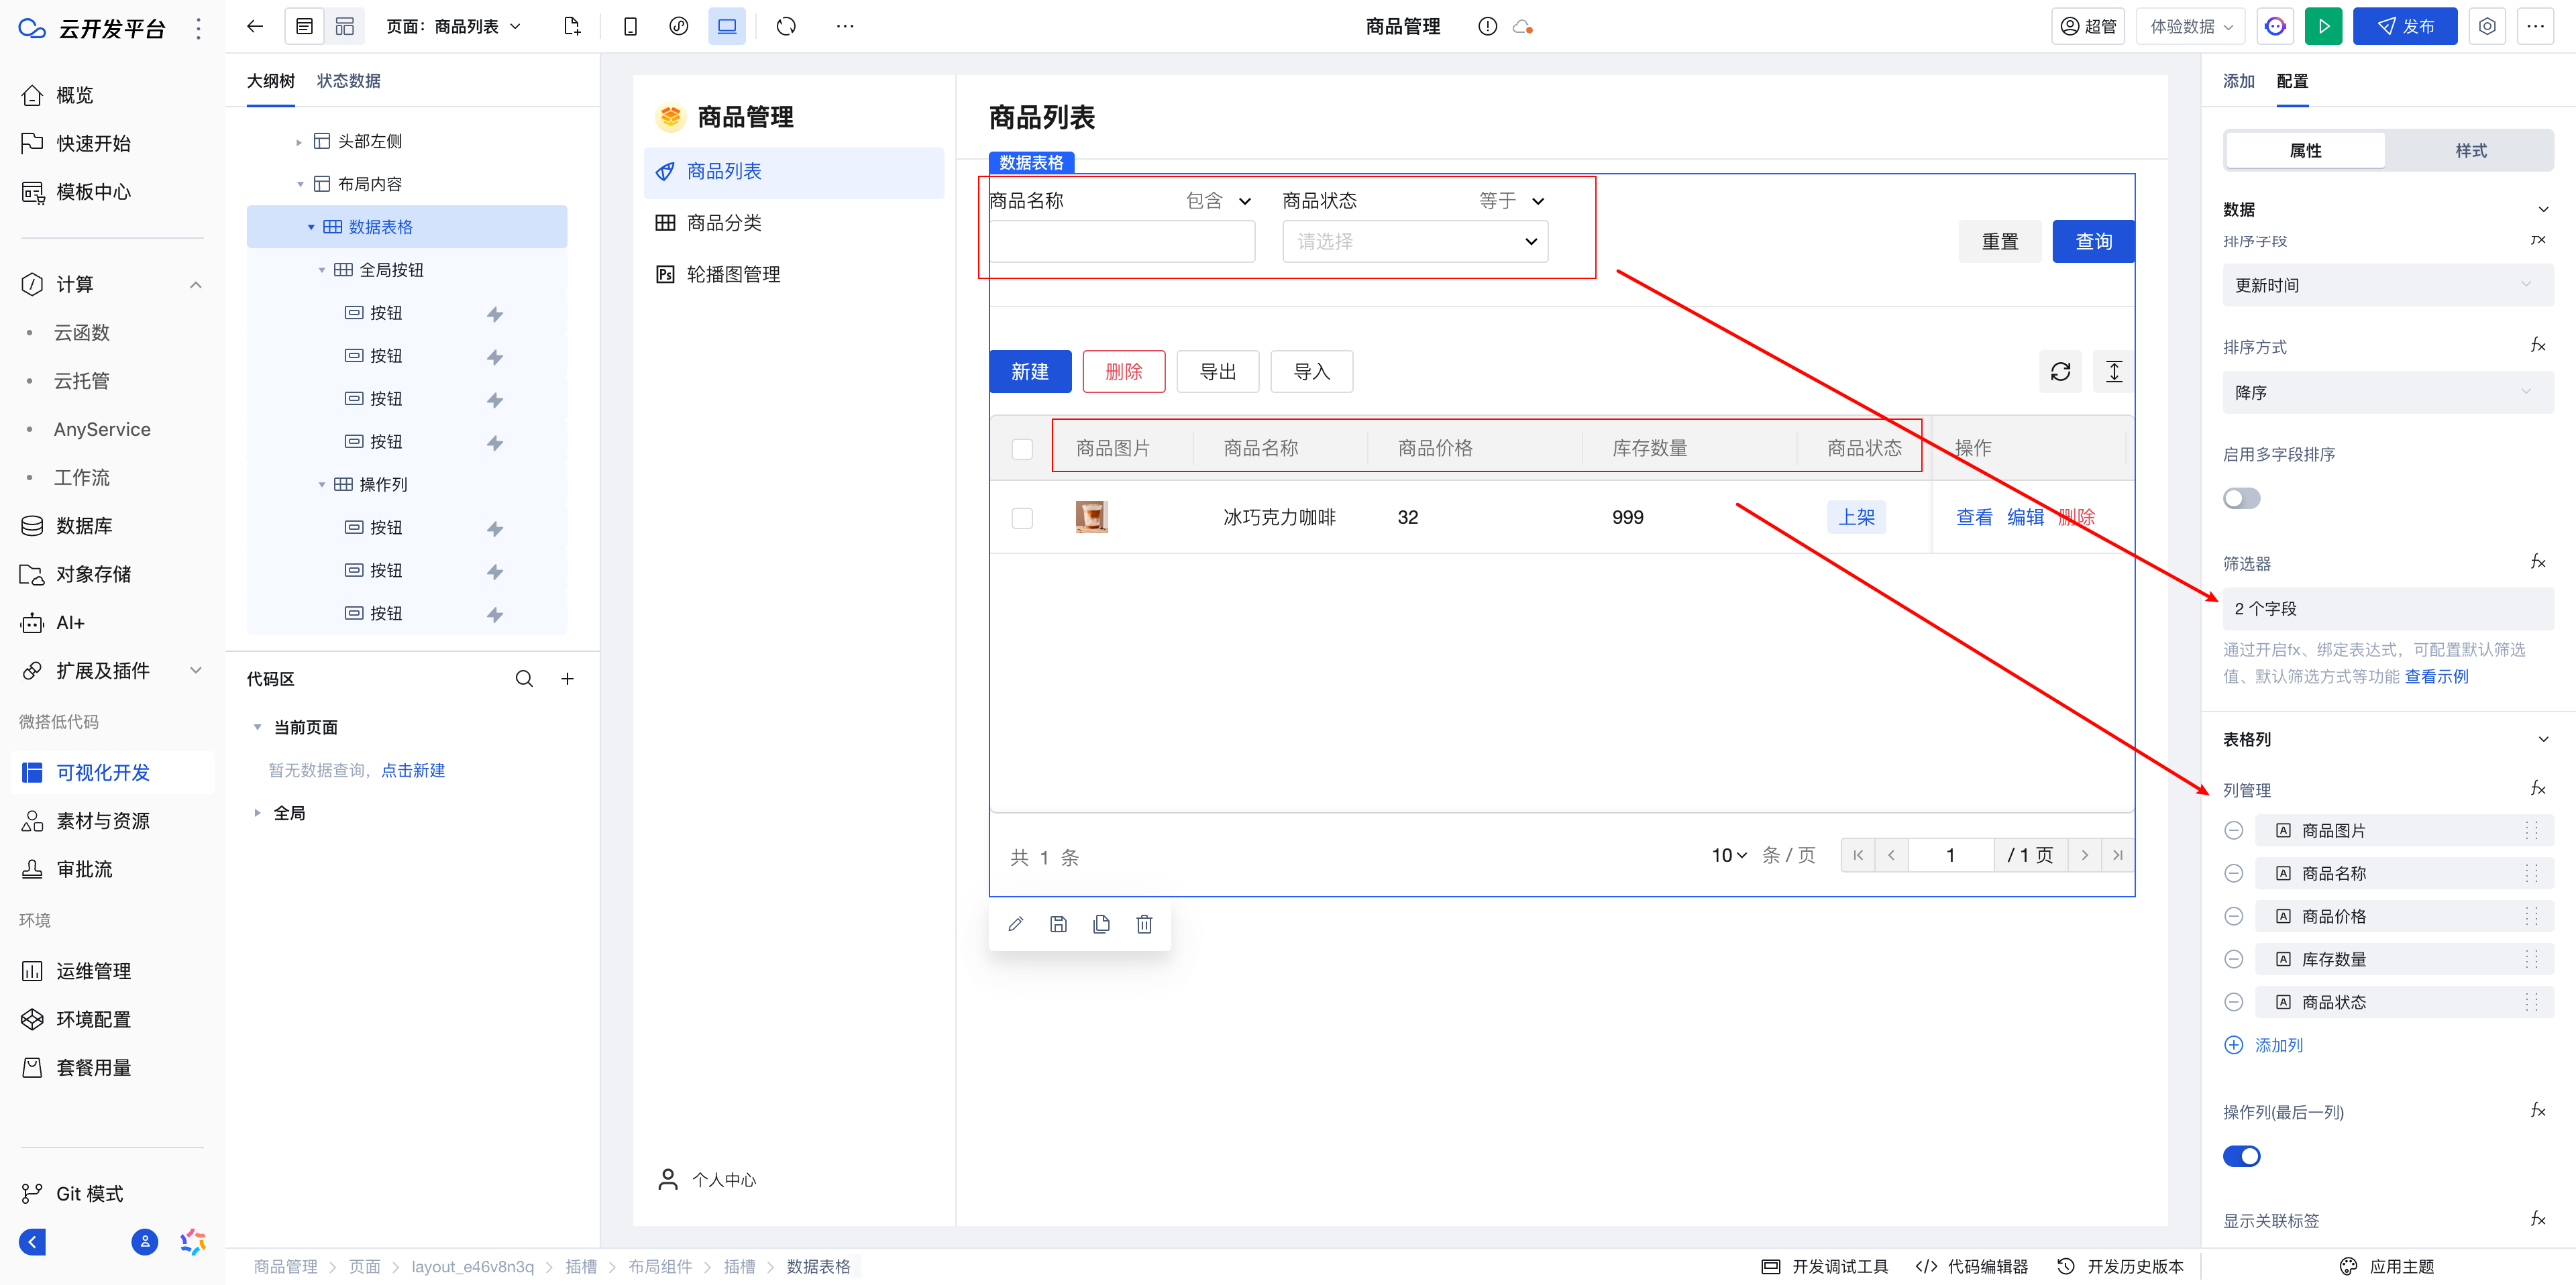
List Component
- Add query conditions
- Select the Data Table component
- In the right properties panel, find the "Filter" property and click to add the required query conditions

-
Add Column
-
In the right properties panel, find the "Column Management" property
-
Add or adjust columns as needed
-

Example effect:
-
More Features
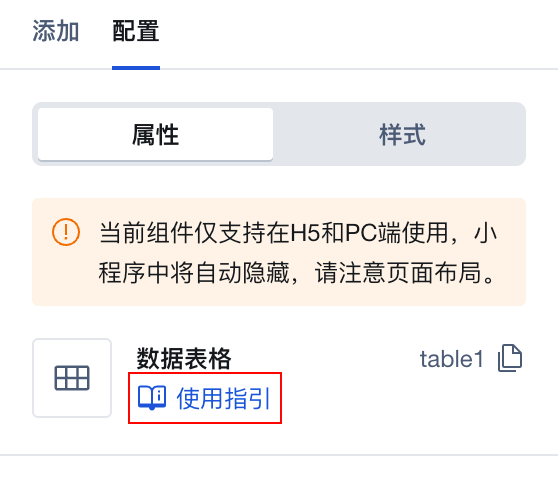
To learn more about component properties and usage, please refer to the component usage guide
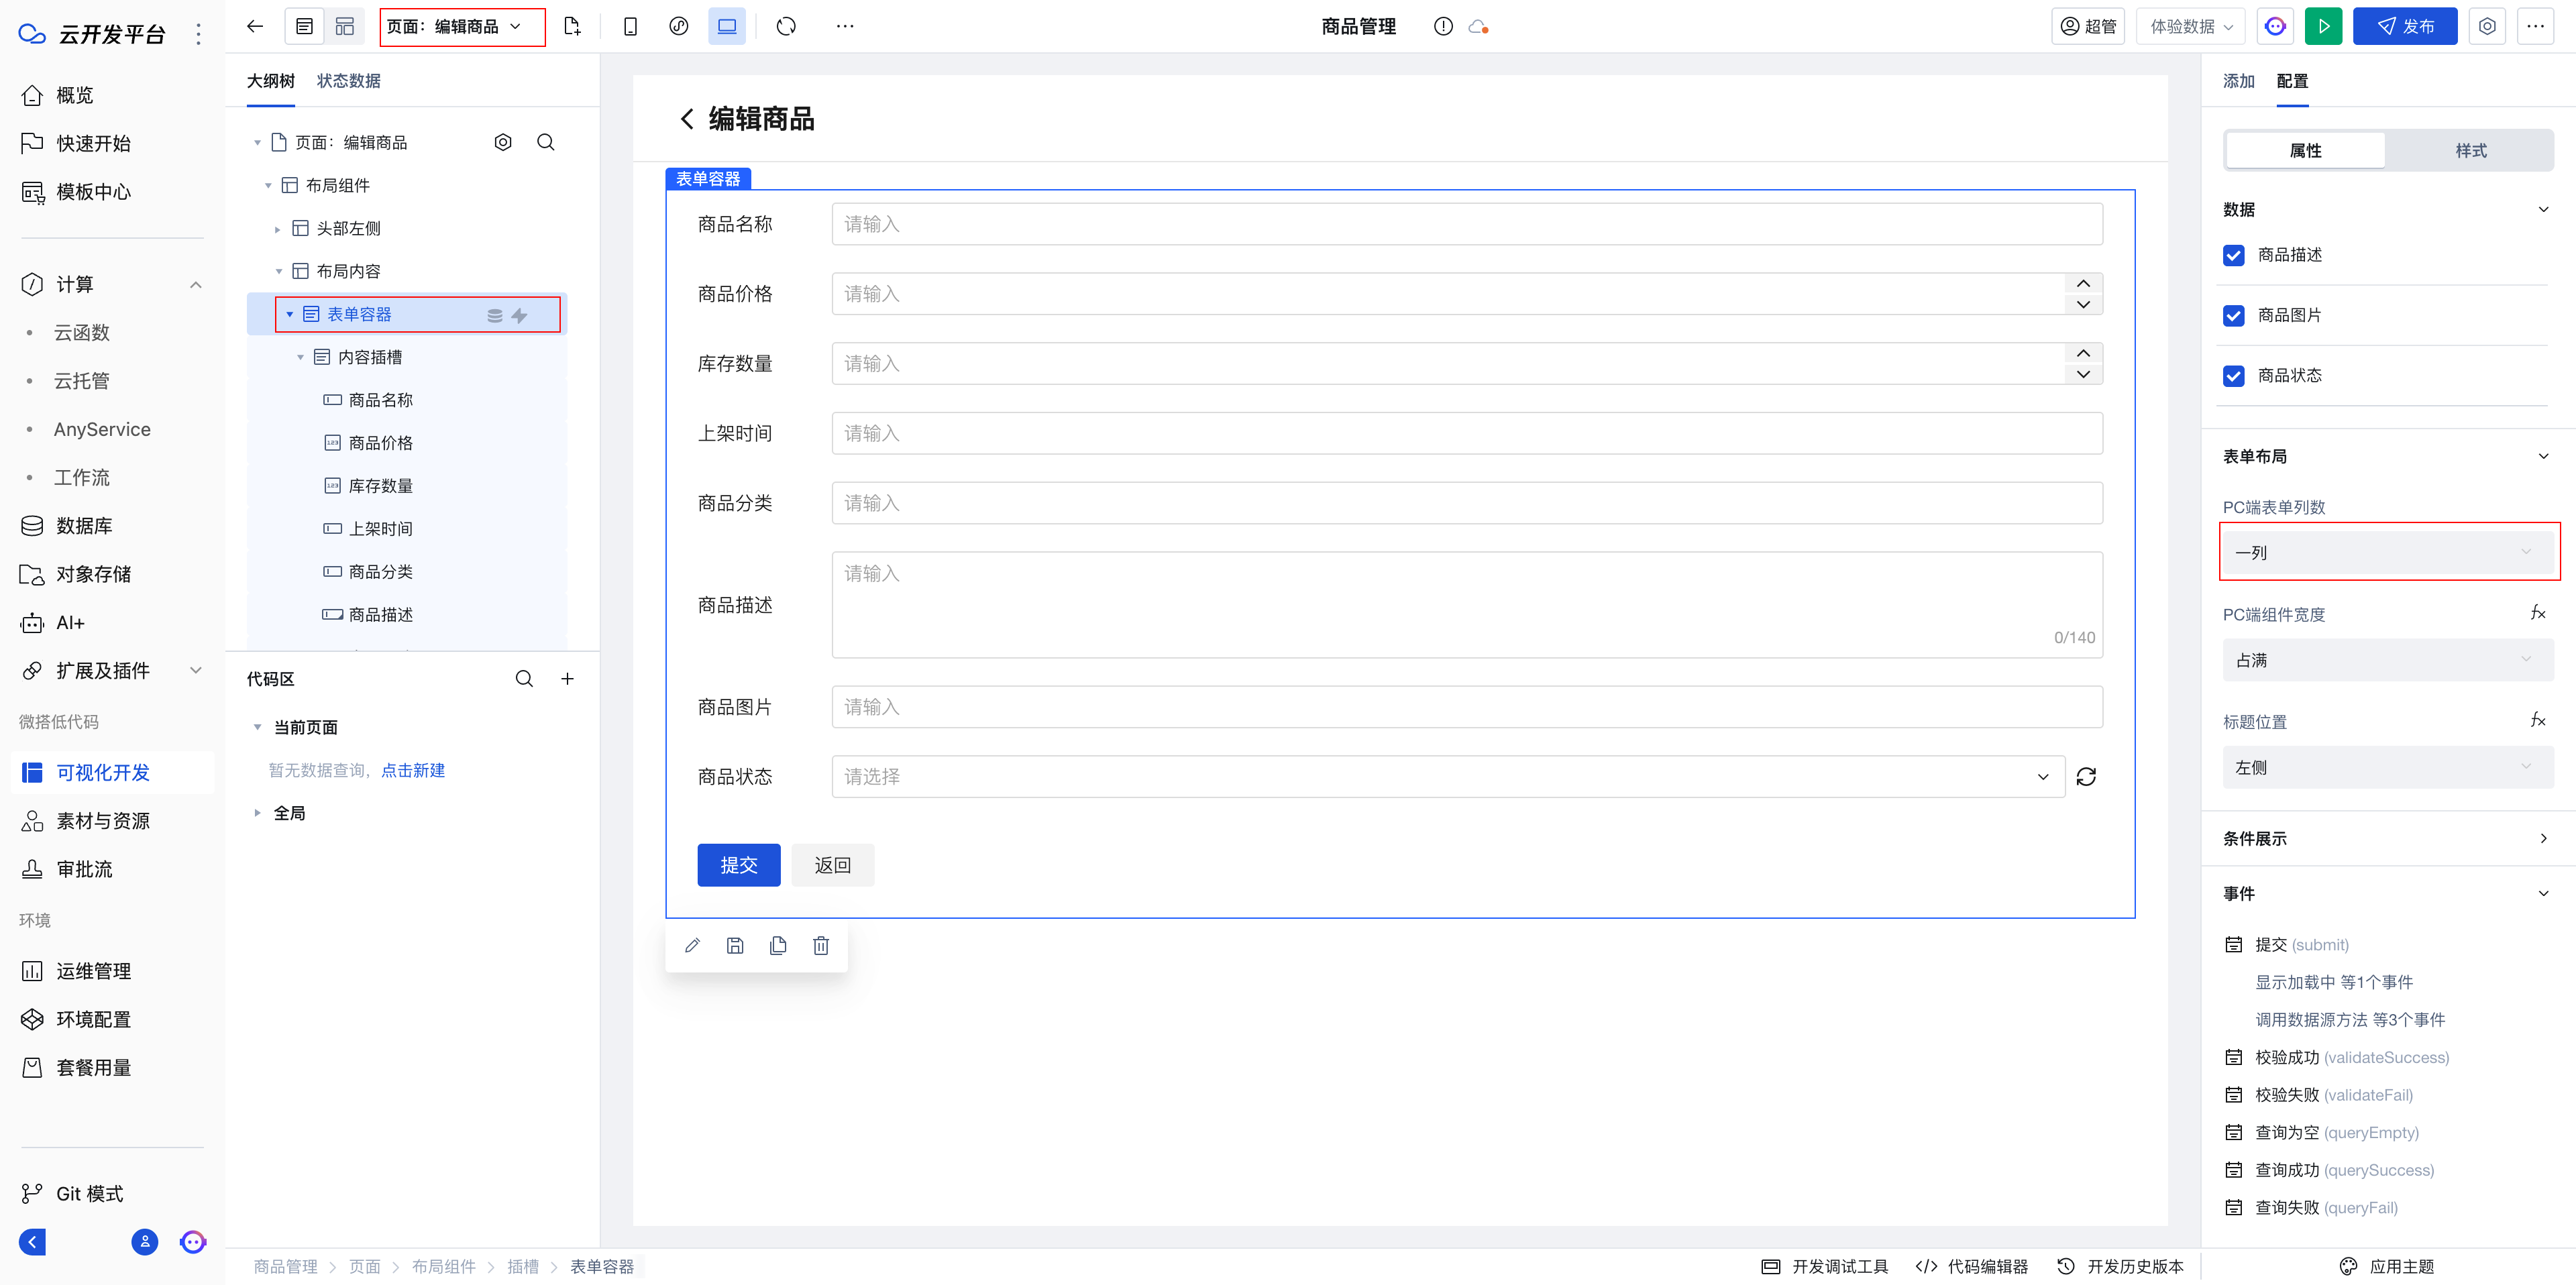
Form Component
- Modify Layout
Adjust the page structure by selecting the Form Container component and modifying the Form Layout property.
Learn by Analogy
Similarly, we can create the following tables to enrich our management system
-
The "Product Category" table is used to display and manage product categories
-
The "Carousel Management" table is used to manage carousel images in the application
Following the above page creation method, CRUD operations for three modules can be quickly created.
If a product category table is added, an association exists between "Product Category" and "Product". In this case, the "Product Category" field in the "Product" table cannot be a text field for manual entry, but should be selected from "Product Category". You can refer to this article for configuration: Association Relations
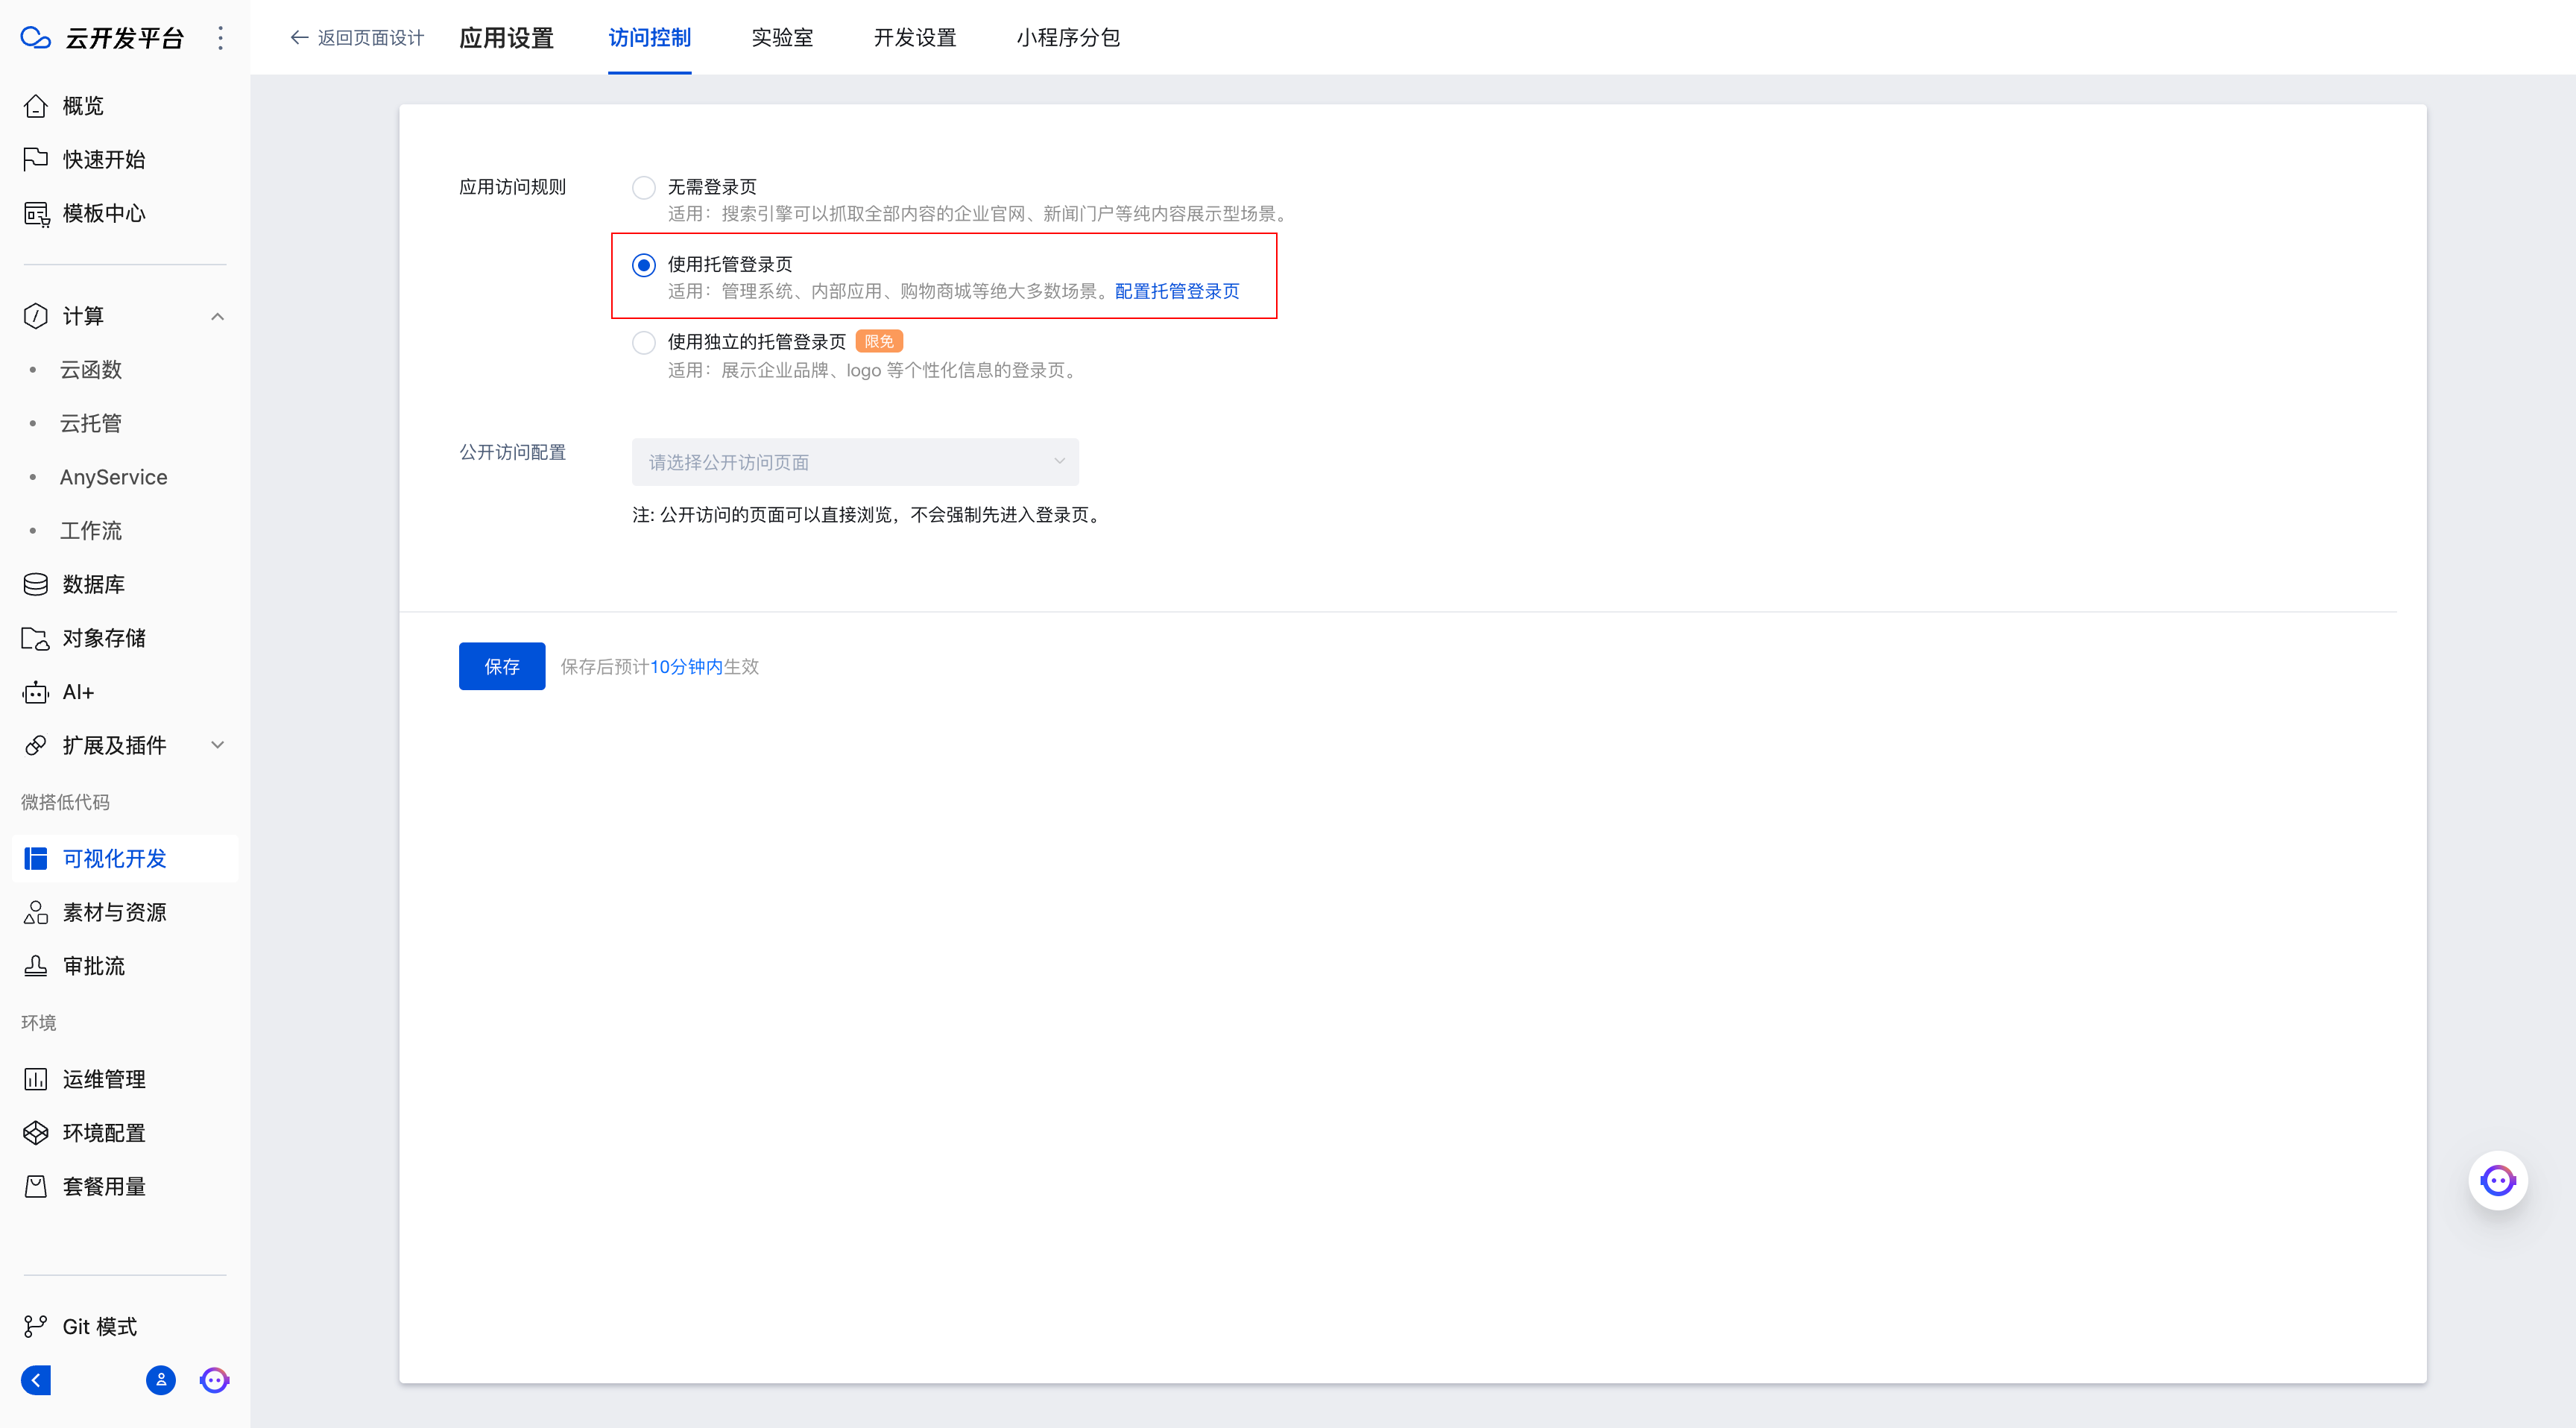
Login Configuration
In application settings, you can configure application access rules to control how users access the application. The cloud development platform provides the following three options:
Access Rule Options:
| Access Rule | Remarks | Recommended Scenarios |
|---|---|---|
| No Login Page | Direct access without login | Official websites, landing pages, and other scenarios not requiring login |
| Use Hosted Login Page | Use a public login page, which is uniformly configured in the Authentication module | Multiple applications requiring consistent login pages can uniformly use the hosted login page |
| Use Independent Hosted Login Page | Independently configured login page | Independently configure the login page for the current application |
If you are unsure whether to choose a hosted or independent login page, use the Independent Hosted Login Page. You can switch later when multiple applications are involved.
Configuring the Independent Hosted Login Page
- Go to Application Settings/Access Control
- Select "Independent Hosted Login Page"
You can configure login methods for the mini-program end and PC/H5 end respectively, and customize the title, logo, background color, etc. of the login page.

- After completing the configuration, click [Save] and republish the application
Configuring the Hosted Login Page
- Go to Application Settings/Access Control, select "Use Hosted Login Page", click [Save], and republish the application.
- Go to the Authentication module to configure the "Hosted Login Page"
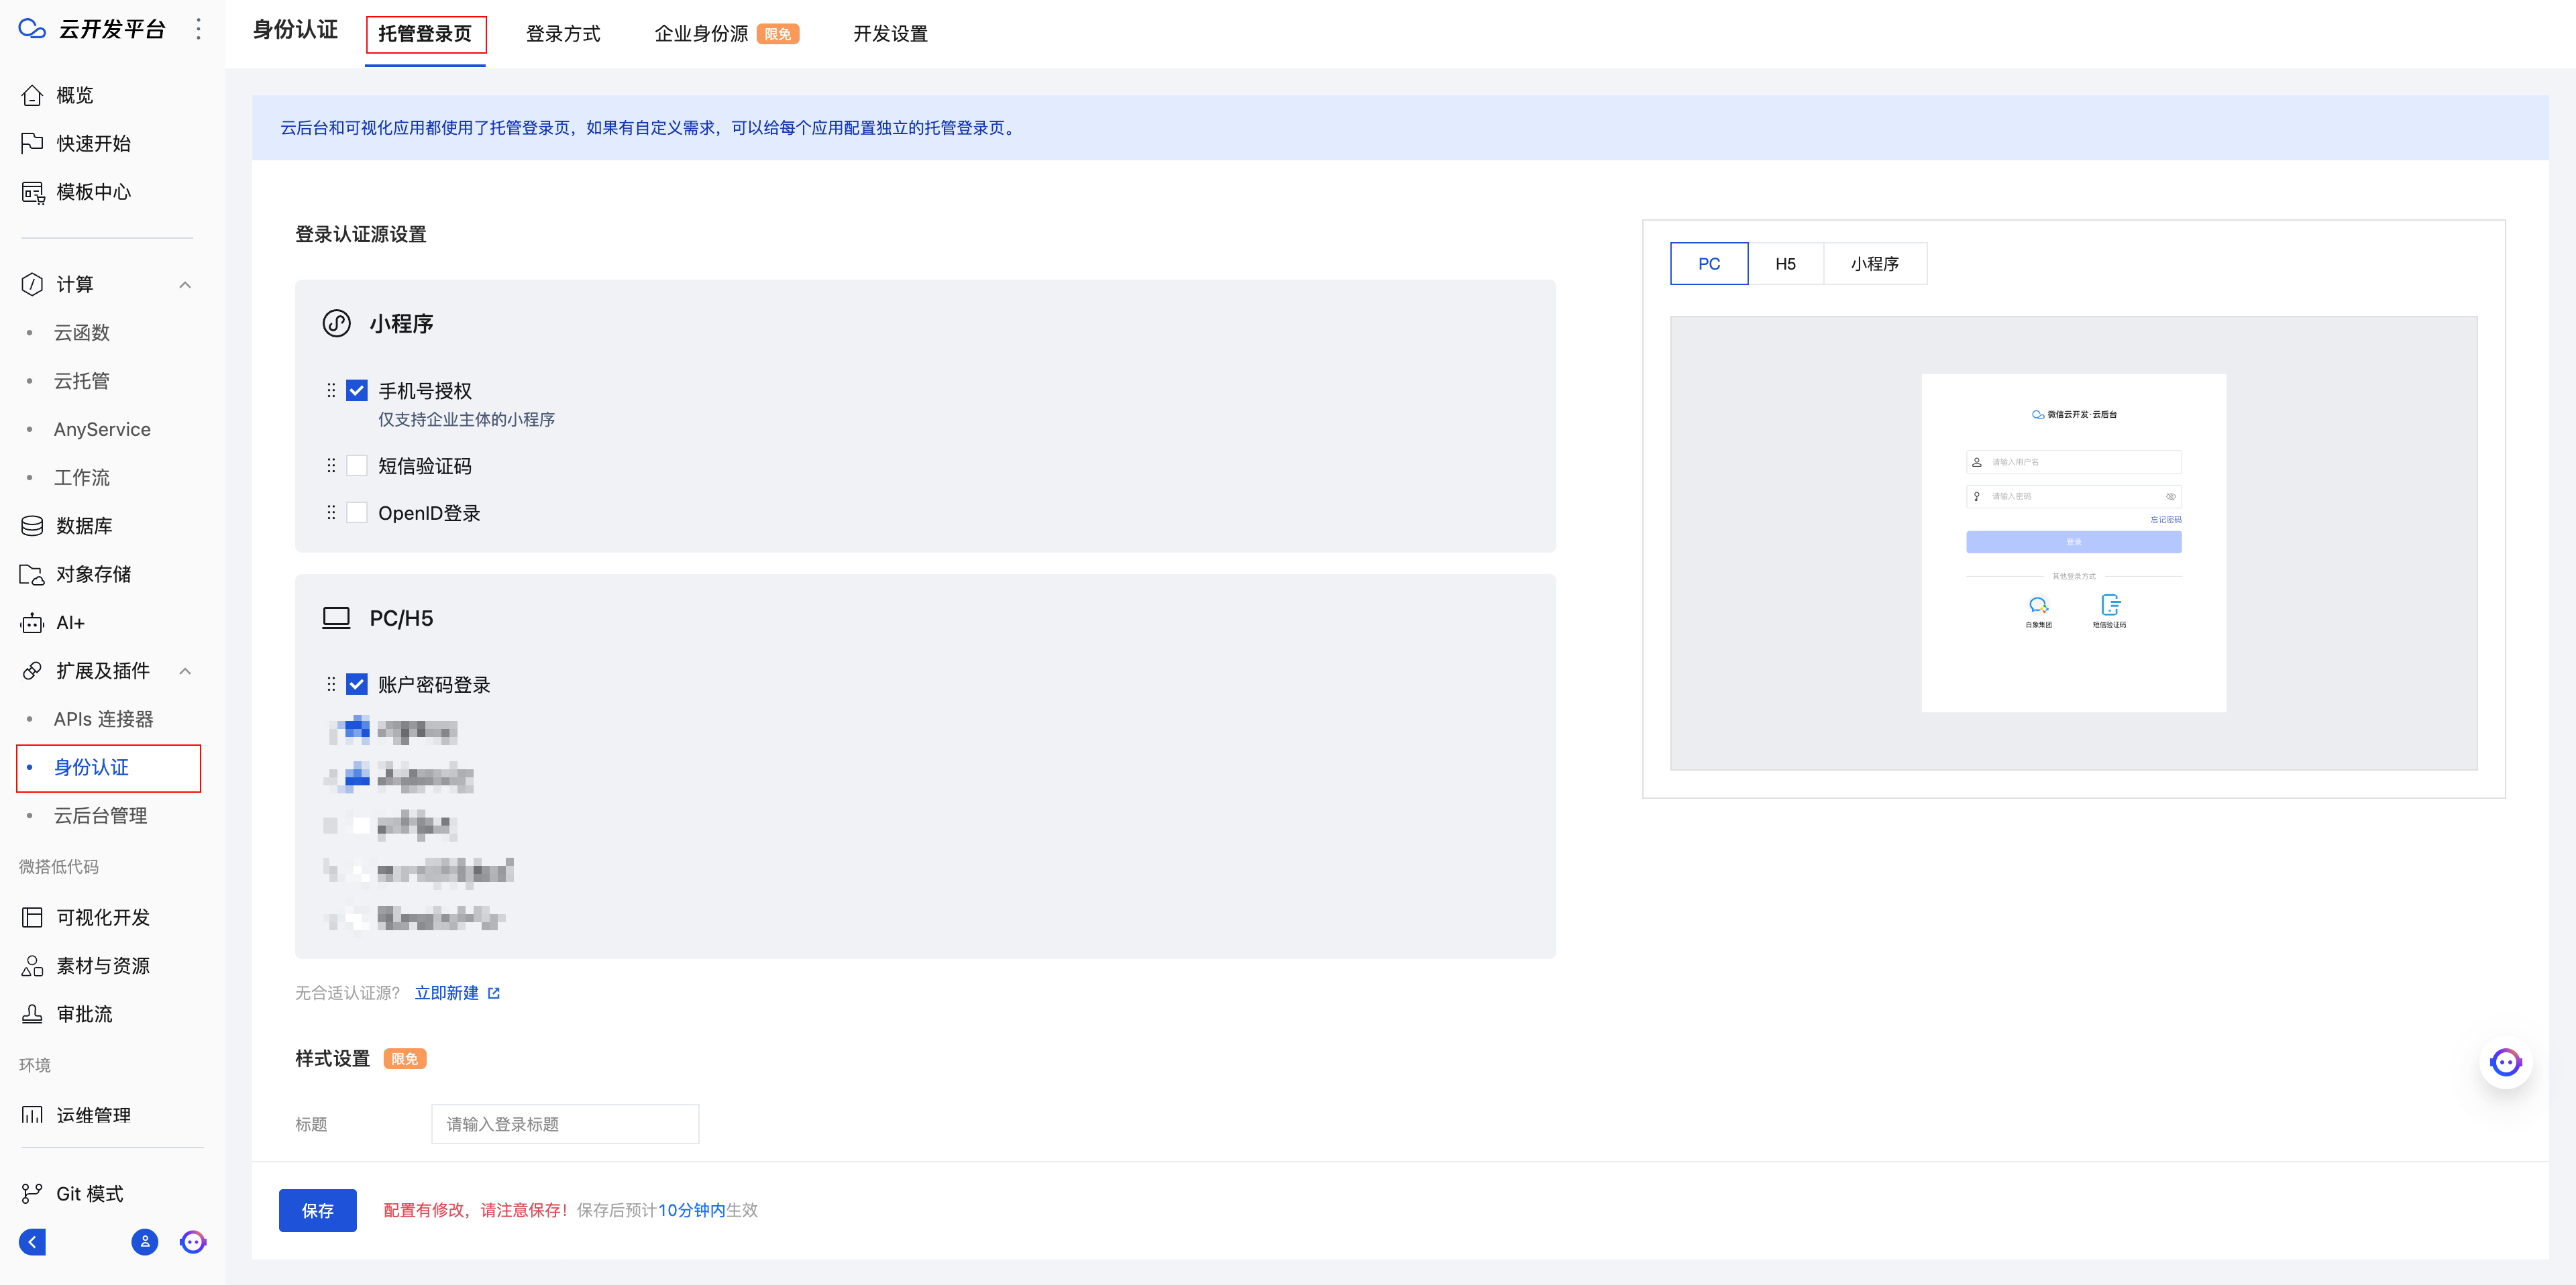
Modifying the Hosted Login Page configuration does not require republishing the application. Wait for 10 minutes for the changes to take effect automatically.
User Permission Configuration
If you need to grant users different permissions when logging into the application, you can configure them in the following location:
User Management
Go to the User Management module in the Cloud Admin Console, where you can perform categorized management of users (organizational structure management, role management).
For specific reference documentation: Tencent Cloud WeDa Low-Code Enterprise Internal Users_Tencent Cloud
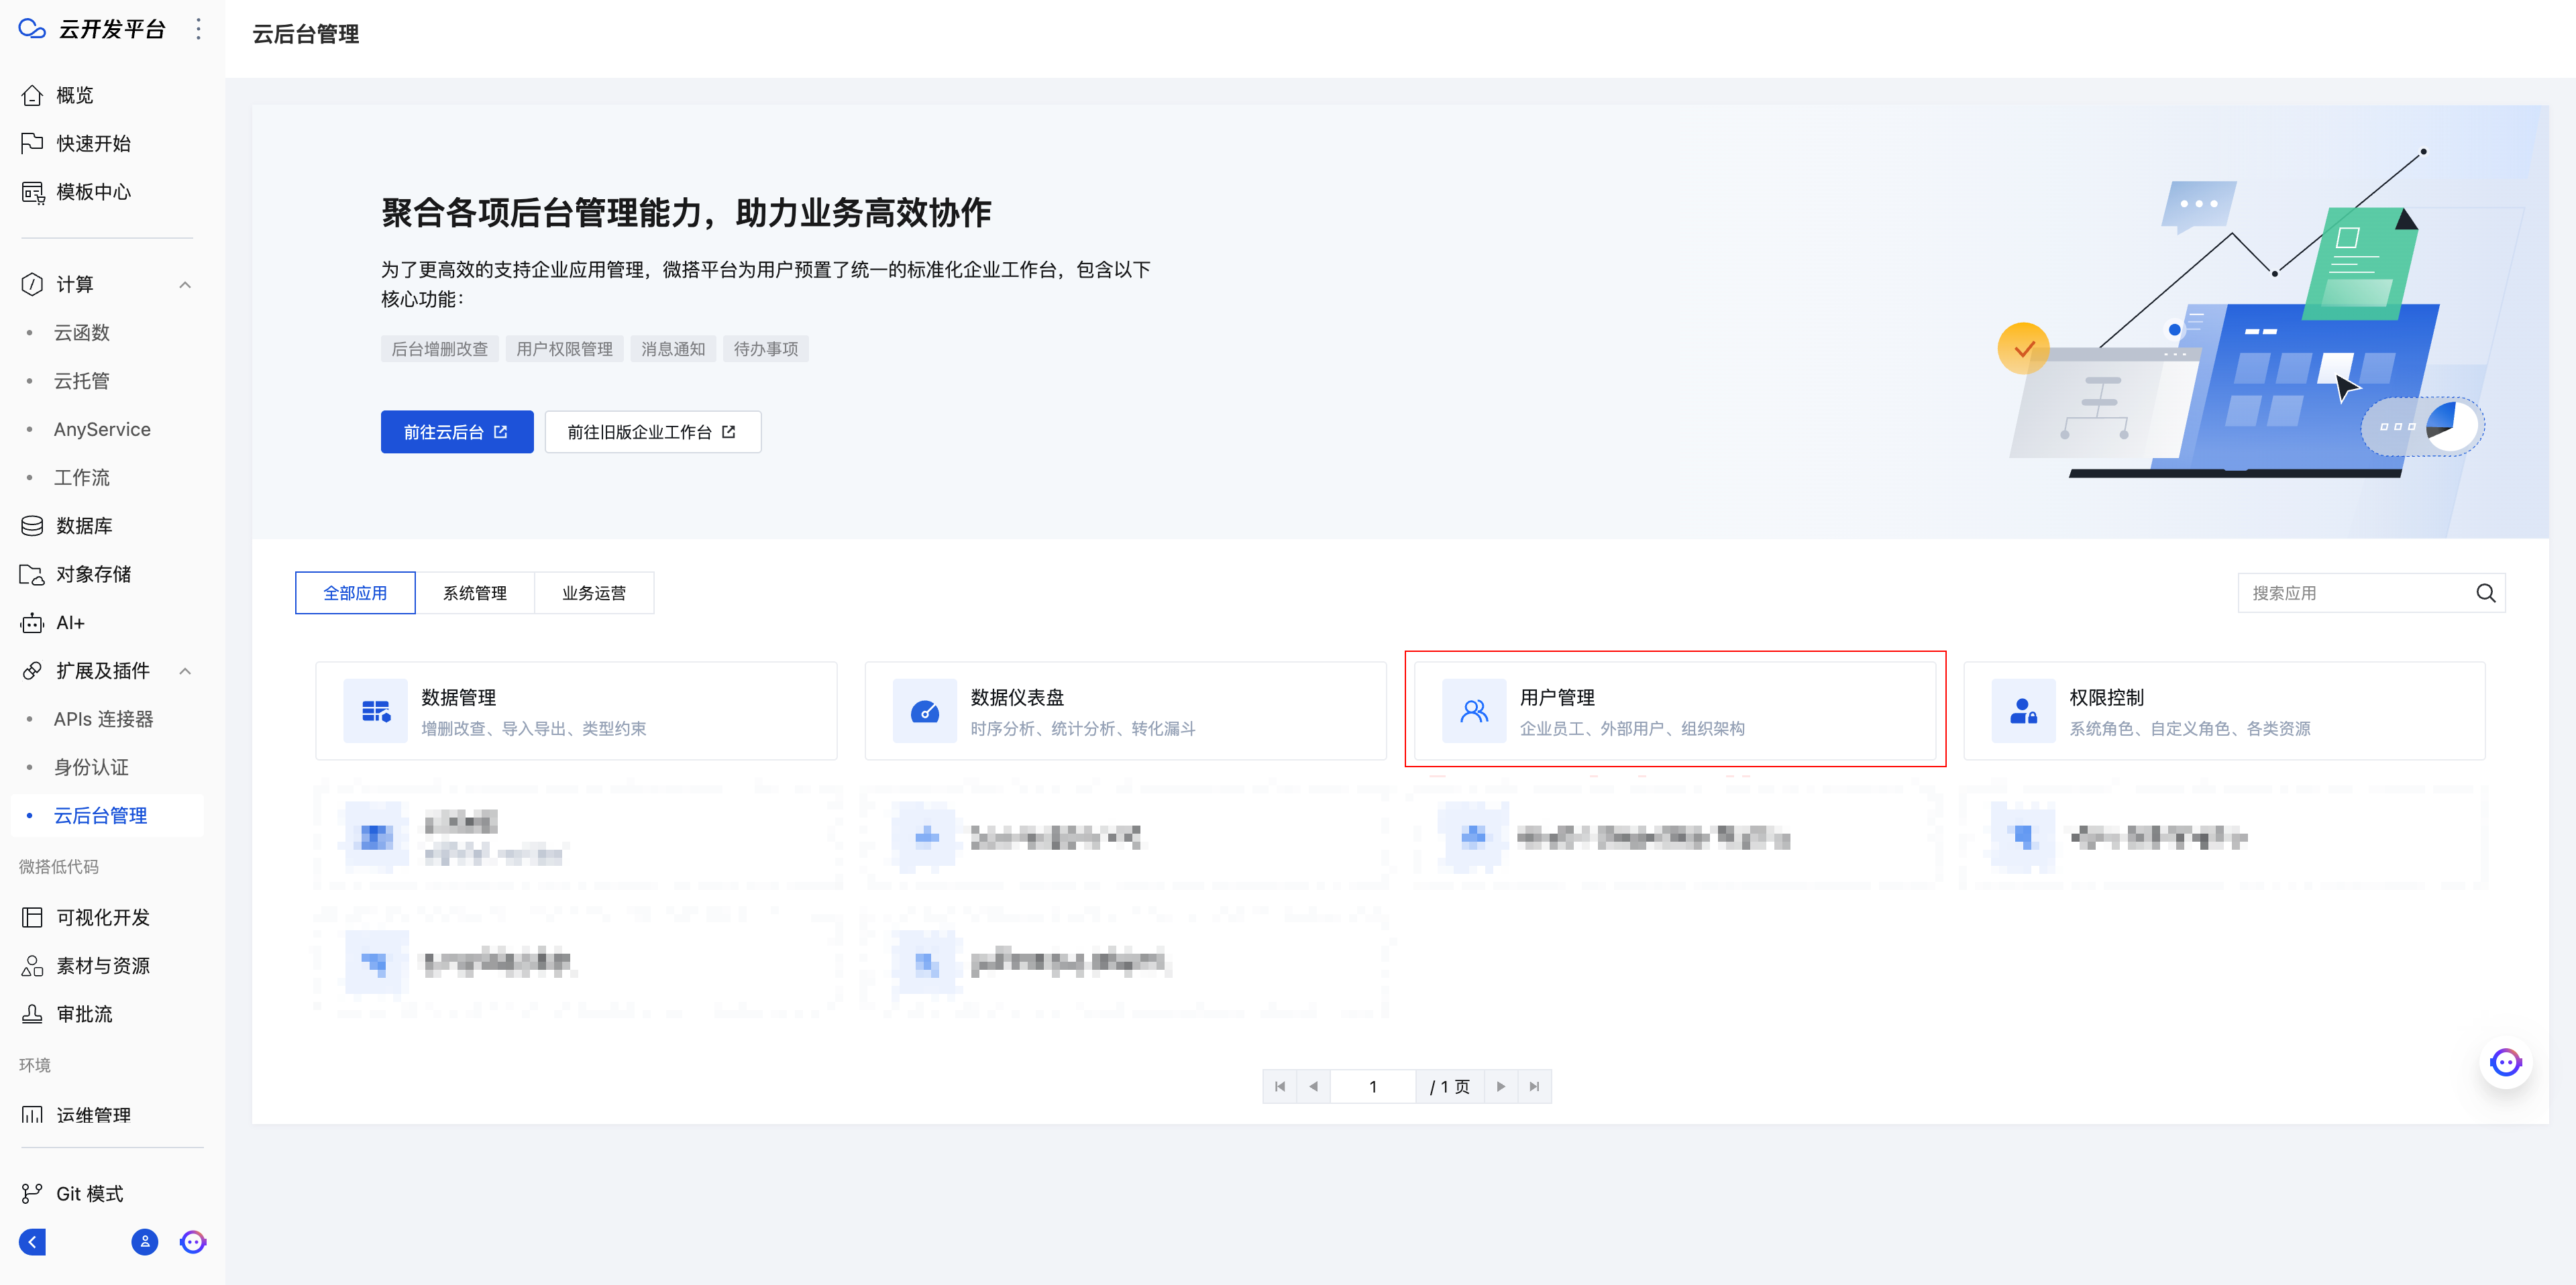
Users in Cloud Development fall into two categories:
- Internal Members: Contain an organizational structure, and each user's role can be individually configured to control permissions.
- External Users: Cannot configure role-based permissions individually but can only have their permissions managed uniformly.
Role Management
You can assign corresponding roles to users and then configure application or data permissions for those roles.
For specific reference documentation: Tencent Cloud WeDa Low-Code Predefined Roles_Tencent Cloud
Application Release
Release Process
-
After development is completed, click the 'Publish' button in the upper-right corner of the editor to go to the publish process.
-
Select the target platform for publishing. Currently supported platforms include Mini Program, H5, and Web
-
Select whether to release to the cloud console. If unsure whether it is needed, choose No
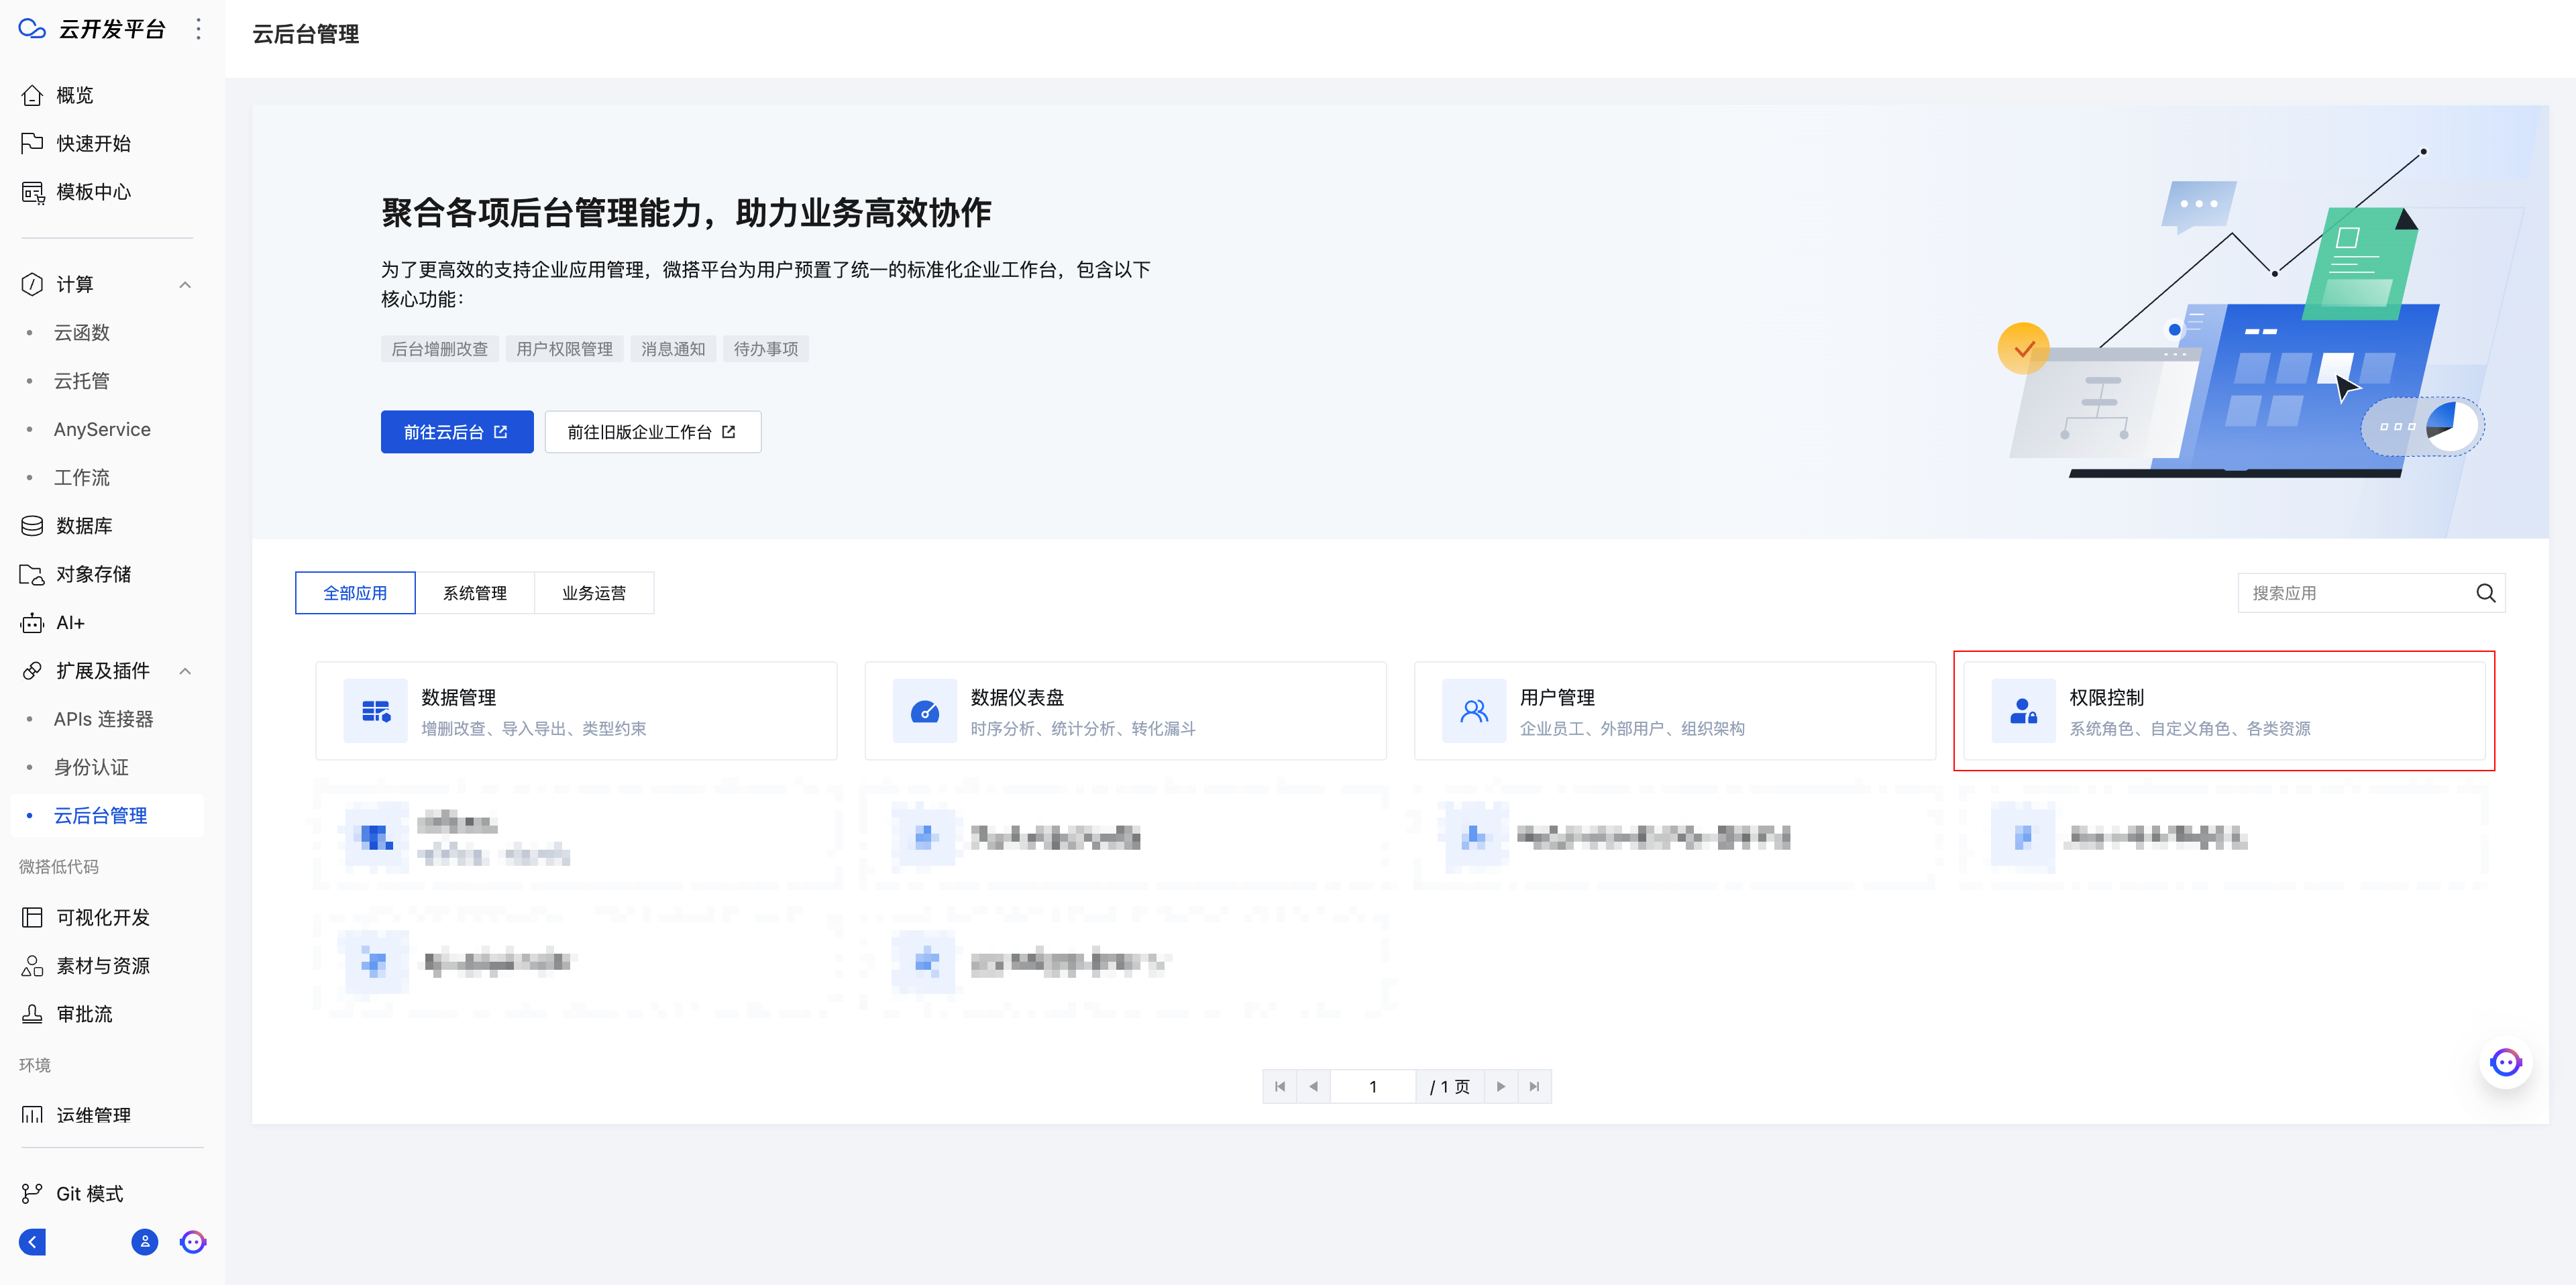
The cloud console provides a unified portal for the Cloud Development Platform, preparing standard capabilities such as unified user login and message notifications. It better supports scenarios such as enterprise application management and business operation management. -
Select the release type: Trial Edition, Formal Edition
Use the Trial Edition for development environments and the Production Version for official releases. Data is isolated between the two versions. -
Select the data source: It is recommended to keep the data source consistent with the release method.
-
Process the release check results
-
Click the "Confirm" button
Release Process
| Release Type | Applicable Scenarios and Features |
|---|---|
| Trial Version | - Applicable scenarios: Trial testing before official application launch- Data display: Data from data models in the trial environment- Resource publishing: No need to publish resources like data models, roles, and workflows; they remain fully functional within the application |
| Production Version | - Applicable scenarios: Official launch after application development and testing are completed- Data display: Data from data models in the production environment- Resource publishing: Must publish resources such as data models, roles, and workflows for them to function properly within the application |
Release Check
Before release, the system validates components, roles, data sources, etc., that the application depends on, and presents a checklist of validation prompts. Please address the issues according to the prompts.
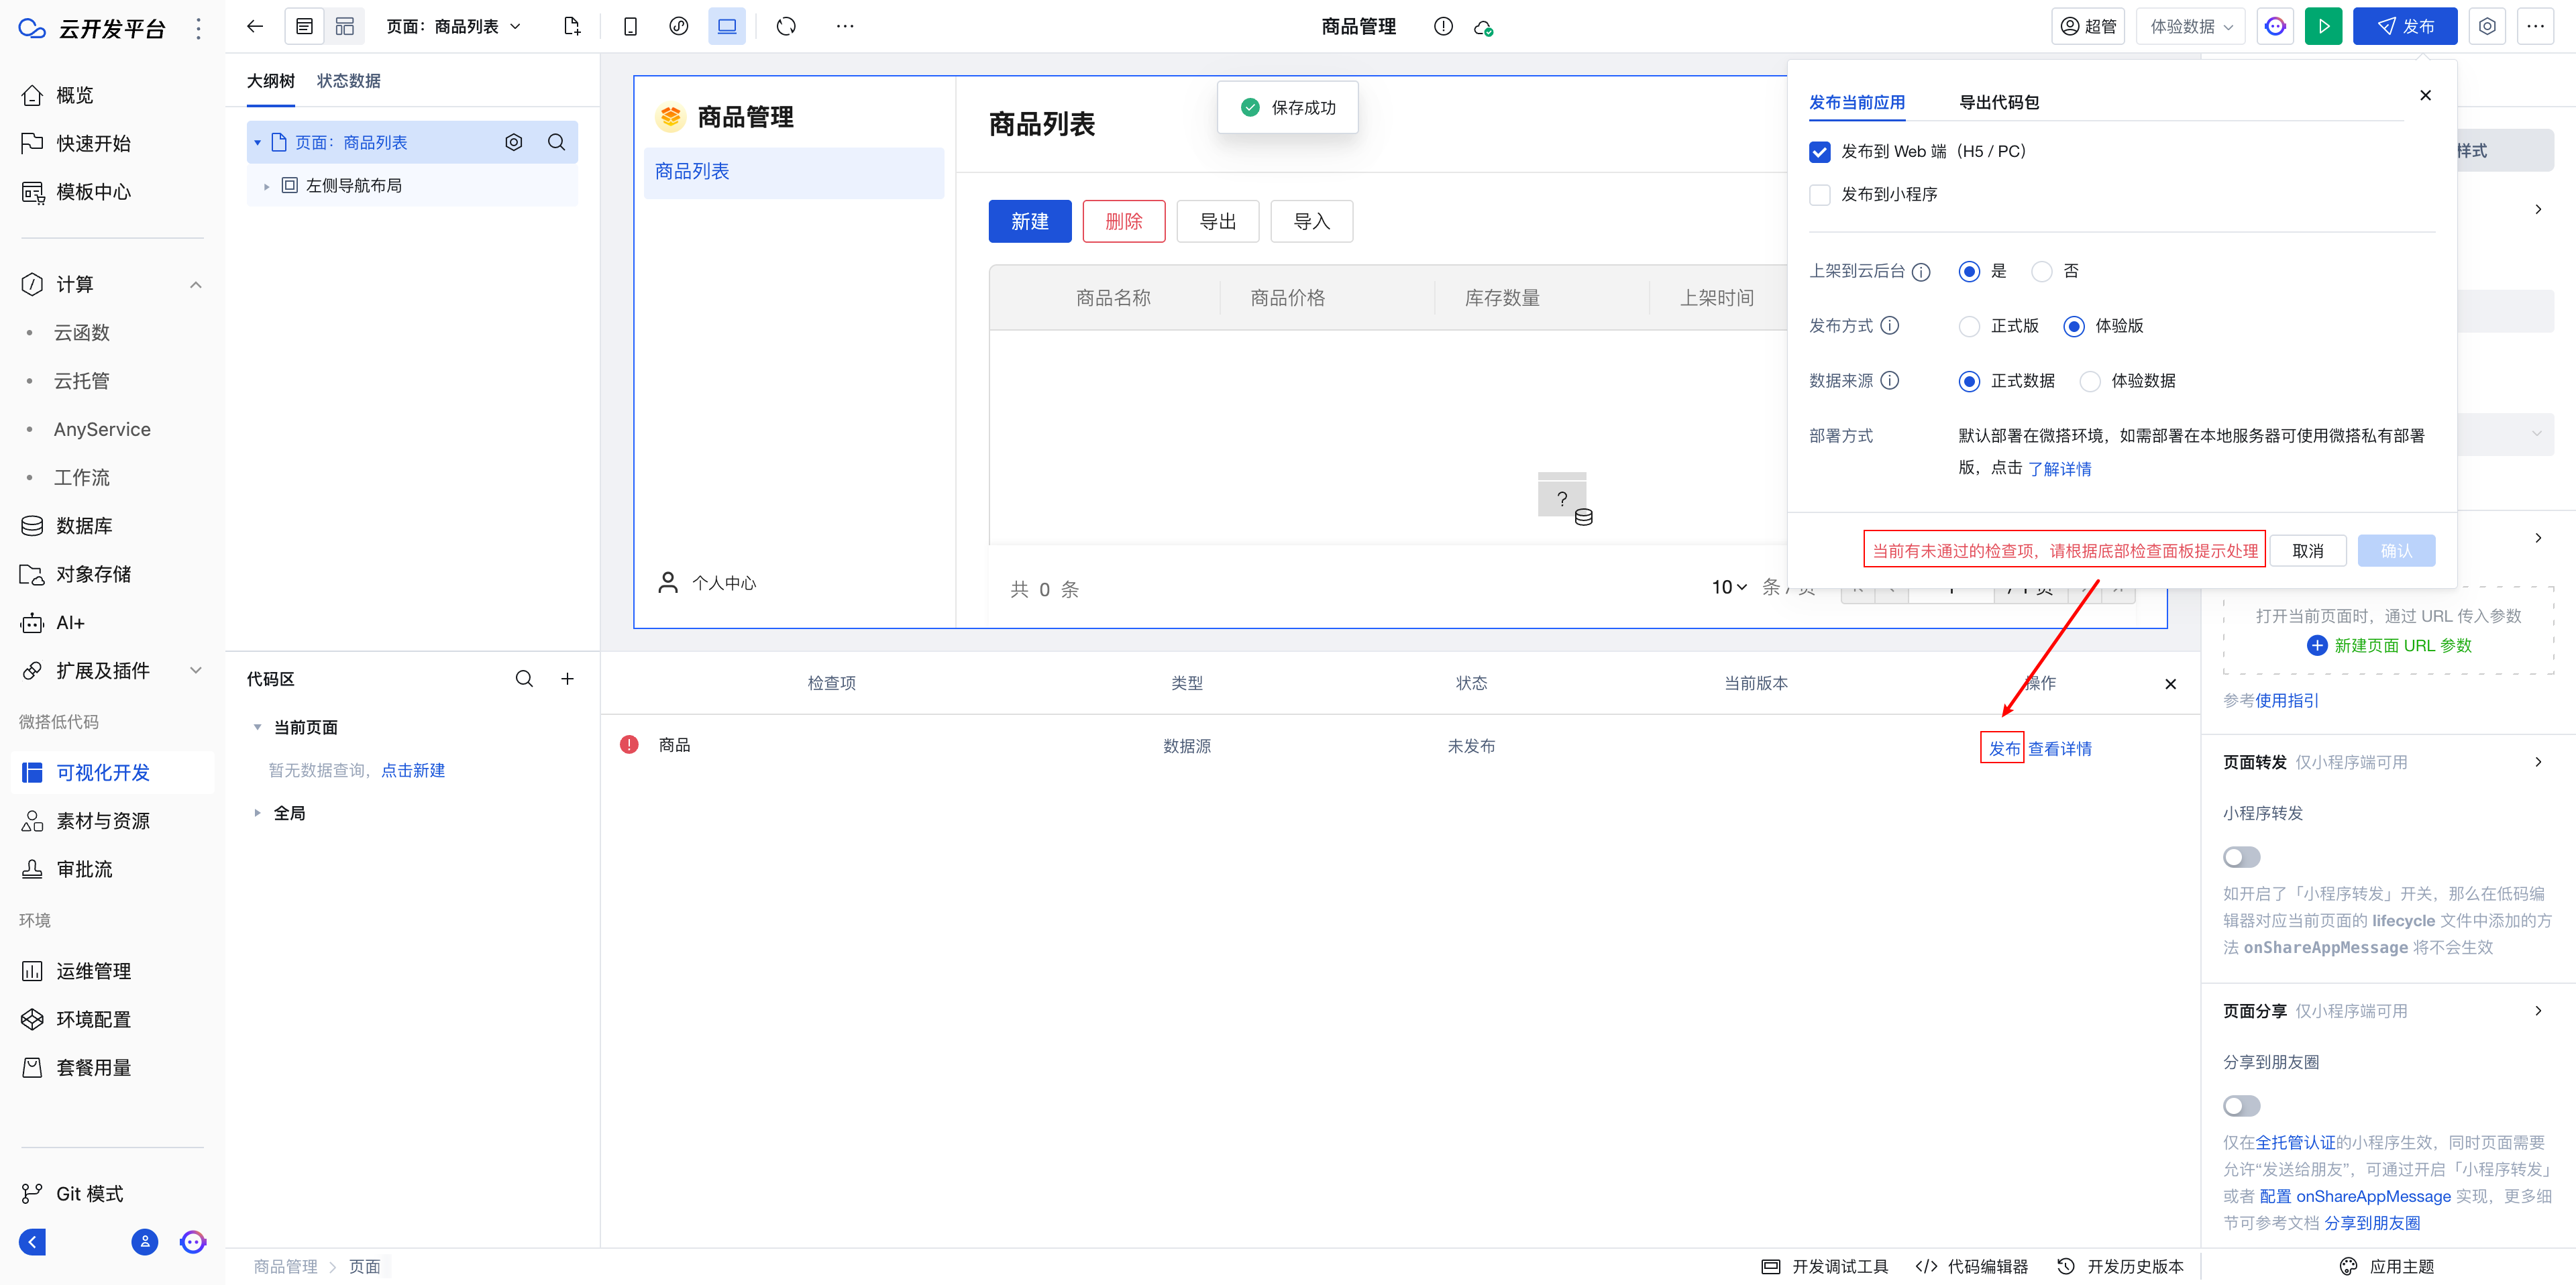
The release can only be performed after the check passes.
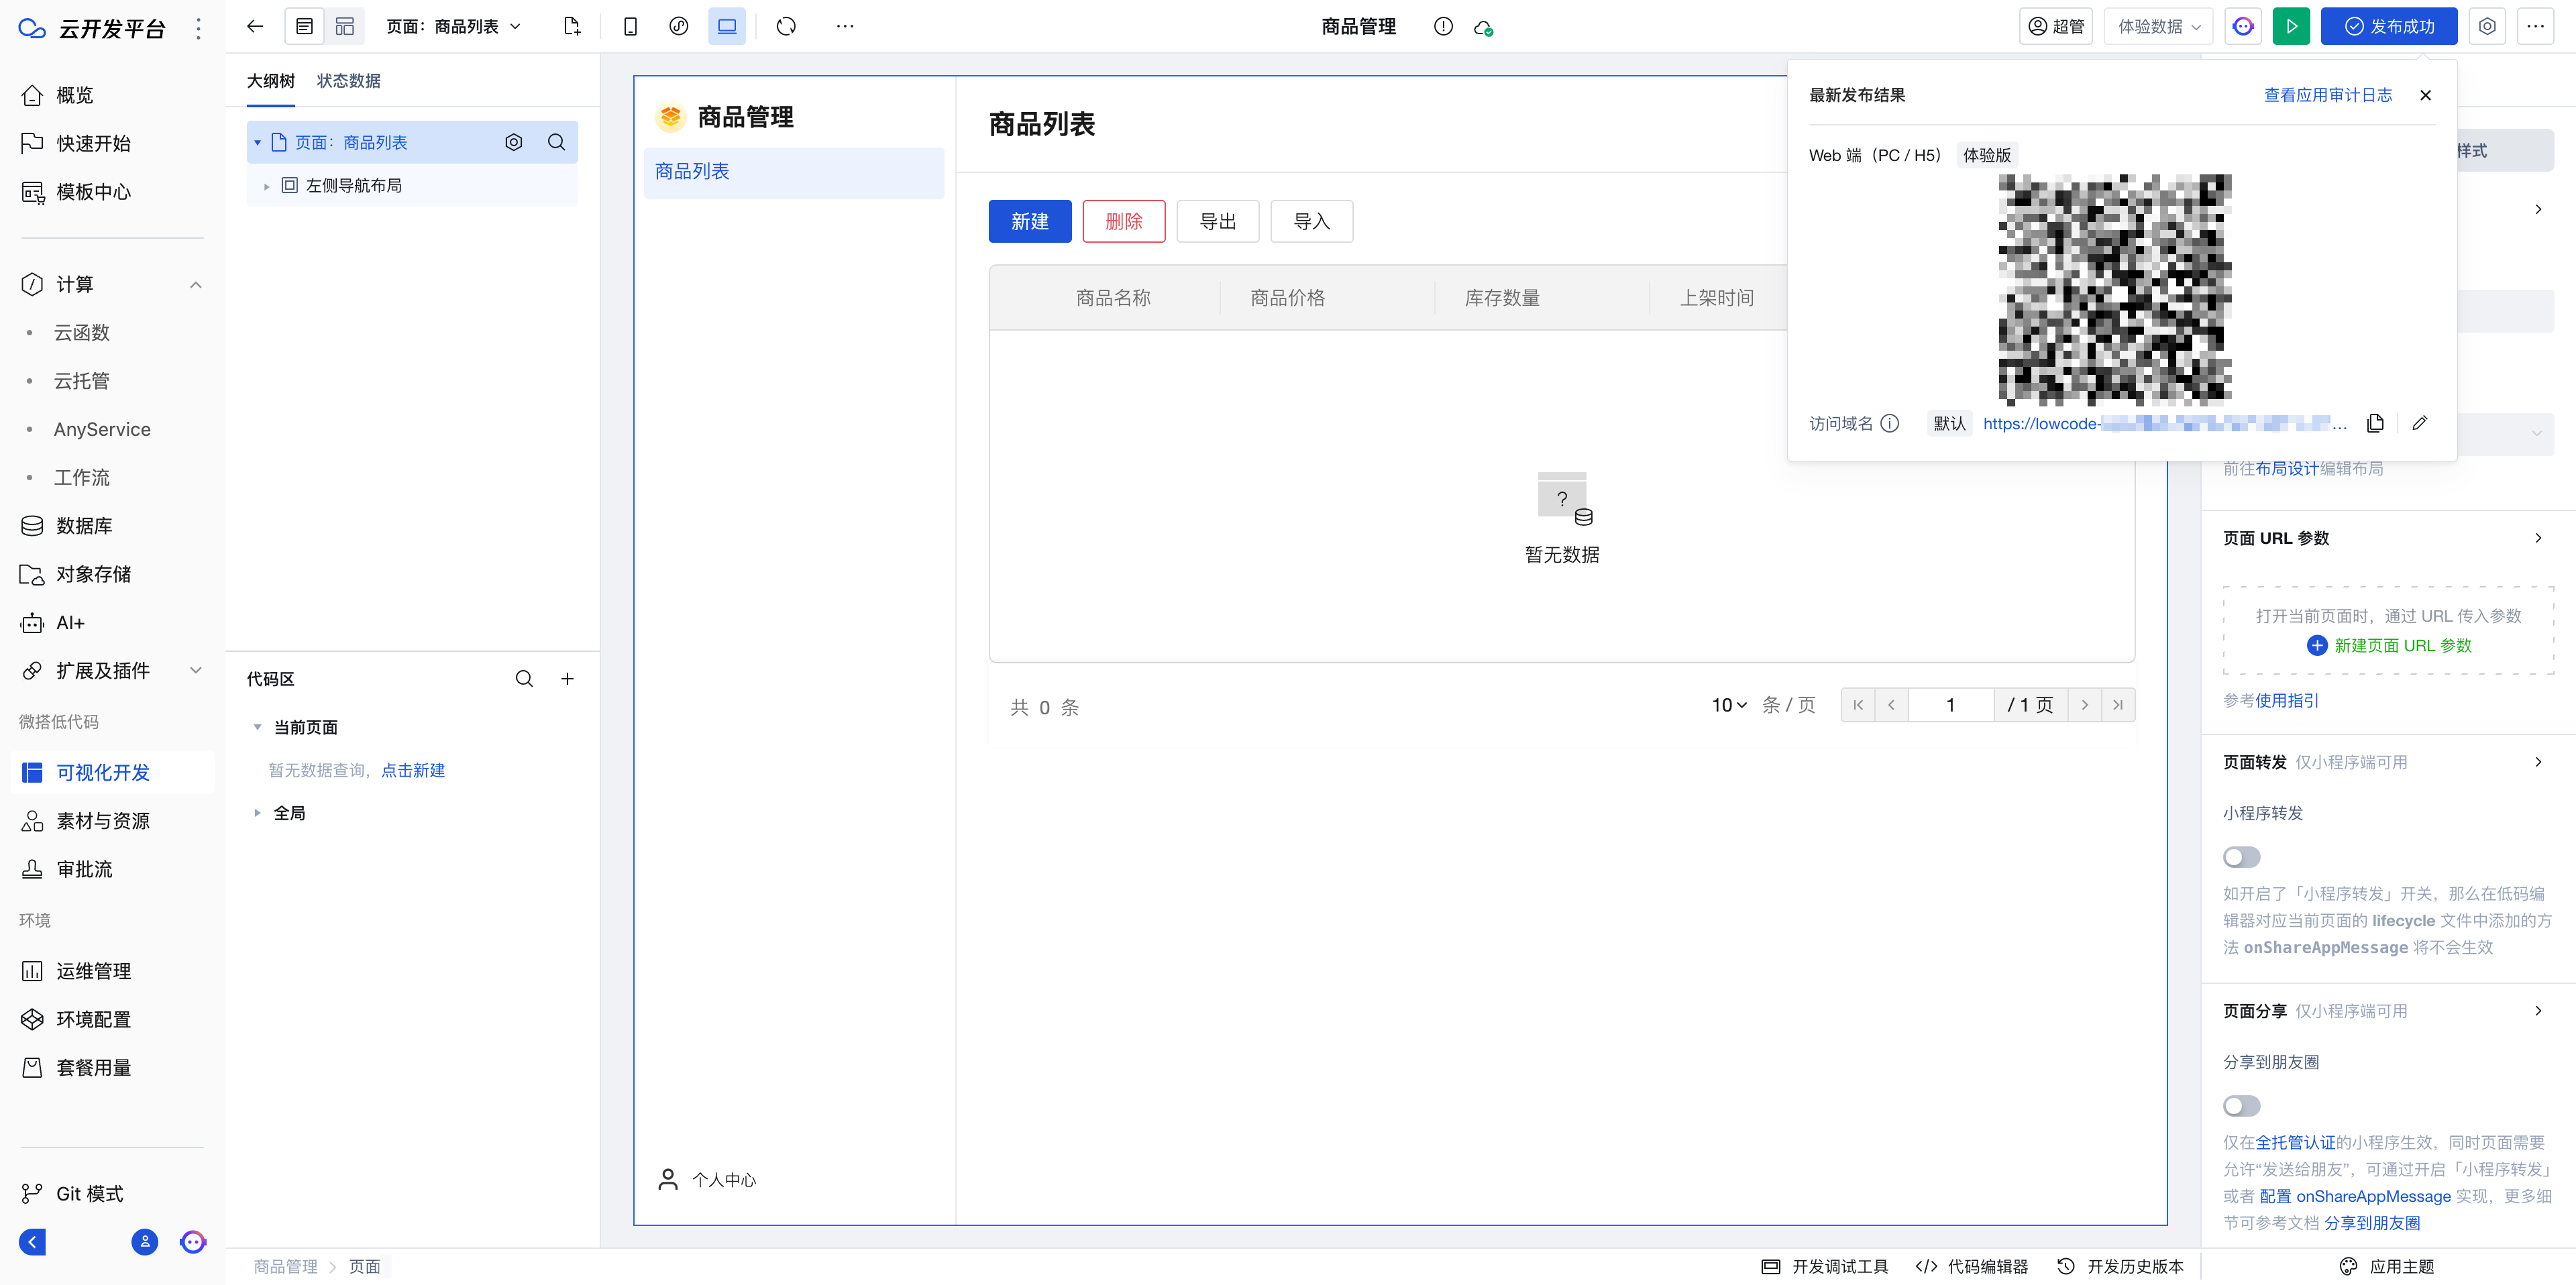
Release Successful
After the application is successfully released, you can view the application's QR code and access domain. You can either scan the code to access it or click the link to access it directly.
FAQ
-
Data not displayed after publishing the application
After creation, the default permissions for a data model are "read and write access only for the creator and administrators". If you want the data to be readable by everyone, you need to set the permissions to "readable by all users, writable only by the creator and administrators".
- Official documentation not found
It is recommended to use copilot for inquiries. If not precise, refer to the following documentation
Operation Guide: Tencent Cloud WeDa Low-Code Creating Applications_Tencent Cloud
Component Documentation: Component List | Tencent Cloud CloudBase - All-in-One Backend Cloud Service
Expression Introduction: Expression | Tencent CloudBase - All-in-One Backend Cloud Service