Create Your First Component Library
Preparation
- Have a Tencent Cloud account;
- Activate CloudBase LowCode;
- Install Node.js;
- Install Cloudbase CLI.
If npm install -g @cloudbase/cli fails, you may need to follow this document to install npm in a non-administrator directory or modify the default npm directory
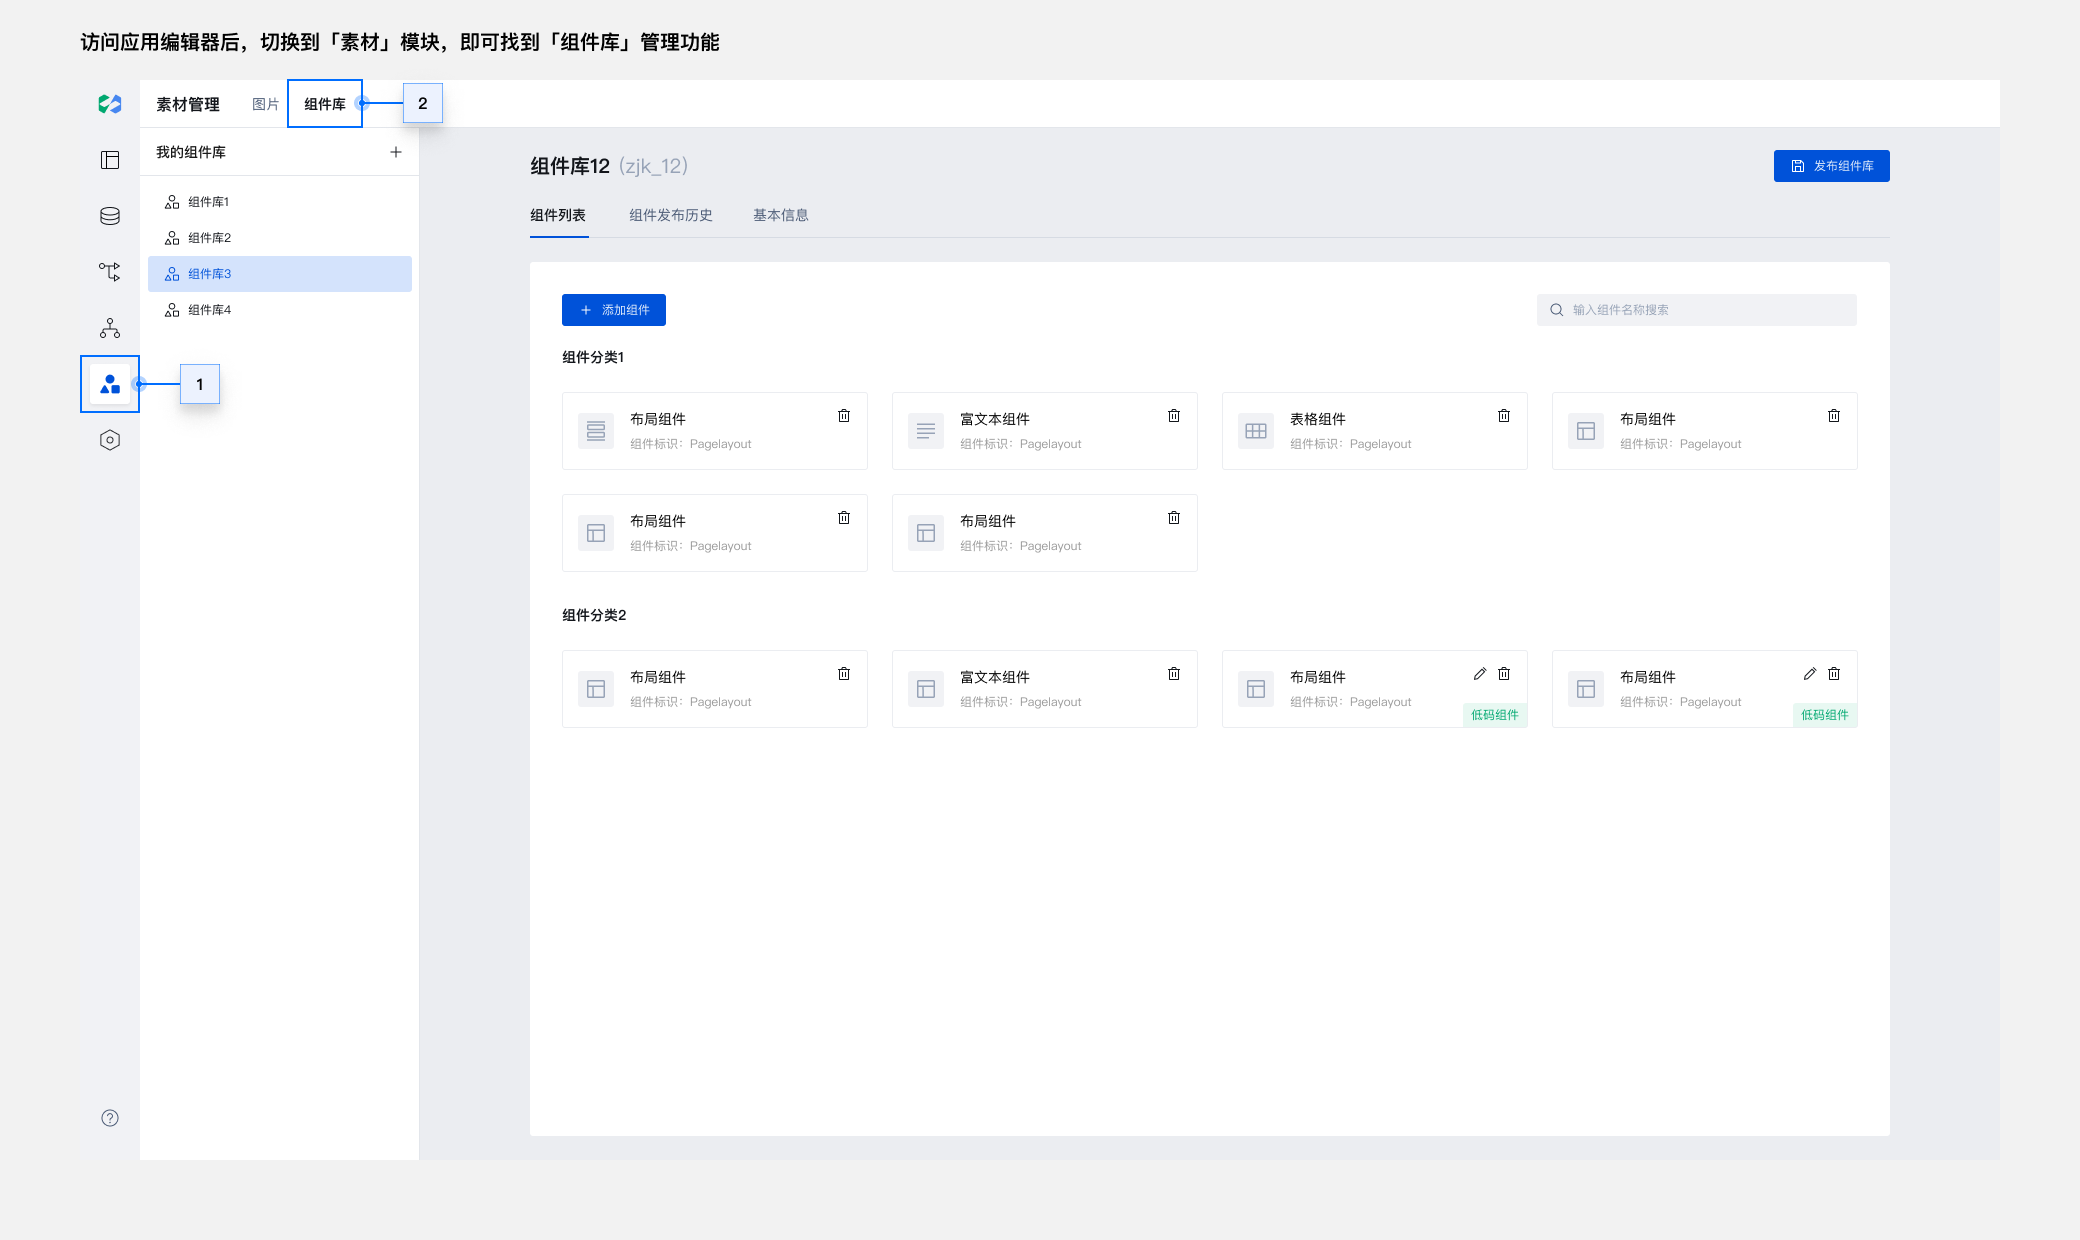
Step 1: Create Cloud Component Library
In the WeDa console - Application menu, open the editor of any application, find the Component Library Management module, and create a component library mydemo.
Step 2: Associate Local Component Library
tcb lowcode create mydemo
The identifier mydemo used to create the local component library needs to be consistent with the cloud to associate with the cloud component library.
Or use the command tcb lowcode create to complete the association through smart prompts.
Step 3: Debug Local Component Library
cd mydemo
tcb lowcode debug
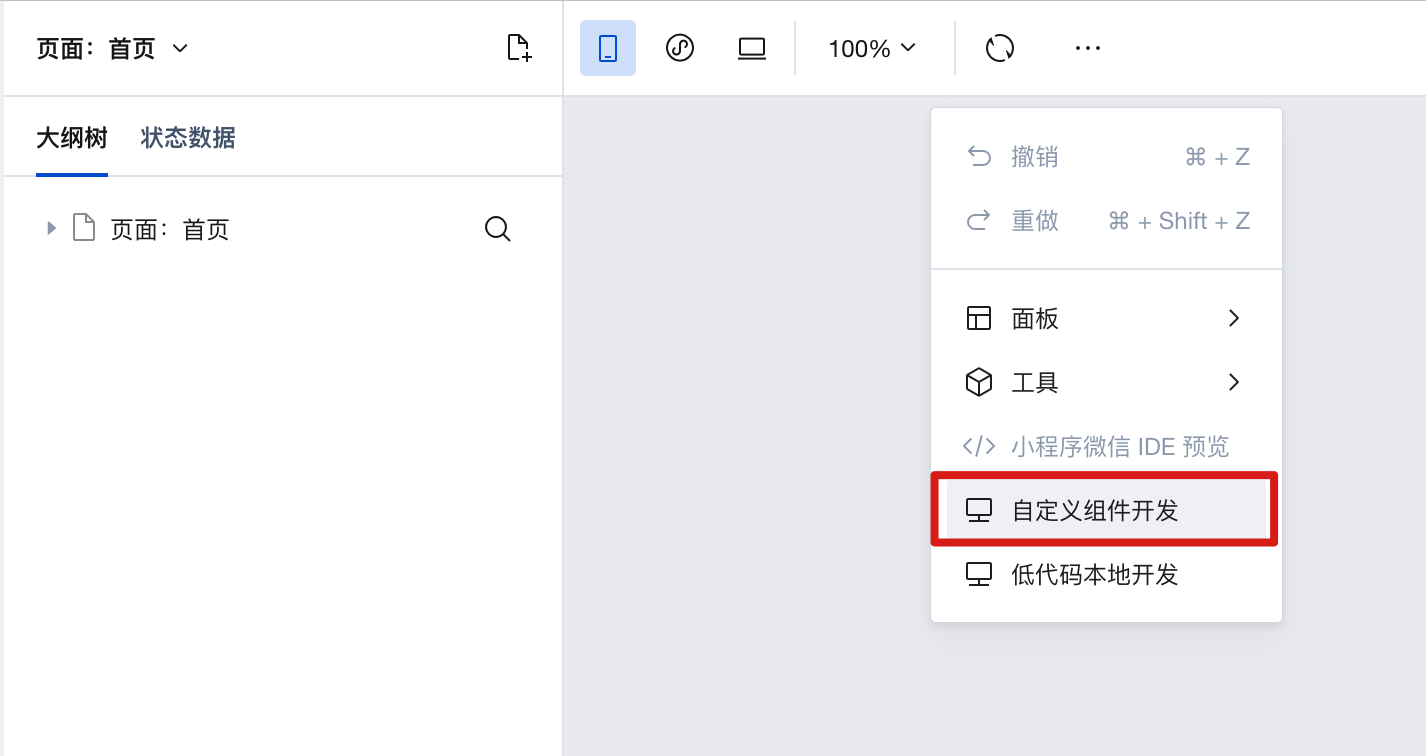
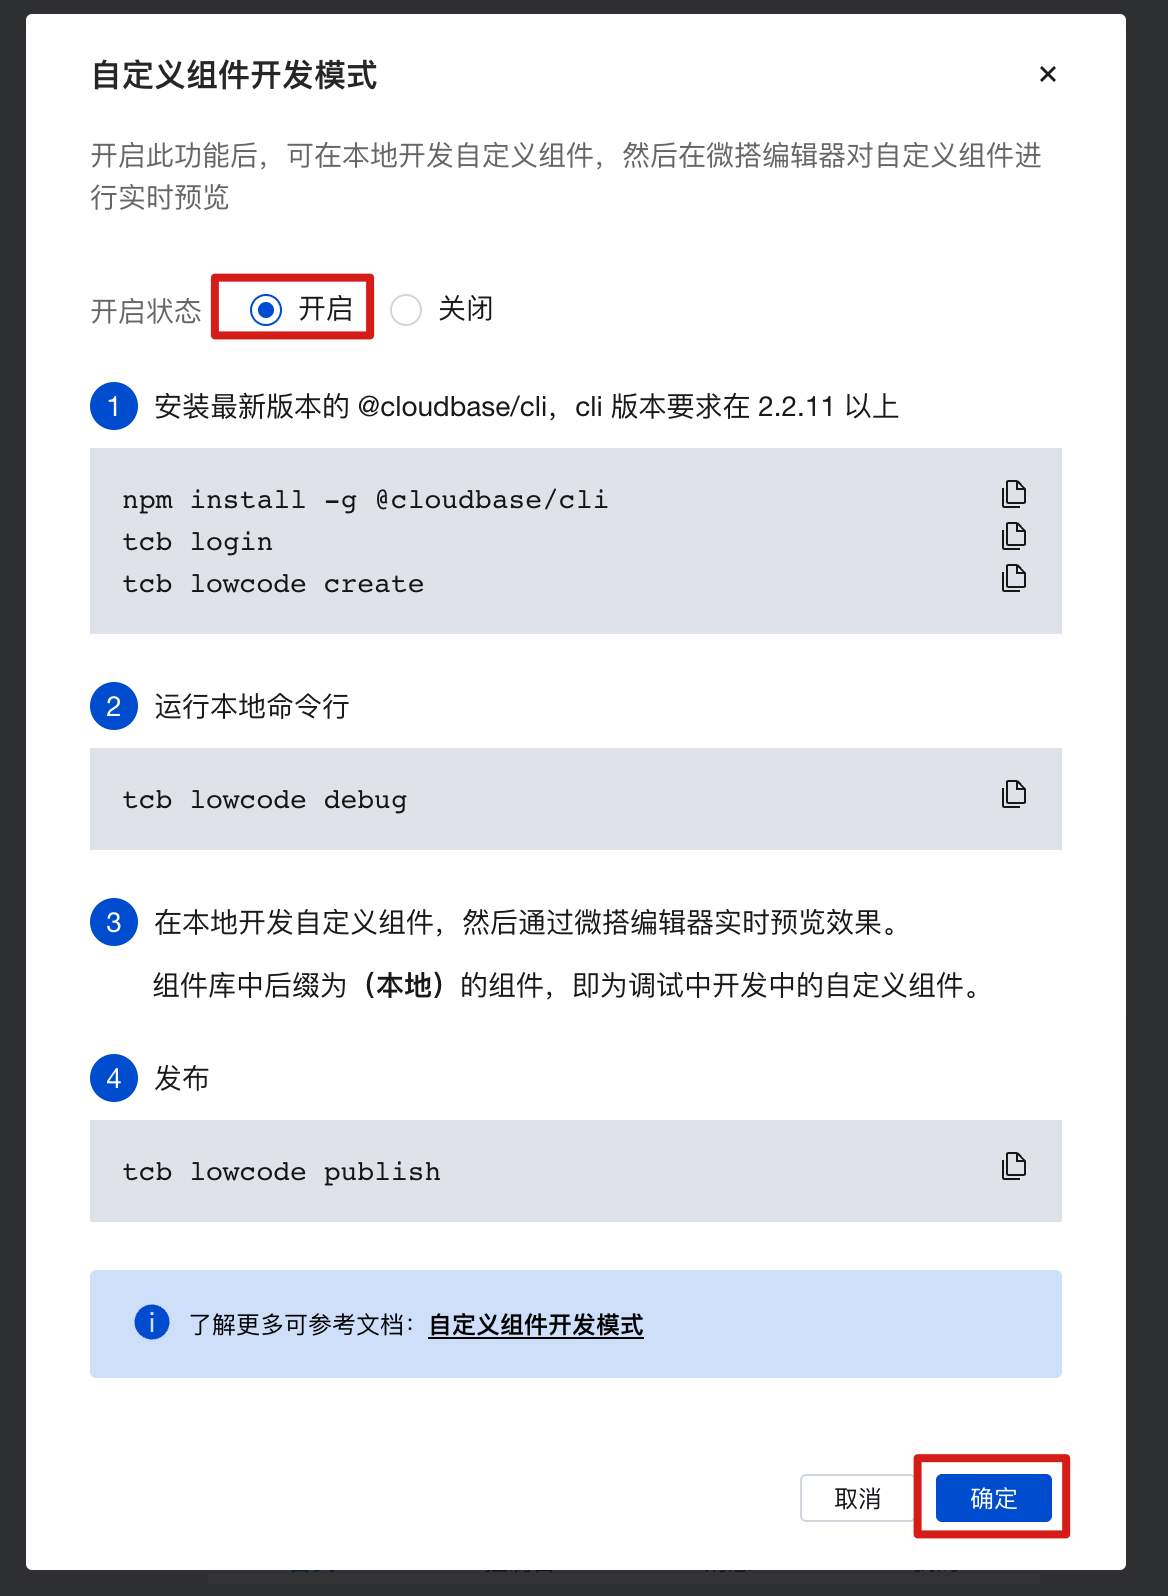
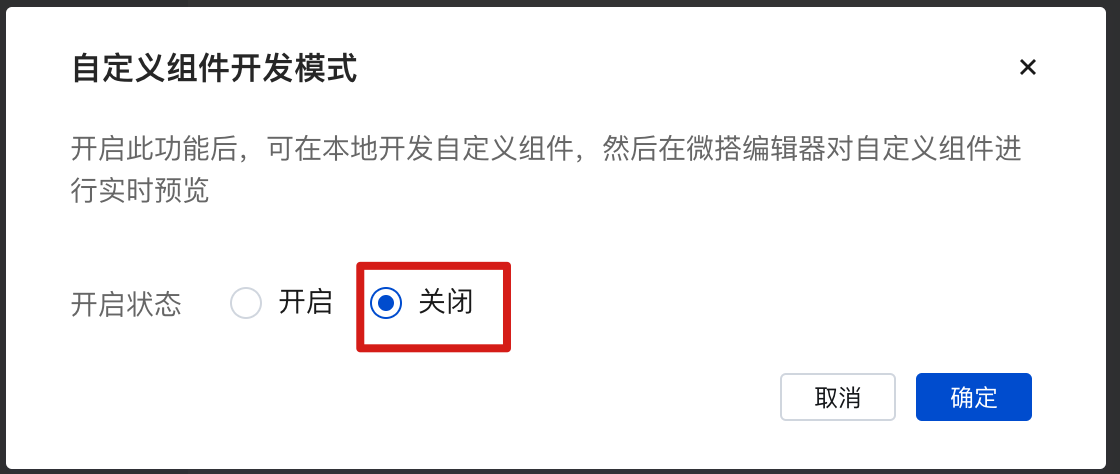
After executing the above command, enter the page editor, click【···】in the upper left corner, and enable 【Custom Component Development】 mode to preview local components.
For CLI versions before 2.2.11, it is recommended to upgrade to version 2.2.11 or higher, otherwise debug mode will open the old version of the editor.
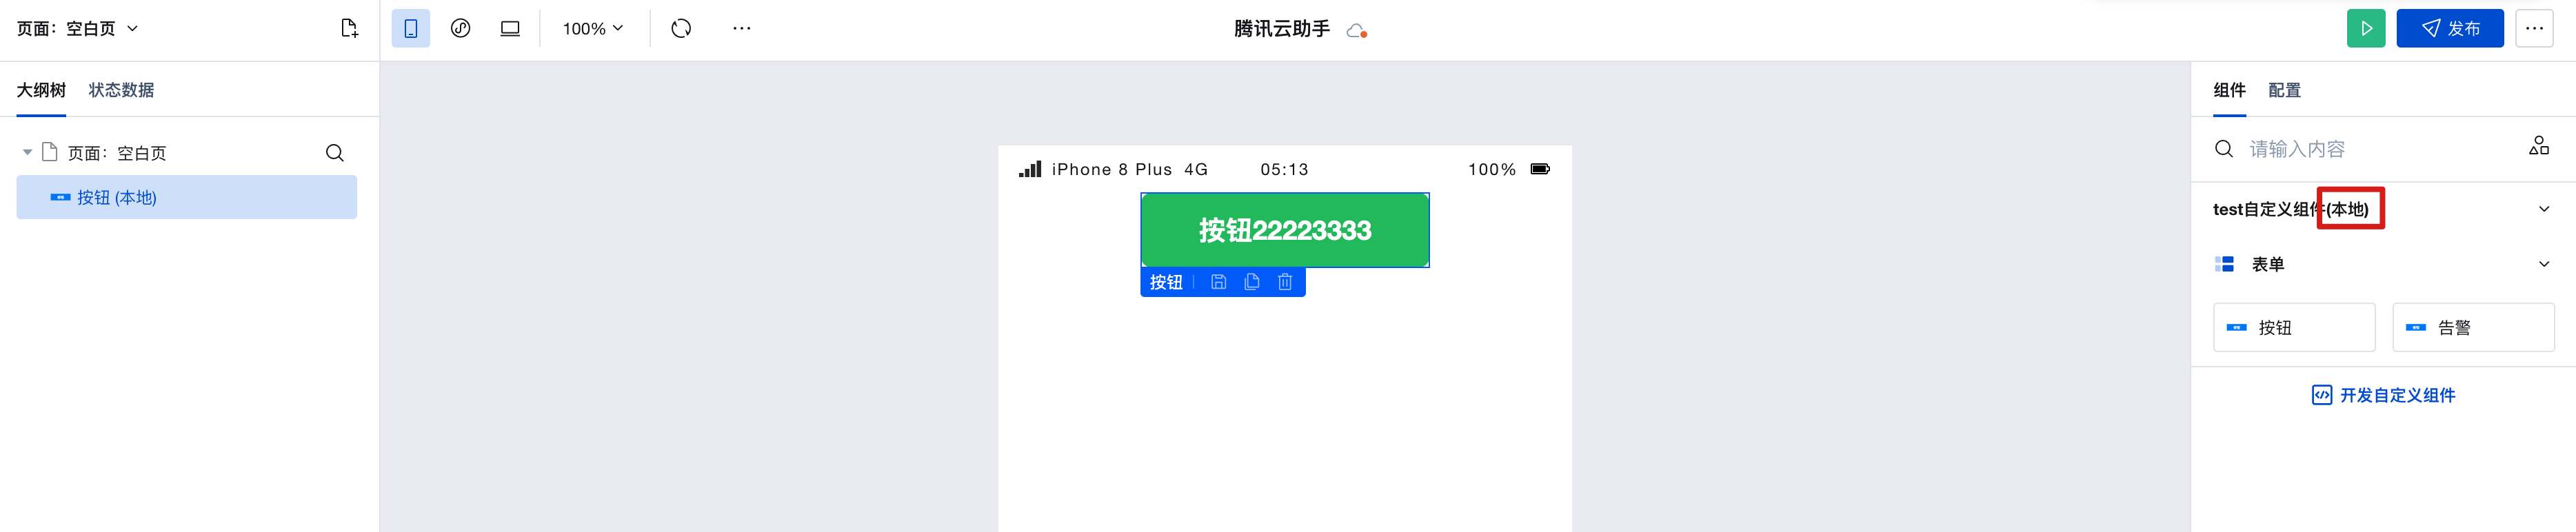
You can debug on this page:
- Drag components to the Edit Area and view the effect
- In the component's Properties panel, configure properties and view the effect
- In the component's Styles panel, configure styles and view the effect
Step 4: Publish Local Component Library
tcb lowcode publish
Publishing the local component library is equivalent to updating the draft of the cloud component library. You still need to publish the draft as an official version in the console.
Step 5: Publish Cloud Component Library
Open the component details page of the mydemo component library and publish the component library.
After the component library is published, exit the custom development mode in the editor to preview the actual effect.
Step 6: Use Custom Component Library in Applications
The usage is similar to Step 3: Debug Local Component Library, but this is the application editor in Normal Mode, and the edited application can be published normally.
Upgrade Notice: Custom Component Library CLI Upgrade Reminder
Starting from November 6, 2025, CLI tools below version 2.10.0 will no longer be maintained. Please execute the following command to upgrade:
Execute the following command to upgrade your CLI tool.
npm install -g @cloudbase/cli