Agent UI WeDa Visual Component
Agent UI helps developers quickly build chat interfaces and integrate them into WeChat Mini Programs, H5, and web scenarios. Agent UI provides the following features:
- Agent Session Component: Provides components that integrate with Agent services and support session capabilities of Agent services.
- User Feedback: Provides a user feedback pop-up for submitting user feedback to optimize Agent service quality.
Due to the security policy upgrade in the WeChat Mini Program basic library, the file upload feature parsing process may be affected. Please upgrade the agent ui component.
- Mini Program source code component, please update to the latest version.
- For WeDa low-code components, create a new page and re-drag to update the agent-ui block, then publish the application after completion.
Usage Instructions
Create Agent
On the Agent management page, click the Create Agent button to create an Agent and configure its information.
Copy the Agent ID for Agent UI block configuration.
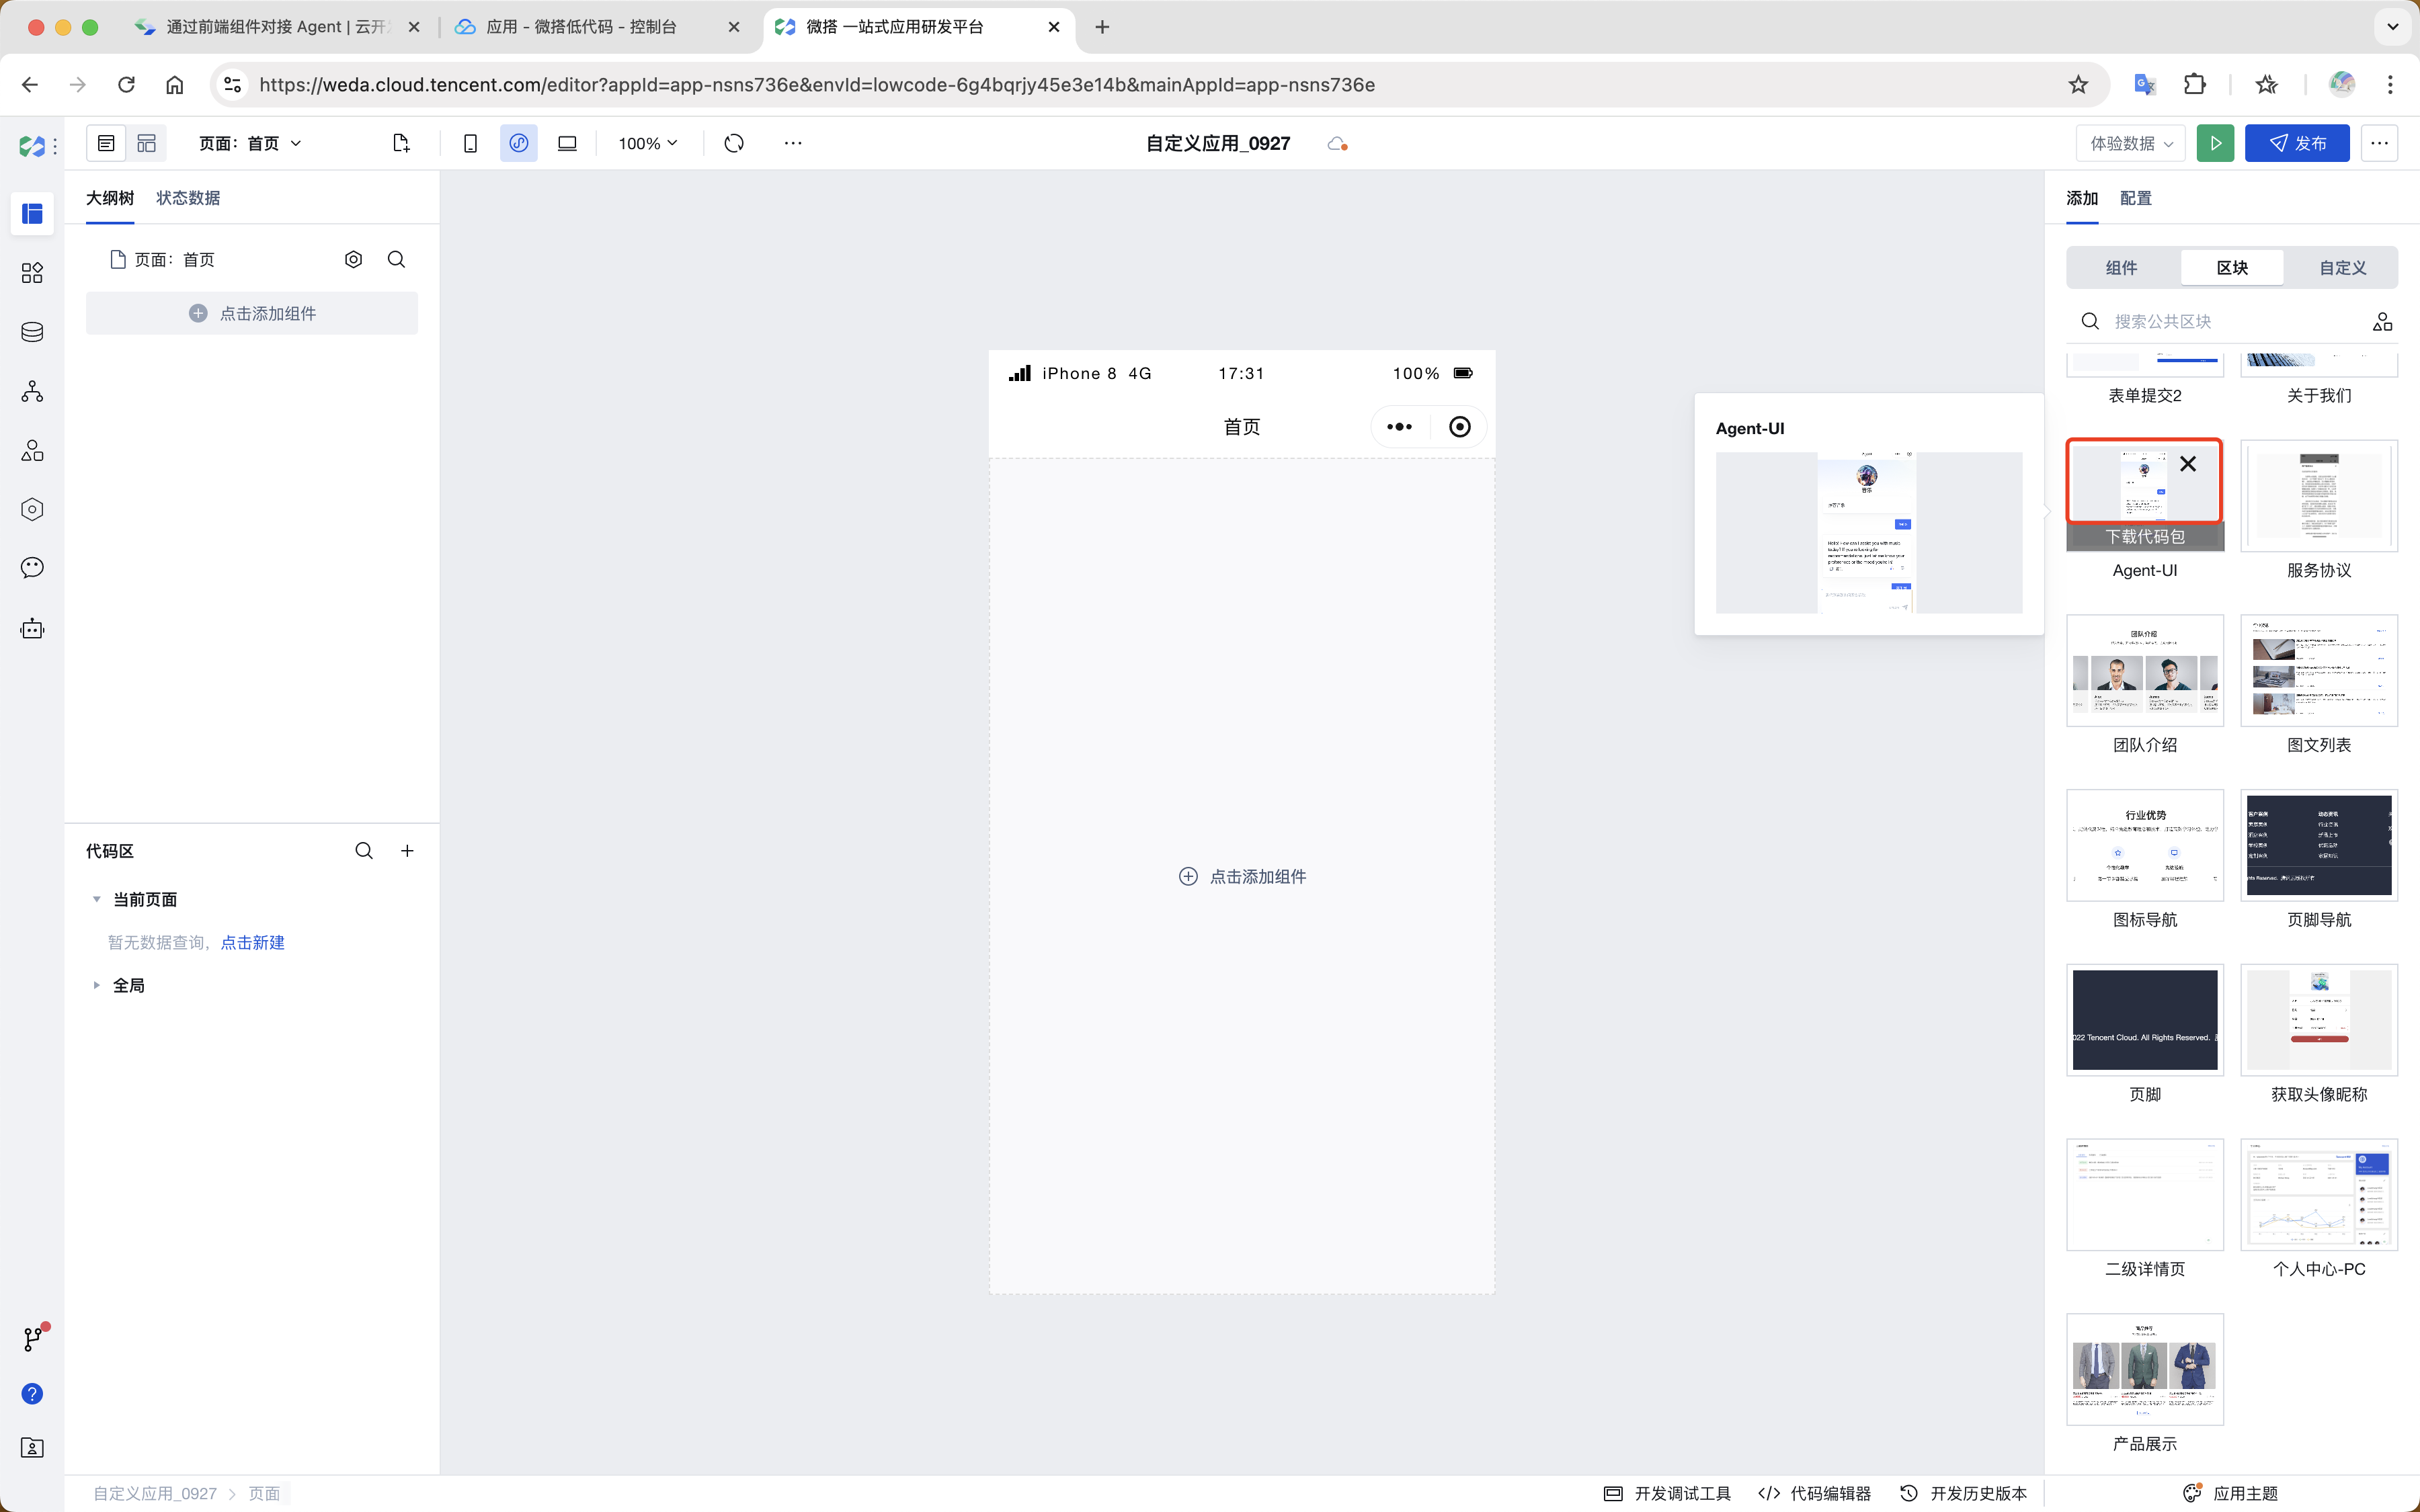
Add Agent UI
Search for Agent UI in the public blocks and add it to the current page.
Configure Agent ID
Click the Agent UI block to configure the Agent ID. The Agent ID can be copied from AI + -> Agent -> specific Agent details page.
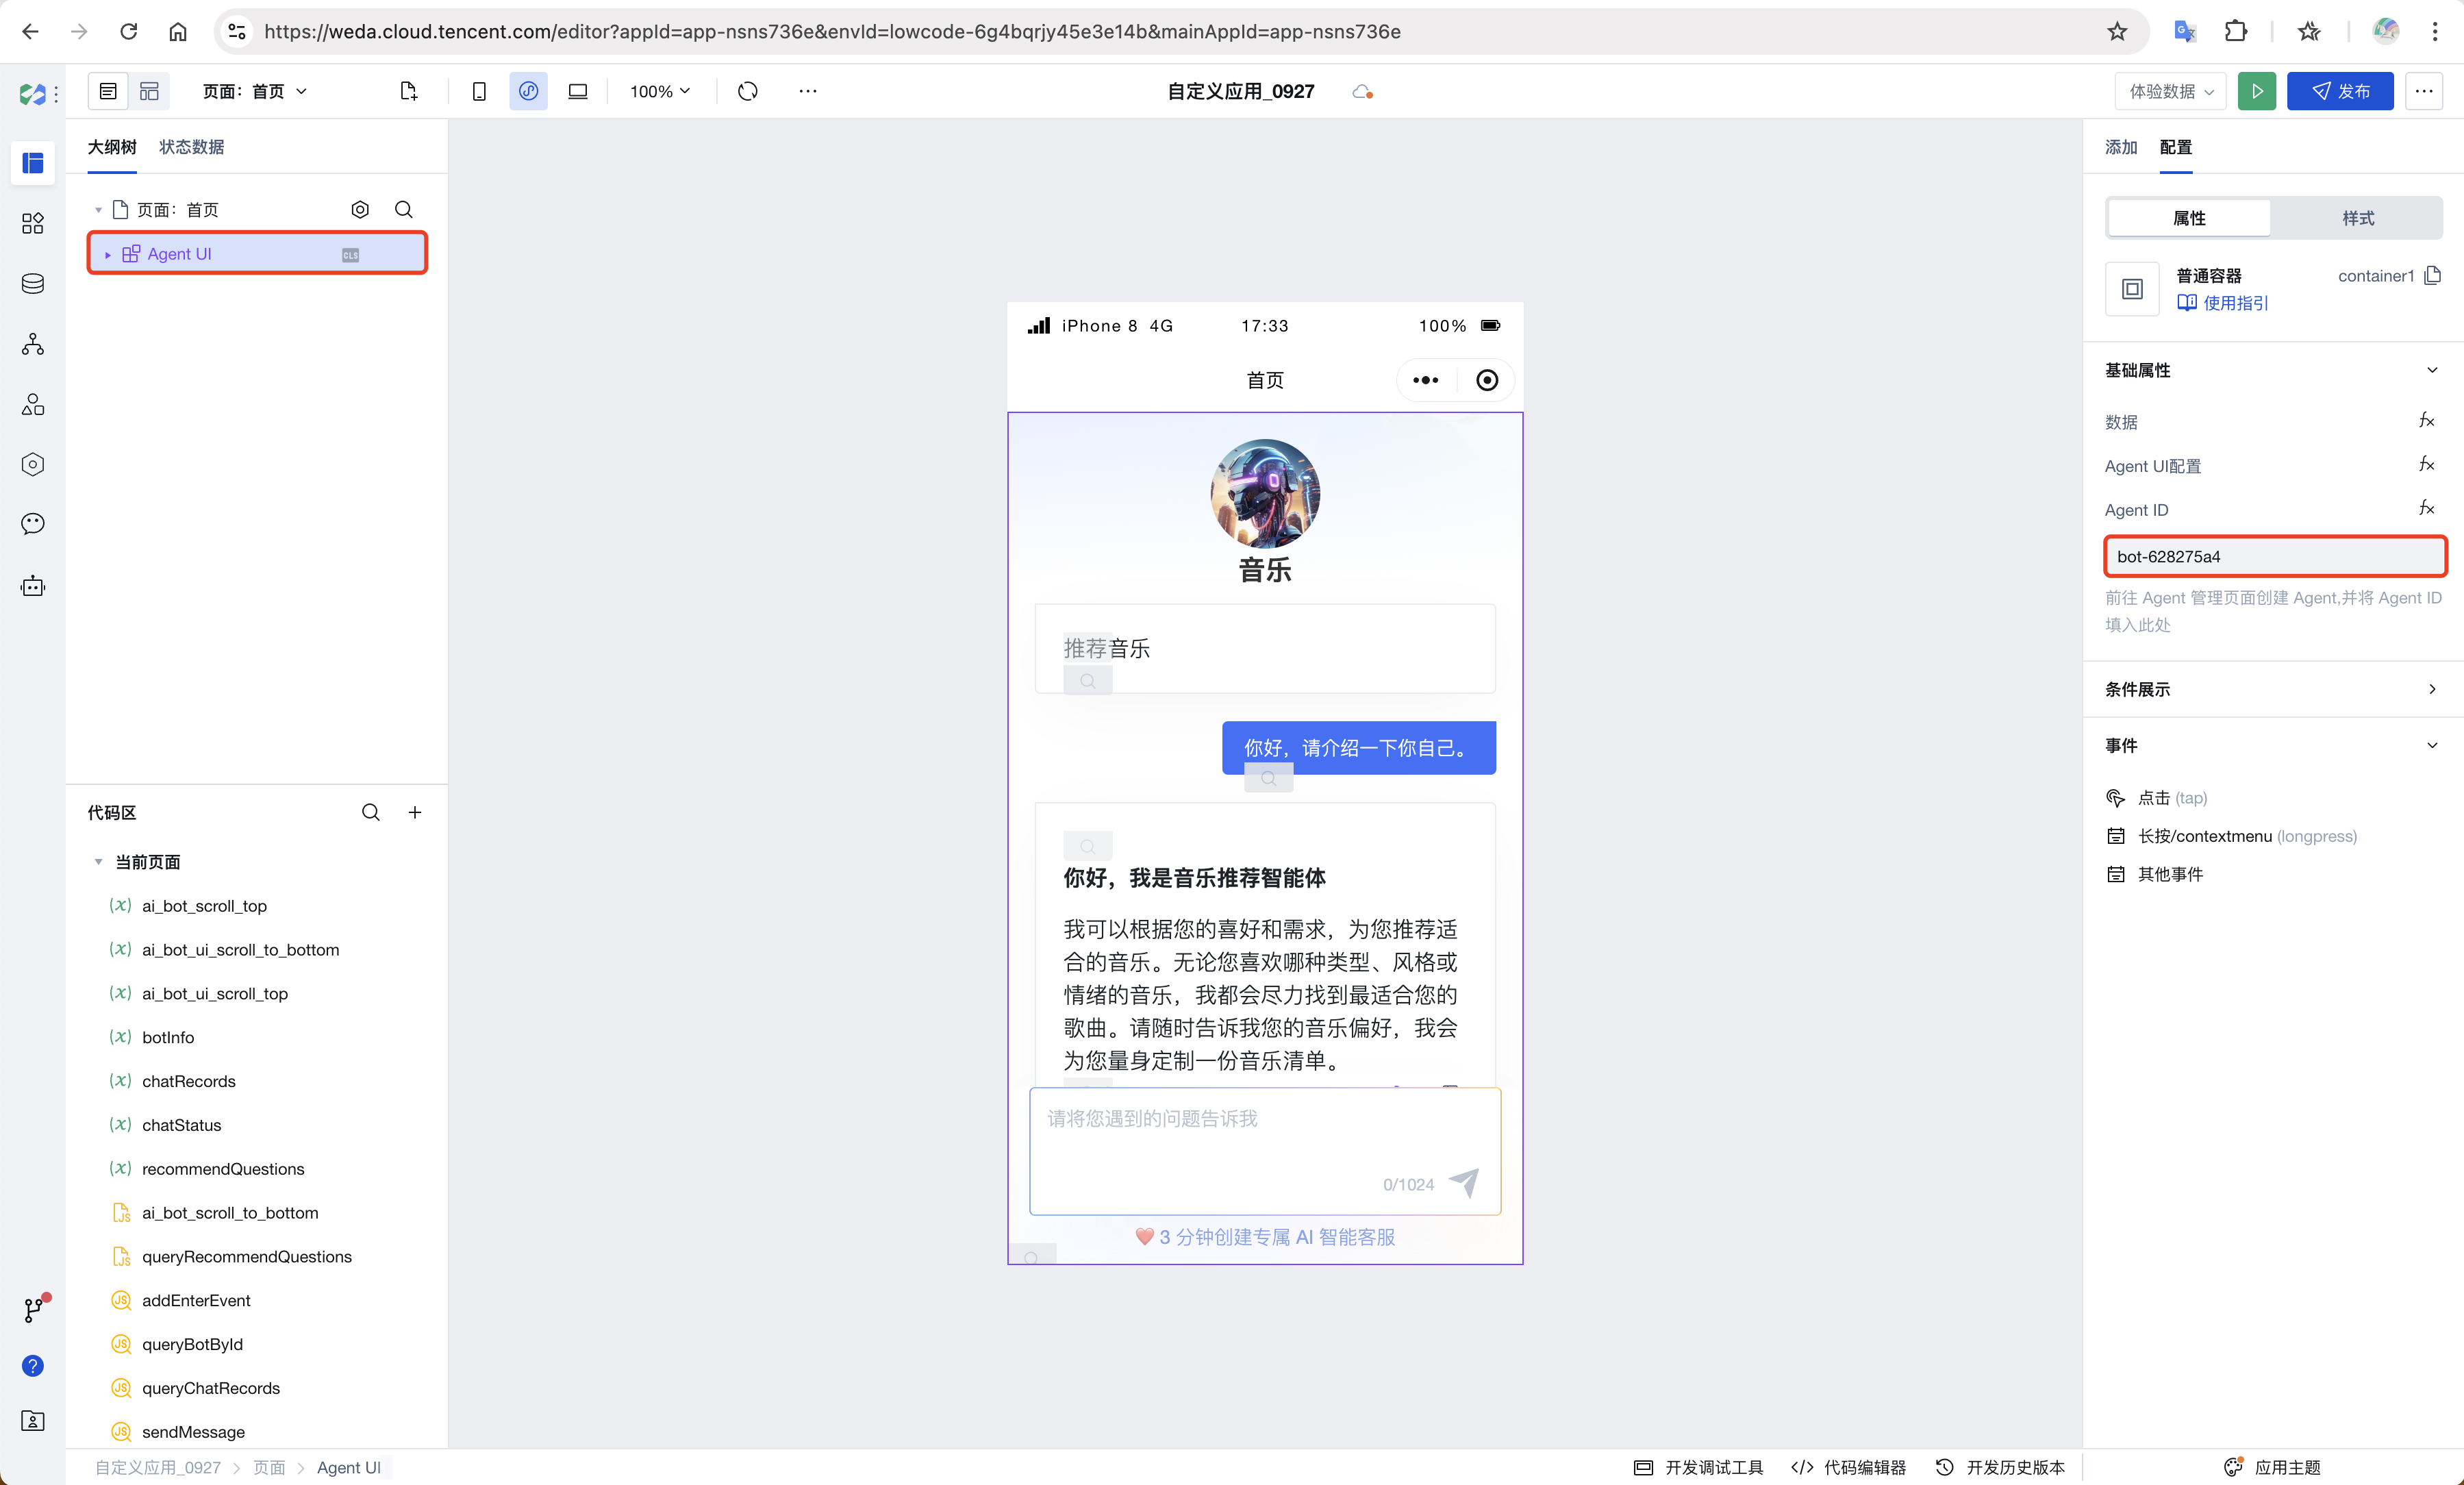
After completing the above configurations, the Agent UI is already set up and displays a complete chat interface.
Publish to CloudBase Platform
Build visually Agent UI application by referring to the following document: Release Agent application
Integrate into WeChat Mini Program
To integrate Agent UI into a WeChat Mini Program scenario, download the Agent UI code package, integrate it into the WeChat Mini Program, and configure the Agent ID. It is recommended to use subpackage integration.
-
Access any WeDa application
-
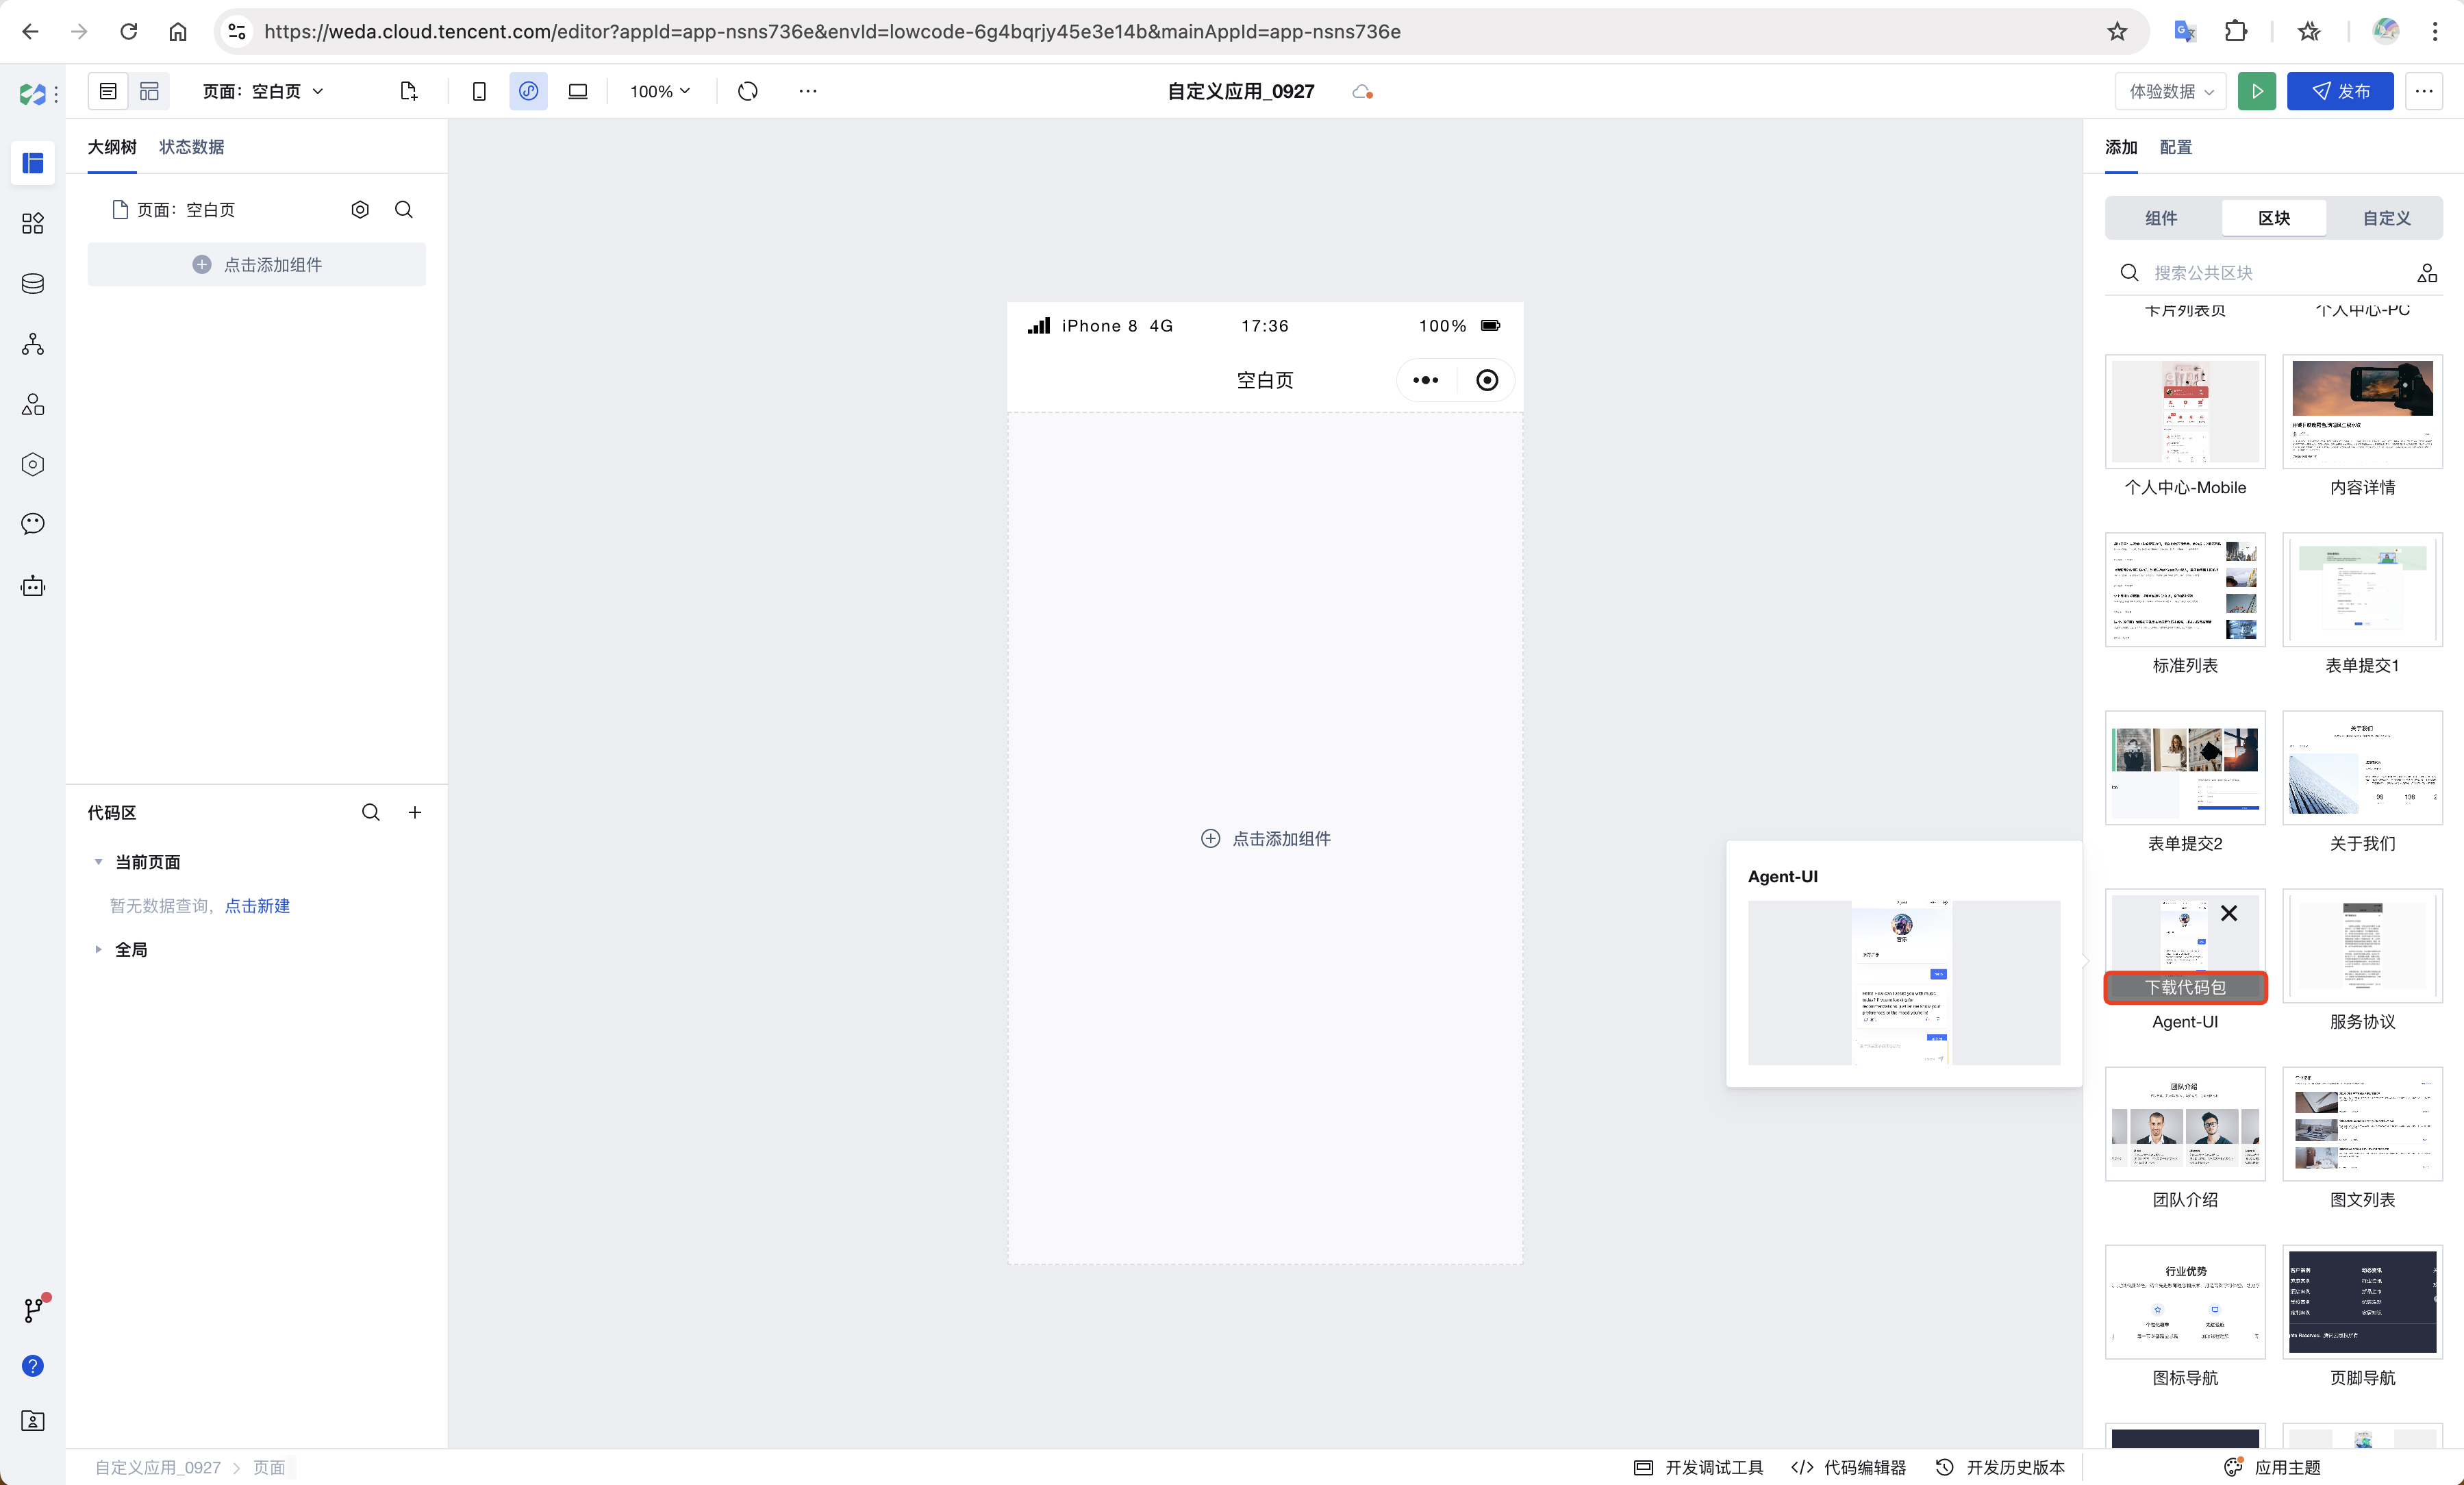
Download the code package
Search for Agent UI in the right-side block and download the code package.
- Unzip and add to the Mini Program directory.
Unzip the Agent UI code package to obtain a components folder. For clarity, rename the folder to agent_ui and add the code package to the miniprogram directory. The directory structure of the Mini Program is as follows:
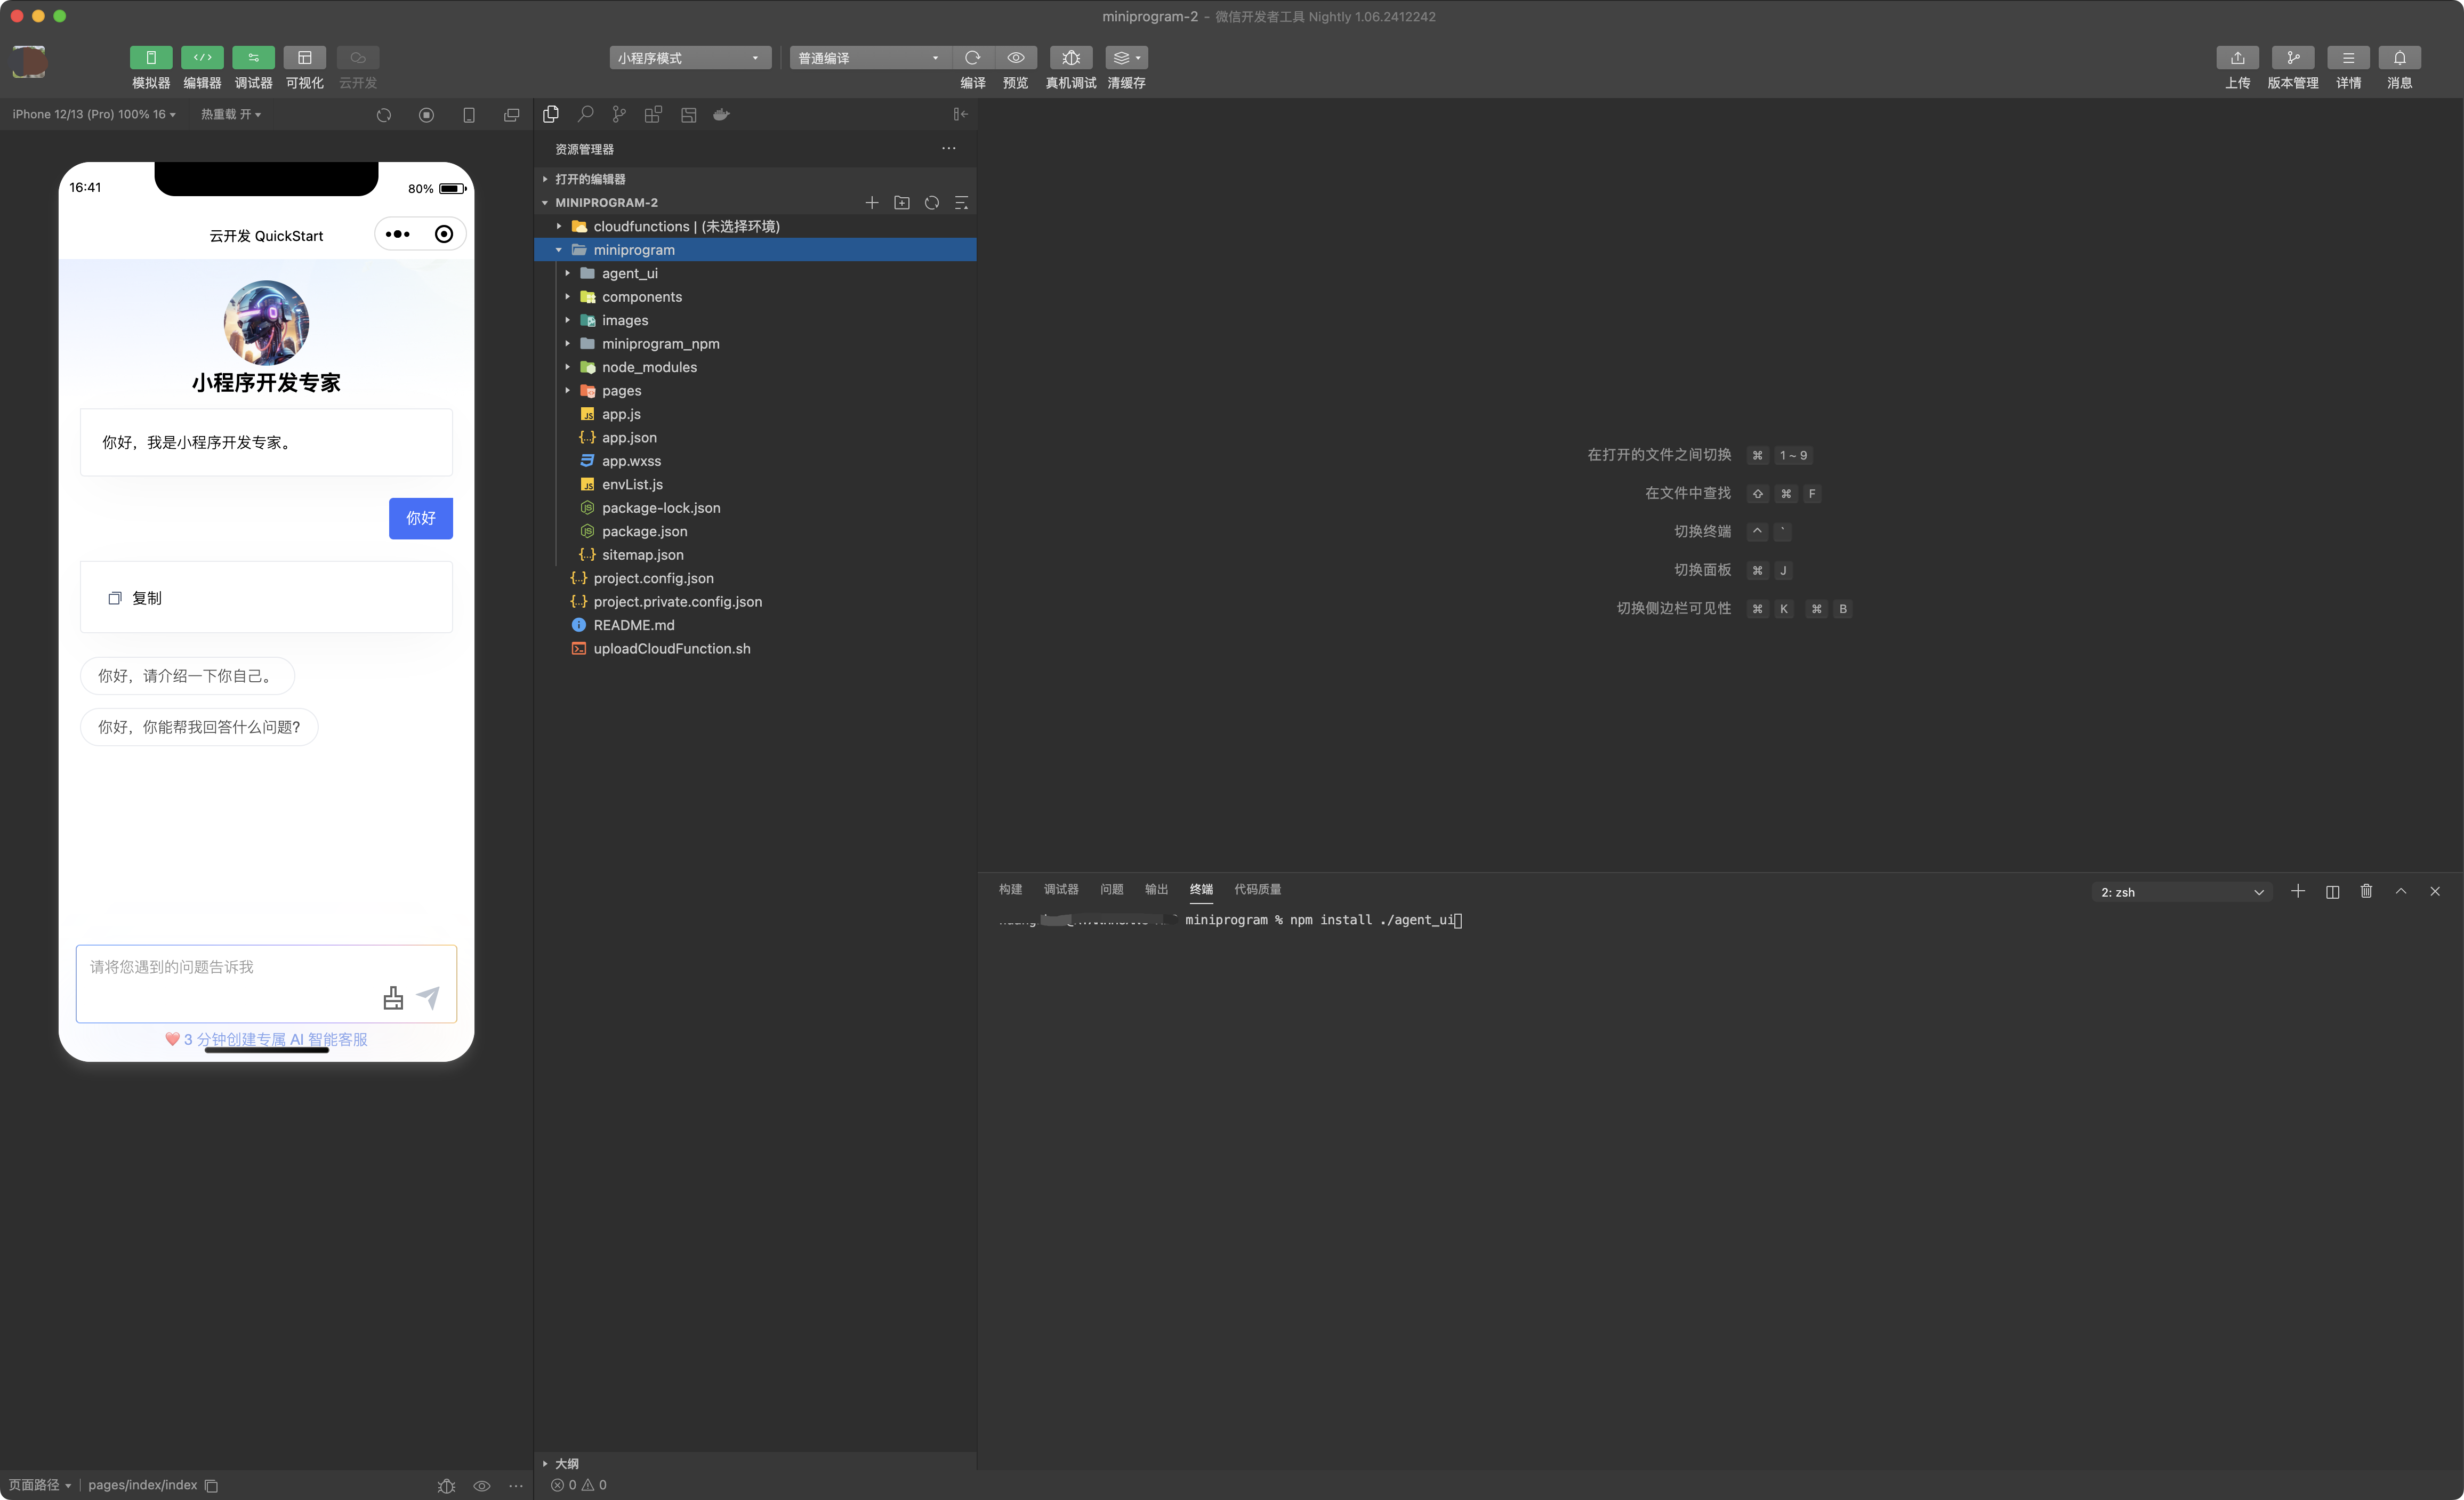
- Install Dependencies
Right-click on the miniprogram folder, open it in the terminal, and execute the npm command: npm install ./agent_ui
Note: agent_ui should be replaced with the folder name renamed in step 3.
Build npm
Click the Tools menu bar in the Mini Program and select Build npm.

- Initialize the SDK
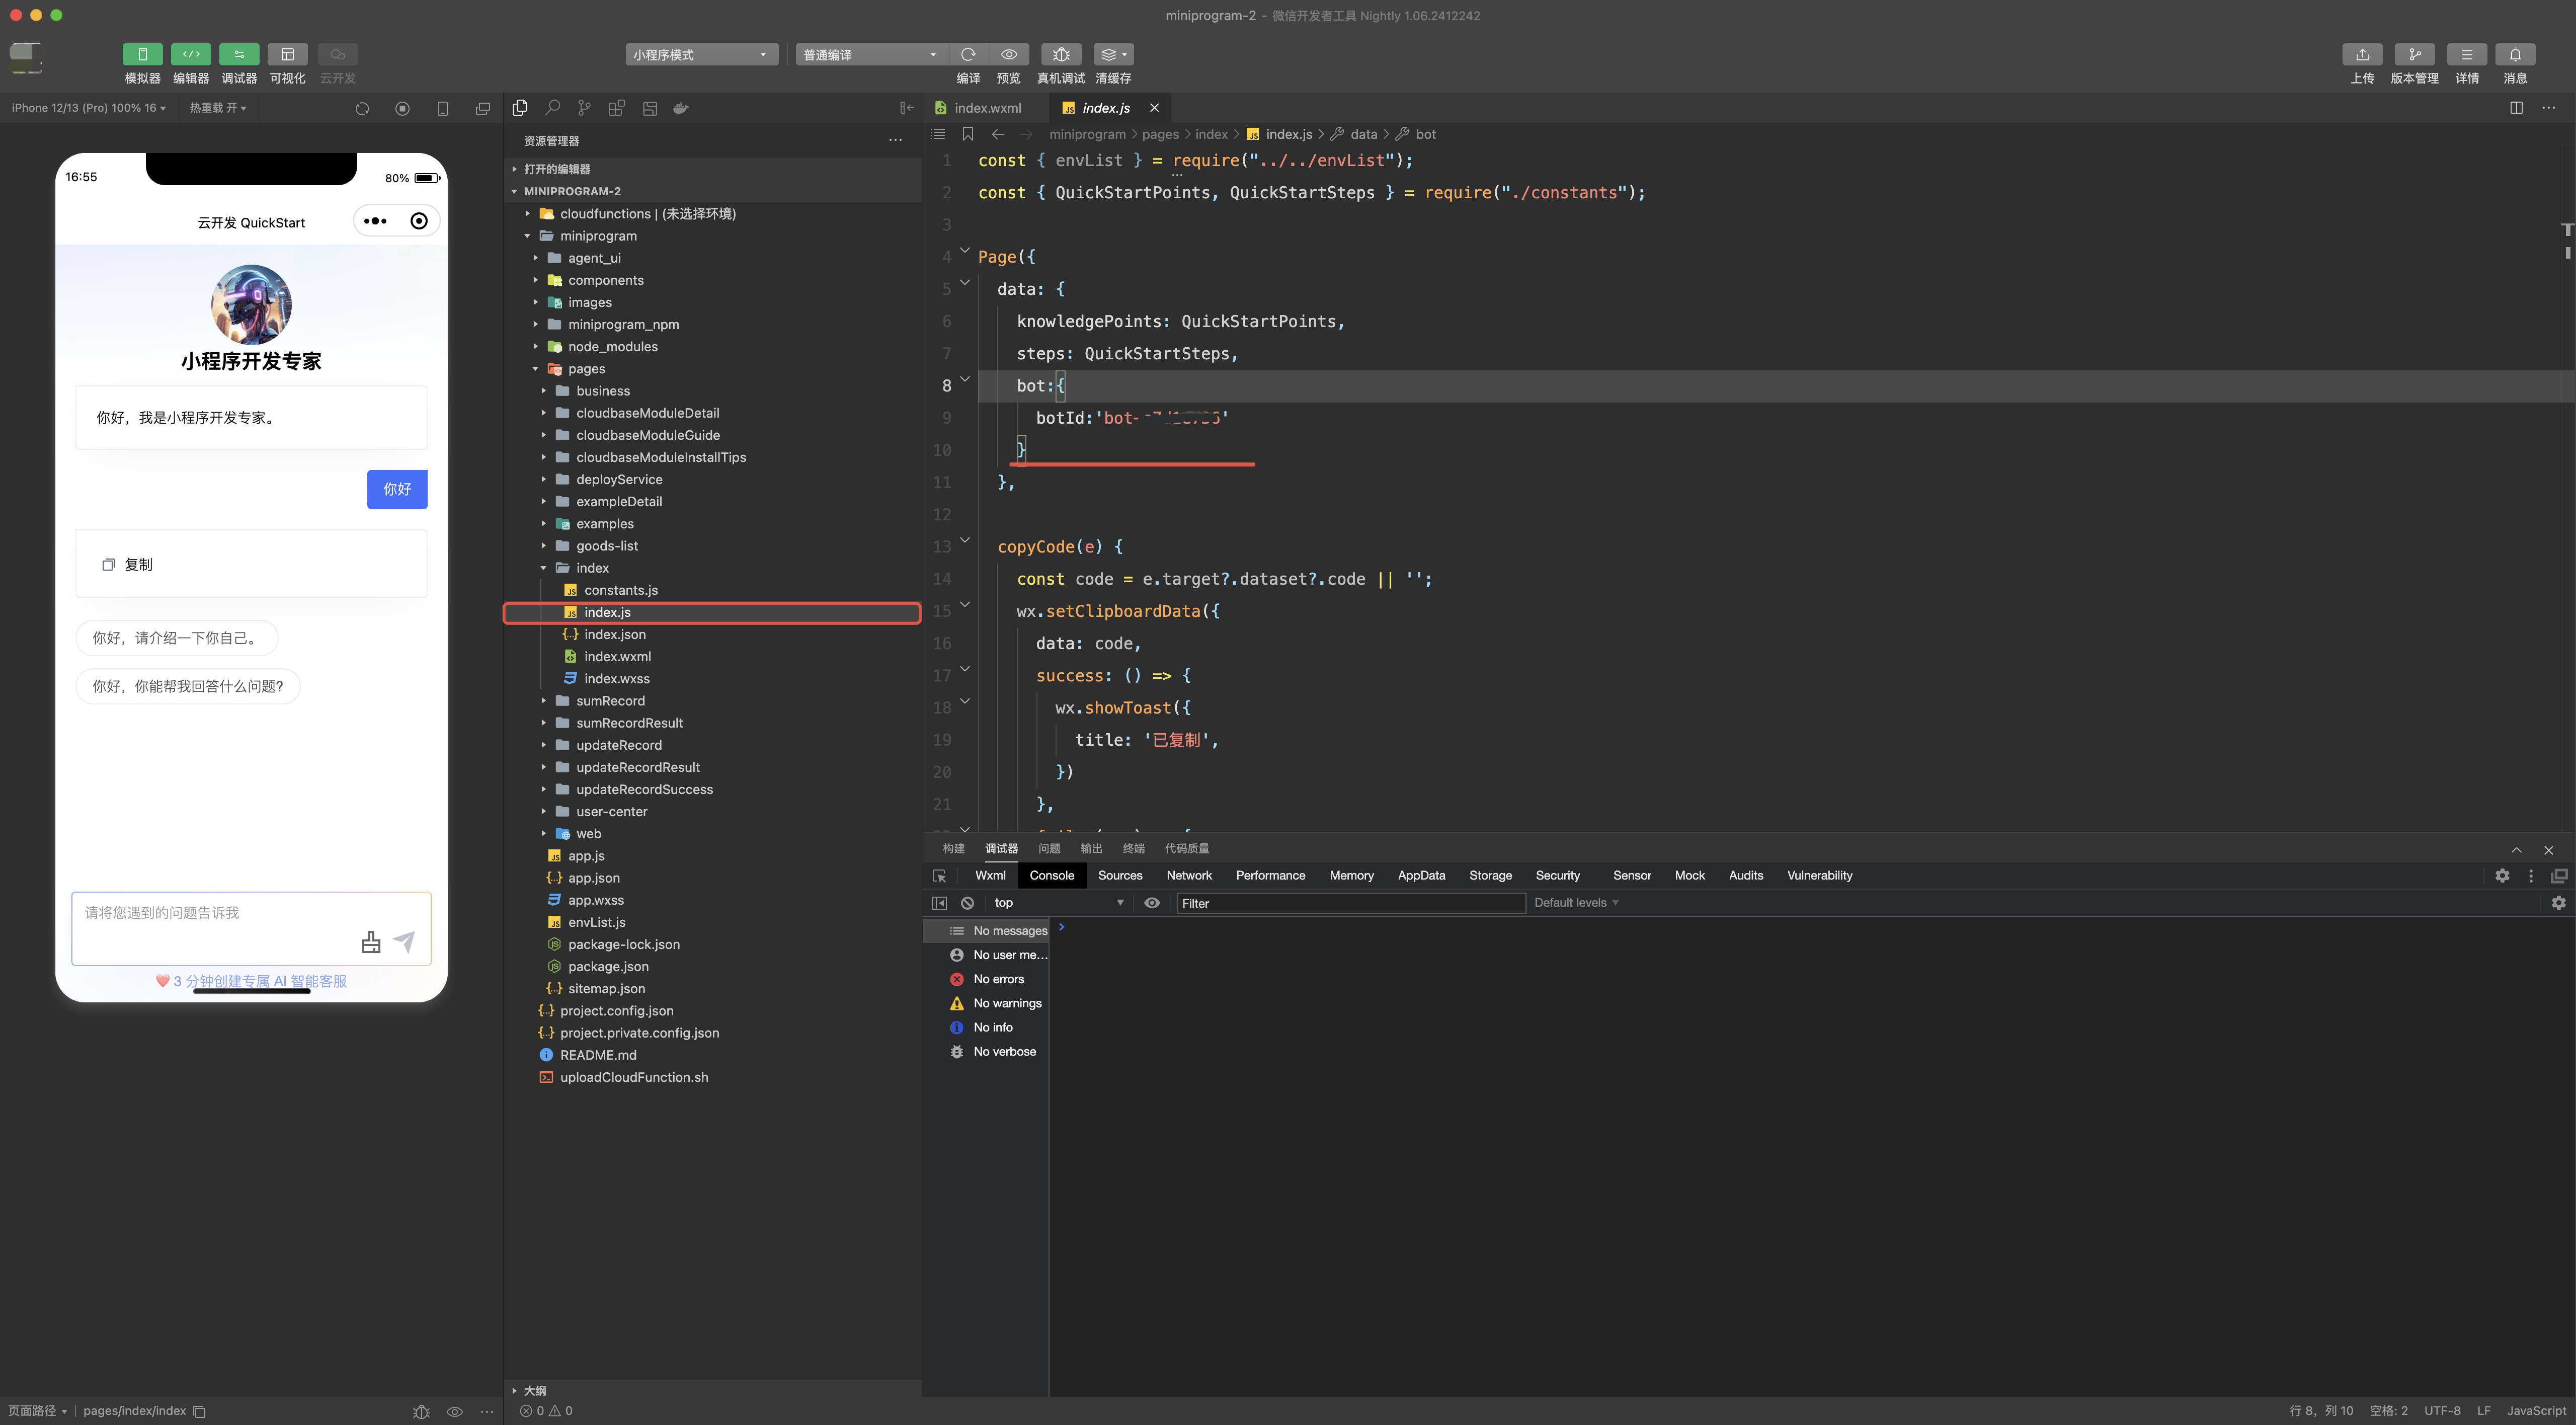
Initialize weda-client at the top of the Mini Program's app.js.
envID and staticResourceDomain can be obtained in the pop-up window when downloading the code package.
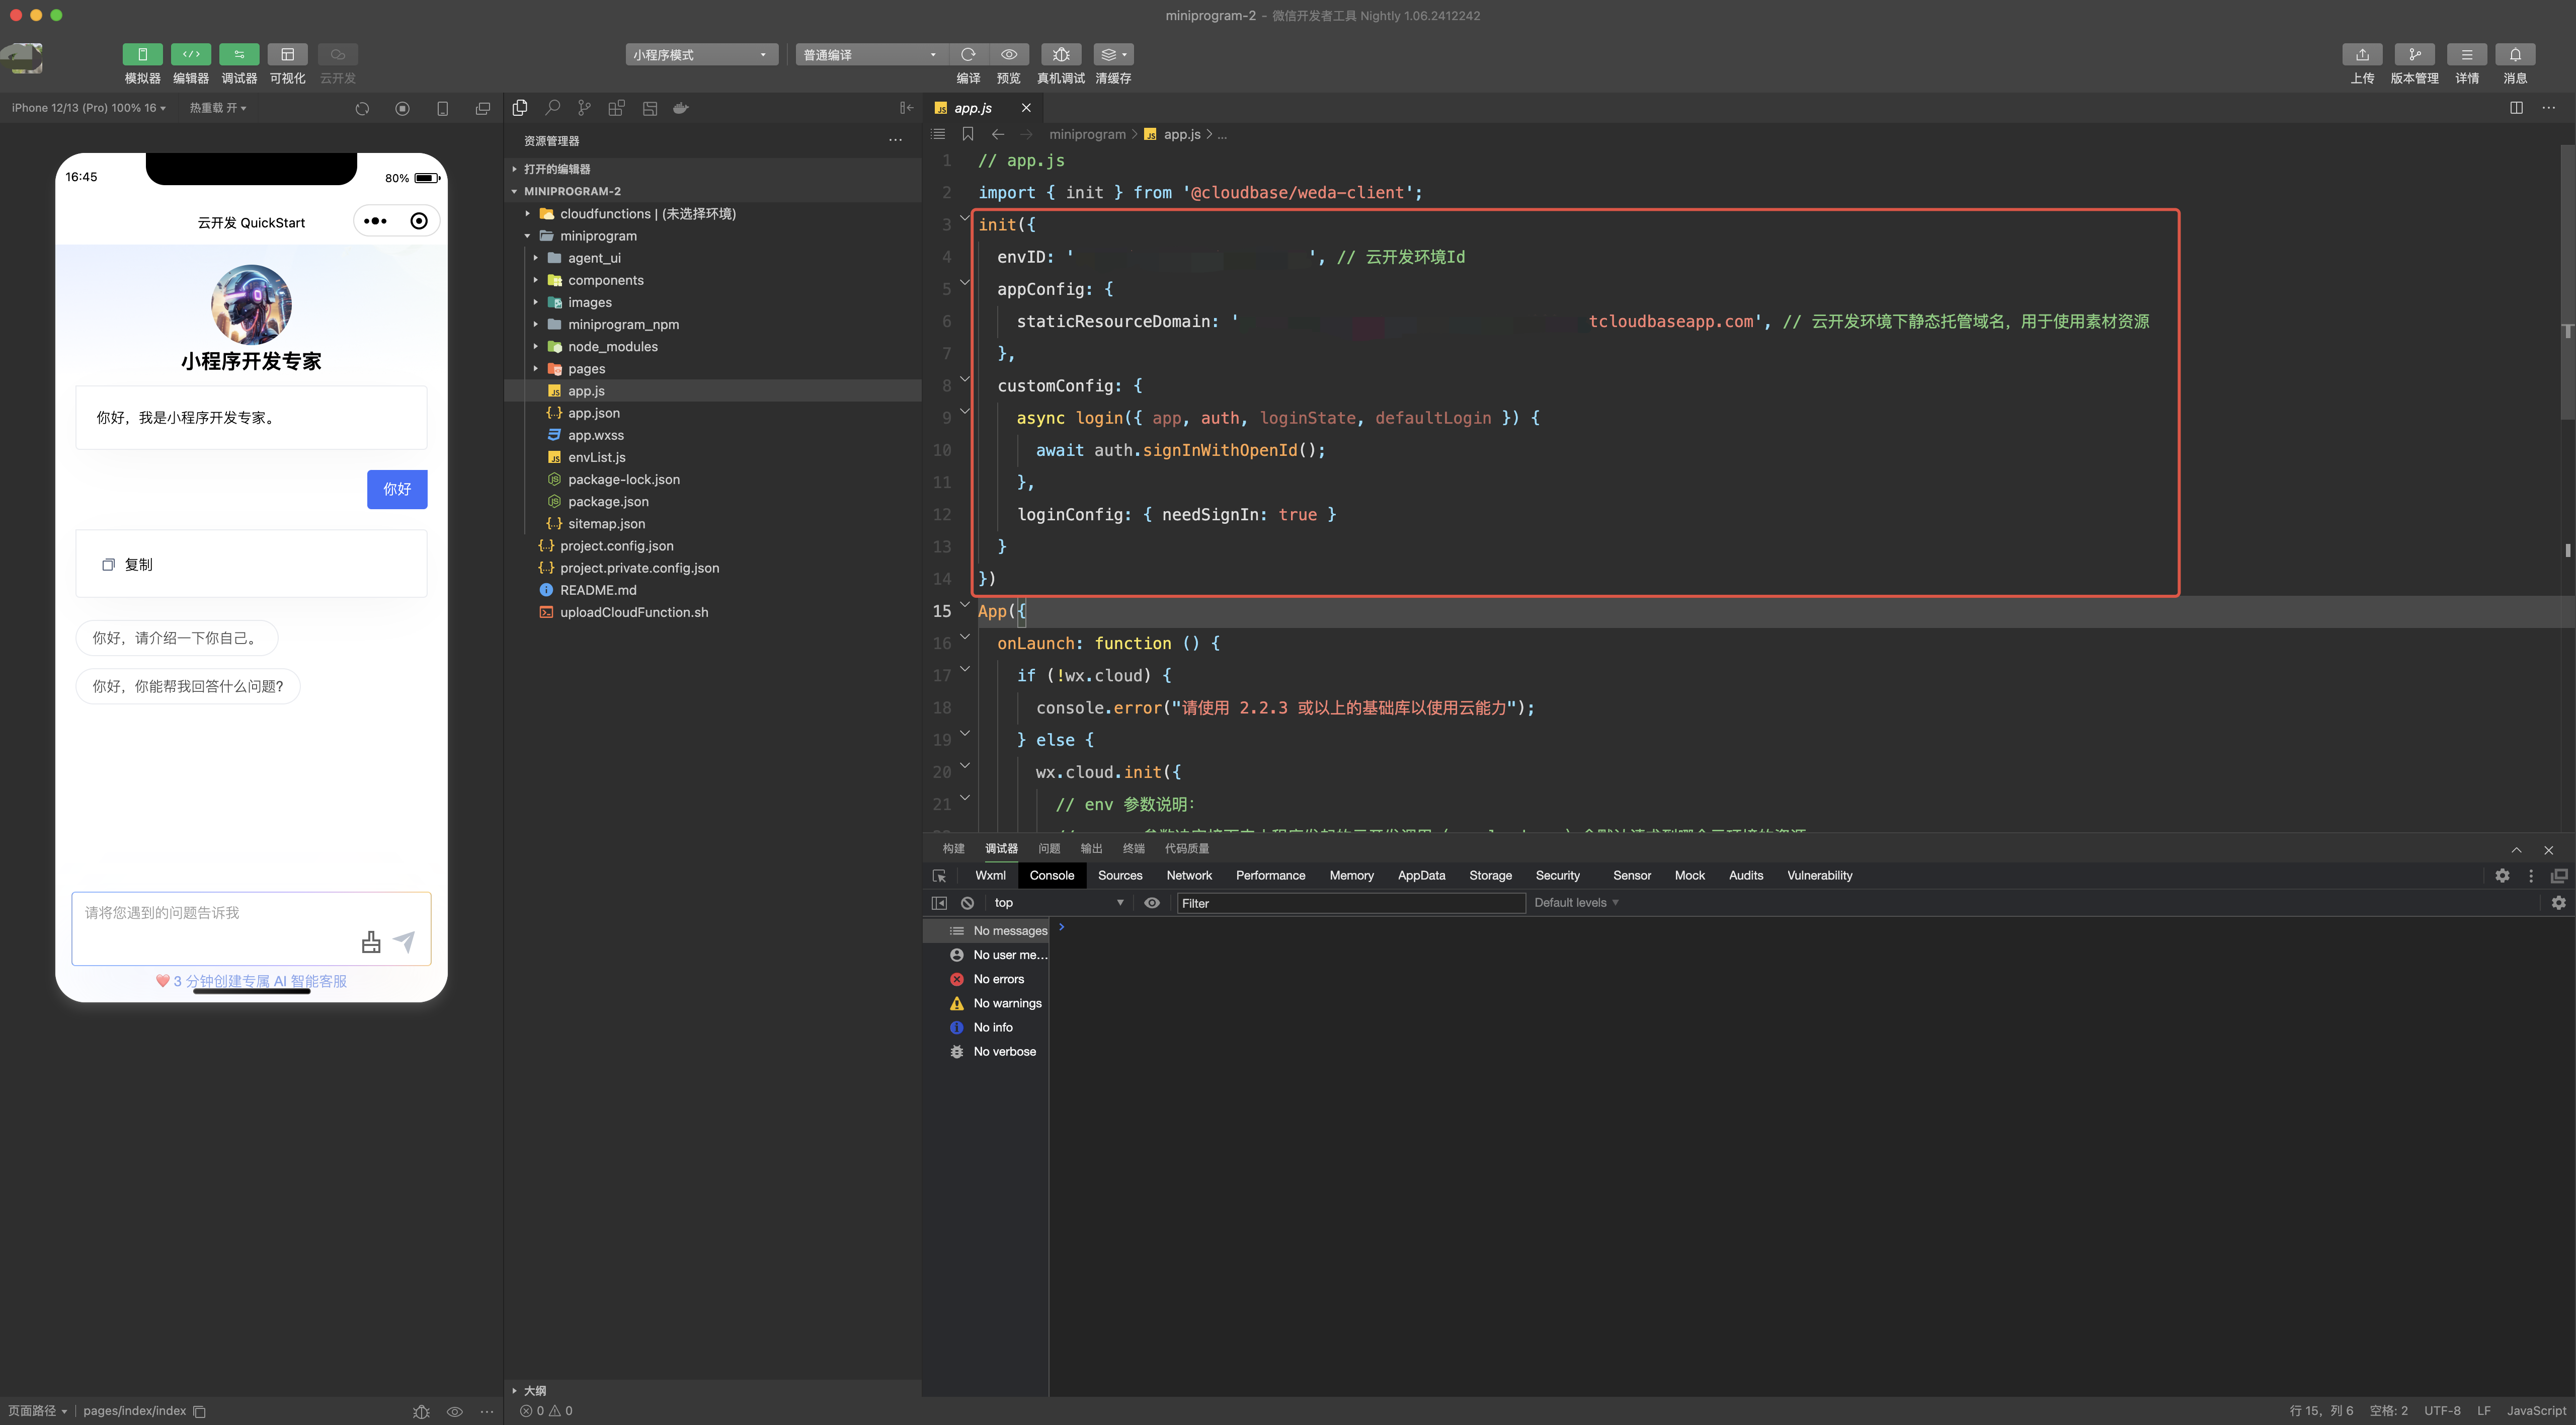
import { init } from "@cloudbase/weda-client";
init({
  envID: "xxx", // CloudBase environment Id
  appConfig: {
    staticResourceDomain: "xxx.tcloudbaseapp.com", // Static hosting domain in the CloudBase environment, used for accessing material resources
  },
  customConfig: {
    async login({ app, auth, loginState, defaultLogin }) {
      await auth.signInWithOpenId();
    },
    loginConfig: { needSignIn: true },
  },
});
- Add block reference to the page
Register the agent_ui component
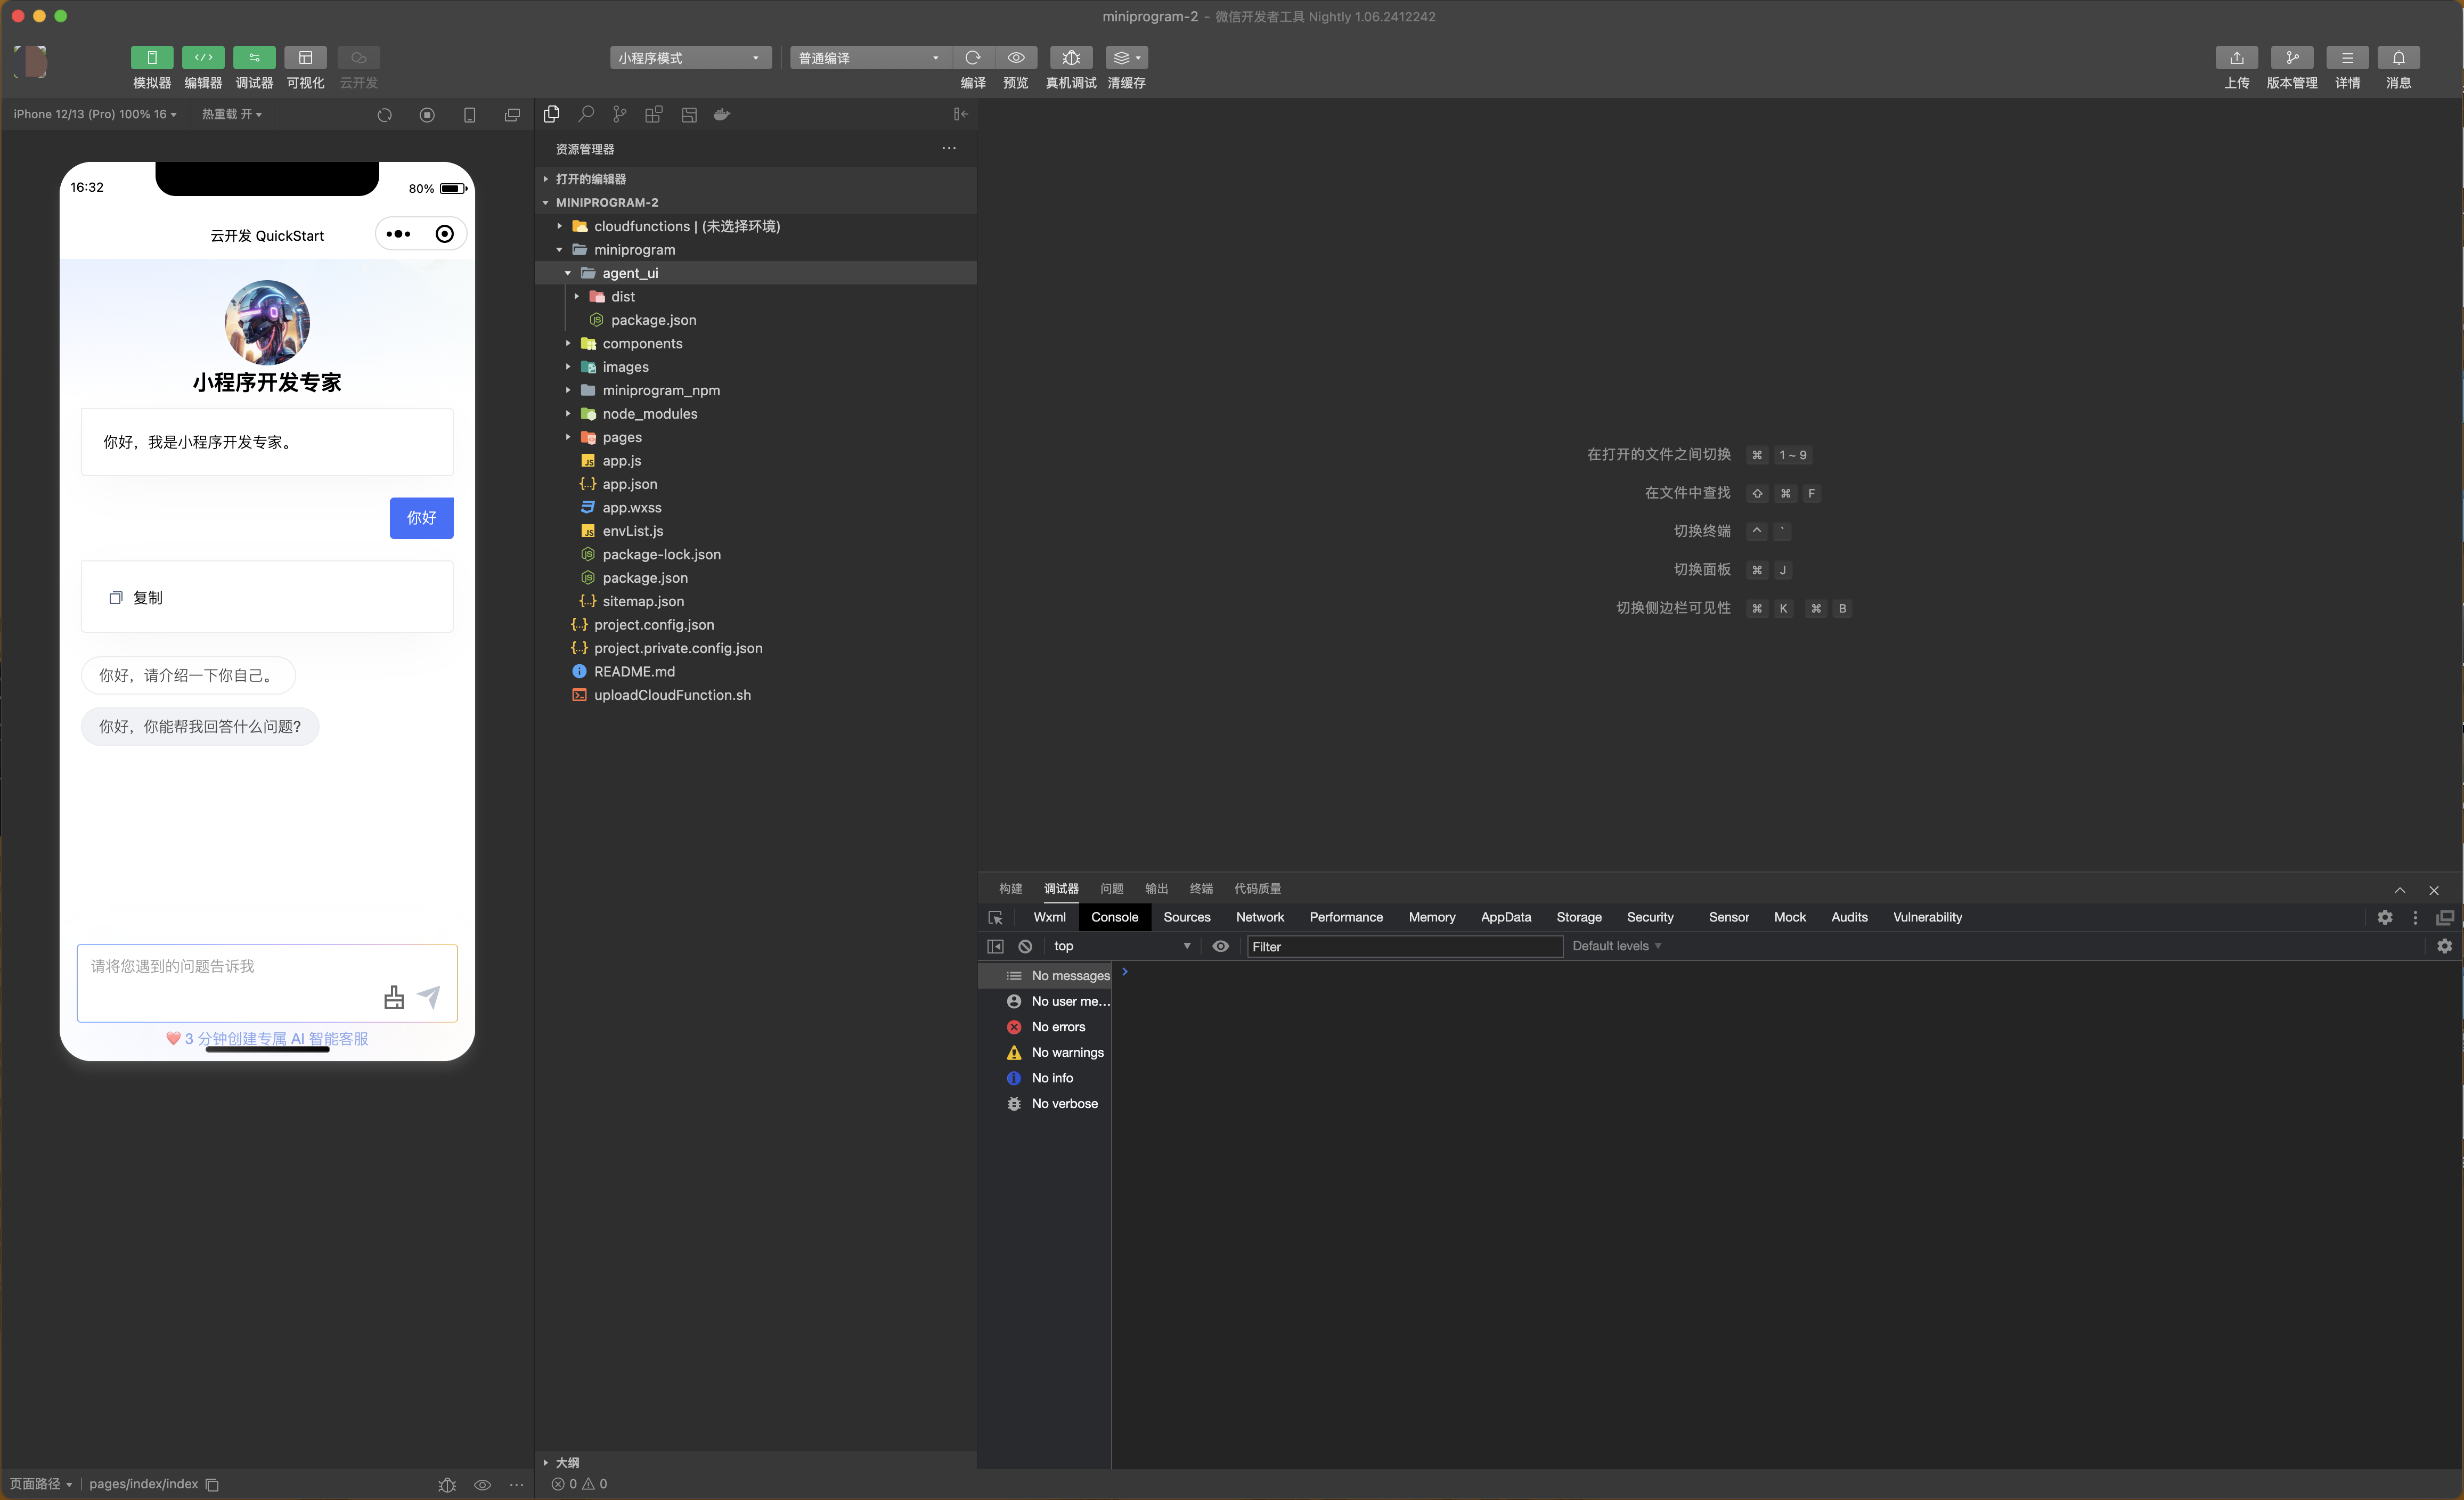
Register the agent_ui component in the pages/index page.
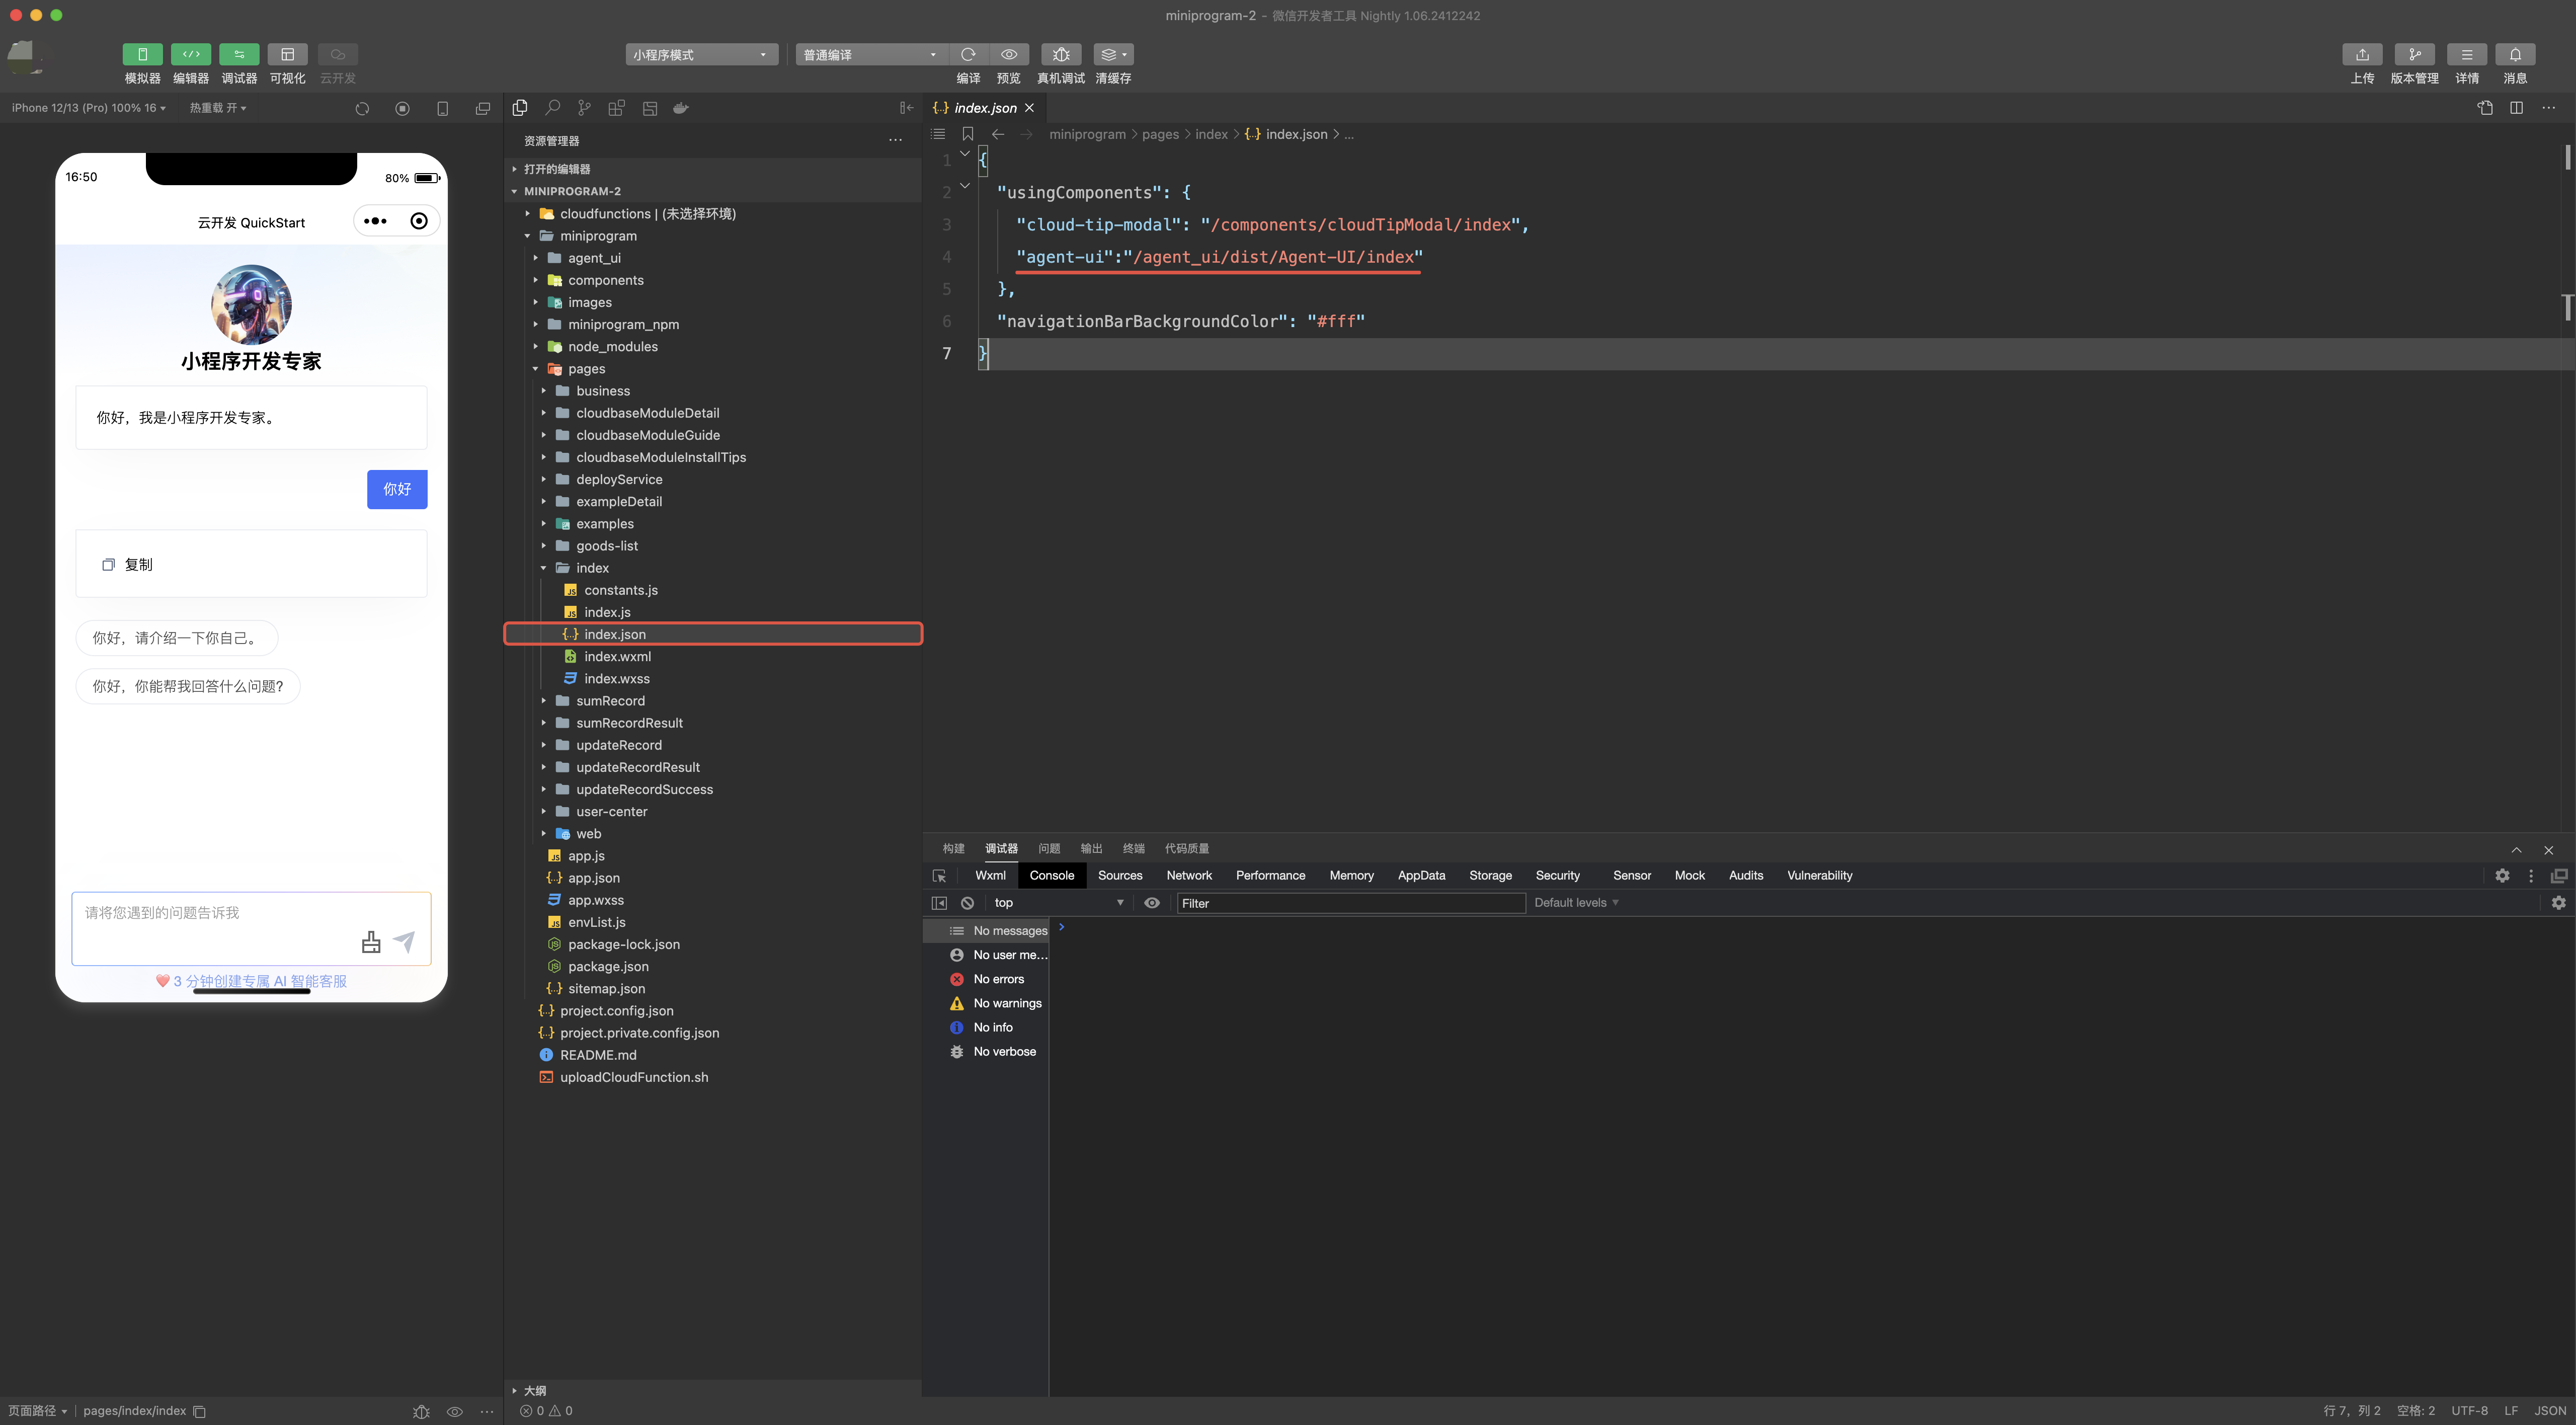
Add the agent_ui component to the page.
Add the agent_ui component in the pages/index page.
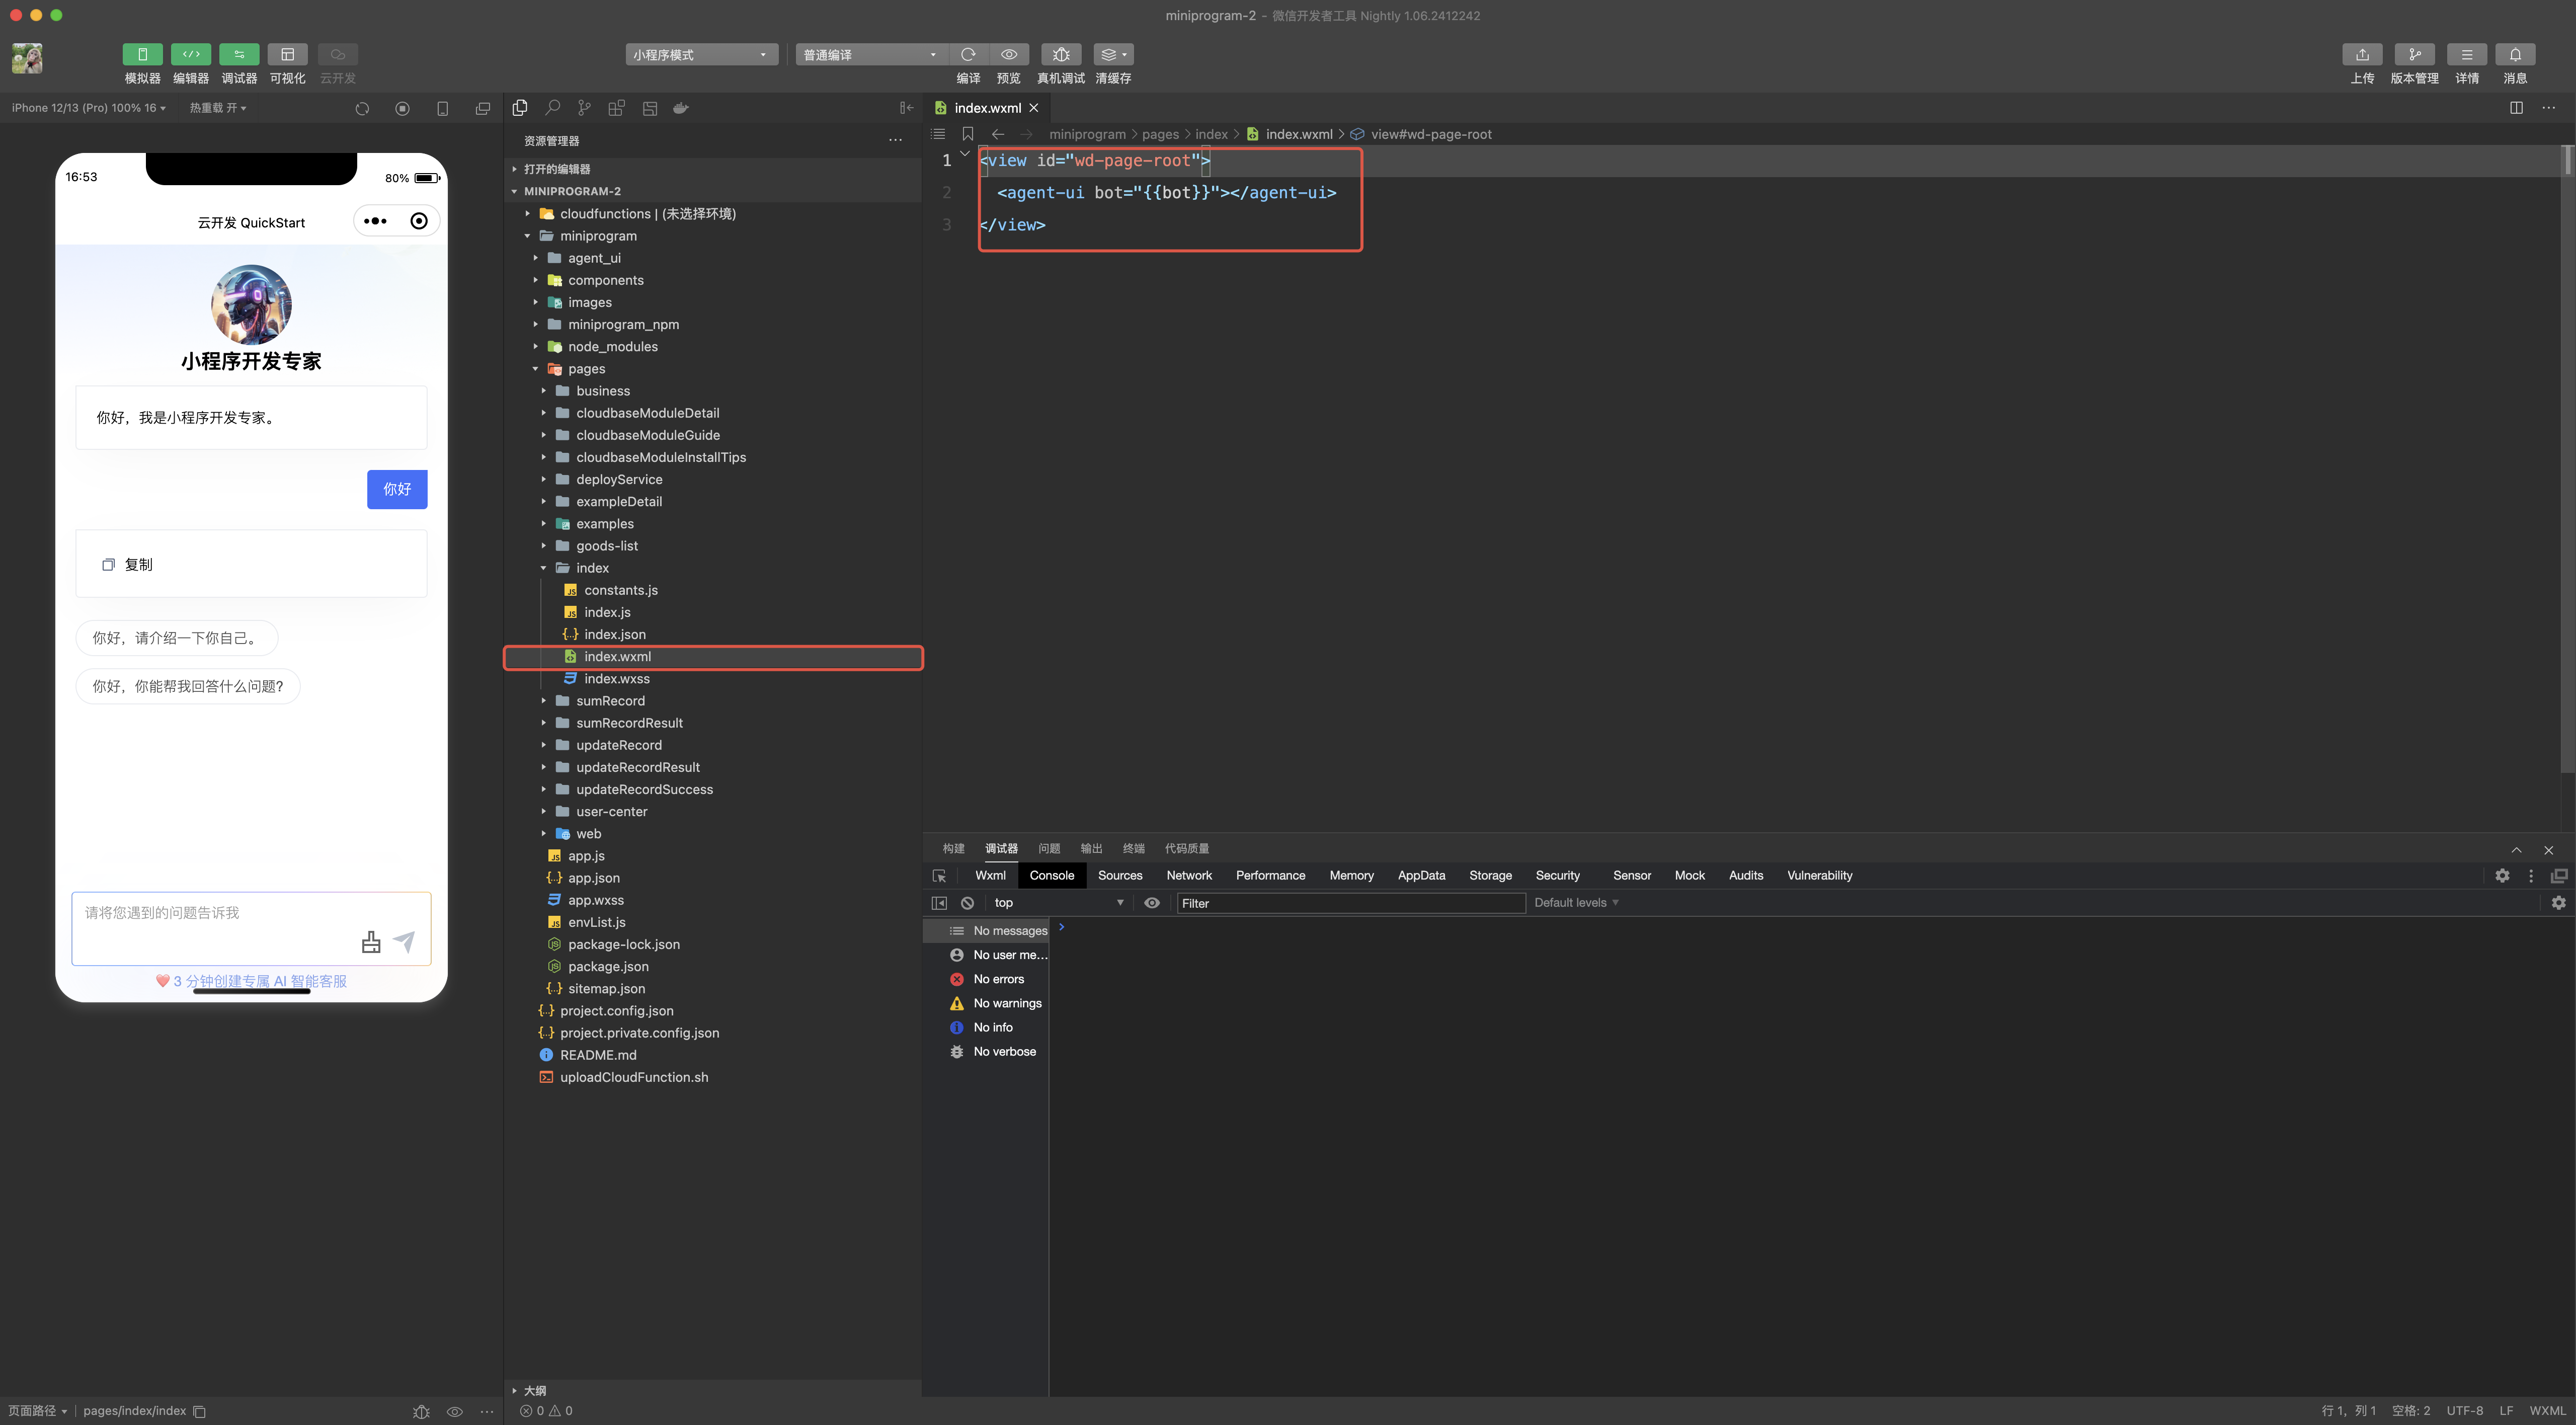
Note: The agent_ui component must be placed under the view with id="wd-page-root".
Configure agent ID
Configure agent ID in the pages/index page.
Integrate via Mini Program Subpackage
Due to the complex dependencies and potentially large size of Agent UI, we recommend integrating it using the mini program subpackage approach. Assume the code package is decompressed into the agent_ui directory in the mini program project, which contains files such as dist and package.json.
1. Install Dependencies
You can directly download the latest pre-built package. The package has completed the miniprogram build, so you can skip this step.
-
Execute the command in the
agent_uidirectory to install dependencies:npm install -
Configure multi-directory miniprogram_npm compilation. Assume the mini-program's
project.config.jsonis at the same level asapp.json(i.e., miniprogramRoot is the root directory), and configure the setting inproject.config.json.{"setting": {/* ... */"packNpmManually": true,"packNpmRelationList": [/* If the project itself requires a package.json, you can add the configuration/* {"packageJsonPath": "package.json","miniprogramNpmDistDir": "./"}, *//* Paths and directory names are subject to actual values. */{"packageJsonPath": "agent_ui/package.json","miniprogramNpmDistDir": "agent_ui"}]}} -
Build npm. In WeChat DevTools, select
Tools - Build npmfrom the menu bar and wait for the miniprogram_npm to be built.
2. Configure Subpackage
Modify app.json to add subpackage configuration and external dependency library configuration in the subpackages section.
{
  "useExtendedLib": {
    "weui": true
  },
  "subpackages": [
    /* ... */
    {
      "root": "agent_ui",
      "name": "agent-ui",
      "pages": []
    }
  ]
}
Also add the setting to exclude unused files in the setting configuration of project.config.json:
{
  "setting": {
    /* Add the following configuration */
    "ignoreDevUnusedFiles": true,
    "ignoreUploadUnusedFiles": true
  }
}
3. Initialize the SDK
Before using the component, sdk initialization is required. Since it exists entirely in a subpackage, there are two initialization options.
- Initializing in the subpackage ensures that when the component is used, the sdk is already initialized, guaranteeing timing consistency.
Create the
index.jsfile in theagent_uidirectory:Add the referenceimport * as ClientSDK from "@cloudbase/weda-client";ClientSDK.init({envID: "xxx", // CloudBase environment Id});import '../../index'at the top of the agent_ui/dist/xxx/index.js component so that the sdk is initialized immediately upon loading. - Initializing in the main package requires ensuring that components are used only after initialization is completed.
Create the
index.jsfile in theagent_uidirectory:In app.js, within the onLaunch lifecycle, initialize the sdk asynchronouslyexport * as ClientSDK from "@cloudbase/weda-client";require.async("./agent_ui/index").then((module) => {module.ClientSDK.init({envID: "xxx", // CloudBase environment Id});});
4. Using the Component in Mini Programs
Due to the use of subpackages, the method of referencing components is slightly different.
-
In the page
index.json, when referencing the component, due to asynchronous subpackage loading, configure componentPlaceholder:{"usingComponents": {"chat": "/agent-ui/dist/Agent-UI/index"},"componentPlaceholder": {"chat": "block"}} -
In
index.wxml, when using the component, note that it must be wrapped by an element with the idwd-page-root.<view id="wd-page-root"><chat bot="{{xxx}}" /></view>
Mini Program Valid Domain Configuration
When using agent ui in WeDa Low-code and Mini Programs, after publishing the Mini Program, if an error message request valid domain verification failed is displayed, you need to configure valid domains in the Mini Program admin backend.
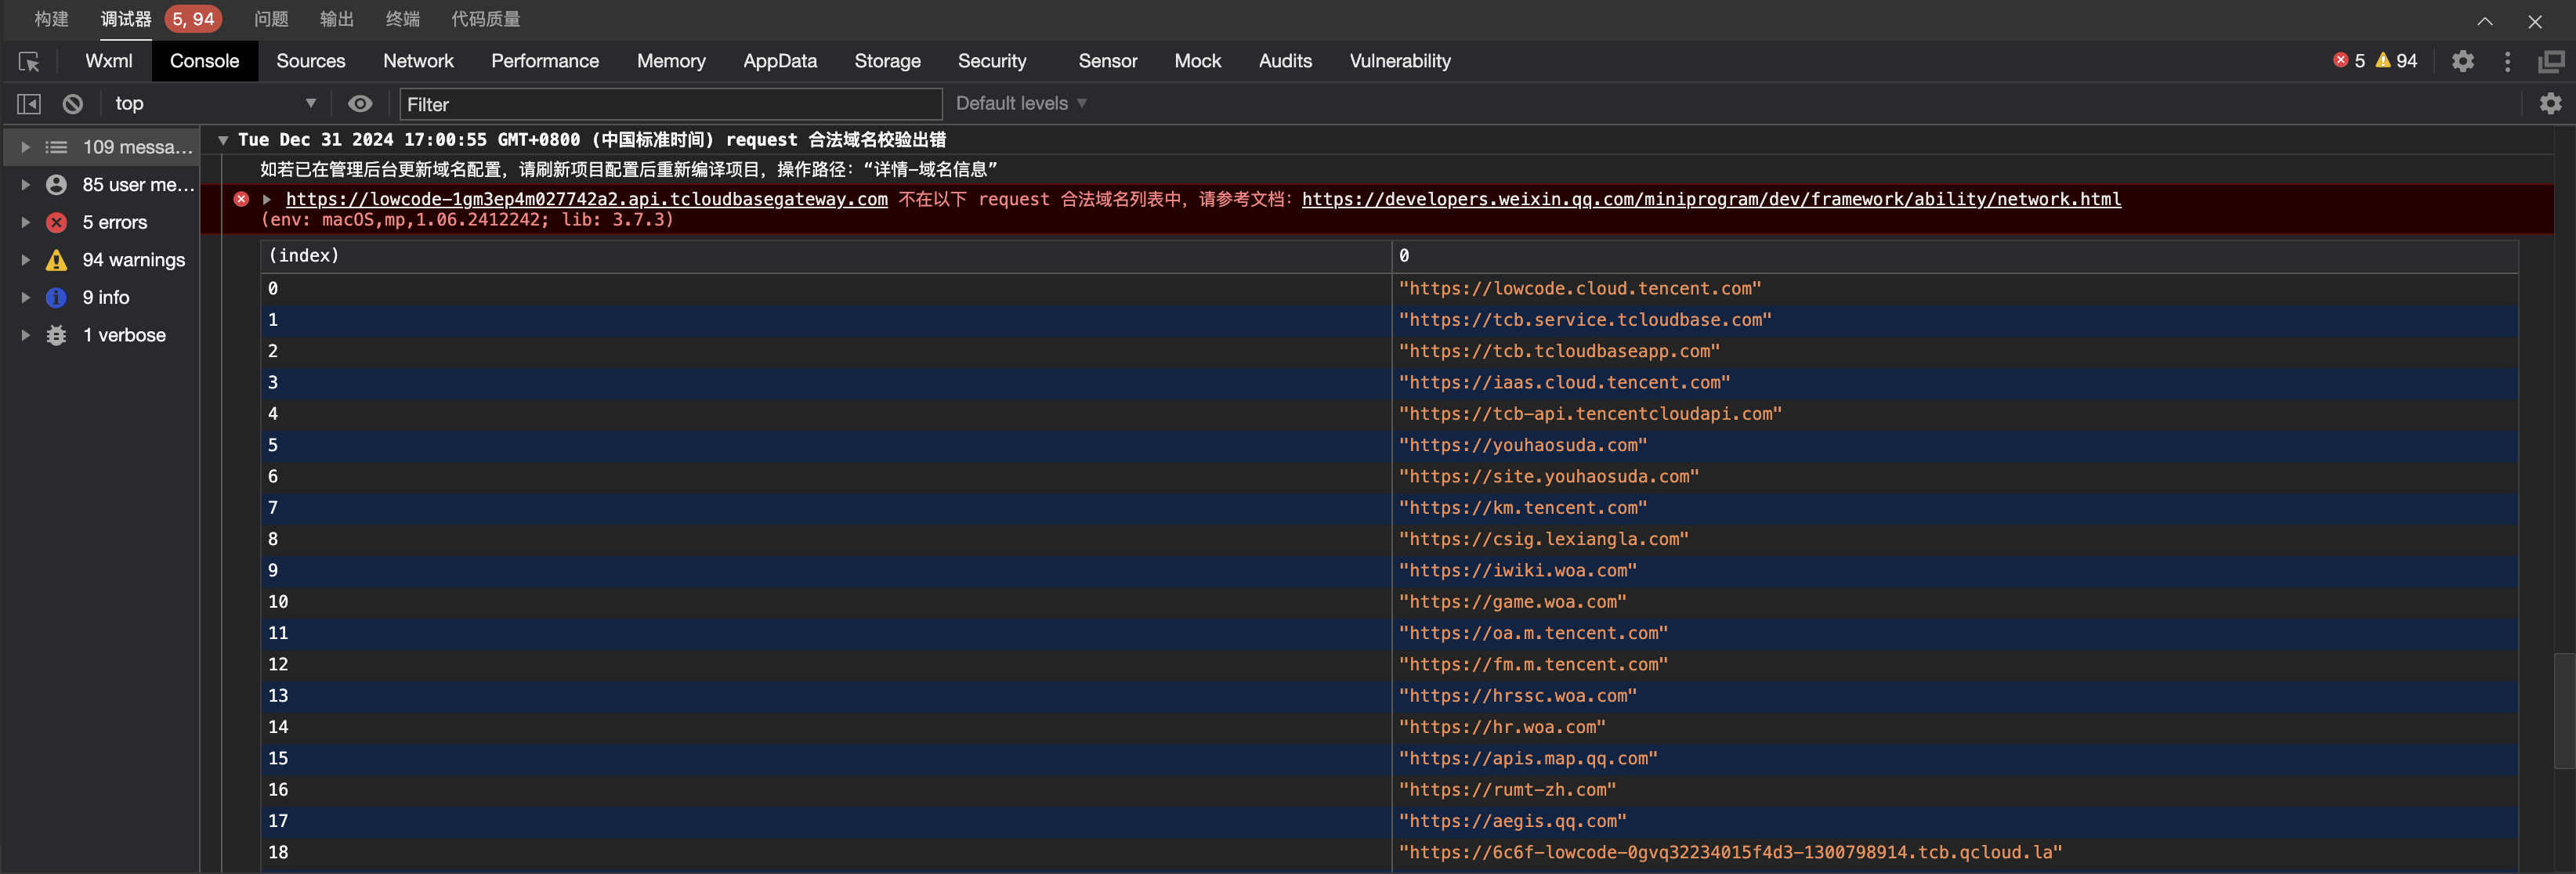
Add the domain name that caused the error to the valid domain list.
If the Mini Program is authorized to WeDa and prompts about disabled domain configuration, you can first unbind the Mini Program in WeDa, configure valid domains, then rebind it to WeDa.

Properties
The block receives properties passed in externally.
| Property Name | Property Identifier | Type | Description |
|---|---|---|---|
| Agent ID | botId | String | Required, Agent ID |
Implementation Details
The Agent UI block component is built with visual technology. To facilitate developer customization, this section details the implementation specifics to assist developers in customizing the logic.
Using Agent UI only requires configuring the Agent ID. After configuring the Agent ID, Agent UI will automatically load the corresponding Agent configuration. The Agent loading and conversation process is as follows.
Internal Data Interaction
Initialization Phase:
- Query Agent information corresponding to the Agent ID
- Load Agent chat history
- Initialize the Agent session
Session Phase:
- Initiate the Agent session
- Load Agent responses in streaming mode
- Query suggested questions
Block query and Event Description
| Name | Description |
|---|---|
| $w.queryBotById | Query the Agent based on the ID configured in the Agent UI |
| $w.queryChatRecords | Query chat records, call after queryBotById completes |
| $w.sendMessage | Send a message |
| $w.page.handler.queryRecommendQuestions | Query recommended questions |
| $w.submitFeedback | Submit user feedback |