Chapter 3: Implementing Custom Business Logic
This chapter will guide how to use "running JS scripts" to implement custom business logic:
- If a subscribe event push is received, send different welcome messages based on whether the user is a new user.
- If a message sent by a user to the official account is received, return the corresponding reply text.
Step 1: Write Business Logic for User Subscribe Event
After selecting and adding the "Run JS Script" node from the node list to the canvas, edit the script code.
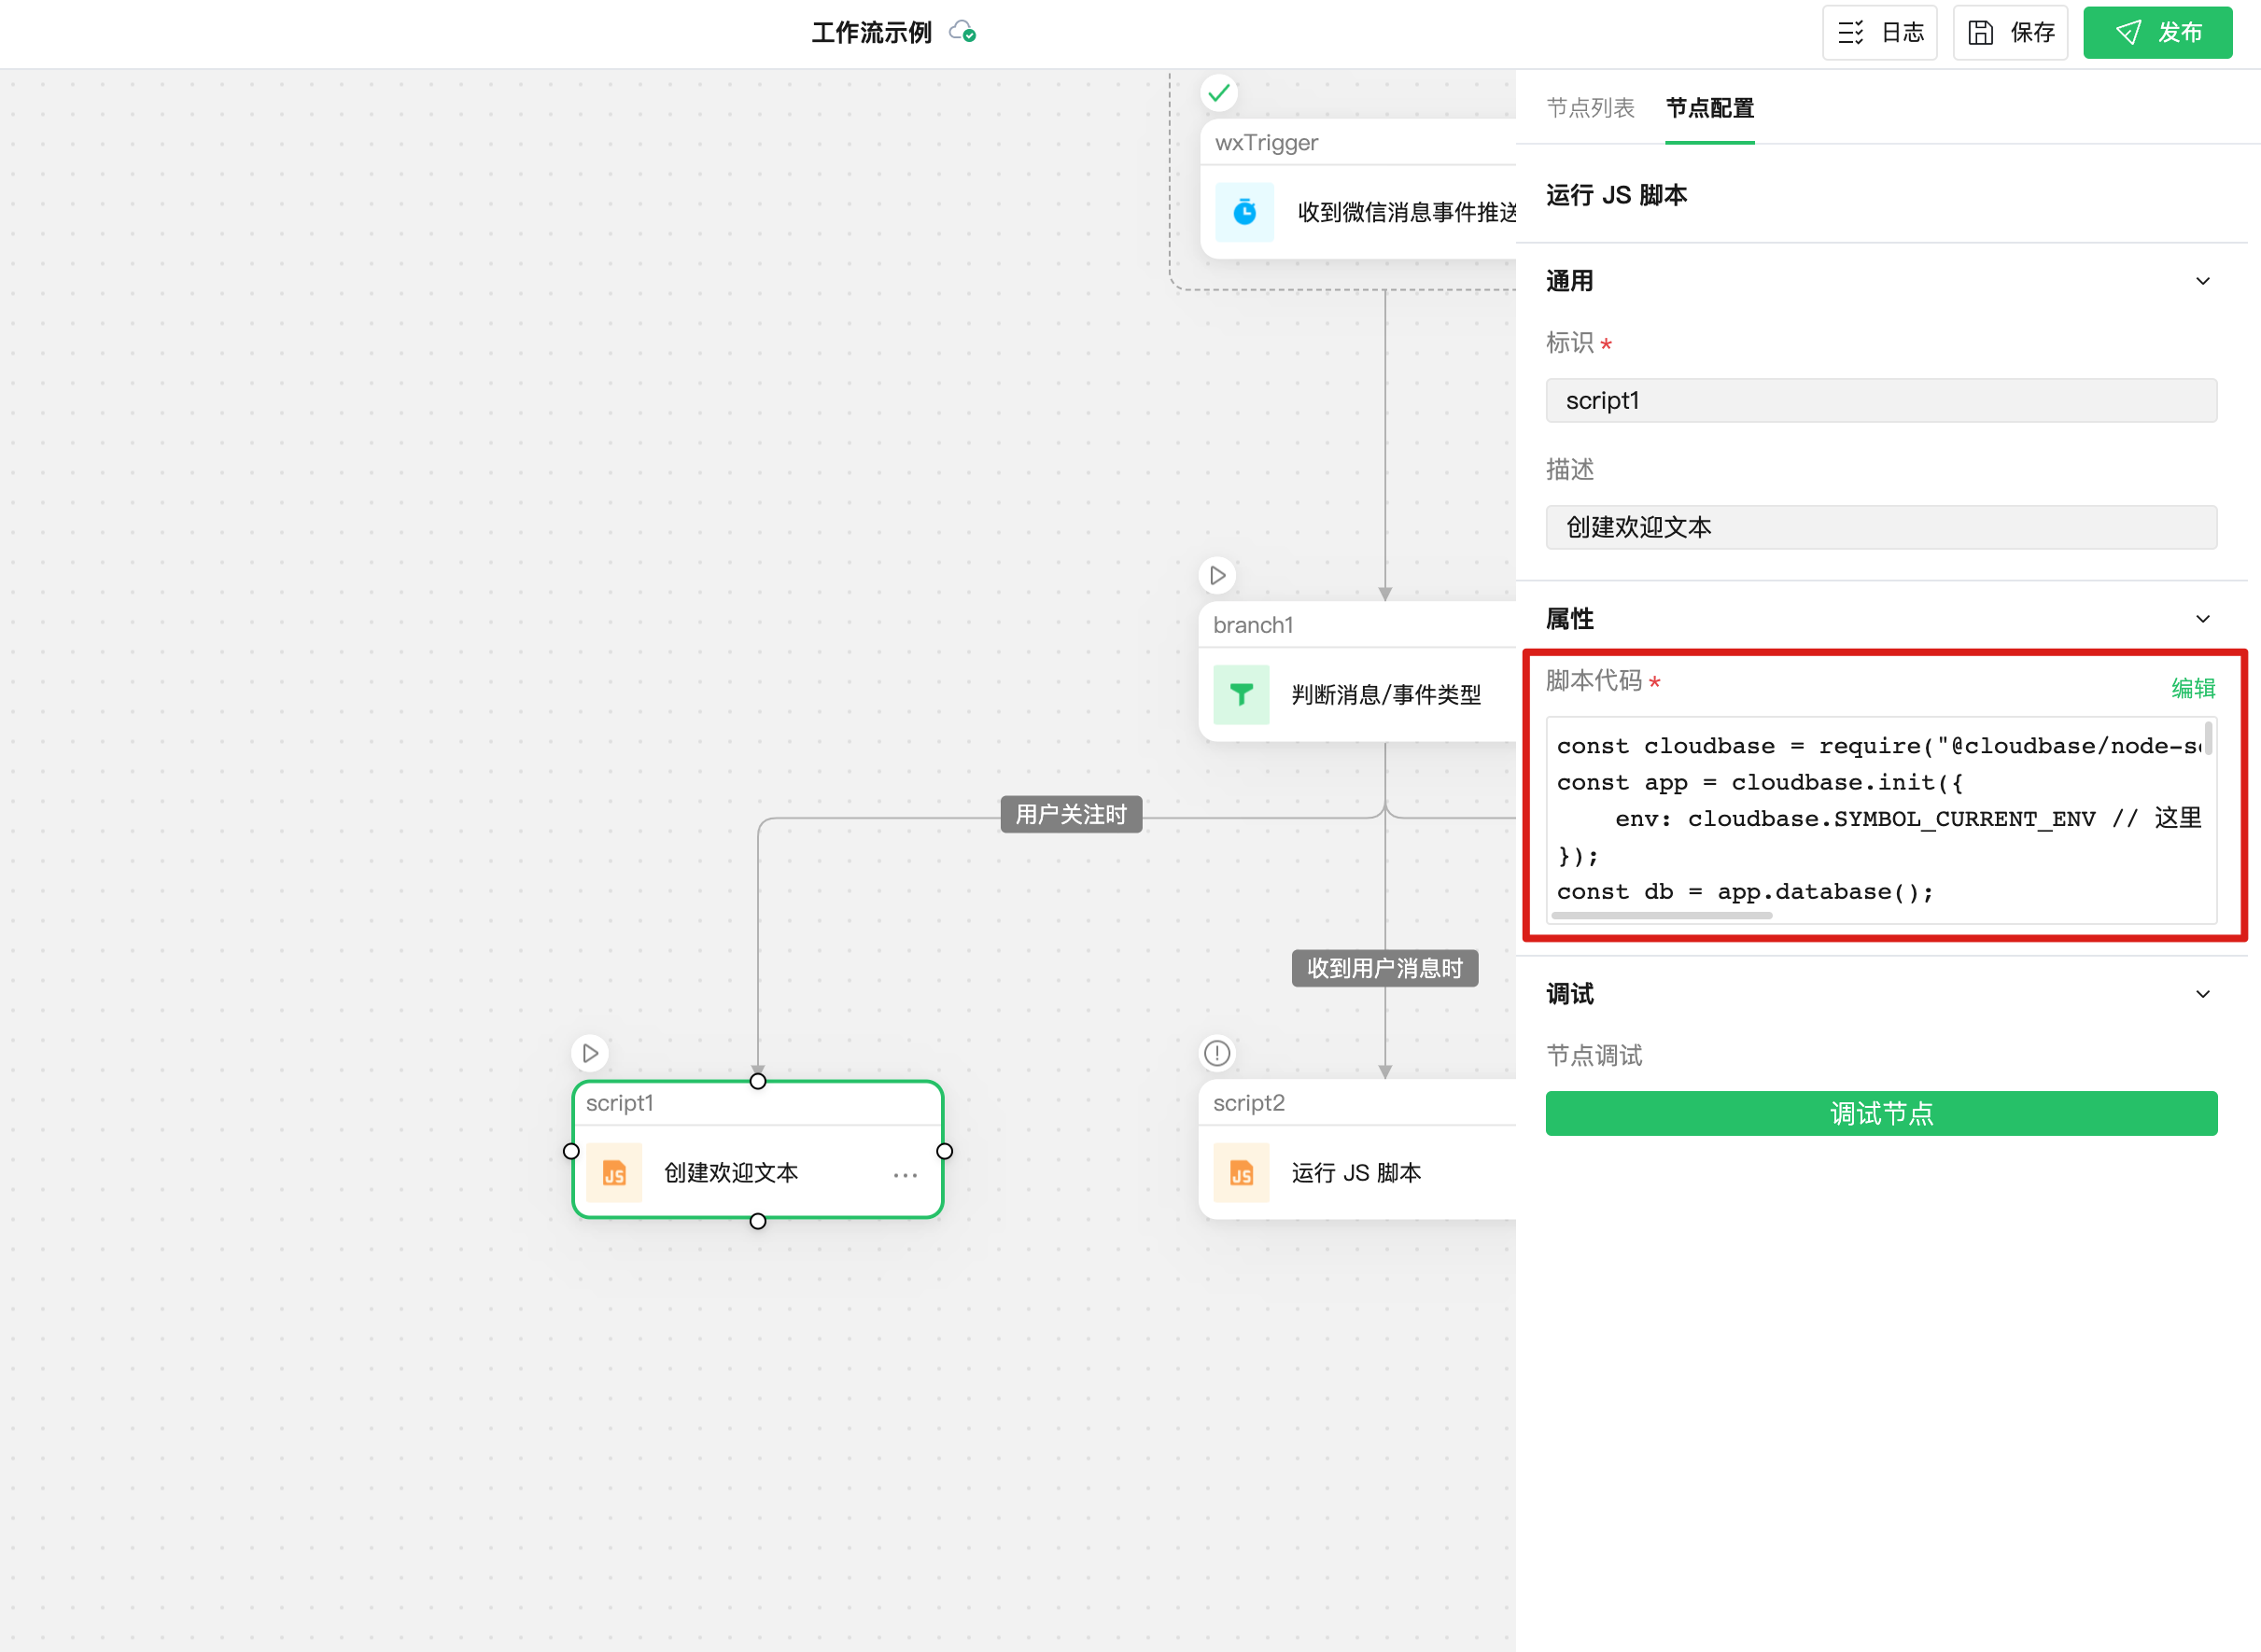
In the code editor, you can view and select global and node variables on the left. After writing, click the "Debug Node" button on the right to quickly debug the code. You can also view relevant guidance documentation at the bottom:
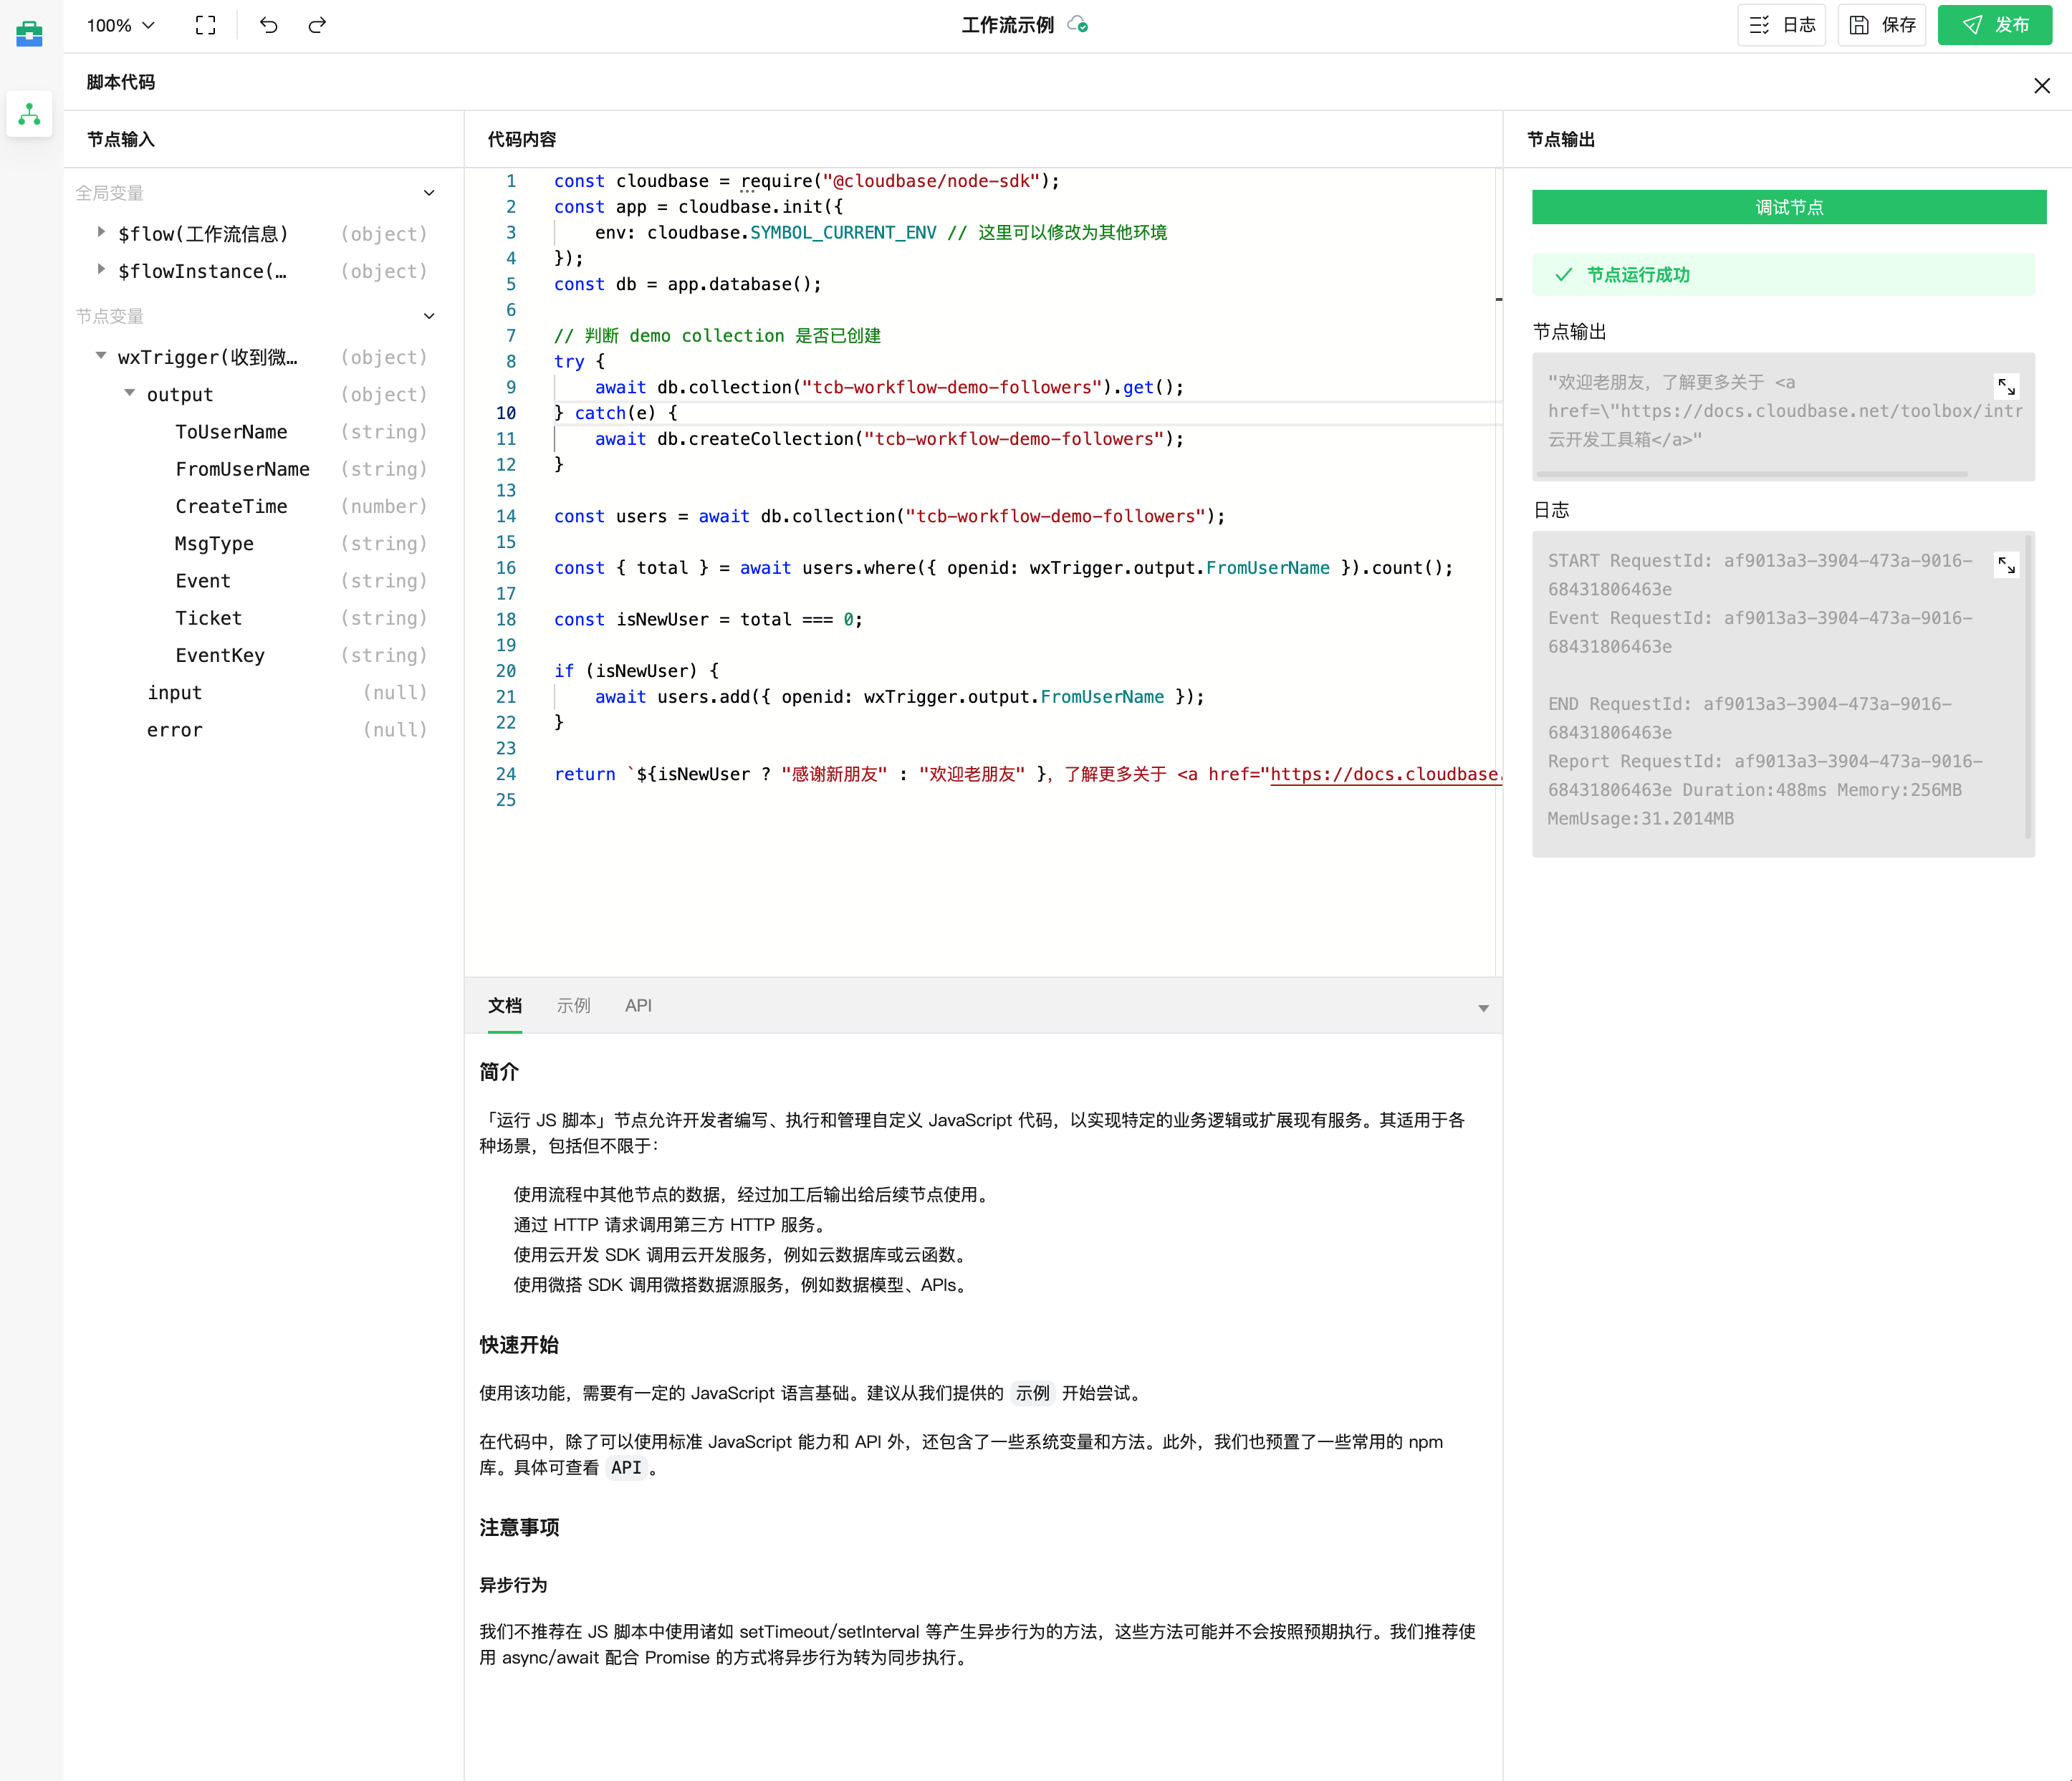
Sample code is as follows, which checks whether the user has followed the official account before when a subscribe event is received, and returns a corresponding reply.
const cloudbase = require("@cloudbase/node-sdk");

const app = cloudbase.init({
  env: cloudbase.SYMBOL_CURRENT_ENV, // This can be modified to other environments
});
const db = app.database();

// Check whether the demo collection has been created
try {
  await db.collection("tcb-workflow-demo-followers").get();
} catch (e) {
  await db.createCollection("tcb-workflow-demo-followers");
}

const users = await db.collection("tcb-workflow-demo-followers");

const { total } = await users
  .where({ openid: wxTrigger.output.FromUserName })
  .count();

const isNewUser = total === 0;

if (isNewUser) {
  await users.add({ openid: wxTrigger.output.FromUserName });
}

// return The return value will be used as the node output for subsequent nodes
return `${
  isNewUser ? "Thanks new friend" : "Welcome back old friend"
}, Learn more about <a href="https://docs.cloudbase.net/toolbox/intro">CloudBase Management System</a>`;
Step 2: Set Up Response for Welcome Message Reply
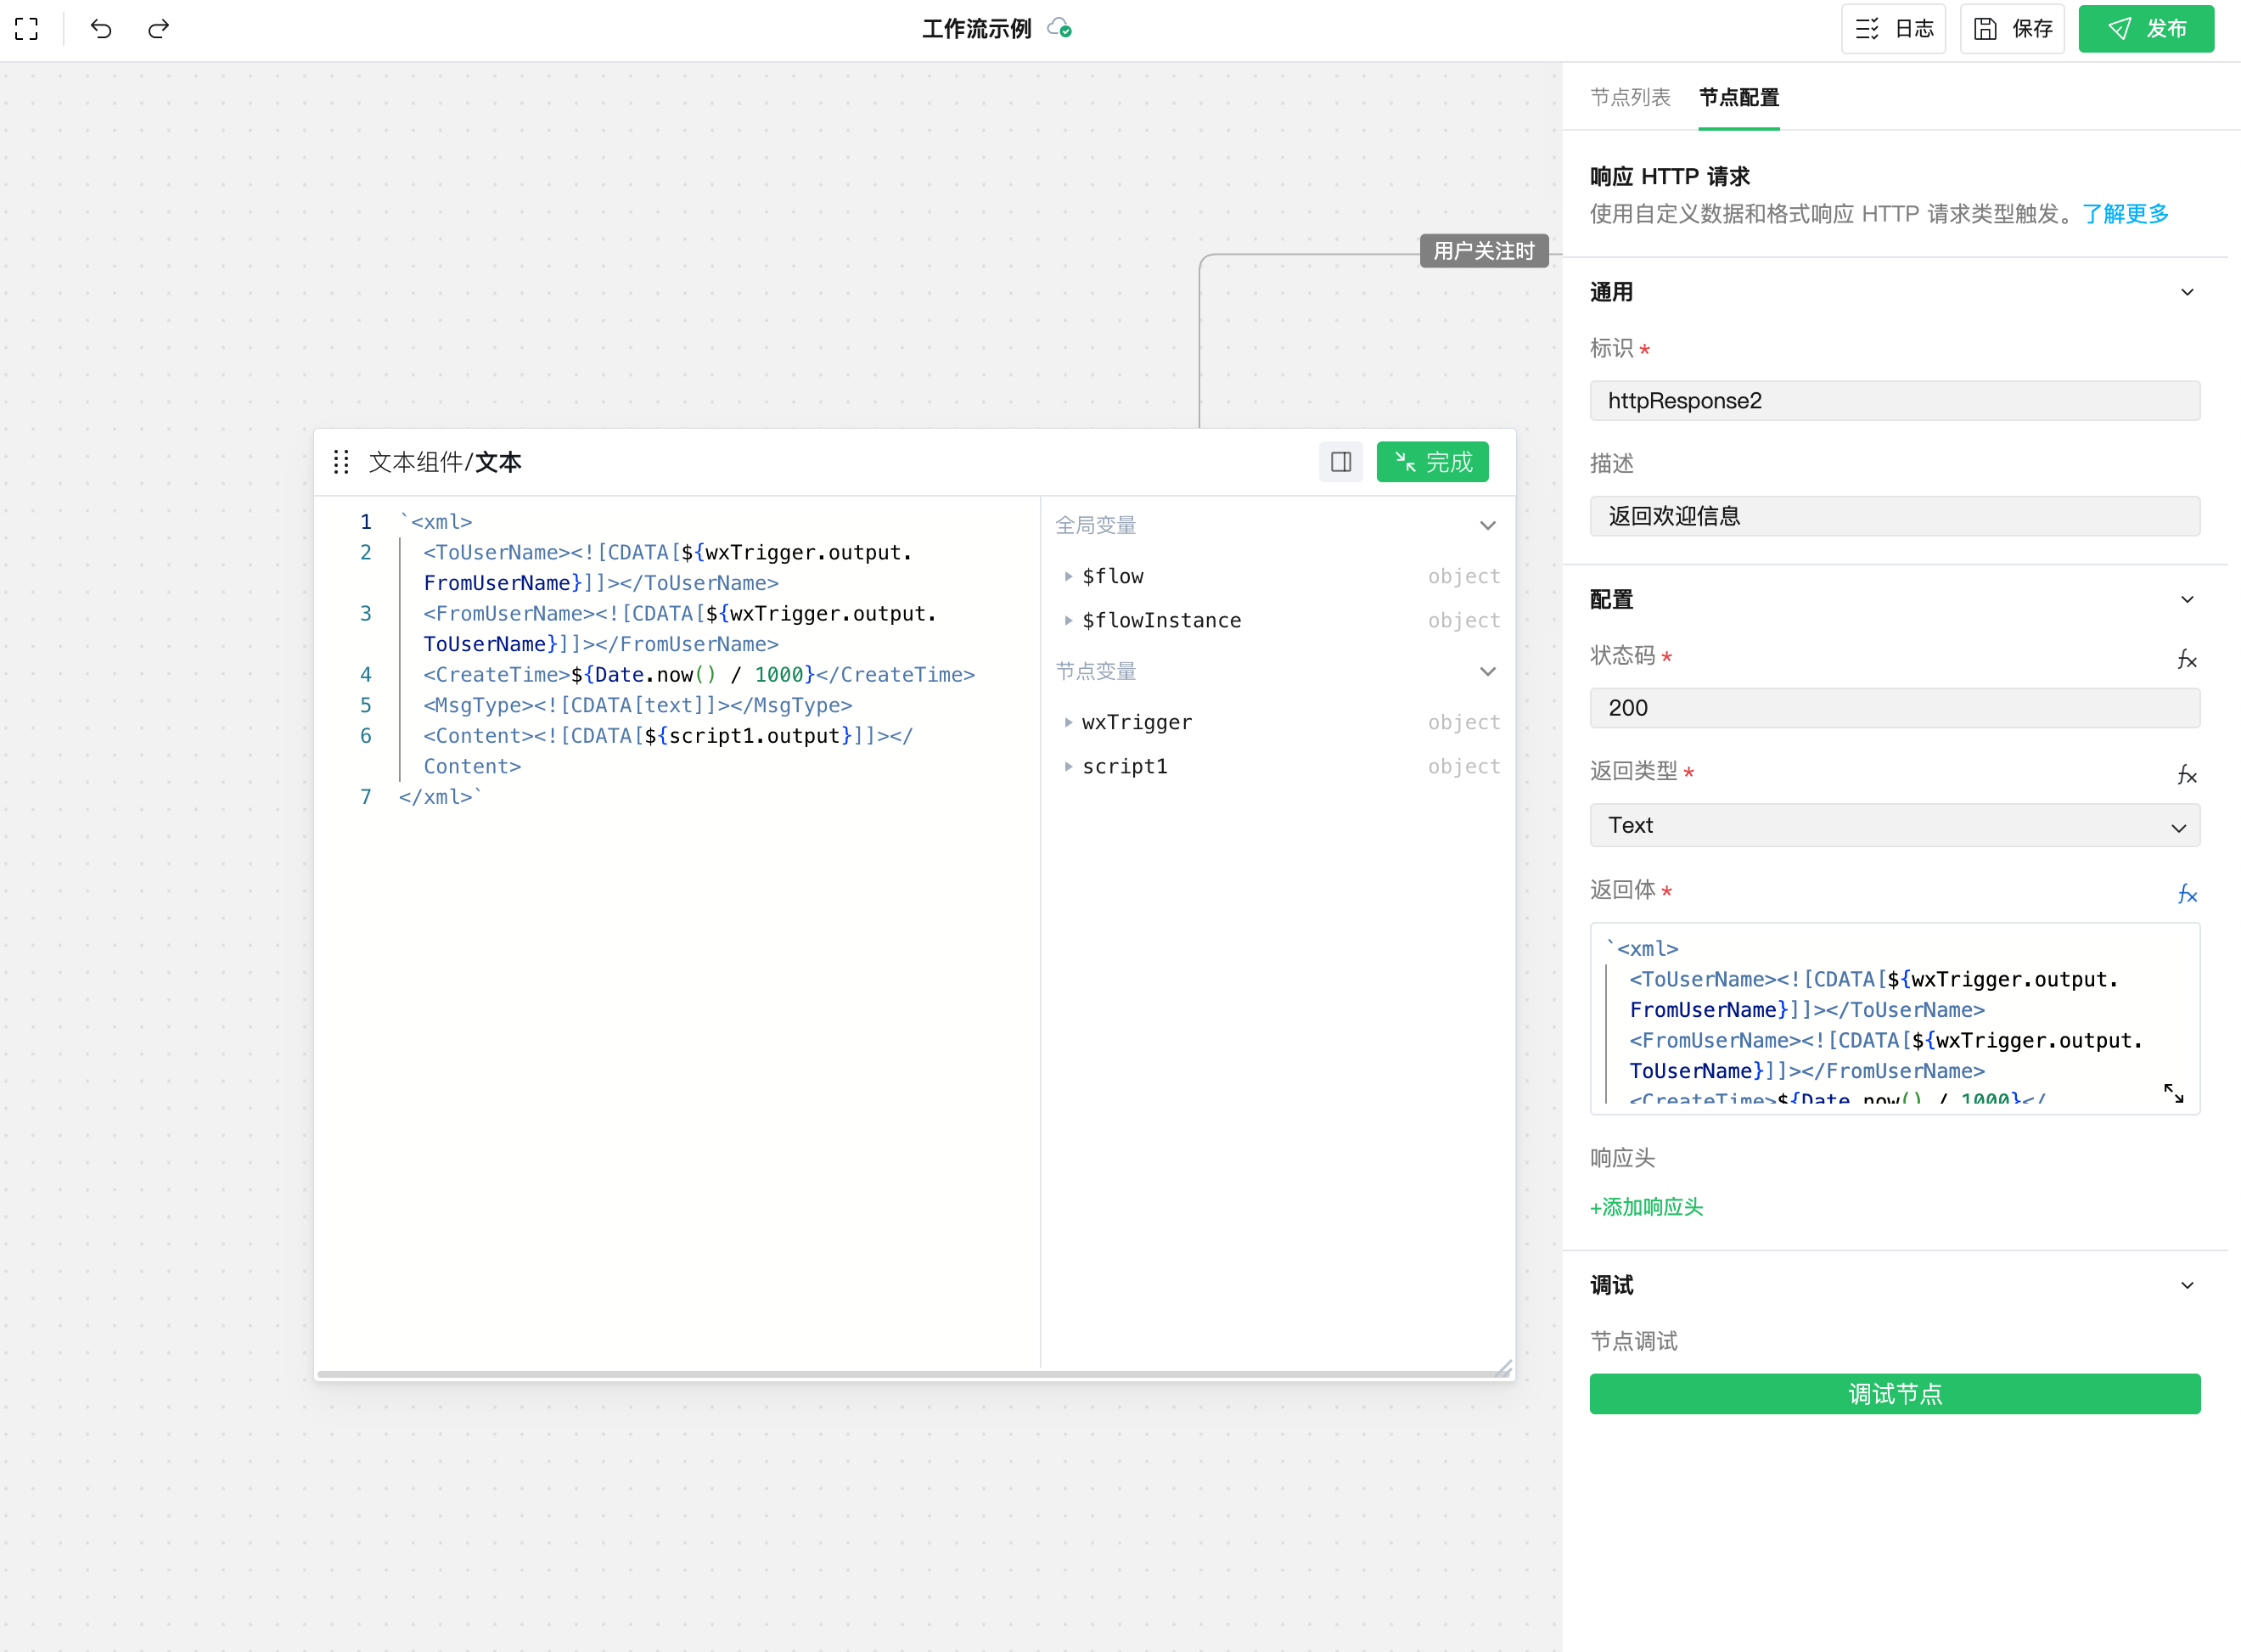
Since WeChat message push is an HTTP request, we can add a "Respond to HTTP Request" node to handle this request, enabling the capability to passively reply to user messages.
From the node list, add the "Respond to HTTP Request" node. WeChat requires responses in text/xml format, so configure the response as shown in the figure below.
`<xml>
  <ToUserName><![CDATA[${wxTrigger.output.FromUserName}]]></ToUserName>
  <FromUserName><![CDATA[${wxTrigger.output.ToUserName}]]></FromUserName>
  <CreateTime>${Date.now() / 1000}</CreateTime>
  <MsgType><![CDATA[text]]></MsgType>
  <Content><![CDATA[${script1.output}]]></Content>
</xml>`;
Step 3: Write Business Logic for Received User Messages
Refer to Step 1 to add and set up the JS script node:
/* Refer to the following for the format of passive reply message type: https://developers.weixin.qq.com/doc/offiaccount/Message_Management/Passive_user_reply_message.html */
switch (wxTrigger.output.MsgType) {
  case "text":
    return `<MsgType><![CDATA[text]]></MsgType><Content><![CDATA[Received the text message you sent: ${wxTrigger.output.Content}]]></Content>`;
  case "image":
    return `<MsgType><![CDATA[image]]></MsgType><Image><MediaId><![CDATA[${wxTrigger.output.MediaId}]]></MediaId></Image>`;
  case "voice":
    return `<MsgType><![CDATA[voice]]></MsgType><Voice><MediaId><![CDATA[${wxTrigger.output.MediaId}]]></MediaId></Voice>`;
  default:
    return `<MsgType><![CDATA[text]]></MsgType><Content><![CDATA[Received the [${wxTrigger.output.MsgType}] type message you sent]]></Content>`;
}
Step 4: Set Up Response for User Message Reply
Refer to Step 2 to add and set up the Respond to HTTP Request node:
`<xml>
  <ToUserName><![CDATA[${wxTrigger.output.FromUserName}]]></ToUserName>
  <FromUserName><![CDATA[${wxTrigger.output.ToUserName}]]></FromUserName>
  <CreateTime>${Date.now() / 1000}</CreateTime>
  ${script2.output}
</xml>`;
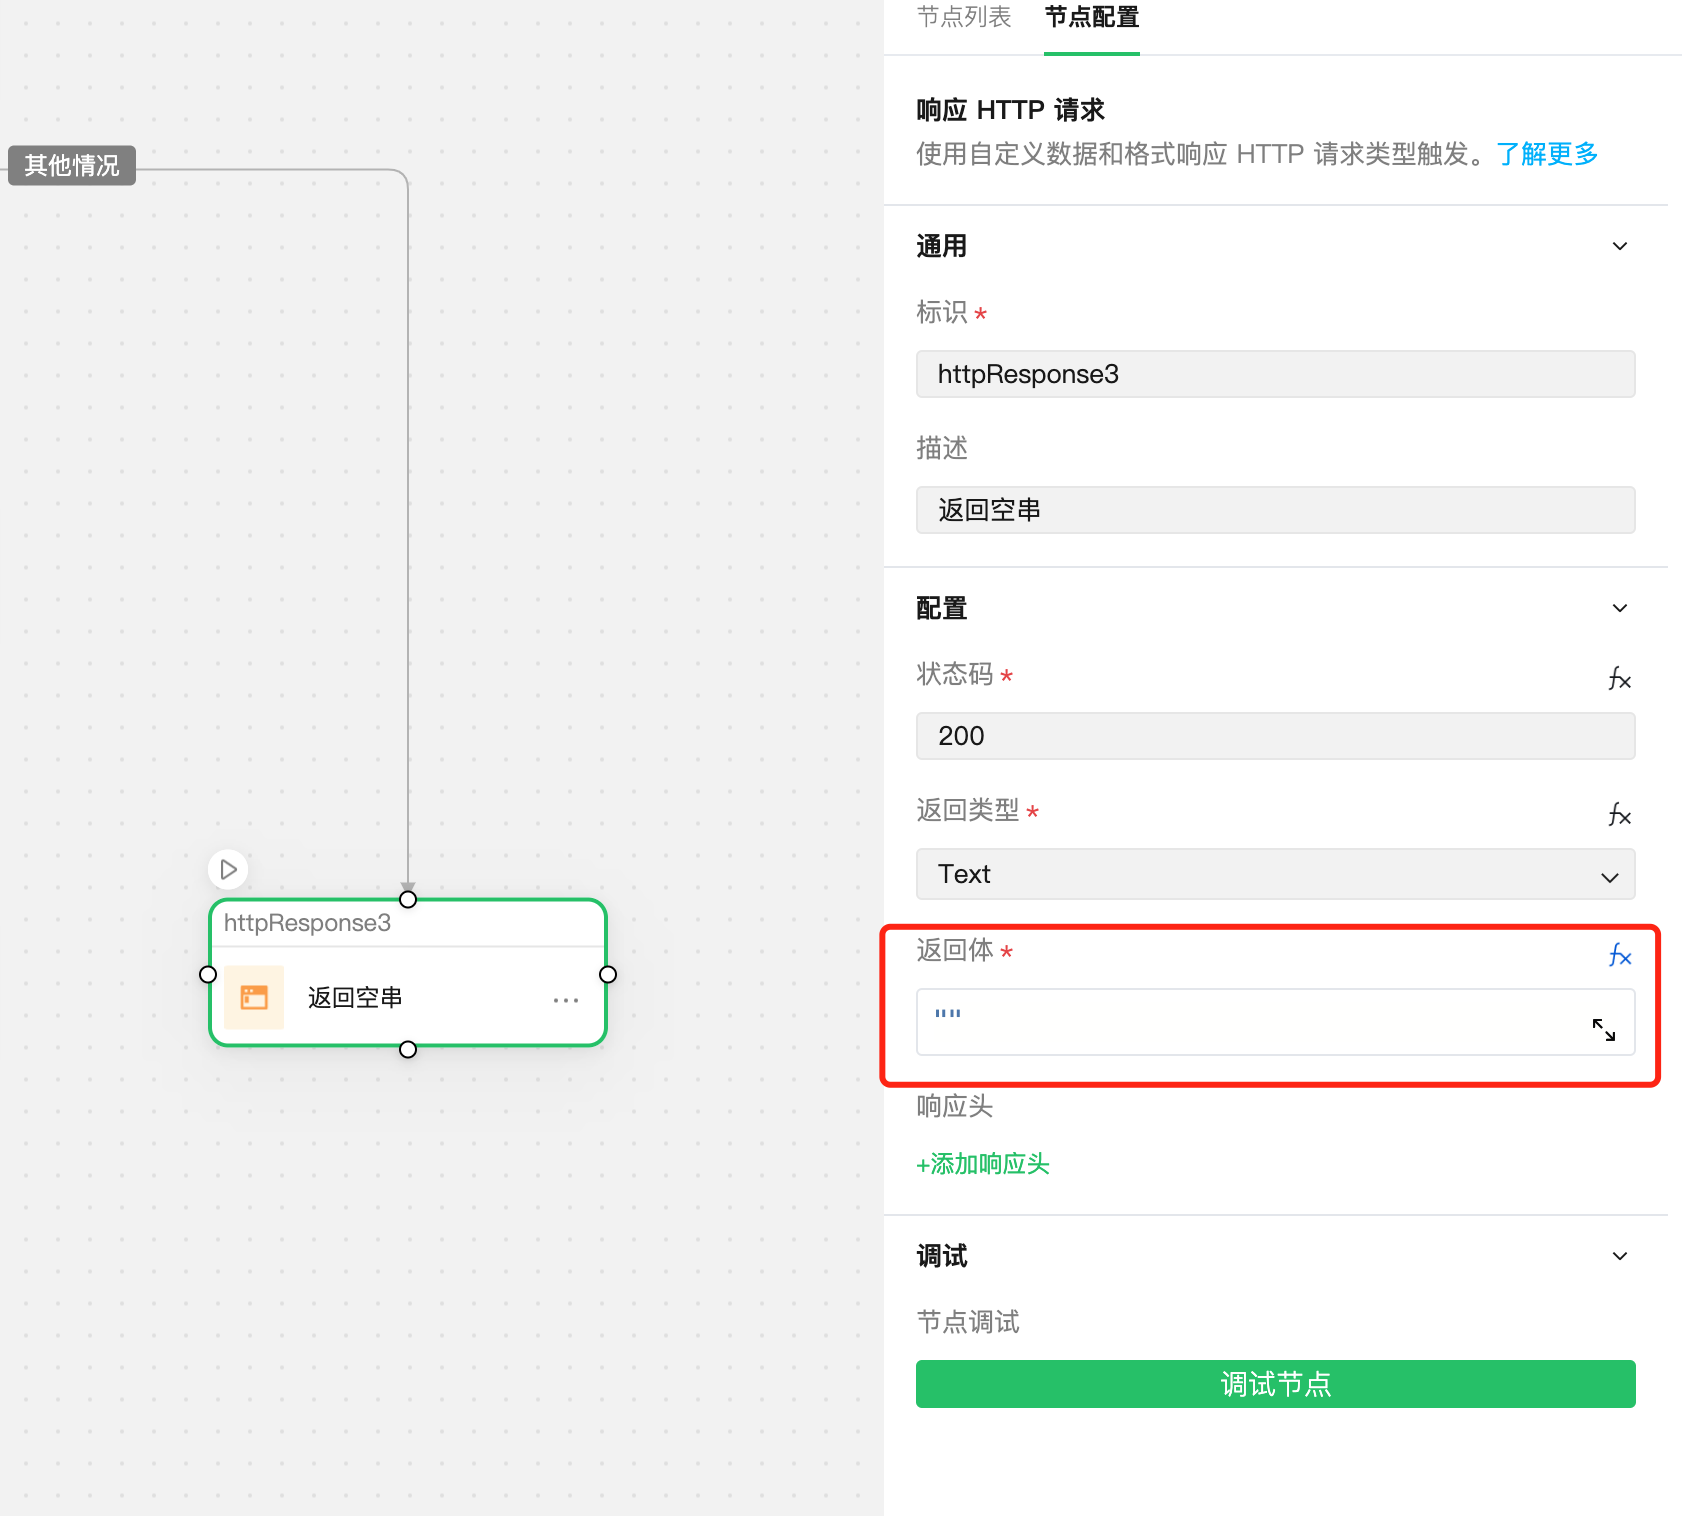
Step 5: Handle Other Cases
In other cases, we respond with an empty string by default as required by WeChat to indicate no processing.
Next
Next, we will learn how to publish and officially use workflows. Please proceed to Section 4: Publishing Workflows