WeChat Mini Program Quick Start
Preparations
Step 1: Create Initial Project
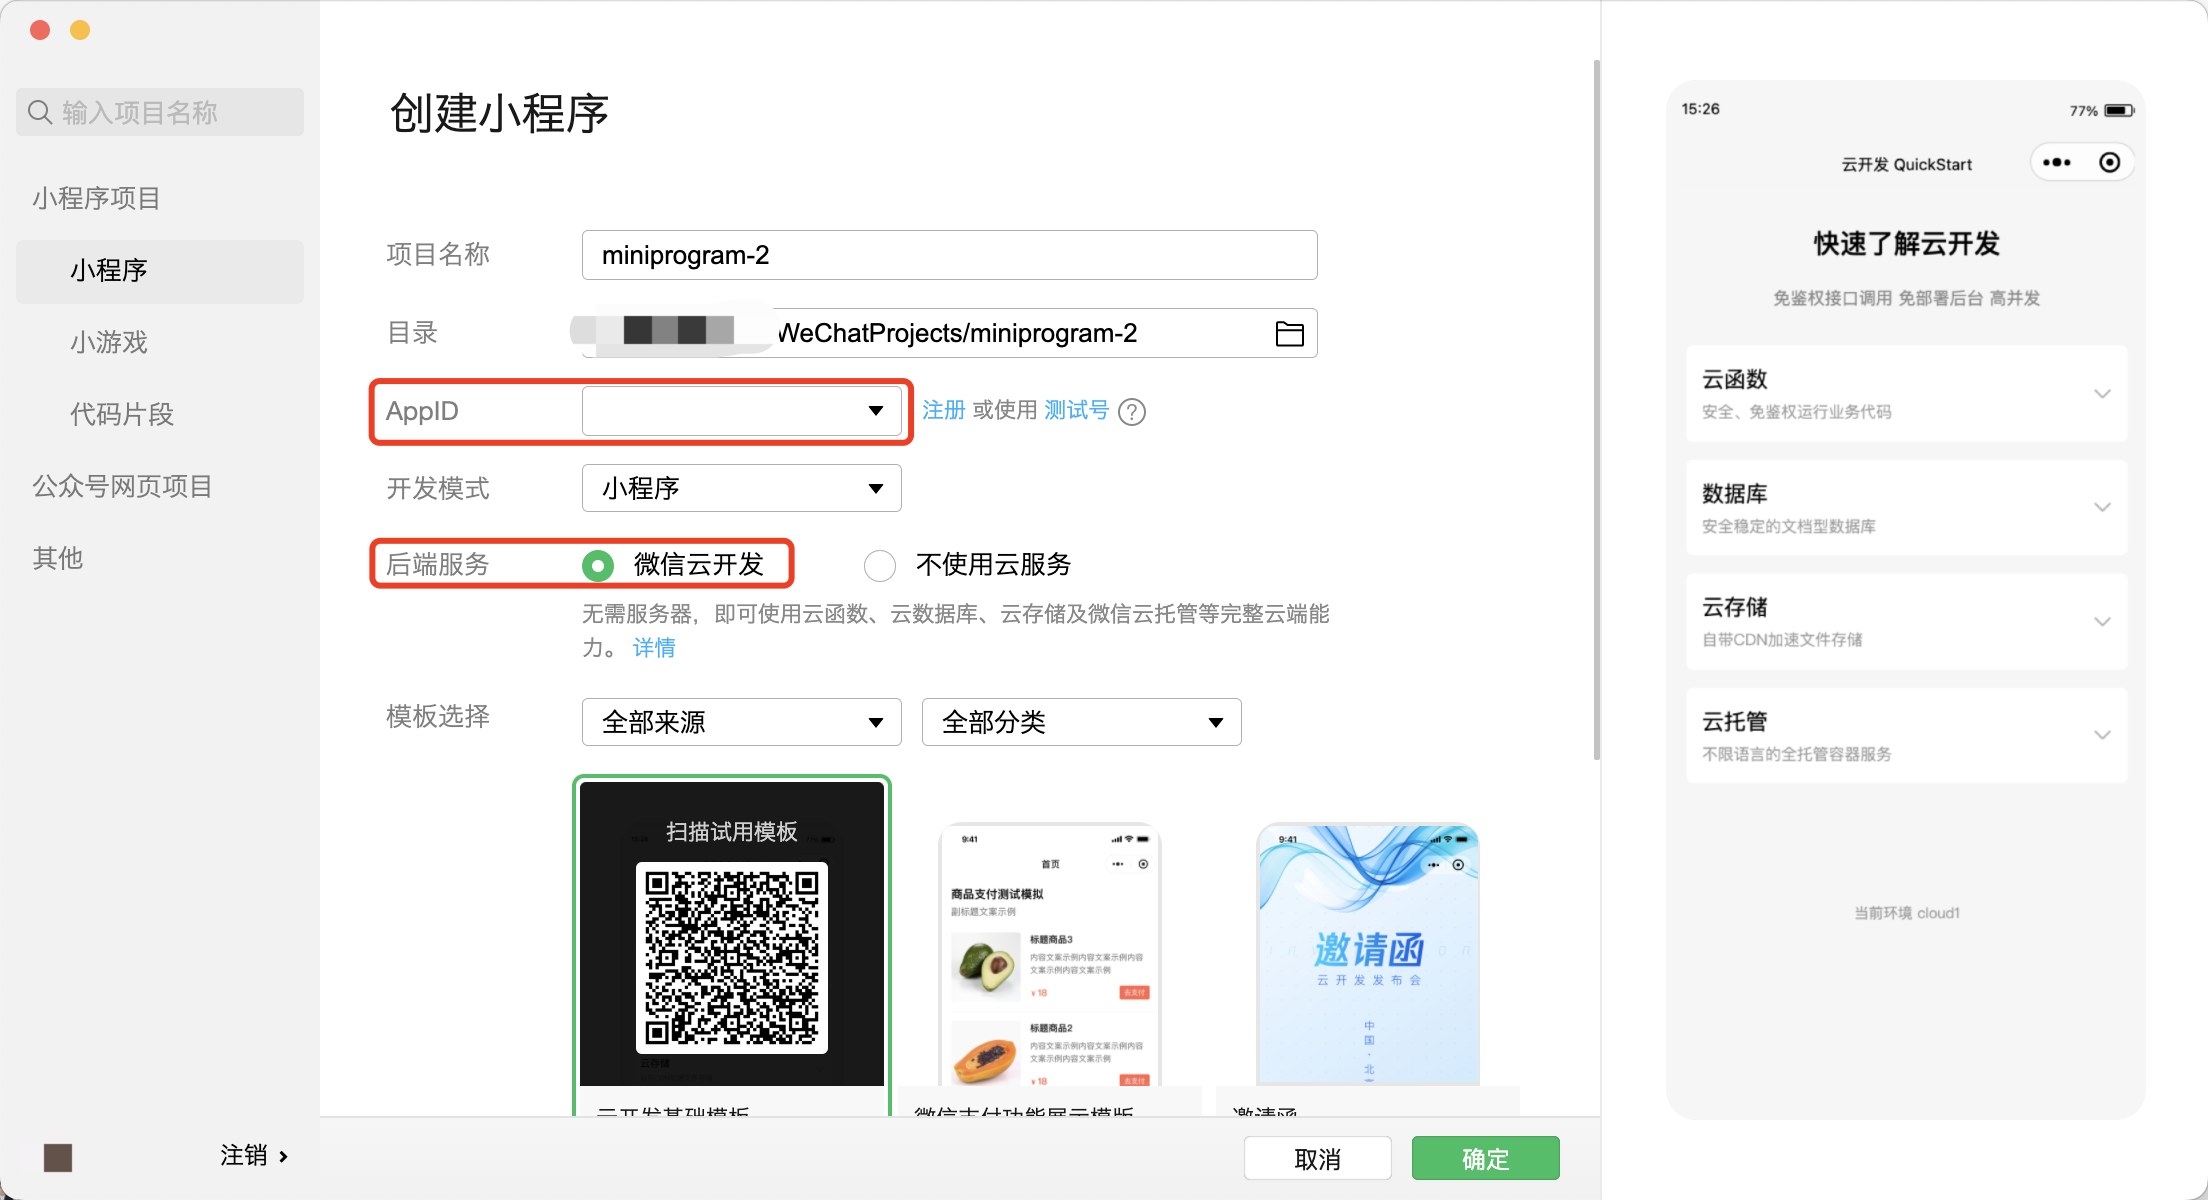
Open WeChat Developer Tools, create a Mini Program project, fill in the AppId, select WeChat Cloud Development for the backend service, choose any template to start the project, as shown in the example below:

Step 2: Create a Cloud Development Environment
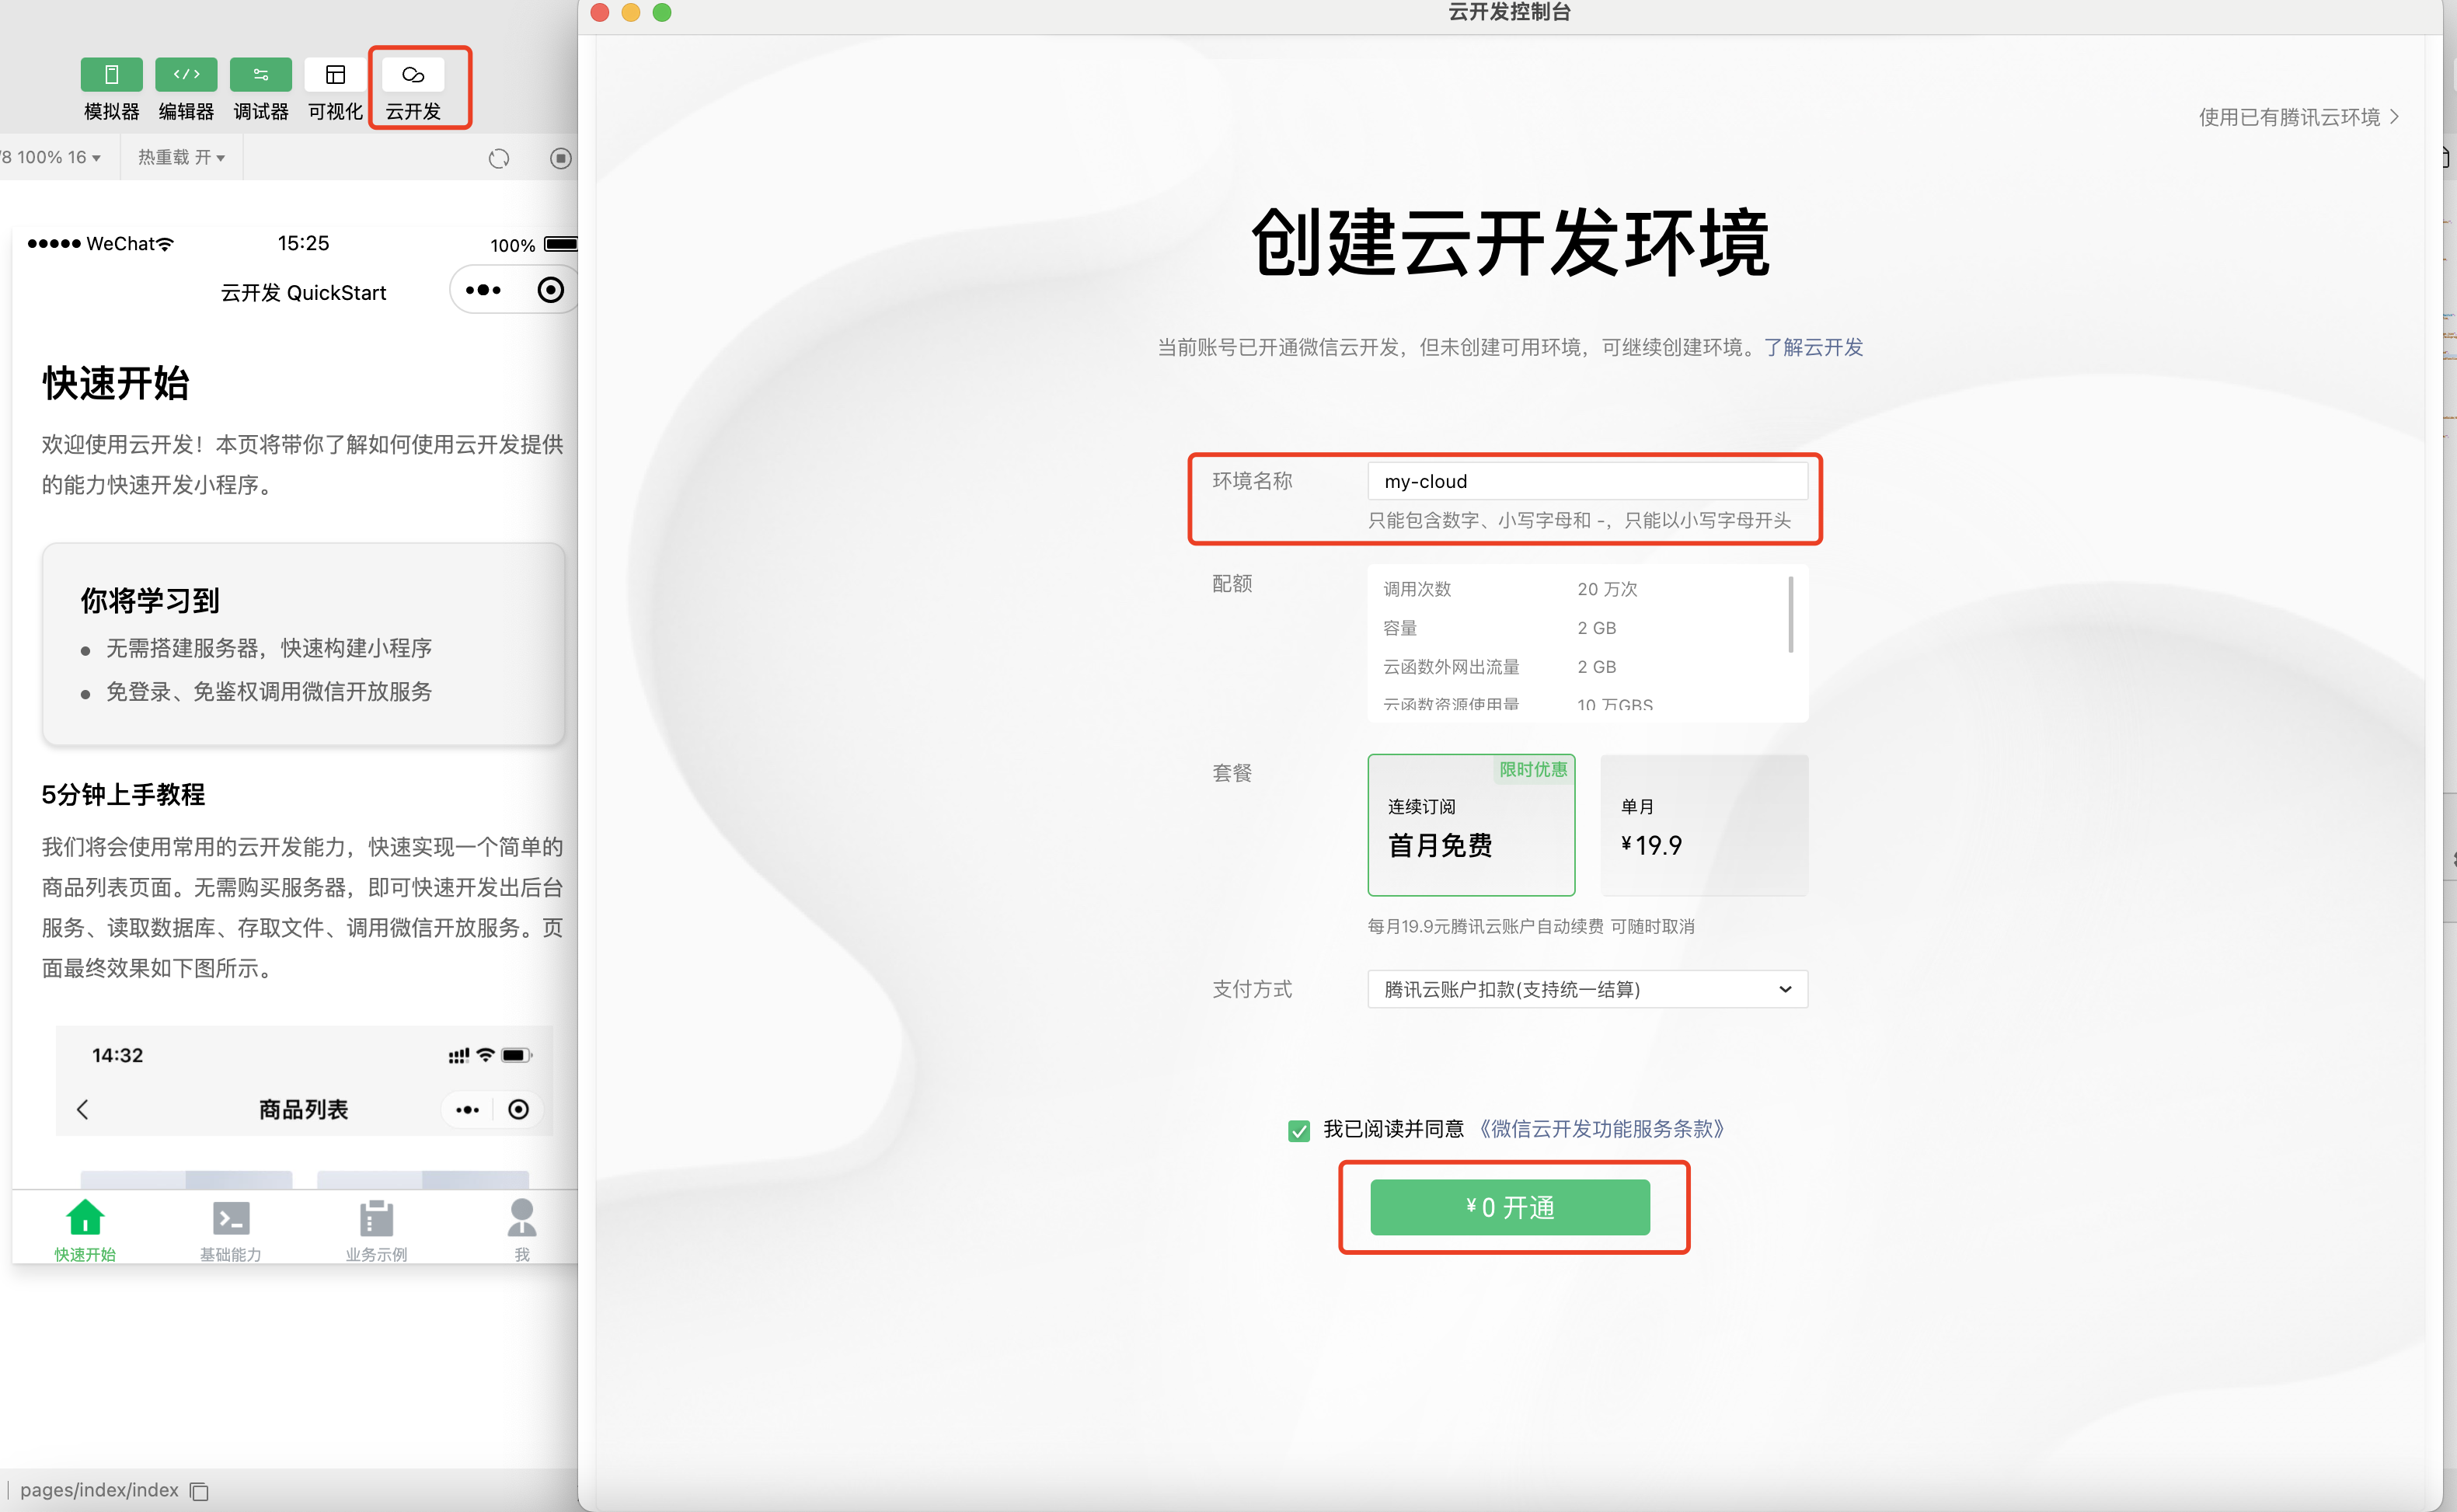
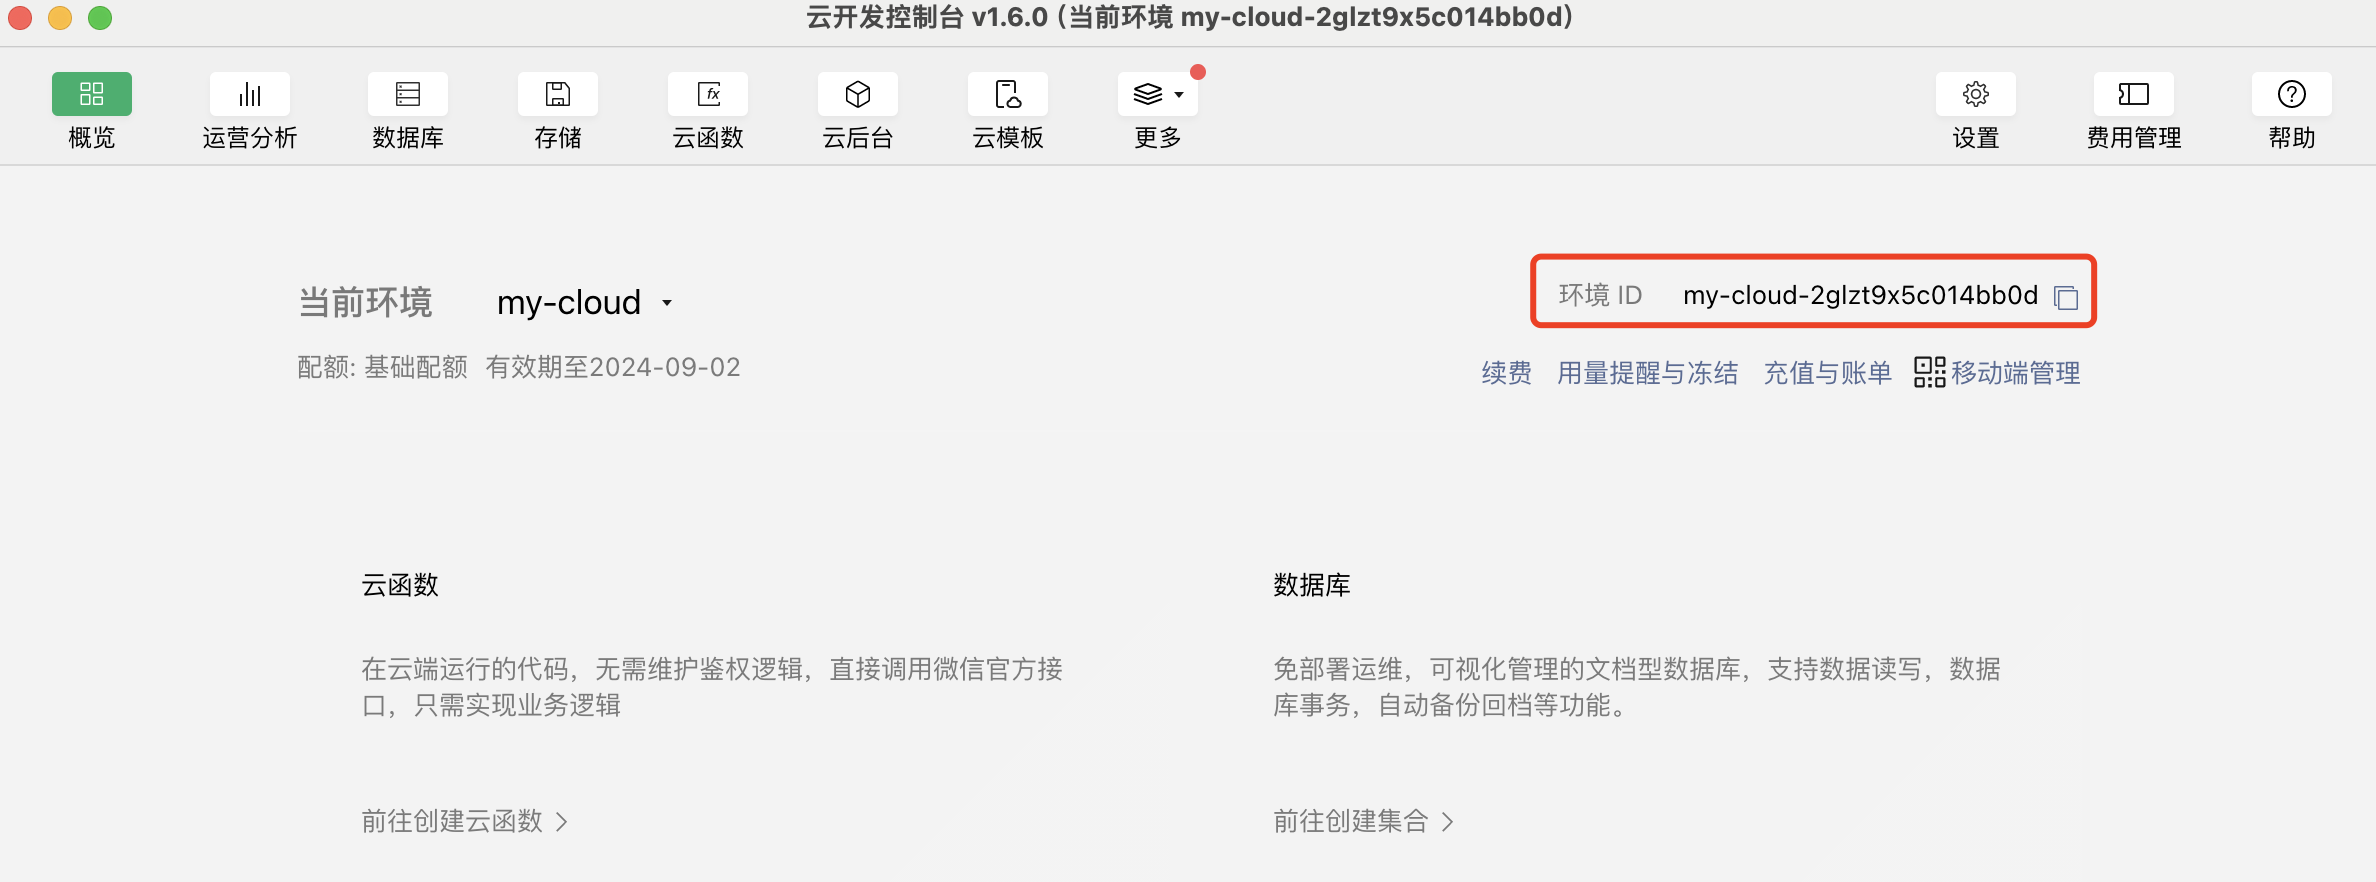
After entering the project in WeChat Developer Tools, click the Cloud Development menu to activate the cloud development environment. Once activated, you can see the assigned Environment ID; copy it for later use, as shown in the example below:


Step 3: Configure Mini Program Request Domain
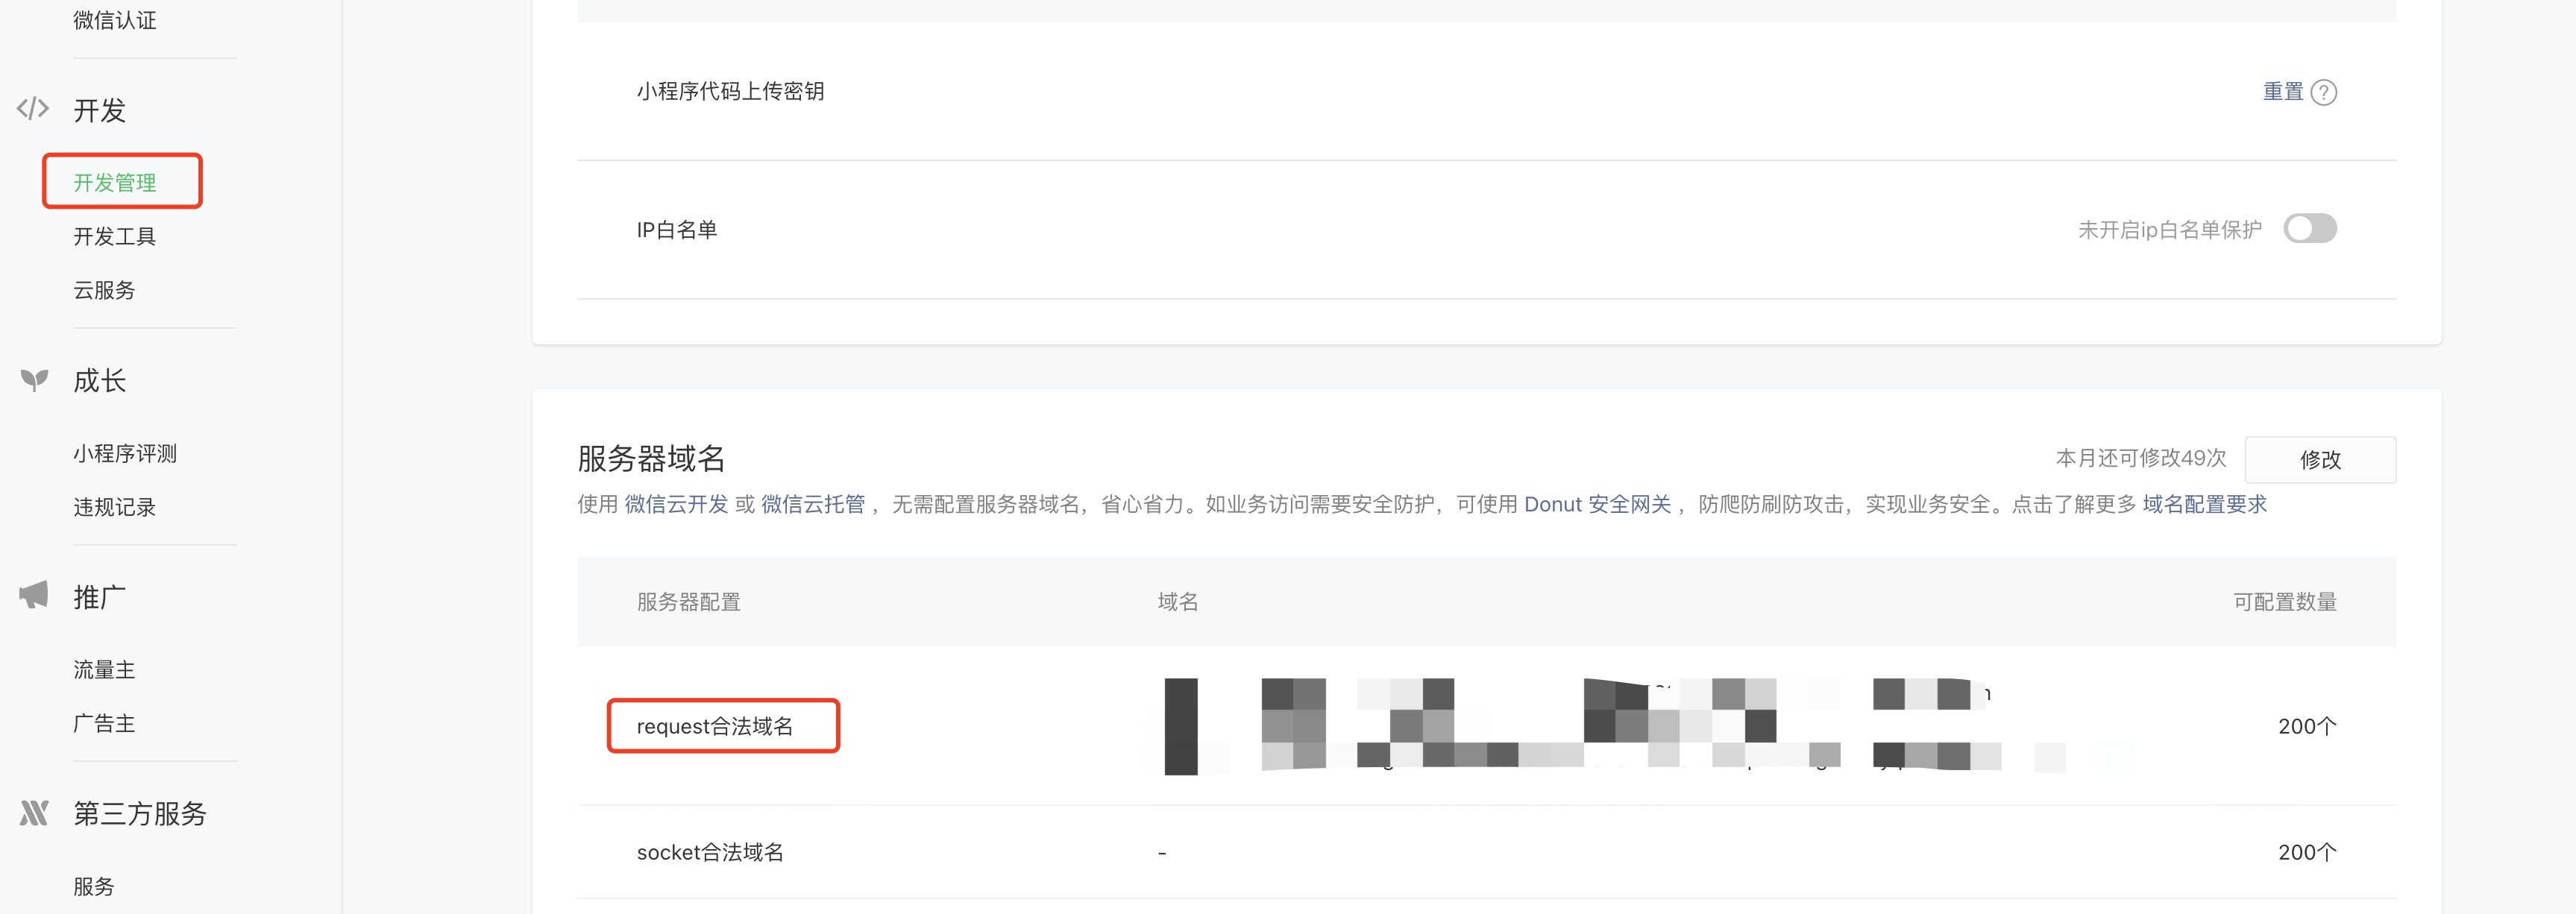
Log in to WeChat Official Accounts Platform, and add the request domain in Development Settings.
Need to add 2 domains, as follows:
https://{Environment ID}.ap-shanghai.tcb-api.tencentcloudapi.comhttps://{Environment ID}.api.tcloudbasegateway.com
For example, if the Environment ID is my-cloud-2glzt9x5c014bb0d, then the domain is
https://my-cloud-2glzt9x5c014bb0d.ap-shanghai.tcb-api.tencentcloudapi.comhttps://my-cloud-2glzt9x5c014bb0d.api.tcloudbasegateway.com:::
As shown in the example below:

Step 4: Install dependency packages
Open the Terminal tool in WeChat Developer Tools and install the latest @cloudbase/js-sdk dependency package. Note that you must install version 2.x.x; the latest version can be checked on the npm official website. The installation command is as follows:
npm i @cloudbase/js-sdk
After installing the dependency packages, click Tools-Build npm in WeChat Developer Tools. Upon success, you will see the automatically generated miniprogram_npm directory.
If the build fails, please check whether the packNpmRelationList configuration in the project.config.json file is correct. The general configuration is as follows. For details, refer to the official npm support documentation
"packNpmRelationList": [
  {
    "packageJsonPath": "./package.json",
    "miniprogramNpmDistDir": "./miniprogram/"
  }
]
:::
As shown in the example below:

Step 5: Write functional code
For writing related functions, you can refer to the official documentation. Below is a sample of simple initialization and openId silent login:
// Kernel.
import cloudbase from "@cloudbase/js-sdk/app";
// Login module.
import { registerAuth } from "@cloudbase/js-sdk/auth";
// Cloud function module.
import { registerFunctions } from "@cloudbase/js-sdk/functions";
// Cloud storage module.
import { registerStorage } from "@cloudbase/js-sdk/storage";
// Database module.
import { registerDatabase } from "@cloudbase/js-sdk/database";

// Feature module registration
registerAuth(cloudbase);
registerFunctions(cloudbase);
registerStorage(cloudbase);
registerDatabase(cloudbase);

const app = cloudbase.init({
  env: "environment ID", // Replace with the environment ID obtained in step 2
});
const auth = app.auth();
auth.signInWithOpenId();
console.log(auth.currentUser);
Other Mini Program Examples
Please refer to Mini Program Quick Start