Quick Start
In about 10 minutes, you can try out CloudBase Platform Edition: purchase a package, create an environment, issue an API Key, and operate CloudBase resources directly in your AI development tool.
| Step | Action | Result |
|---|---|---|
| 1 | Purchase Platform Edition | An available account-level package |
| 2 | Create an environment | Environment ID |
| 3 | Create an API Key | Environment access credential |
| 4 | Connect CloudBase in your AI tool | Connector ready |
| 5 | Sign in with the API Key | Ready to build in the conversation |
Prerequisites
- A registered Tencent Cloud account
- An AI development tool installed. This document uses WorkBuddy as an example; other tools that support CloudBase MCP follow the same flow
1. Purchase Platform Edition
Go to the CloudBase purchase page, select a package under Platform Edition, and complete the order and payment.
Platform Edition uses the Tencent Cloud account (UIN) as the unit of billing and management: one package covers all environments under the account, and environment creation and resource usage are metered and deducted from the package credits. You do not need to purchase a package separately for each environment. For details, see Purchase and Initialization.
2. Create an Environment and Copy the Environment ID
- After the purchase, go to the CloudBase console. When using CloudBase for the first time, follow the console guidance to activate the CloudBase service and complete service role authorization.
- Wait until the package is delivered successfully (the status changes from "Delivering" to "Normal"), then go to the Select Environment page on the left and click Create Environment.
- In the dialog, enter an environment name and click OK. The environment name can contain lowercase letters, digits, and
-; it must start with a letter, end with a letter or digit, and cannot contain consecutive-. - Back in the environment list, click the copy icon next to the environment ID to get the environment ID of this environment.
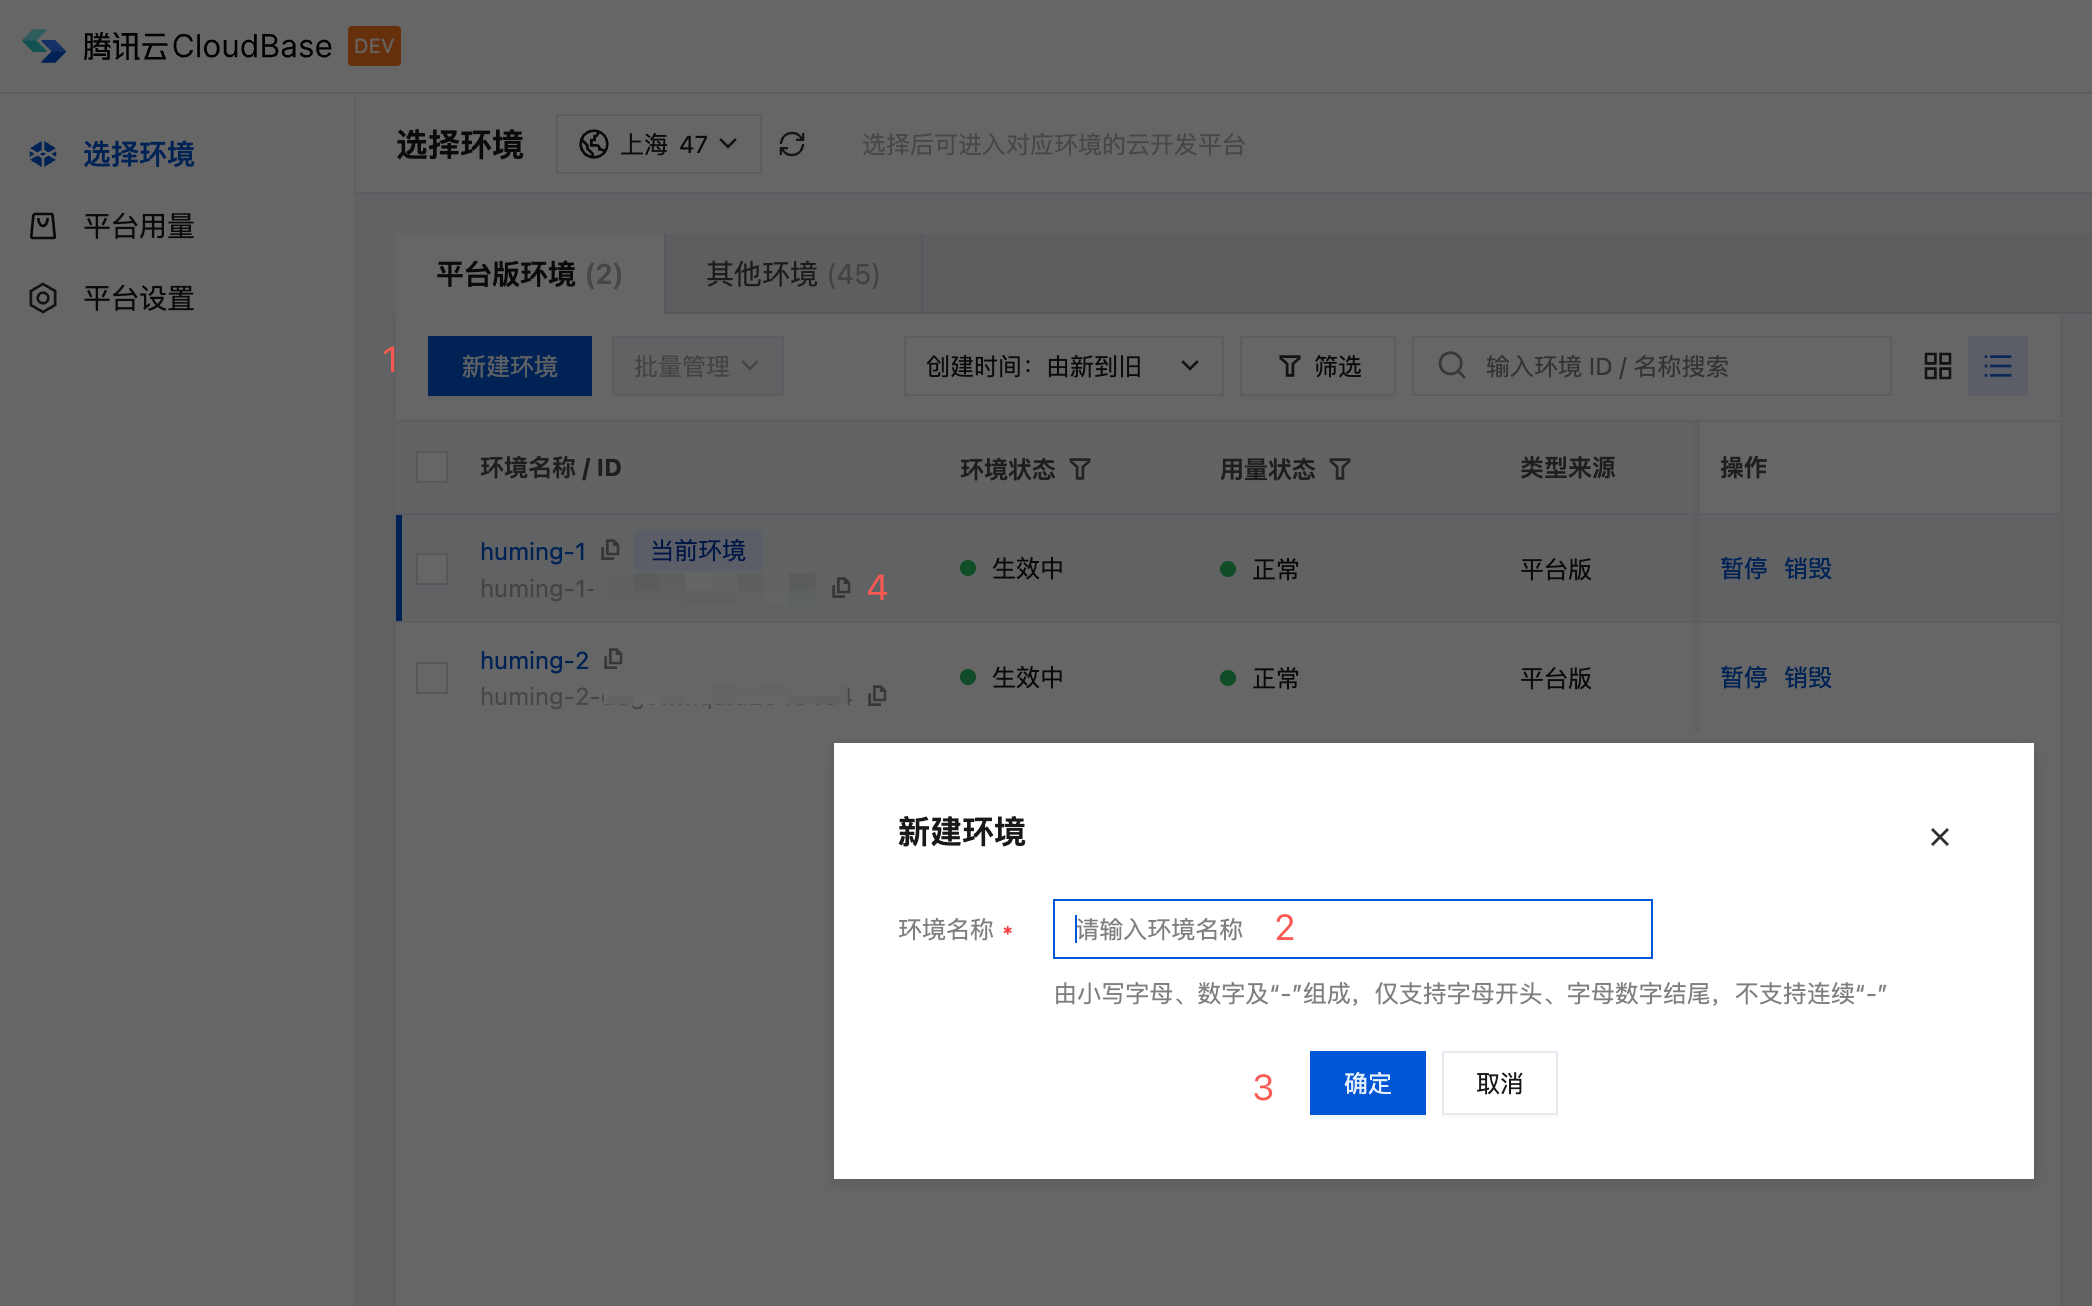
Environment creation takes some time. Wait until the environment status shows Normal before continuing.
3. Create an API Key and Copy It
- Go to Environment Management → Environment Configuration → API Key Configuration, and in the Server-side API Key section, click Create API Key.
- Enter a name and confirm. Then copy the generated API Key immediately — the plaintext is shown only once and cannot be viewed again after the dialog is closed.
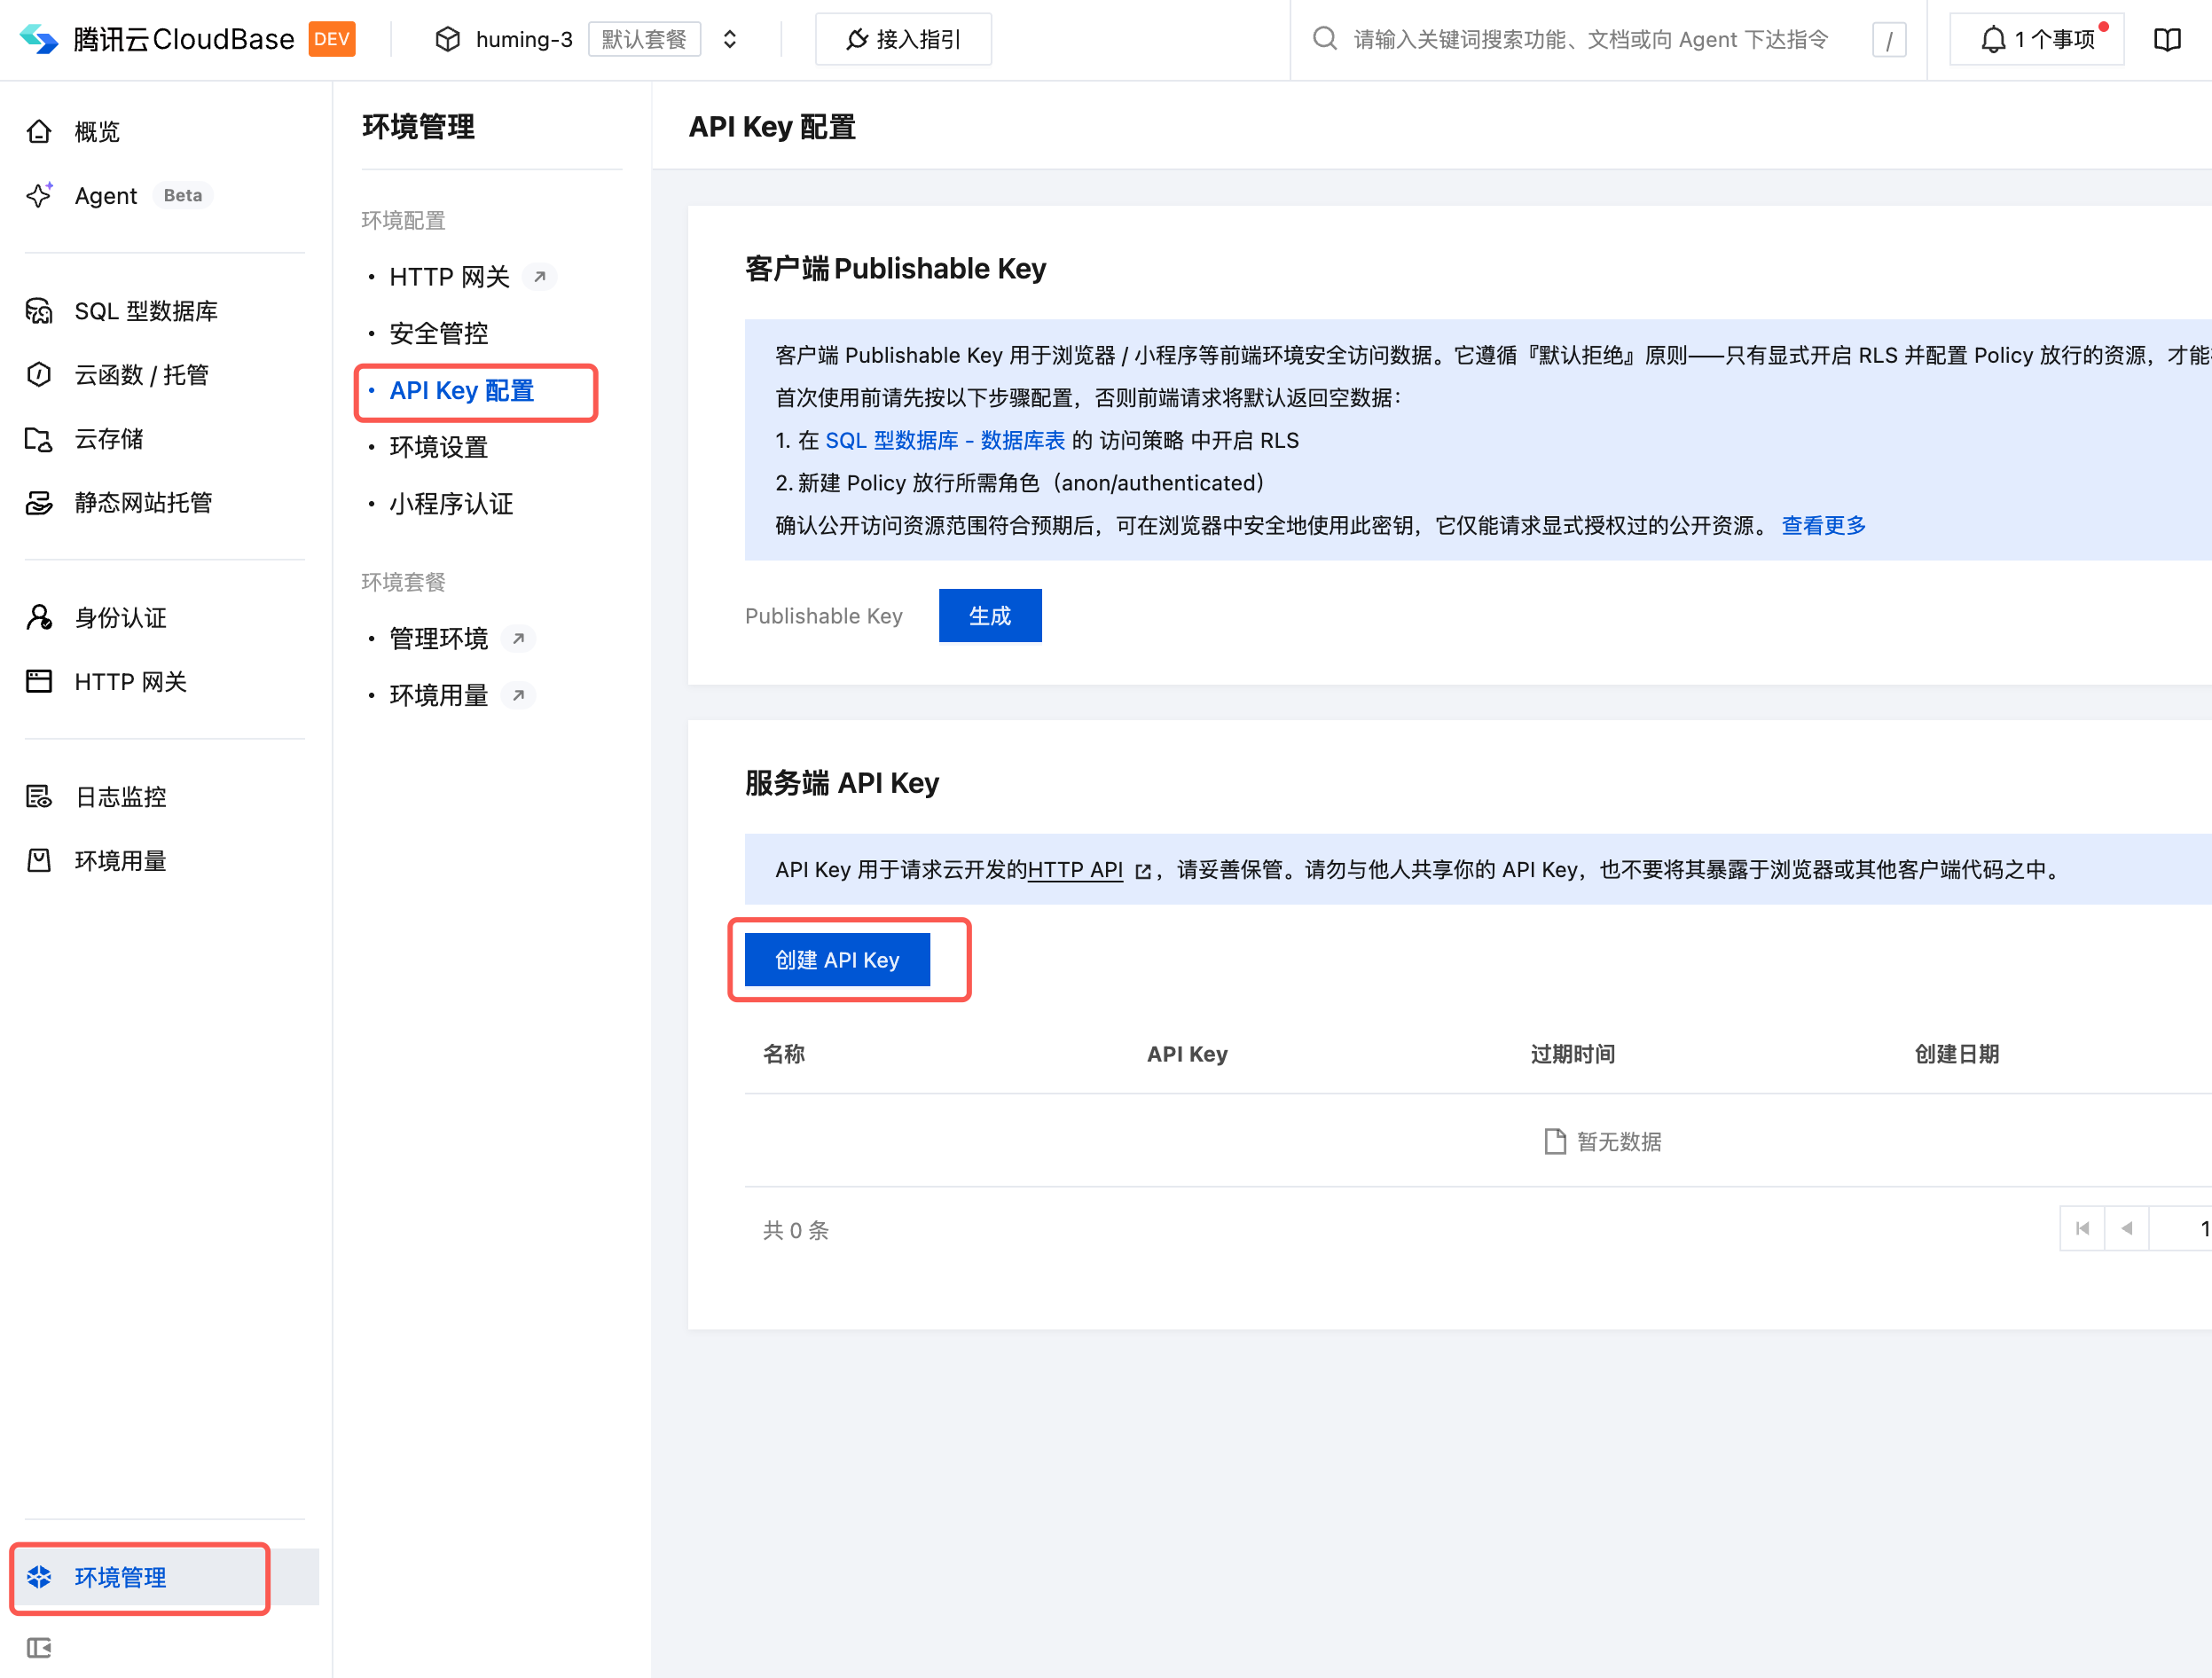
The API Key has read and write permissions on the resources of this environment. Never include it in the business frontend, browser-executable code, application repositories, or public channels. You can create up to 5 API Keys per environment; rotate them regularly. See Manage API Keys.
4. Connect CloudBase in Your AI Tool
Open WorkBuddy (or another AI development tool) and find the Tencent CloudBase connector. Open its details page and click Connect.
For the entry point and detailed steps in WorkBuddy, see the WorkBuddy Configuration Guide.
For more tools, see AI-Native Development.
5. Sign in with the API Key
On the connector authorization page, select Sign in with API Key and enter the API Key you copied above as prompted.
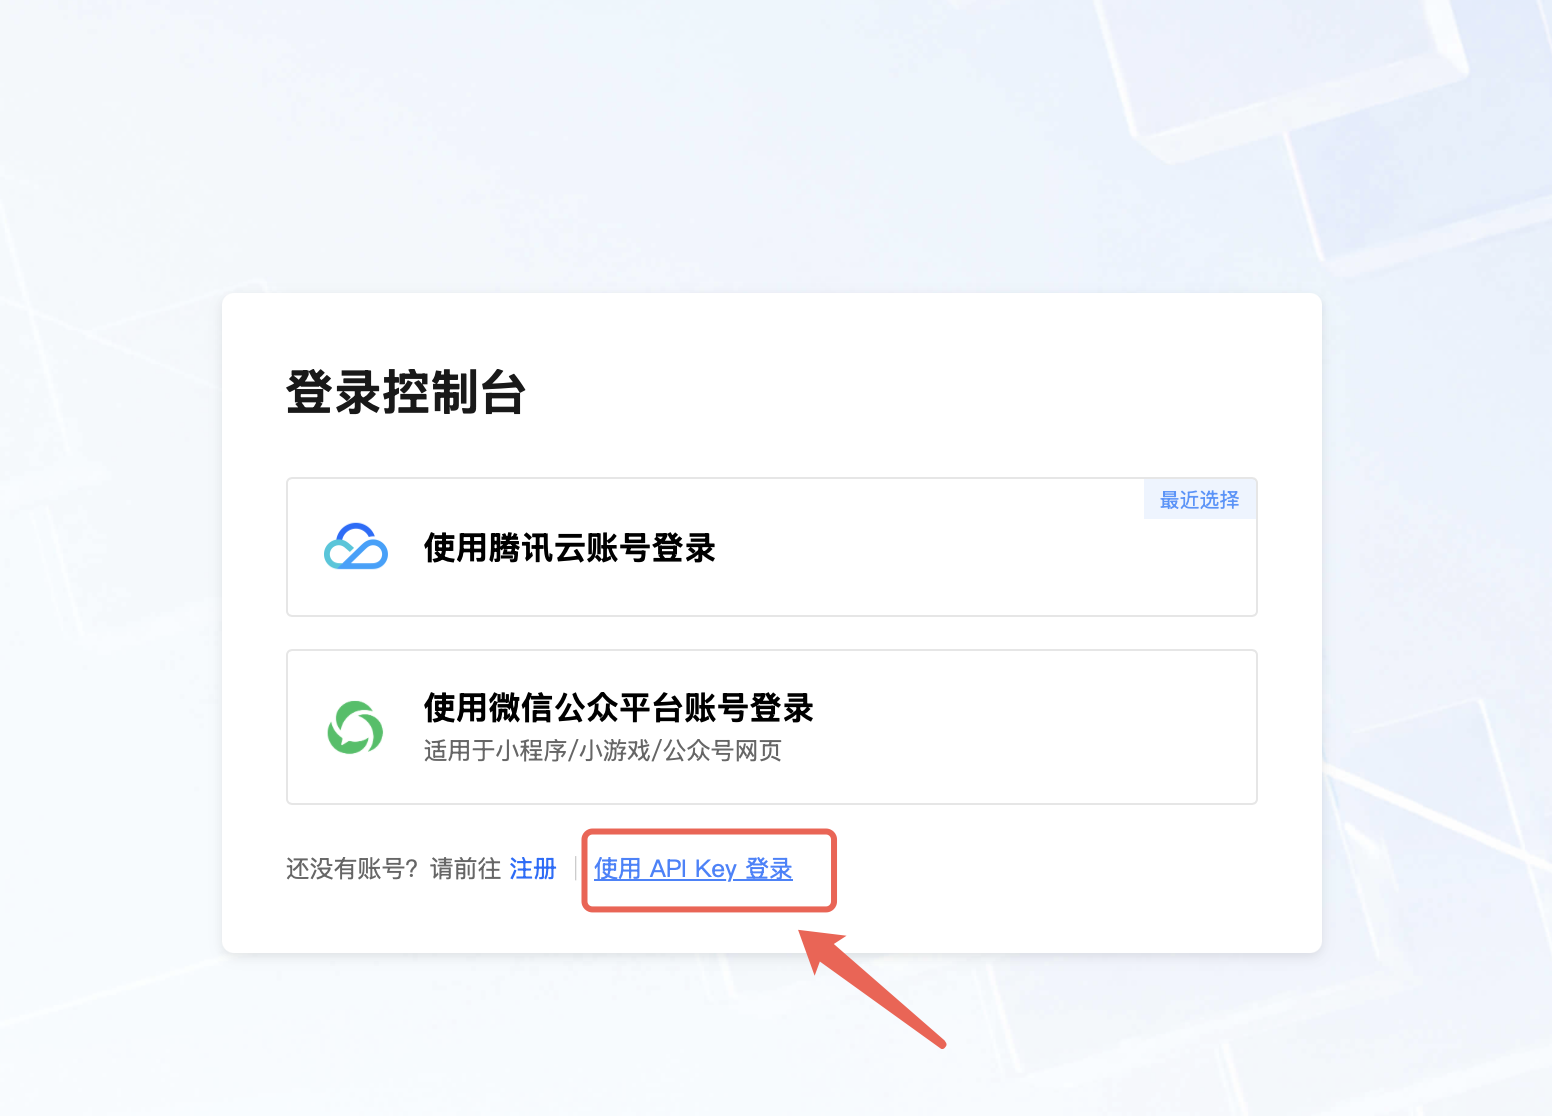
After signing in successfully, go back to the conversation and start using CloudBase capabilities directly.
Next Steps
- Start building: describe your requirements in the conversation, for example, "Build a to-do list app with CloudBase that supports sign-in and collaboration". The AI creates the database, writes Cloud Functions, and deploys the app for you
- Learn about Platform Edition capabilities: Overview
- Manage more environments: Environment Management
- Check usage and bills: Billing Cycle and Usage Control