Accessing Custom CDN
The HTTP access service provides CDN acceleration capabilities for the Chinese mainland by default. If this does not meet your needs (for example, if you need global acceleration for your site), you can integrate a cloud-based custom CDN.
Preparations
- A custom domain for access (not bound in CloudBase)
Operation Steps
Step 1: Purchase CDN
Go to the Tencent Cloud CDN console, access the Domain Management page, and click Add Domain:
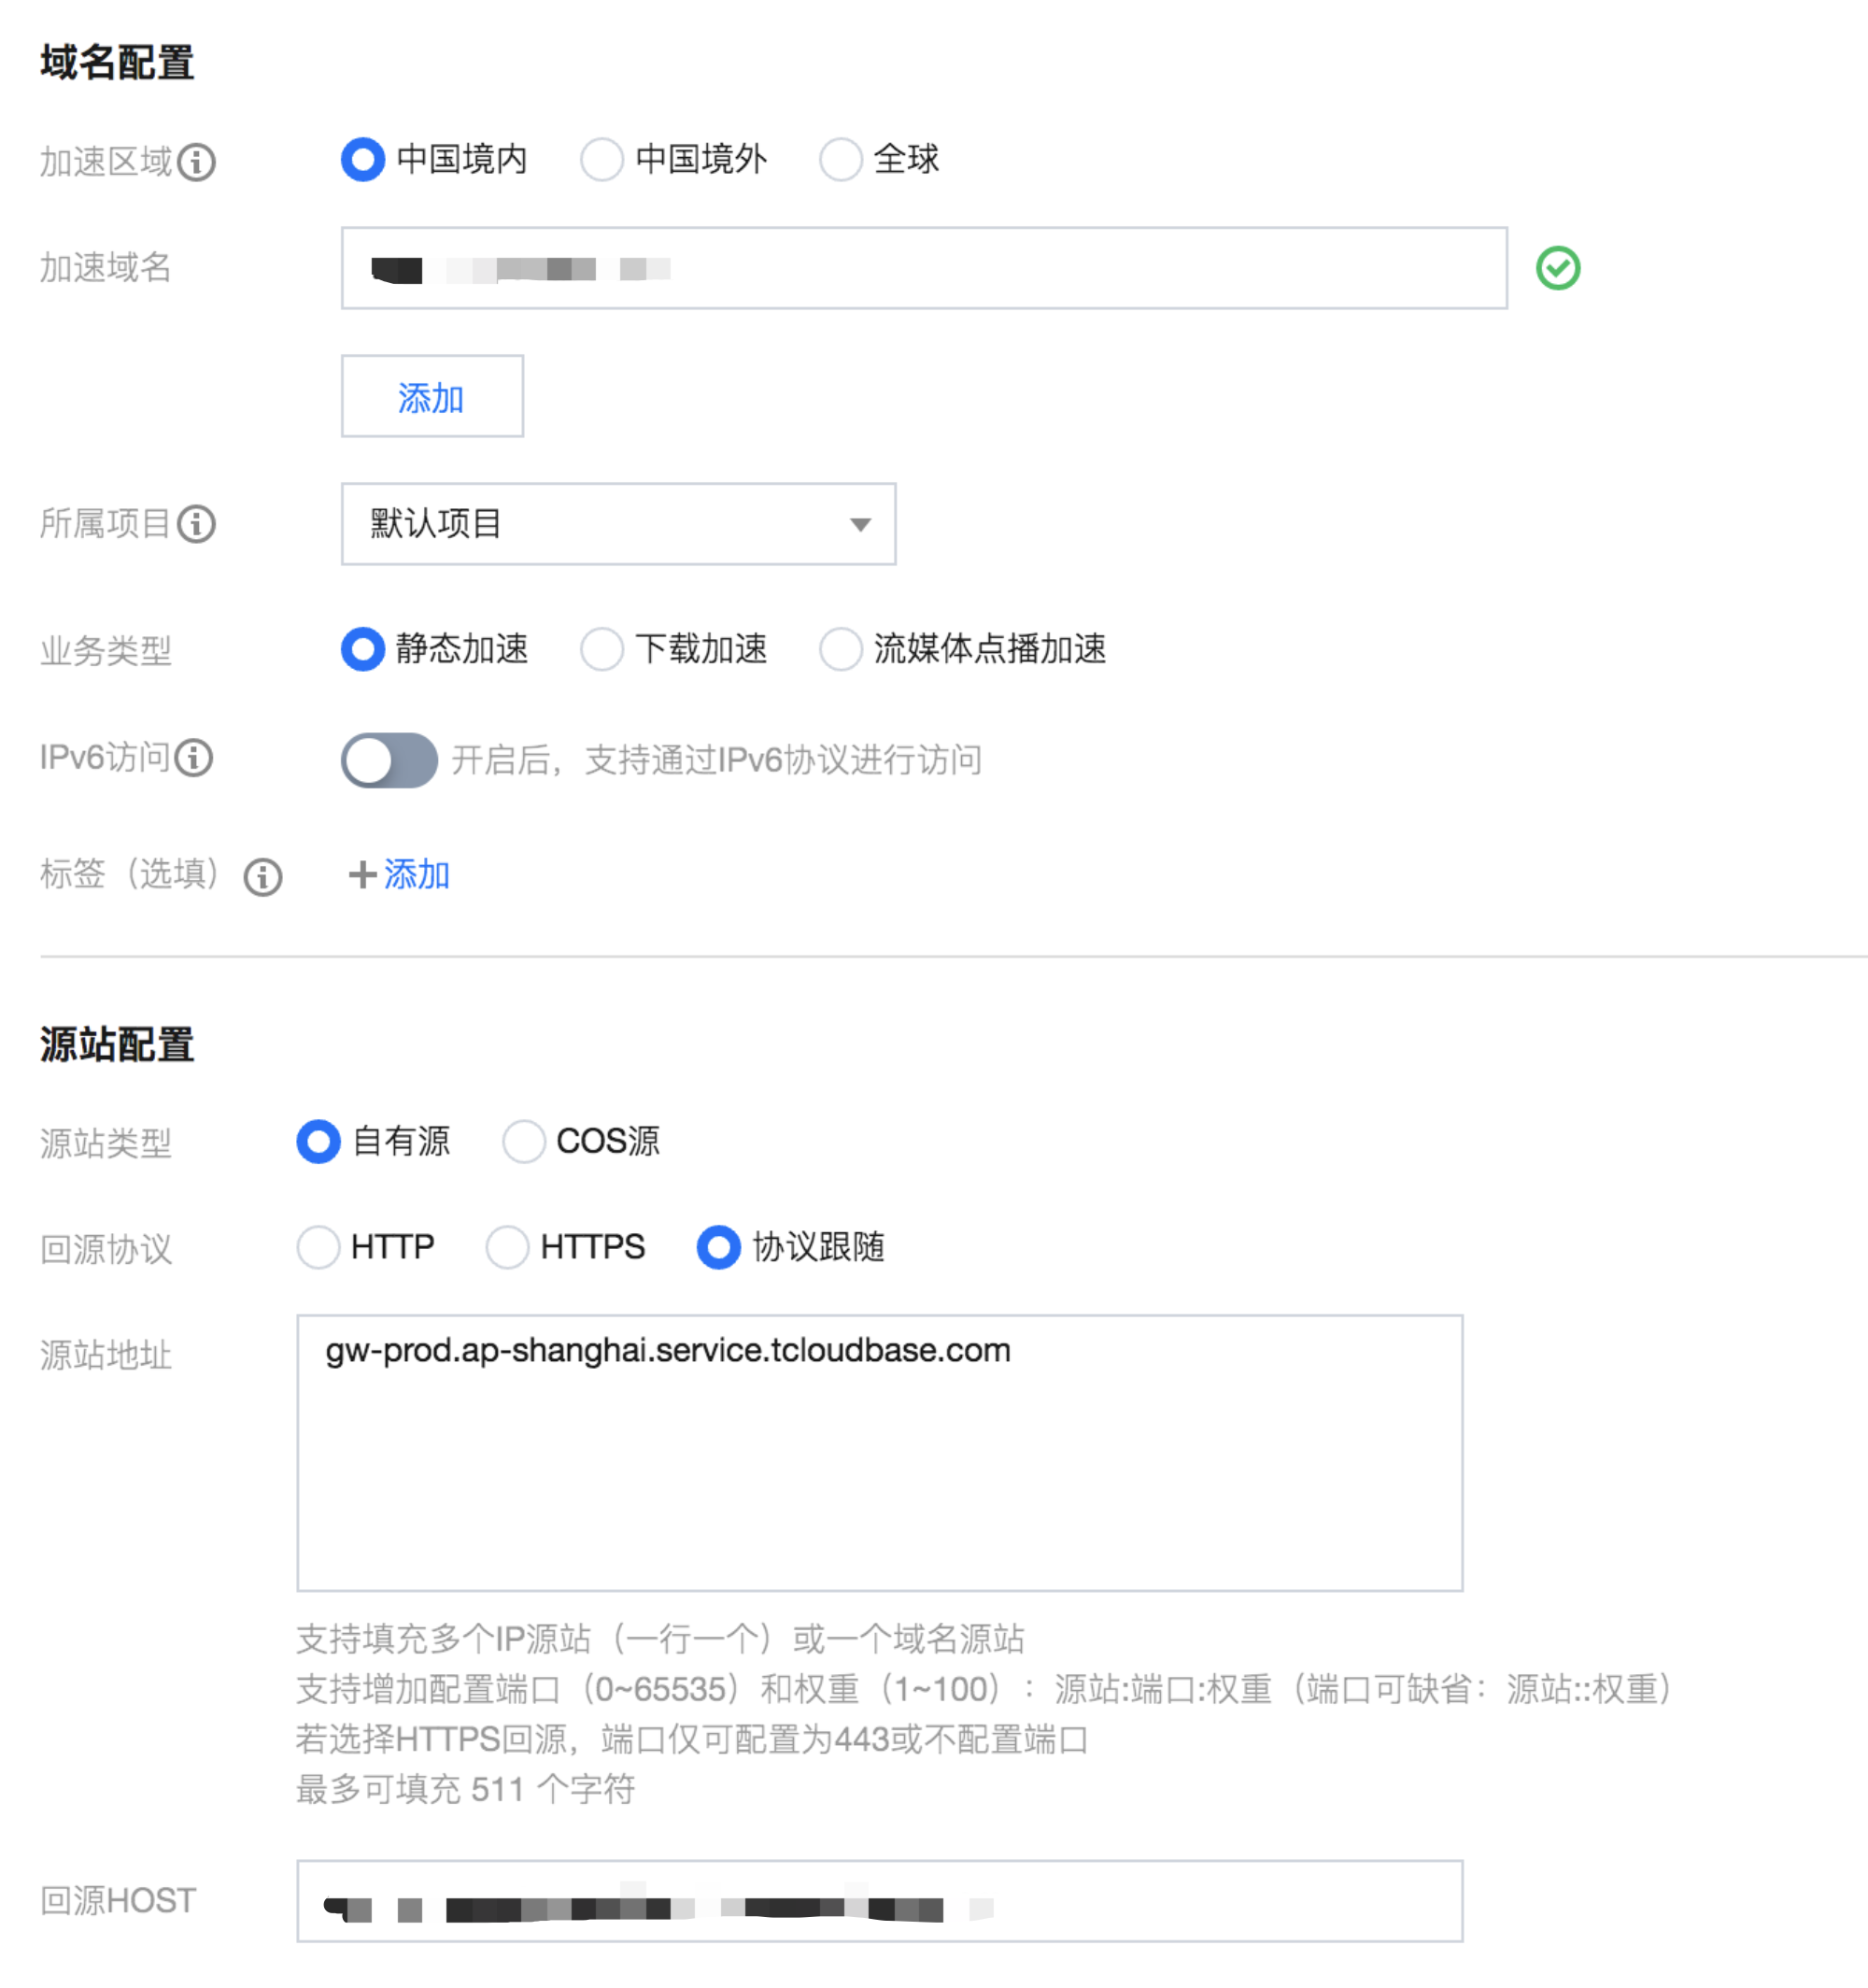
The modified configuration is as follows:
- Select the acceleration region based on your needs.
- Fill in the Accelerated Domain field with the custom domain you have prepared.
- Business Type: Static Acceleration
- Origin Type: Self-owned Origin
- Origin Protocol: Follow Protocol
- Origin Address: fill in
gw-prod.<region>.service.tcloudbase.com, where<region>is the region of your CloudBase environment, such asap-shanghai,ap-guangzhou - Origin Host: fill in your CloudBase environment default domain
Then click Confirm Submission to create the CDN and wait for a while until it is successfully created:

Step 2: Configure Domain DNS
Change the CNAME record of your custom domain to the domain name displayed on the CDN console. For specific configuration methods, please refer to the appendix below:

Step 3 (Optional): Configure HTTPS Certificate
If you need to configure HTTPS for your domain, you can go to the CDN console to configure the HTTPS certificate. For specific operations, please refer to the Tencent Cloud CDN documentation.
Appendix: CNAME Configuration Method
Tencent Cloud Setup Guide
If your DNS service provider is Tencent Cloud, you can add a CNAME record by following the steps below.
- Log in to the Domain Name Service console. In the list, locate the row of the domain name for which you need to add a CNAME record, and click Resolve in the Operation column.

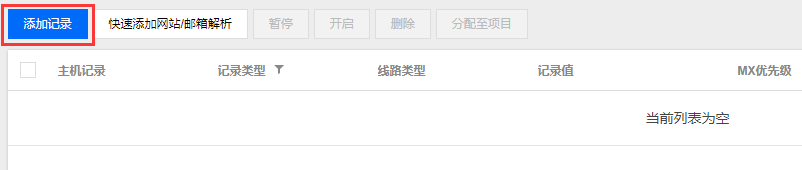
- On the redirected page, click Add Record.
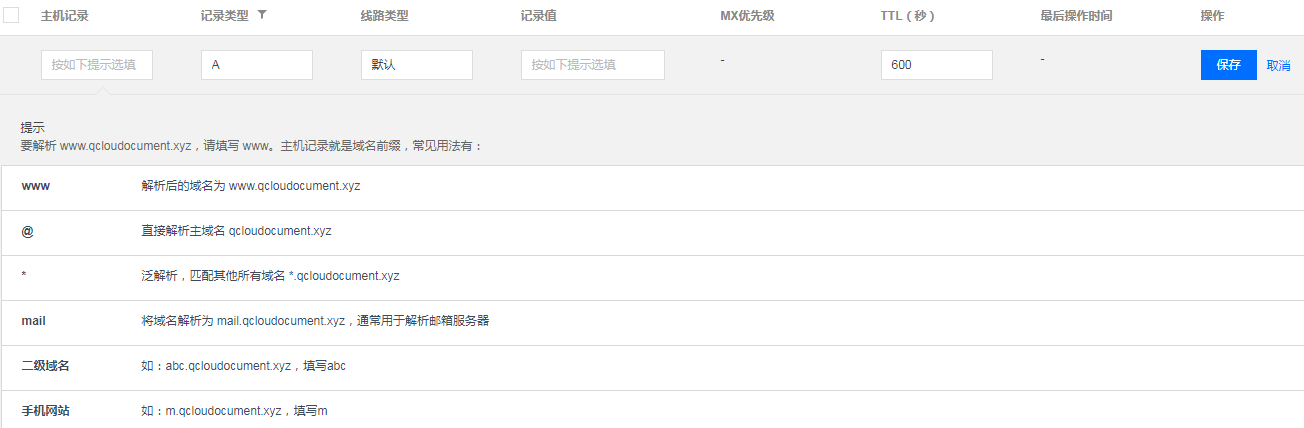
- In the Host Record field, enter the domain prefix (e.g., www). Set Record Type to CNAME, fill in the CNAME domain name in the Record Value field, then click Save to add the CNAME record.
There are priority differences among various record types in domain name resolution. When the host record is the same, different record types in the same line cannot coexist; otherwise, a conflict will be prompted. CNAME records conflict with all record types except CNAME records. You need to delete other records before configuration. For details, see Why is "record conflict" prompted when adding a resolution record?.
DNSPod Setup Guide
If your DNS service provider is DNSPod, log in to the DNSPod Domain Name Service console. In the list, locate the row of the domain name for which you need to add a CNAME record, click the corresponding domain name to navigate to the "Add Record" page, then add the CNAME record by following the steps below.

- Fill in the subdomain in the Host Record field (for example, to add a resolution record for
www.123.com, simply enterwwwin the Host Record field. If you only want to add a resolution record for123.com, leave the Host Record field blank—the system will automatically populate an "@" symbol in the input box. Note that a CNAME record for "@" may affect normal resolution of MX records; consider carefully before adding). - Set Record Type to CNAME.
- Line Type (Required by default; otherwise, some users may fail to resolve. In the figure above, the default setting means: all users except those from China Unicom will be directed to 1.com).
- The record value is the domain name pointed to by the CNAME. Only a domain name can be entered. After the record is generated, a "." will automatically be appended to the end of the domain name—this is normal.
- The MX priority field does not need to be filled in.
- TTL does not need to be filled in; the system will automatically generate it upon addition, defaulting to 600 seconds (TTL represents the cache time—the lower the value, the faster record modifications propagate globally).
Hichina Setup Guide
If your DNS service provider is Hichina, you can add a CNAME record by following the steps below.
- Log in to the Hichina Member Center.
- Click "Product Management" > "My Cloud DNS" in the left navigation bar of the Member Center to access the Hichina Cloud DNS list page.
- Click the domain name to be resolved to access the resolution record page.
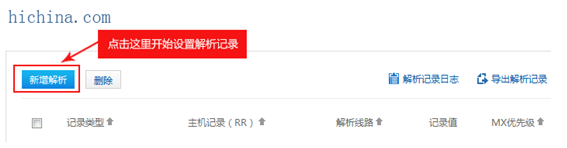
- After accessing the resolution record page, click the "Add Record" button to begin setting up the resolution record.
- To set up a CNAME resolution record, select CNAME for the record type. The host record is the domain prefix and can be filled in arbitrarily (e.g.,
www). Enter the target domain name in the record value field. Leave the resolution line and TTL at their default values.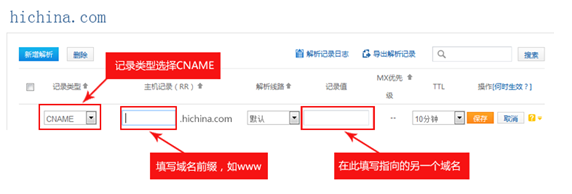
- After filling in the information, click "Save" to complete the resolution setup.
Xinnet Setup Guide
If your DNS service provider is Xinnet, you can add a CNAME record by following the steps below.
Setting Up an Alias (CNAME Record)
That is: an alias record. This type of record allows you to map multiple names to the same computer. It is typically used for computers providing both WWW and MAIL services. For example, a computer named host.mydomain.com (A record) that provides both WWW and MAIL services. To facilitate user access to these services, you can set up two aliases (CNAME records): WWW and MAIL. As shown below:

Verify CNAME Record Effectiveness
Different DNS service providers have slightly different times for CNAME to take effect, usually within half an hour. You can also use the dig command to check if the CNAME has taken effect; if you dig a domain name with the suffix .cdn.dnsv1.com, it indicates that the CNAME for the domain has taken effect.