快速开始
云函数本质也是一份代码,这里以 Node.js 作为示例,介绍如何创建云函数。
Node.js 服务一般都需要一个入口文件 index.js,如果您用到了 npm 包,还需要一个 package.json 文件,用于描述依赖关系。
因此最基本的 Node.js 服务目录结构如下:
└── helloWorld
    ├── index.js
    └── package.json
创建云函数
您可以通过以下三种方式创建云函数,请根据您的开发环境选择合适的方式:
- 云开发控制台
- 小程序 IDE
- 本地创建
进入 云开发平台/云函数,点击「新建云函数」按钮。
- 选择合适的模版,没有合适的可以选择从空白创建
- 选择运行环境为 Nodejs 18.15(也可以选择其他版本)
- 填入函数名称
- 点击「开始创建」按钮
创建完成后,进入到云函数中,可以看到默认有个 index.js 文件。
- 点击下方「保存并安装依赖」,即可完成云函数的部署
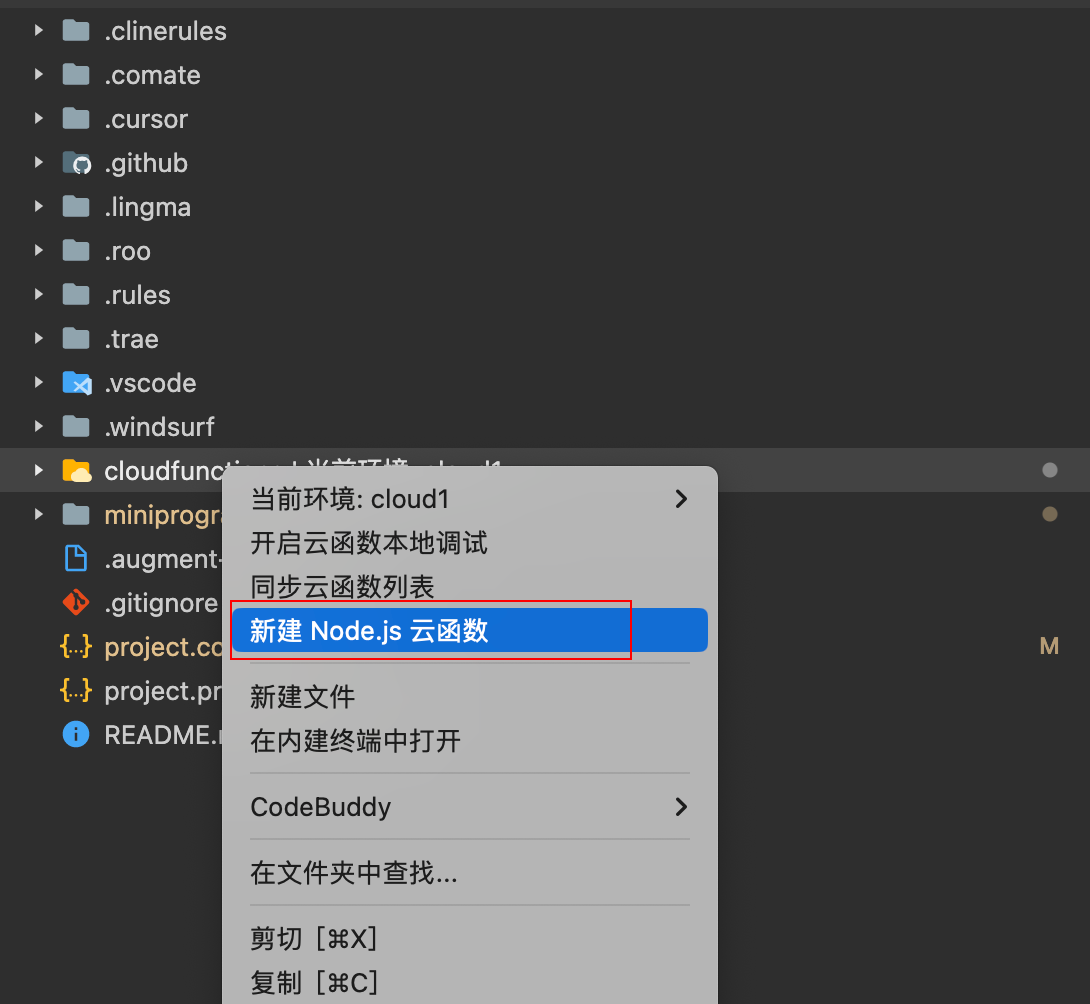
如果您是基于��「微信开发者工具」进行开发云函数,那么可以直接在微信开发者工具中创建云函数,步骤参考 云函数快速开始。
- 右键云函数目录,选择「新建 Node.js 云函数」,即可创建云函数
- 编写
index.js文件内容如下:
exports.main = async function () {
    return 'Hello World!';
};
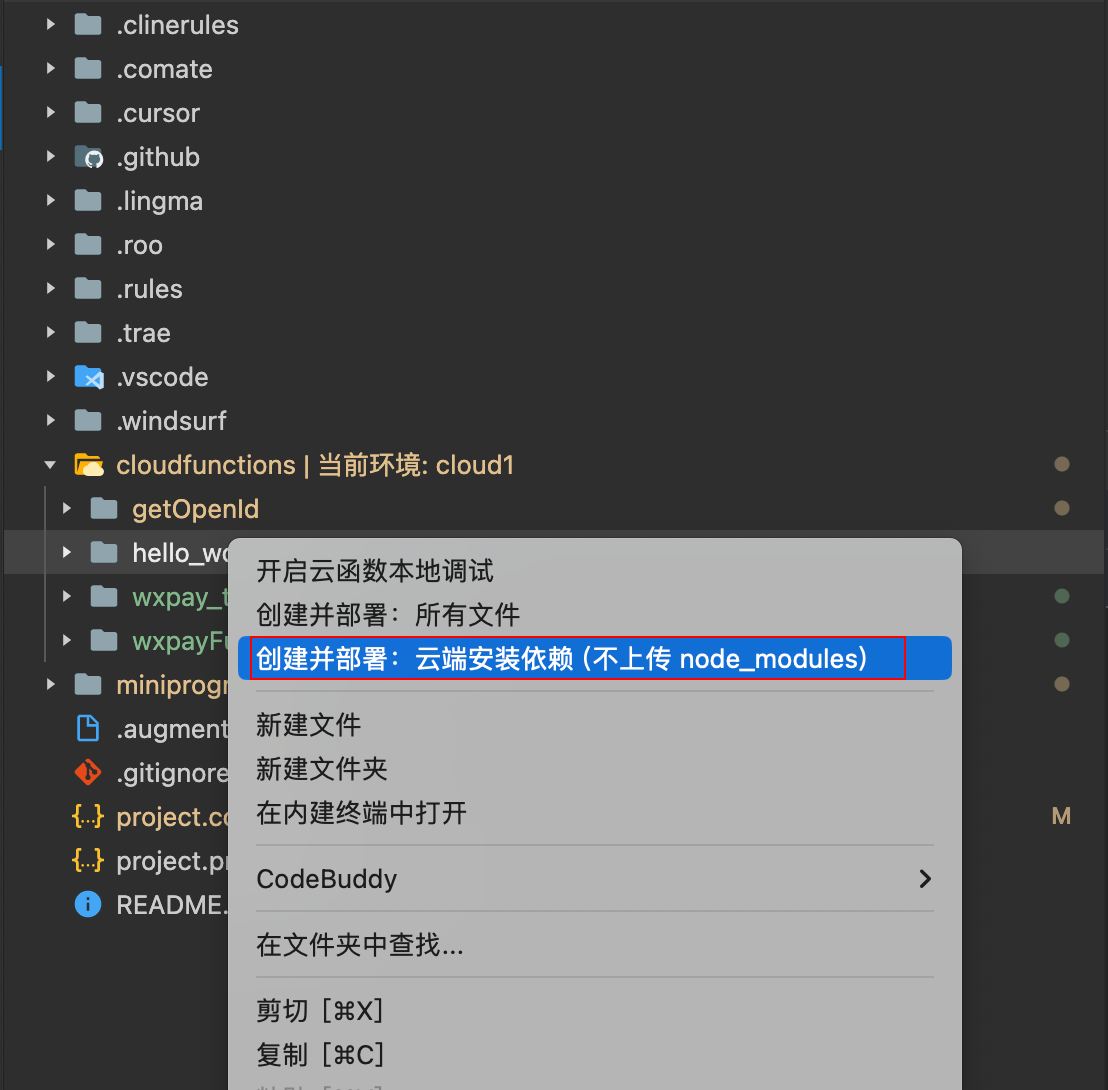
- 选择云函数目录,右键点击,选择「创建并部署:云端安装依赖」,即可完成云函数的部署
- 在本地创建一个空的文件夹,作为项目的根目录,这里命名为
cloud-demo(项目根目录) - 进入根目录,创建 functions 文件夹(存放云函数的目录)
- 在 functions 下创建 hello_world 文件夹(具体云函数目录)
- 在云函数 hello_world 中创建 index.js(云函数入口文件)
此时目录结构如下:
└── cloud-demo          # 项目根目录
    └── functions        # 云函数目录
        └── hello_world  # 云函数实例文件夹
            └── index.js # 云函数入口文件
- 编写
index.js文件内容如下:
exports.main = async function () {
    return 'Hello World!';
};
- 然后打开终端到当前
hello_world文件夹下,执行以下命令初始化 package.json:
npm init -y
- 通过 CloudBase CLI 工具进行部署云函数
在终端执行如下命令全局安装 CLI:
npm i -g @cloudbase/cli
安装成功后输入如下命令检查是否安装成功:
tcb -v
如果看到输出版本号,说明已经安装成功。
- CLI 登录
需要让 CLI 登录到云函数需要发布的环境中,执行如下命令:
tcb login
CloudBase CLI 会自动打开云开发控制台获取授权,您需要点击「同意授权」按钮允许 CloudBase CLI 获取授权。如您没有登录,您需要登录后才能进行此操作。
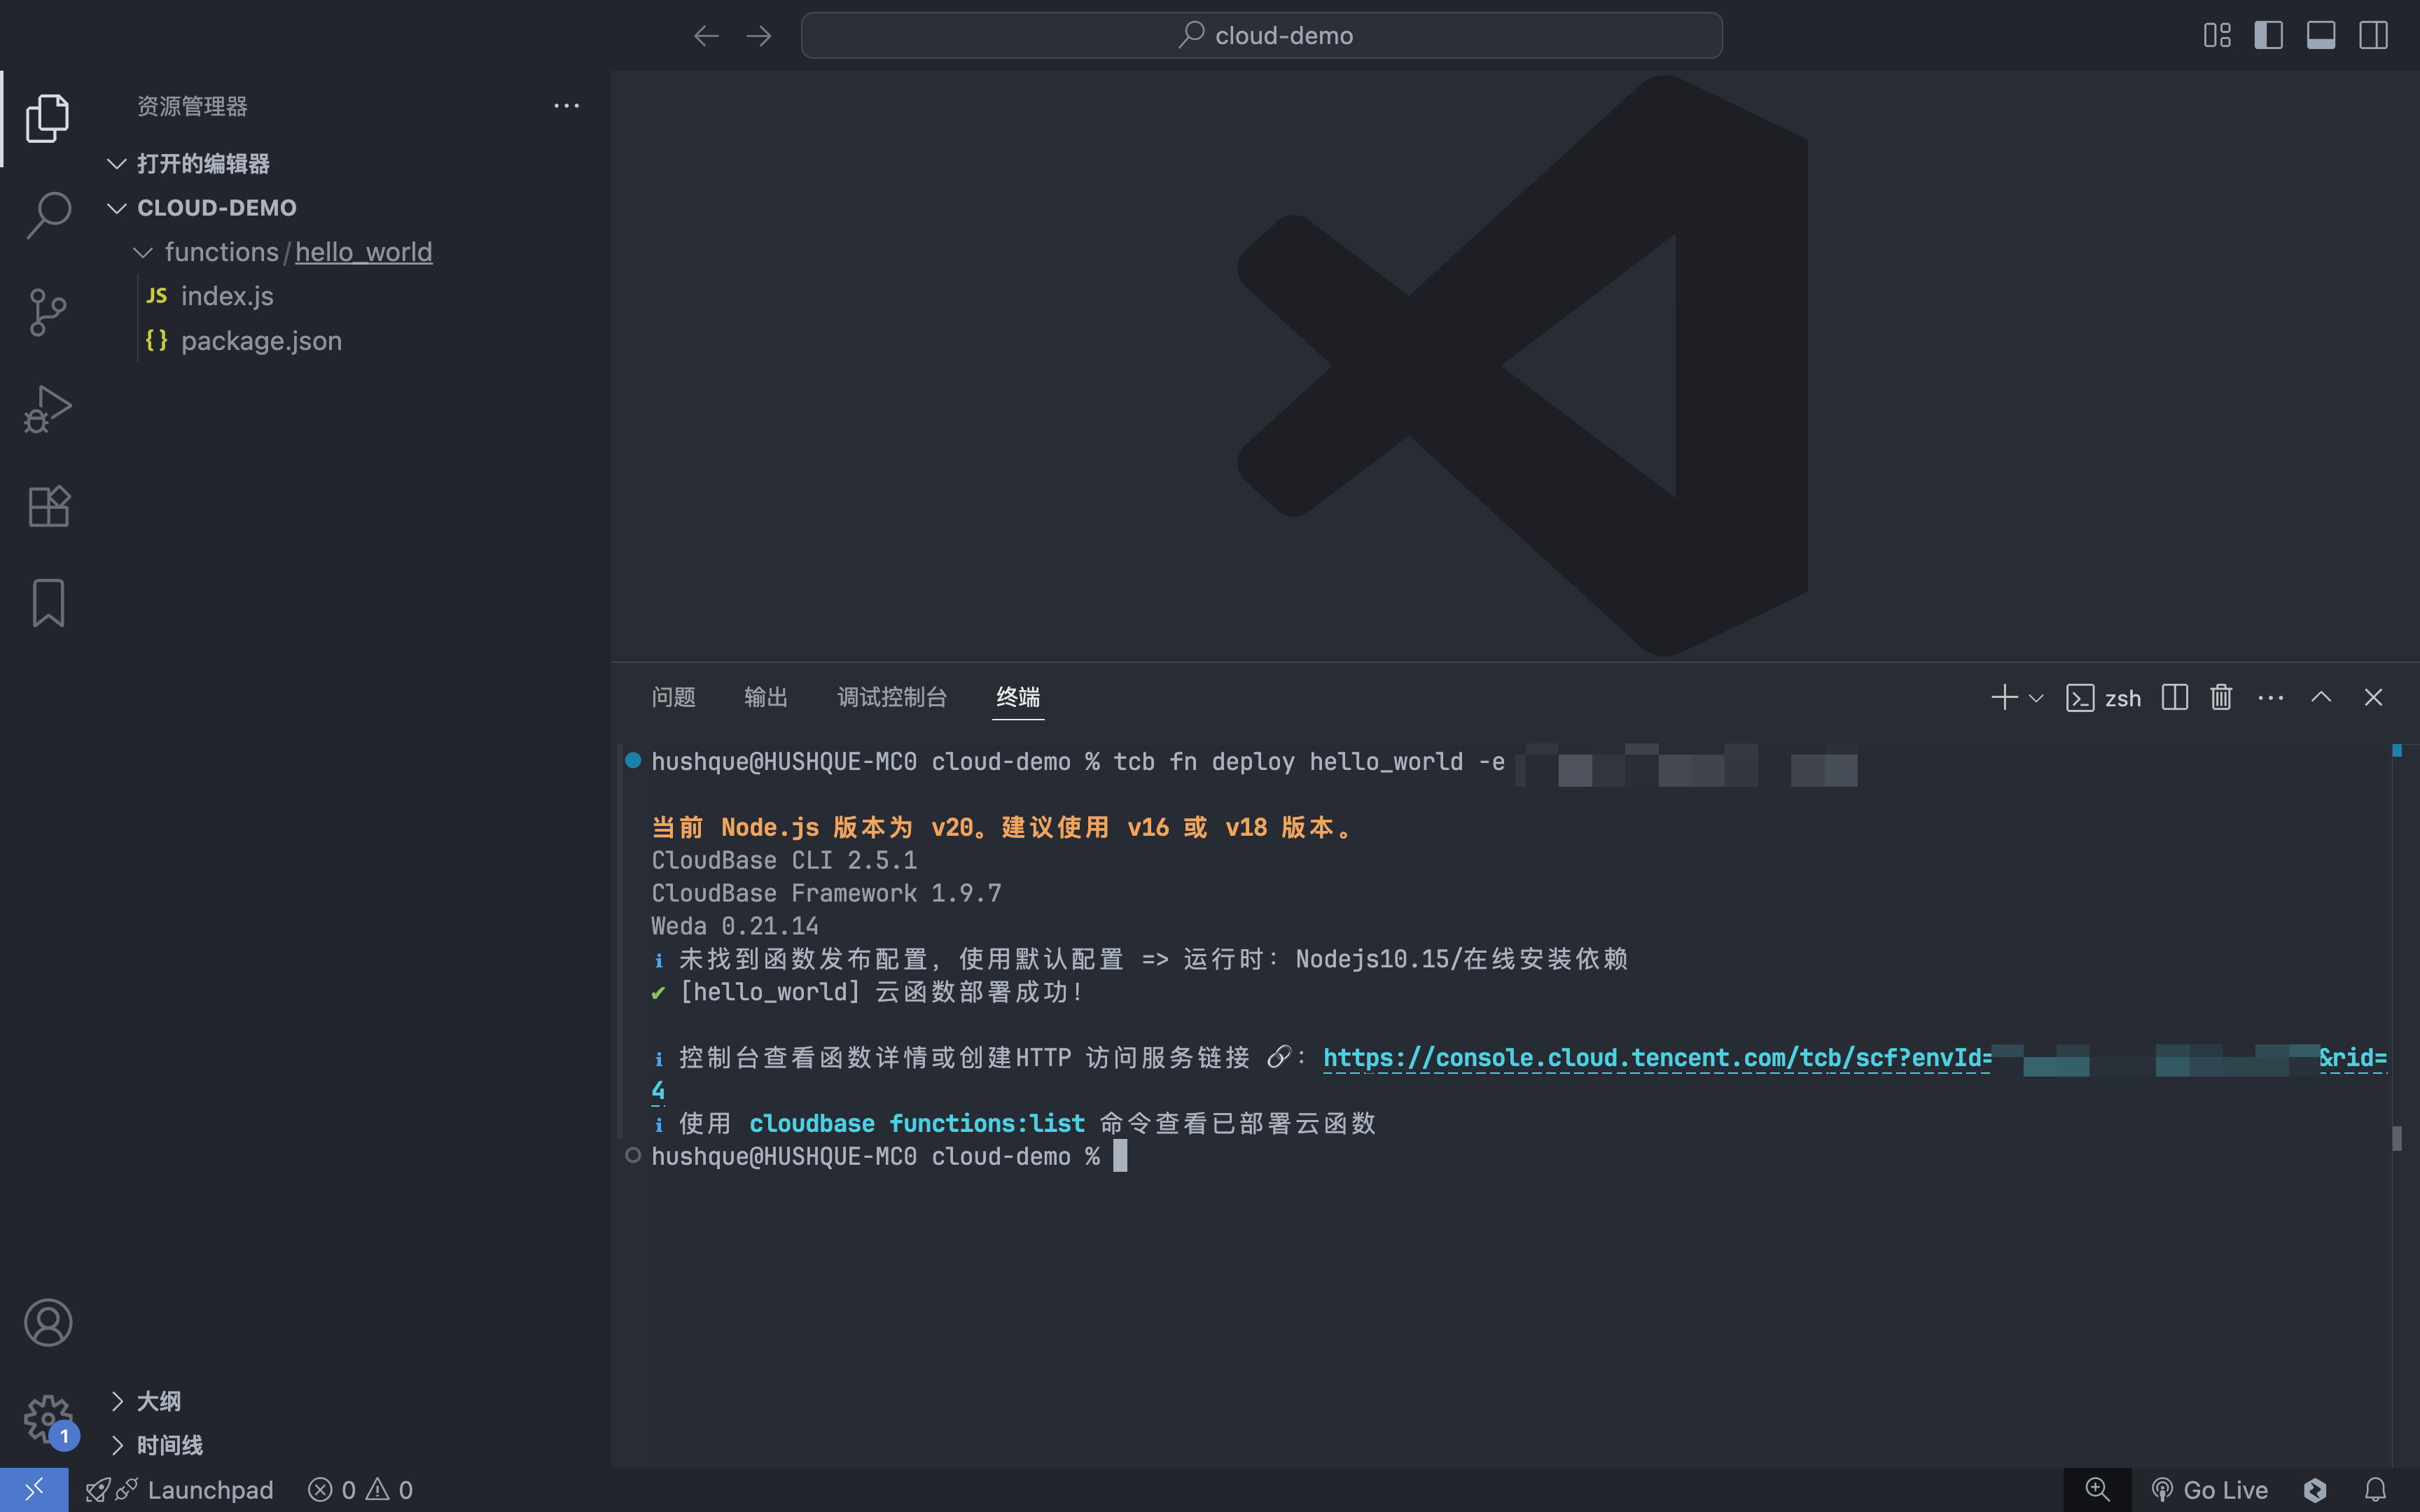
- 在项目根目录运行以下命令,并且使用默认配置:
⚠️ 注意:需要获取云开发环境的环境 ID
tcb fn deploy hello_world -e <env-id>
调用云函数
调用云函数主要有以下几种方法:
- 使用云开发 SDK
- 使用 HTTP 访问服务
- 使用 HTTP API
- 使用定时触发器
使用 SDK 调用云函数
- 小程序
- Web
- Node.js
wx.cloud
    .callFunction({
        // 云函数名称
        name: 'hello_world',
        // 传给云函数的参数
        data: {
            a: 1,
        },
    })
    .then((res) => {
        console.log(res); // Hello World!
    })
    .catch(console.error);
import cloudbase from '@cloudbase/js-sdk';
const app = cloudbase.init({
    env: 'xxxx-yyy',
});

app.callFunction({
    // 云函数名称
    name: 'hello_world',
    // 传给云函数的参数
    data: {
        a: 1,
    },
})
    .then((res) => {
        console.log(res); // Hello World!
    })
    .catch(console.error);
const cloudbase = require('@cloudbase/node-sdk');
const app = cloudbase.init({
    env: 'xxxx-yyy',
});

app.callFunction({
    // 云函数名称
    name: 'hello_world',
    // 传给云函数的参数
    data: {
        a: 1,
    },
})
    .then((res) => {
        console.log(res); // Hello World!
    })
    .catch(console.error);
使用 HTTP 访问服务调用云函数
您可以选择创建 HTTP 服务 用来访问云函数,然后通过 HTTP 调用云函数。
有如下两种操作方式:
云开发控制台
-
新建一个「域名关联资源」:
- 关联资源选择云函数,hello_world
- 域名选择默认域名,也可以选择您自定义域名
- 填写触发路径,这里填写
/hello
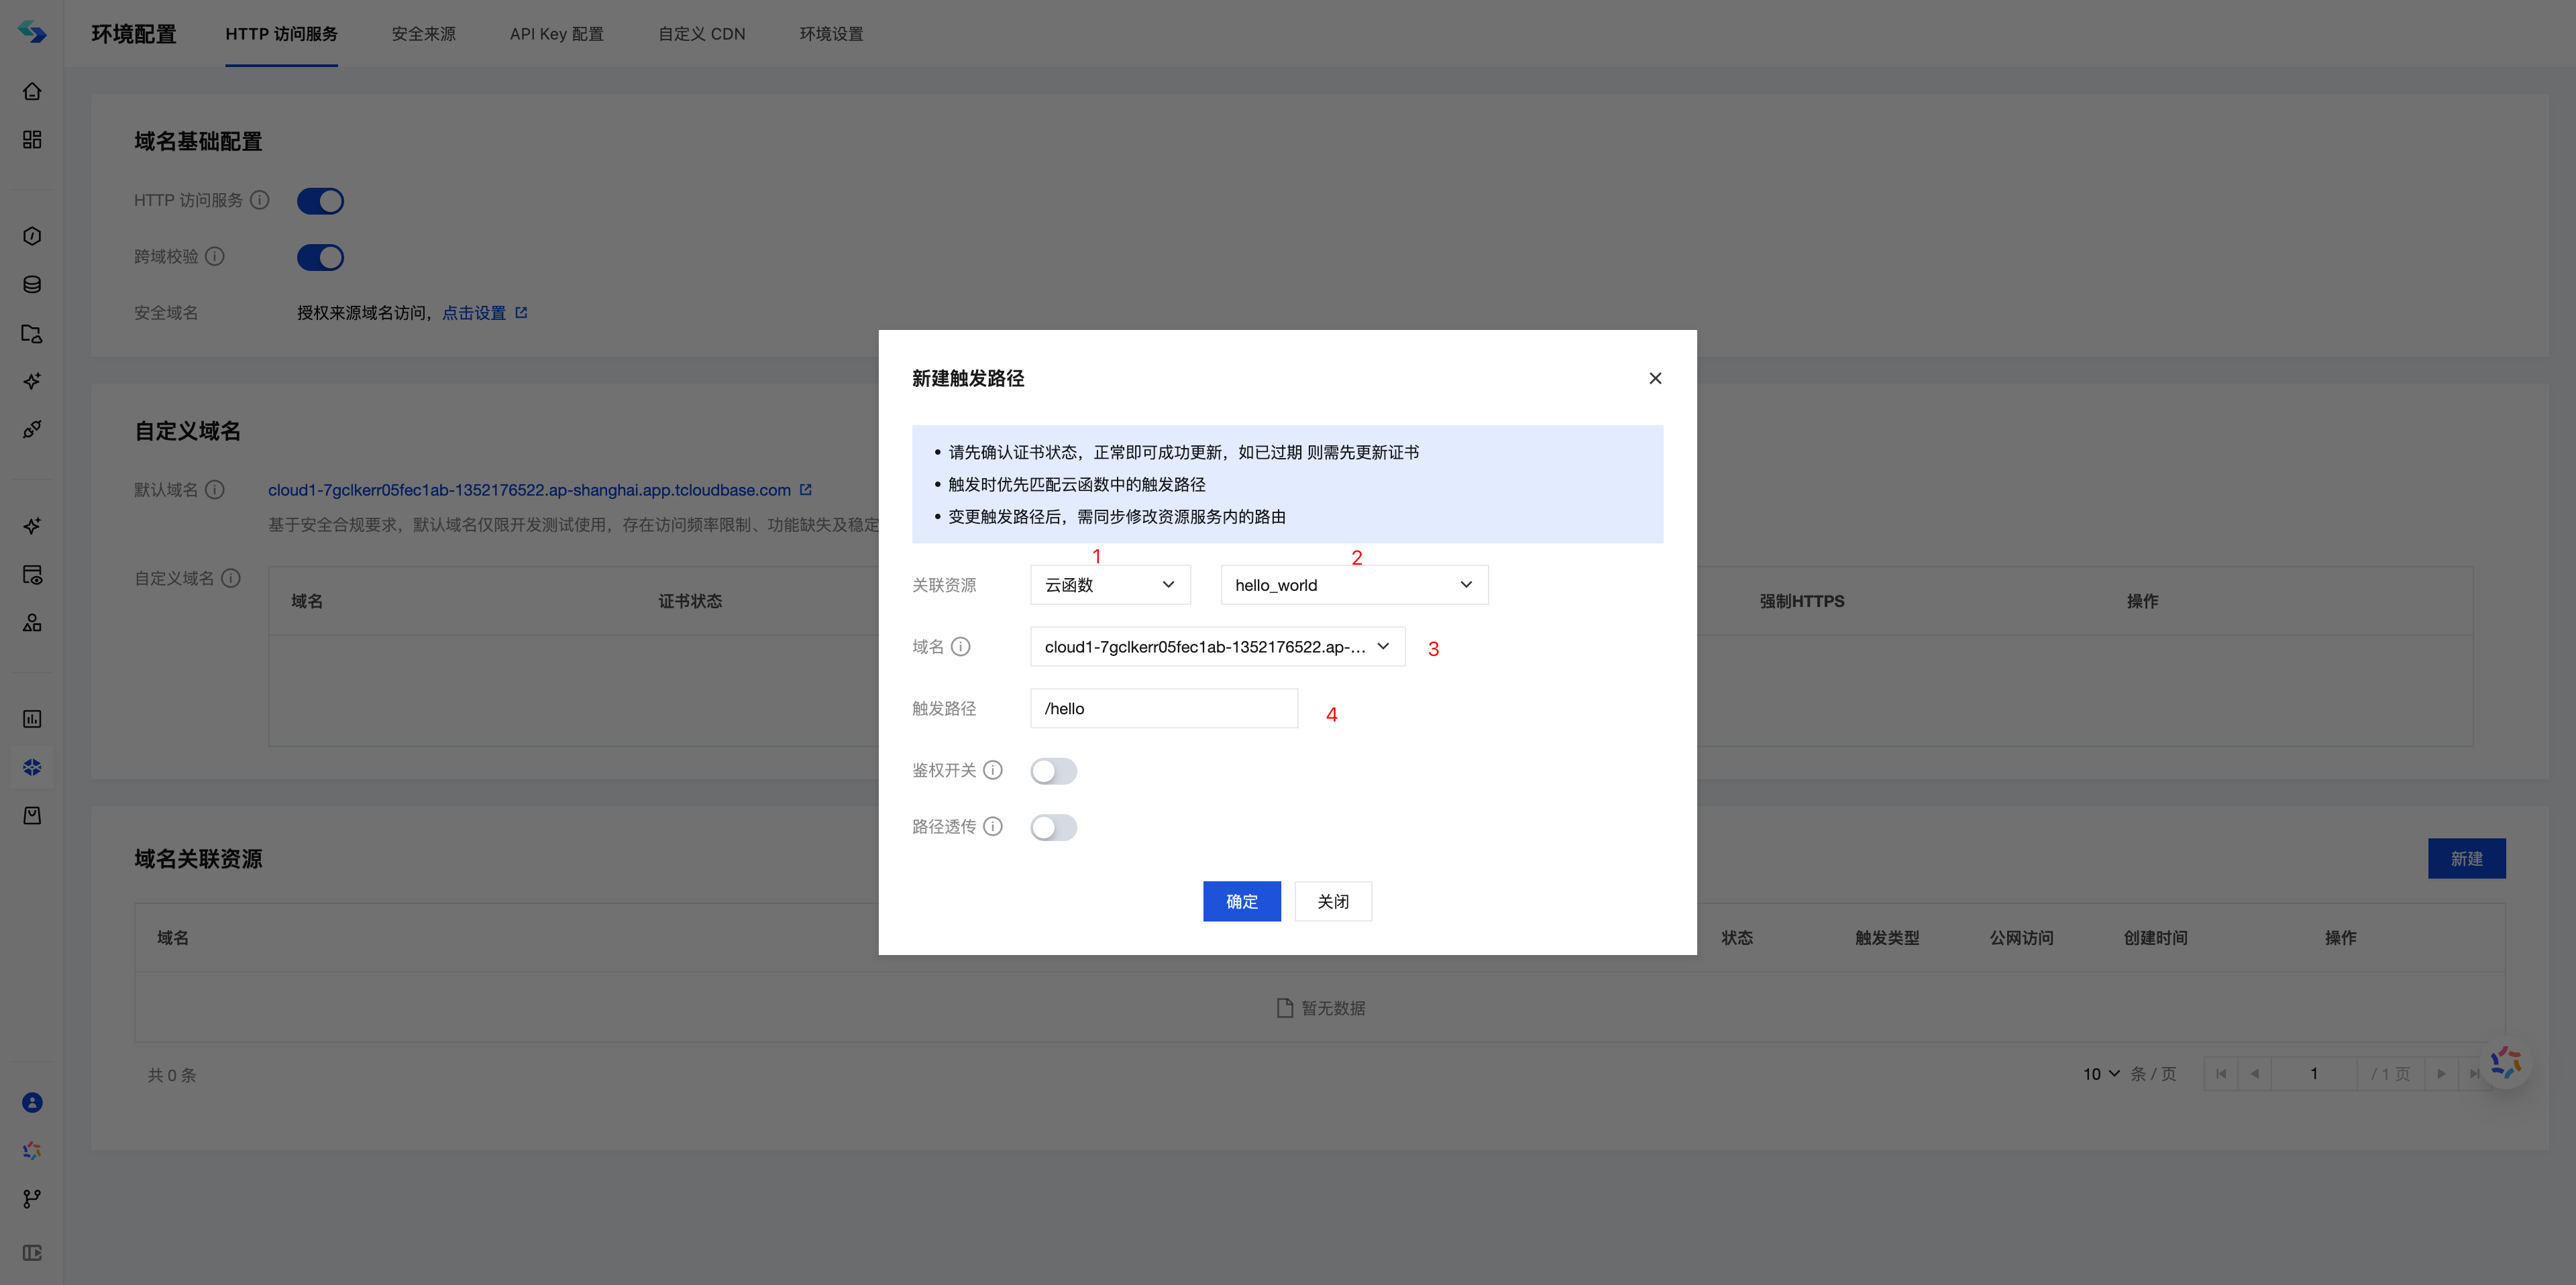
- 点击确定,等待 3-5 分钟后,即可完成 HTTP 服务 创建

- HTTP 服务地址为
默认域名+触发路径,您也可以选择用自定义域名进行绑定资源
CLI 工具
具体请参考 HTTP 访问服务
执行以下命令创建一条 HTTP 服务路由,路径为 /hello,指向的云函数为 hello_world:
tcb service create -p hello -f hello_world -e <env-id>
随后便可以通过进入 云开发平台/HTTP 访问服务 查看创建的 HTTP 服务。
使用 HTTP API 调用云函数
创建好云函数后,可以通过 HTTP API 在任意客户端调用云函数,无需 SDK。
具体请参考 HTTP API 调用云函数,访问 HTTP API 需要一个 ACCESS_TOKEN。
curl -L 'https://your-envId.api.tcloudbasegateway.com/v1/functions/:name' \
  -H 'Content-Type: application/json' \
  -H 'Accept: application/json' \
  -H 'Authorization: Bearer <ACCESS_TOKEN>' \
  -d '{}'